Today’s post is going to be super short because I’m racing around getting the last few things done for my first Northwest Crafty Escape Weekend! Today is set up day and then everyone shows up to kick things off tonight! So, if you want to see some of the fun, join me over on my Northwest Stamper Facebook Page, as I’ll be sharing as I go throughout the weekend!
In the meantime, here is a fun card to share with you today!
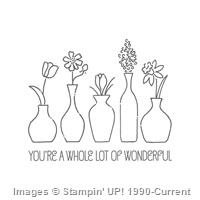
Vivid Vases is such a fun stamp to color in, whether you are using your Blender Pen, Aqua Pen, Stampin’ Write markers, or your Blendabilities (if you still have yours like I do!) I actually took a picture of using this stamp set with each type of coloring method but turns out is it just blurry enough to not be useful, so I’ll do another comparison for you and share it soon!
I colored my vases leaving a little bit of white on one side so that it looked shiney a little bit more “real life” (ish… its not like you’ve be confused that these are real ) but it is just something fun to try.
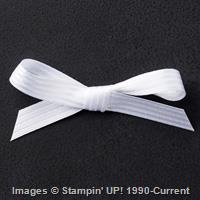
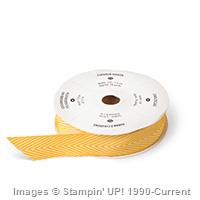
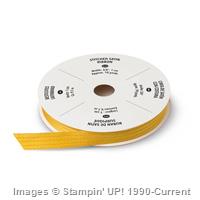
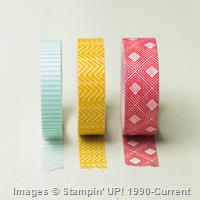
And you see that stitched ribbon on the top of the card? It is Hello Honey, which was retired on June 1st, but they have new Stitched Satin ribbons in different colors and oh my word, I just adore them! The new colors are so pretty that I think we are going to be fast friends!
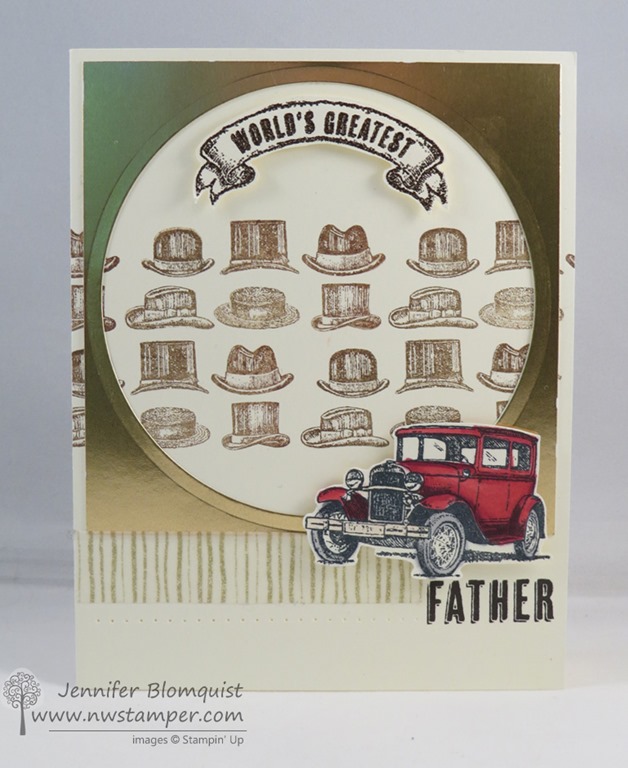
I can’t believe Father’s Day is coming up quick! This year I’m bound and determined to make a gift early… I’m not sure what the gift will be yet, but at least I have a card ready!
I aimed for the balance of fancy but not fussy, and I think it makes it there.
Tips for making this card:
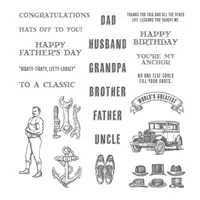
Mix and match the images from the Guy Greetings stamp set to make this for that special guy in your life.
The stamp set not only says “Father” but you also get the choice of Grandpa, Dad, Uncle, Husband and Brother!
Stamp the hats image multiple times to make a background for your card. To help blend in the fact that you are using the same stamp a bunch, stamp the first time and then offset the second stamped image – ie stamp so the last row of the hats in the first image are lined up under the middle row of hats in the second image.
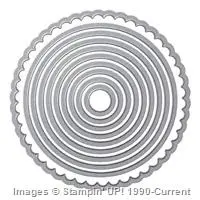
Spotlight them by using the Circles Framelits and cutting out a large circle from a 4”x4” piece of the Gold Foil paper – which is awesome stuff, btw!
Stamp and cut out the “Worlds Greatest” and the car image to give extra POP on the card.
Make it a little more polished by heat embossing the “World’s Greatest” and the “Father” sentiments.
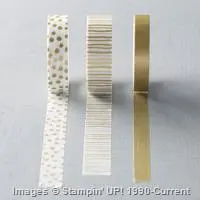
I also added a bit of the retired gold Watercolor Wonder washi tape and the used my Essentials piercing template to pierce a row of holes from the left edge to the “Father” sentiment. Sometimes the little details are just what it needs!
A few of the steps take a little bit of work, but for the awesome men in our lives, it is worth it, right?
Want more ideas with this set?
You can still get the instructions for the class by mail from last month and I have 1 kit left if you want an actual kit. Get the details here.
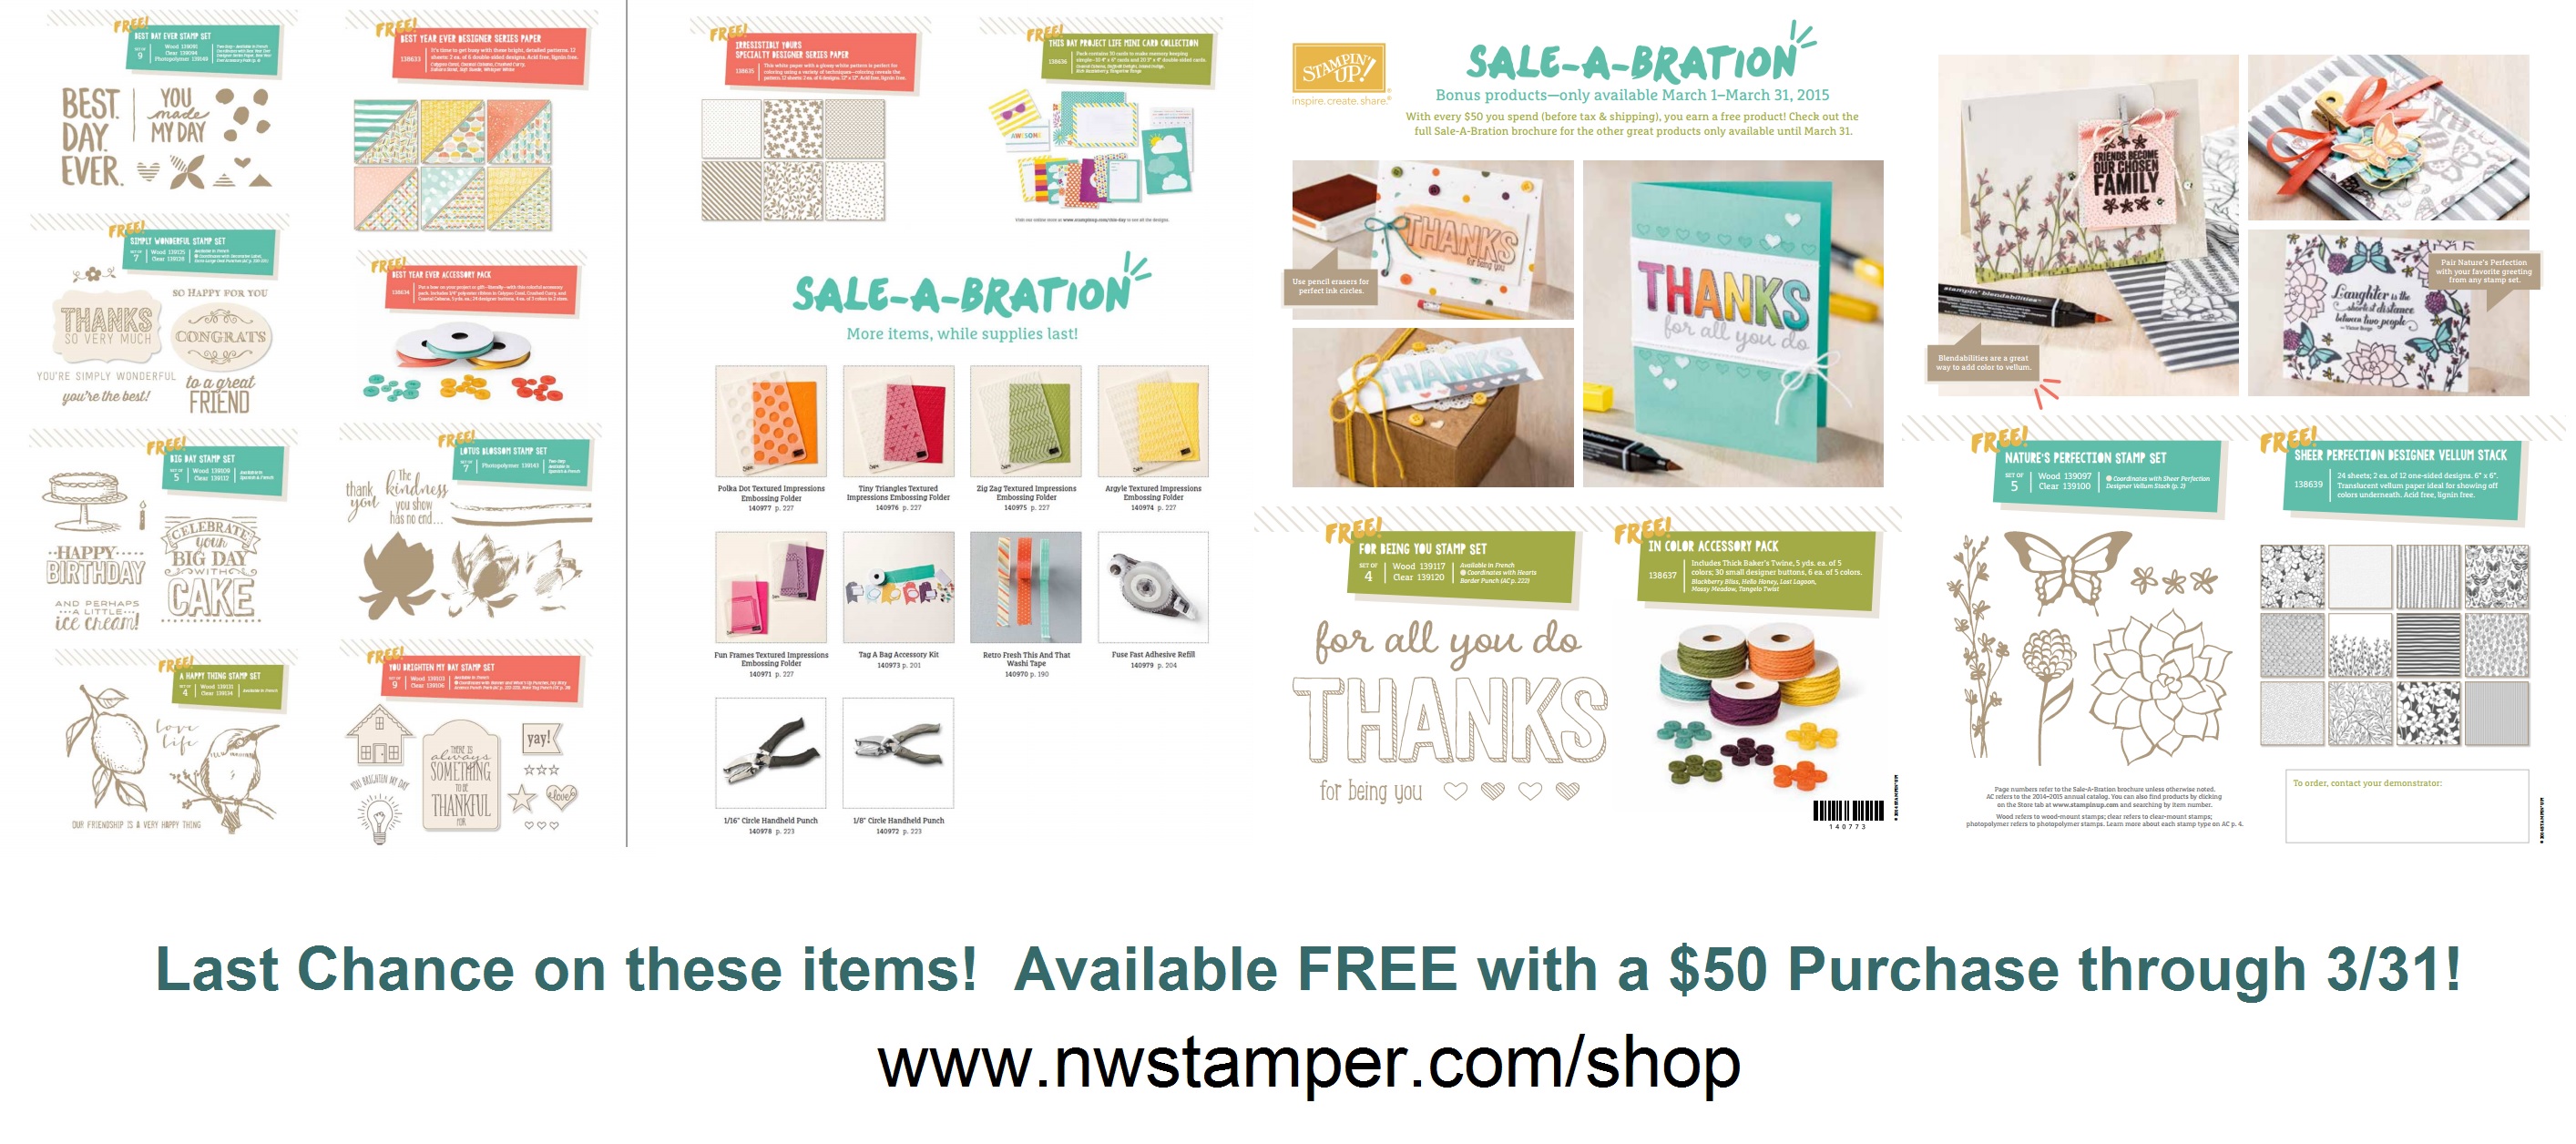
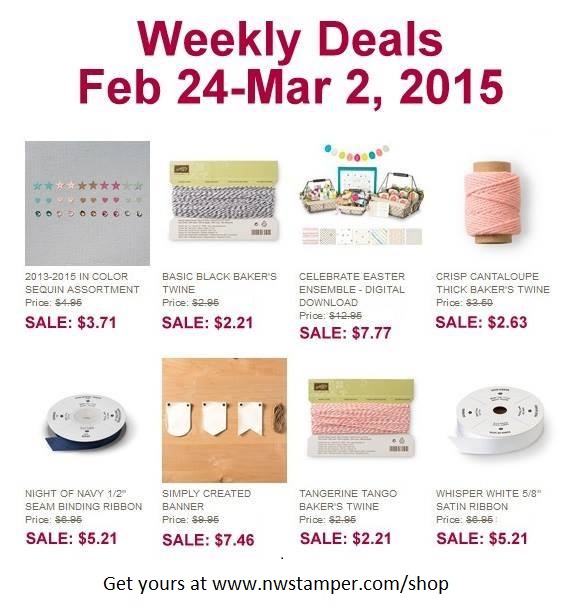
And here is a little something for you – new discounts with the Weekly Deals!
It’s that time of the year where I need to start saying good bye to some wonderful Stampin’ Up stamps and products as we count down to the new catalog change over in June. So over here on the blog I’m going to start sending off many of my retiring products by featuring some of my favorite projects using them (and next week. you’ll start seeing some of the new Sneak Peek stuff popping in as well! That UPS man can’t get here fast enough!) But here is my first card share for you –
Get them before they are gone at the end of the month!
Tips for this project:
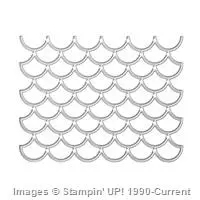
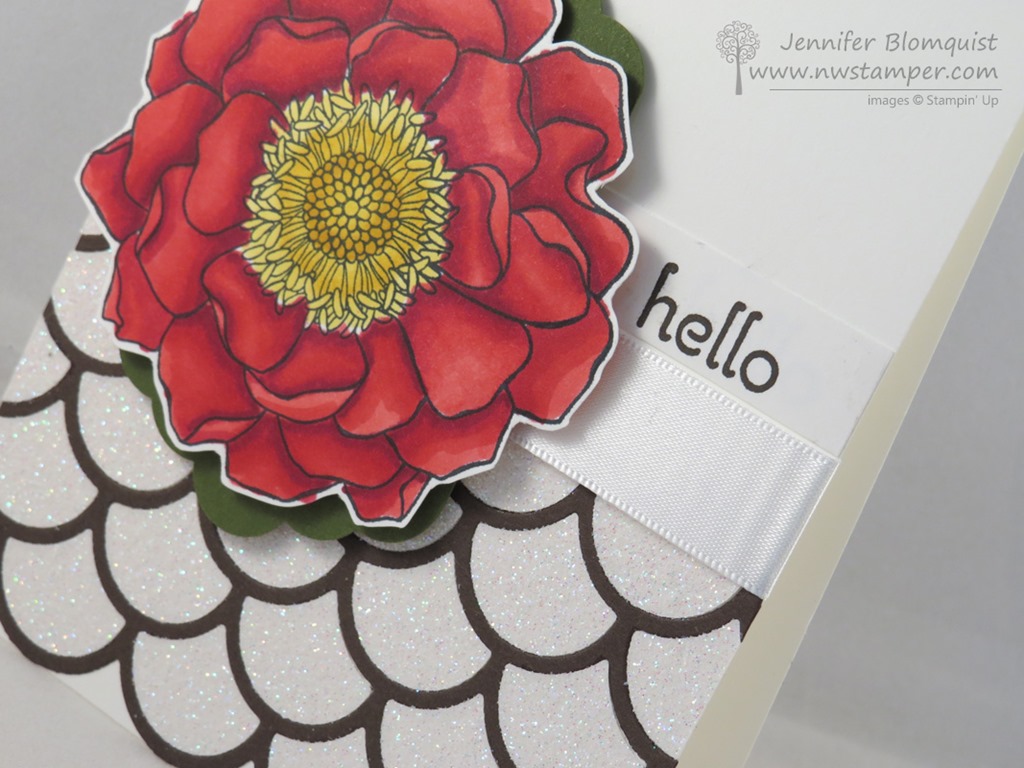
The Striped Scallop Thinlit makes a beautiful background, especially when you use it to die cut glimmer paper – like this Dazzling Diamonds glimmer paper.
Make it easy and NOT MESSY to glue your scalloped background by using the 2-Way Glue pen to draw glue on the backside of the thin cut image. I LOVE using this glue for all of my thin cut dies like words or butterflies!
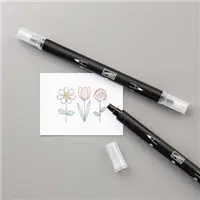
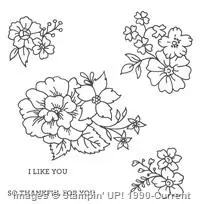
The I Like You stamp set is one of those full of images that is perfect for coloring! I colored this using Blendabilities, but you could also color with your Aqua Pen or your Blender Pens for similar pretty effects. Tip – This stamp set is a hostess exclusive set – which means you need to either host a party (online or in person) or place a personal order of $150 or more. There is still time to earn this for free, so let me know how I can help! Plus, hostess benefits are changing with the new catalog in June so consider doing your order now and get a little bit more for your $150 order!
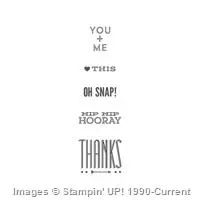
Break up your background with a strip of white cardstock stamped with your sentiment, like this Thanks from the Hip Notes stamp set.
Have fun using your stamps and picking one to color or highlight with a pop of color!
I’ll be back with more fond farewells and starting next week some fun new goodies to share!
Need a new catalog? Let me know! If you’ve placed $50 in orders with me in the last 6 months, yours will be on your way starting late next week. If you haven’t ordered, you can do so in my online store
Or fill out my form here – New Catalog Request Form – and after I hand out catalogs to customers and Stamp Club members, I’ll start sending them out based on the request list!
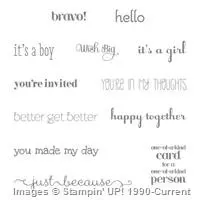
Project Supplies Used: Easy shopping anytime! Click the images below to see the item in the online store.
Ok, so I have A LOT to catch up on… so, big breath in, and get ready to dive in to some project ideas for you!
First up, this fun birthday card idea using the Sale-a-Bration stamp set – Big Day!
Tips for making this card:
This was my first time using the new Chalk inks… and with it my first time playing with the new Chalkboard paper! This paper has the COOLEST texture and is so fun to play with. You want to stamp on the SMOOTH side with the chalk inks so that the ink will sit on the surface and give you that pretty chalkboard look. (this is the Coral Rose color)
Add your own extra touches with the Chalk Pen! The white dots under the cake and the white lines along the side of the chalkboard paper are made with the Chalk Pen. As you can see, it is really vibrant on the Chalkboard paper, but more “chalky” when drawing on regular cardstock.
Make a fun embellishment piece by using the new Ornate Tag Topper punch… only don’t just stick to one side, do both! I had a 2” strip of Whisper White cardstock that I punched both ends. Then run some ribbon through the holes (and tie together on the inside of the card) to hold it in place.
Jazz up your Ornate tag by grabbing a Stampin’ Write marker and drawing a border about 1/16” in from the edge of the tag. Really helps you see the design, huh?
And don’t hesitate to stamp your image and then stamp & color a second version to pop-up on top! It keeps it interesting to look at when viewed at different angles, but you only have to color one.
Lots of fun… and if you need another idea, here is a reminder of one of the official cards shared in the Sale-a-Bration catalog. I love the colors and the little pop of dimension with the “Celebrate”
Now, if you are like me and LOVE the black, white, and yellow combination, I really hope you are a Paper Pumpkin subscriber because check out March’s kit and a fun alternate idea.
You have THROUGH TODAY (3/31/2015) to pick up a 3-month Prepaid subscription to the super fun kits by mail each month and not only SAVE $$ but also get a free Sale-a-Bration item to boot! I know, awesome right? I already picked up mine!
We never know what we are going to get until it ships out to us around the 15th of the month, but over the last year they have been working hard to improve the projects and how much you get in your box and so they have turned out to be really fun projects and you end up with lots of supplies. You know you will always get:
an exclusive stamp set
precut papers and supplies to make usually 6-9 copies of the project, though this varies by month and the project
all the accessories you need for the project and sometimes variations
envelopes (if they are cards)
instructions with video walkthroughs online
ink spots
Basically all you need is scissors and adhesive! (See, now you get why I said they make great gifts!)
Here is what we got for March:
And check out what my downline, Angela McCormack made with it!!!
If you aren’t in love, then you are a tough crowd!
Here is the video that went with it showing how to make the project:
You can cancel at any time or skip a month whenever you want…. so why not give it a try? You know you’ll be excited to see that awesome orange box in your mailbox next month.
Ok, so don’t wait! You only have until midnight MOUNTAINTime to get your order in and pick up your favorites. And then the will be gone and possibly not to be seen again (unless you earned your way to my Sale-a-Bration Celebration, in which case you make be lucky and have one last chance )
And if you’ve been thinking of making the plunge into the awesome world of being a Stampin’ Up Demonstrator (or just have a wishlist that is over $100), I would LOVE to have you join my growing group of Fun n’ Crafty stampers from across the US! We are an active and supportive group that create, share, and cheer each other on and we would love to welcome you in.
Plus you get 2 free Sale-a-bration items or a Project kit as a bonus for signing up in addition to the $125 in product for $99 and free shipping. But who is counting?
New Weekly Deals!
And if that isn’t enough, new weekly deals were released this morning too… so double or triple dip your savings and take advantage while you can.
Ok, that was long enough, thanks for sticking with me and have a great day!
Project Supplies Used: Easy shopping anytime! Click the images below to see the item in the online store.
Are you ready for another Blendabilities card? I have another one for you today…. this was another card that I made using up the bits and pieces I had lying around my craft room. From a stamped Blended Bloom image that needed to be colored to the Striped Scallop thinlit and the cut out pieces from a Dazzling Diamond Glimmer paper die cut. A little bit of this and a little bit of that can come together for something new and fun like this:
And if you are interested, I finally got my Blendabilties Basics video up to share the basics about these markers along with tips and techniques for coloring your images along with a few other fun ways to use your markers that DON’T involve stamping! I have the video below for you to check out!
Tips for making this card:
Use the 2-way Glue Pen for an easy and mess-free way to adhere your Striped Scallop die cut to your project – like the Early Espresso die cut I have on my card.
You can put your die cut over cardstock for a simple accent, or step it up a notch by using the leftover cutouts from a prior project to fill in the gaps! In this case I had previously cut out a Striped Scallop piece from the Dazzling Diamond glimmer paper. I used the outline on a different card and kept the teardrop pieces that had been left behind to use later. So when I was making this card, I just started gluing them the the holes on this card!
For a different take on leaves, use the Scalloped Tag Topper punch to create two scalloped pieces. Let them peek out from behind your flower for a hint of green.
When coloring your flower, it is a big enough image that you will want to color it a few petals at a time. I recommend finishing up 2-4 petals at a time instead of trying to do all of them at once, which would cause the ink to dry too much and keep them from blending well.
I actually walk through coloring a few petals of this flower along with other flowers and projects in this Blendabilities Basics video:
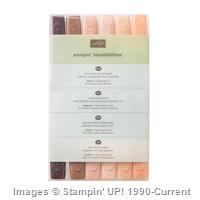
Just a reminder you can get many of the Blendablities for free during Sale-a-Bration! For every $50 you order you can pick one set of the original 12 colors (found in the Annual Catalog) to get included in your order free. Shop online and use Hostess Code EGR29JBV to receive a free gift from mewhen you place your order!
NOTE – due to the dock workers strike on the west coast, some of the colors of blendabilities are unavailable while inventory is being replenished in the warehouse. Those colors are Cherry Cobbler, Daffodil Delight, Old Olive, Pumpkin Pie. If you want to be notified when those become available, you can email me at jennifer@nwstamper.com and I’ll keep you posted!
Project Supplies Used: Easy shopping anytime! Click the images below to see the item in the online store. Use Hostess Code EGR29JBV to receive a free gift from mewhen you place your order!
Tonight is my next Blendabilities technique night and I always relish the chance to play more and differently with my Blendablities! So, today I thought I’d share a card I used as an example of different ideas for your coloring:
Tips on this card:
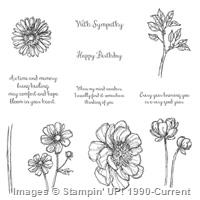
This stamp set is the amazing Bloom with Hope hostess set! It is a ton of stamps and great sentiments and you can get it FREE when you place your own $150 order or when you host a craft night with your friends. Email me at Jennifer@nwstamper.com for more details!
You don’t have to only color on Whisper White paper! I still wanted to stamp with my Memento Black ink as my base, but then I stamped onto Crumb Cake cardstock.
Coloring on different cardstock colors gives you slightly different looks, often a little bit darker than you would see on white, but you can still get your blending and gradients!
Speaking of gradients – try making your own on a piece of Whisper White cardstock! Color your light area and then start building out your darker colors as far as you want. You can make your own pretty and custom spectrums.
Stamp your sentiment AFTER you finish your coloring to make sure it has the best chance of standing out.
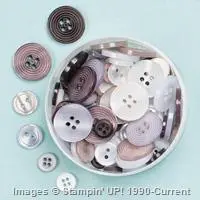
Grab your coordinating colors in accessories to finish out your card like the quick and easy Washi Tape or some Designer buttons.
New Weekly Deals!
Project Supplies Used: Easy shopping anytime! Click the images below to see the item in the online store. Use Hostess Code EGR29JBV to receive a free gift from mewhen you place your order!
What was the stamp set in the Stampin’ Up catalog that you saw and immediately went “I have to have that!”? For me, it was the Kind Koala stamp. I didn’t have a plan or a reason for it, but I just thought it was too cute not to have. So, it went on my first order and I haven’t regretted it! I still love it, especially when coloring this little guy in with my Blendabilities markers.
Tips for making this card:
The Kind Koala stamp set is perfect for quick cards. The image and sentiment are all one single stamp, so you can stamp, add some backing layers and be done! Added extra coloring or accessories as you have the time. 🙂
The skin tones Blendabilities aren’t just for skin! I used them here to color in the Koala. You get a wide range of browns and peaches to work from, some of which are lighter than the Crumb Cake markers. (Plus, this week they are 25% off with the Weekly Deals!)
Keep the rest of your card clean and simple to let the focus be on your colored Koala image. He is cute, why not let him steal the show?
Use the In Color paper and matching In Color ribbon to have a subtle way of adding texture without too much competing colors (this card uses the pretty Lost Lagoon).
Make adding a bow easy! Adhere one piece of ribbon around your card front and then tie a second piece of ribbon into a bow and adhere ON TOP of the first ribbon using a glue dot! It keeps everything tight and just how you like it!
Add your favorite complimentary color for the flower and do some subtle shading with your Blendabilities. Even the littlest bits of coloring can make a big impact!
But most of all, when coloring with Blendabilities, don’t over think it!! Your images will likely turn out darker or fussier if you overthink what you are doing when you are first starting out. Just start with your lightest color and then add touches of the medium and darker color wherever you think there would be shadows or shade and a little bit of squiggles goes a long way! 🙂
Just a reminder that today is the last day of my 12th Man discount to help celebrate the Seahawks heading to the Superbowl! Place an order online using the hostess code WTTJE4Z6 or email me your order by tonight and I’ll give you the extra 12% off!
And if your order is $50 BEFORE the 12% discount, I’ll even throw in a Sale-a-Bration free item as well! Sweet, right?
Tomorrow I’ll be back with another project, and it even uses the Skin Tone blendabilities that are on sale this week with the Weekly Deals! See you then!
When I first saw this Partridge and Pears stamp set, I knew I wanted to use my Blendabilities to color it – but it took until now to actually color the entire tree! Turns out it is great for cards anytime of the year, don’t you think?
I mixed and matched retiring stamps (Partridge and Pears) with upcoming stamps (Simply Wonderful from Sale-a-Bration). Not at all Christmas-y!
Tips for making this card:
Stamp the tree image from Partridge and Pears using Memento ink onto White cardstock. Then color with blendabilities to match the colors and feel you want for your card. In this case, I used: Old Olive, Daffodil Delight, Calypso Coral, Crumb Cake, and the Skin Tones.
Stamp the sentiment from the Simply Wonderful stamp set to make this an anytime card (starting January 6, it will be FREE with a $50 order or if you join my Stampin’ Up team)!
Add the “hi” die cut from the Label Flipcard Thinlit for a fun touch to your sentiment, with a pearl for the dot of the “I”.
Use Stampin’ Dimensionals under the center of the sentiment to help make a rippling banner look.
Yay! 4 more days until the Sale-a-Bration promotion starts and the Occasions Catalog kicks off! I have more projects to share each day and can’t wait to show you the entire catalog on the 6th! If you have any questions, feel free to send them in now and I’ll not only answer you now but will make sure to include the answers in my upcoming video.
Need a catalog? I’m putting more in the mail and would be glad to send you a copy. Just email me at jennifer@nwstamper.com and I’ll get you set up!
Project Supplies Used: (if you are reading this in email, click here to see the list of supplies)
I’m finally finishing up sharing my holiday projects and in a way I’m sad about it. I LOVED the White Christmas stamp set from Stampin’ Up but only started using it really in the last few weeks. Turns out I was right to love it because it always seems to turn out so cute! Even on something as simple as a gift tag, like this:
Quick, easy, and festive for that special gift.
Tips for making this tag:
This is one of the very few times I will tell you to punch your circle BEFORE stamping The spacing is very particular and so it is so much easier if you punch first because you can see what you are doing thanks to the stamp set being a photopolymer (completely clear) set.
Stamp your banner sentiment in black ink FIRST and then add your snowman in the space that fits under the banner.
Use your Stampin’ Write markers to color the “banner thread” and to color in your snowman and add snow (I used Old Olive, Pumpkin Pie, Real Red, and Soft Sky)
Use the 1-3/4” circle punch for the circle and then the 2-3/8” scallop circle for the accent. Add to a tag made from a 2” strip punched on top with the scallop tag topper to make your tag.
Top it off with the Woven Satin ribbon from the 2014 Holiday Catalog – such a soft and pretty ribbon! Also only available until Jan 5th.
Sneak Peek!
I also had to share a quick project I made using the new Treat Bag framelit coming out in the 2015 Occasions Catalog – Stampin’ Up’s spring catalog. It is so easy to make and was perfect for me to use to send some movie ticket gift cards to my family this year.
I made it out of the Nordic Noel designer paper from the 2014 Holiday Catalog and stamped the deer and sentiment from the White Christmas stamp set. Wrap with some Gold Satin ribbon and add Gold sequins and the Nordic Designer buttons to break up the paper pattern and add just a touch of decoration. I can’t wait to play more with this die! It also comes with lots and lots of extra accent dies. I show them all on my Occasions Catalog sneak peek video here – http://youtu.be/qZ8UNeXhJrc?t=6m10s
Project Supplies Used: (if you are reading this in email, click here to see the list of supplies)
It’s official! We are kicked off into the holiday season! I for once am actually almost completely done with my holiday shopping… and now need to focus on finishing up my Christmas Cards and also putting together my December Scrapbook album. Every year I’ve ended up putting together a scrapbook of just the happenings in December. And with 3 birthdays in our family (mine and both my kiddos) plus Christmas, there is always a lot of photos and lots to talk about.
This year I’m trying out an idea I heard from the December daily style albums. Basically, I’m putting together the basic skeleton of my album together in advance using the Stampin’ Up 6×8 Project Life Album and Hello December Card Collection & Accessory Pack. That way, I can add in my pictures as I go and then add in extra pages as needed along the way. But I don’t have to start from scratch at the end of the month! You know, something like this:
So, while I’m working on that, don’t forget about today’s Doorbusters from the Online Sale! (See ALL the sale items listed here)
As of very early this morning, the Blendabilities bundle is sold out. I know, total bummer, but if you had your heart set on that deal, email me at jennifer@nwstamper.com and I’ll give you the best deal I can with my demonstrator discount! Or check out another awesome option below:
Another great option! Not only can you get in on the doorbusters on Monday, but you can turn those into an even better deal when you combine it with the starter kit special! Get $125 in your choice of items for $75 PLUS get at least 25% off anything you order in Decemberincluding NEW Occasions catalog items and free Sale-a-Bration items! BLENDABILITIES STARTER KIT: The Blendabilities doorbuster may have sold out, but you can make your own with the discounted Starter Kit!
Visit the Join The Fun page on my website to get start picking out your starter kit
When you get to select your $125 in items for your kit, you can pick either: – 10 Packs of Blendabilities + the Color Lifter Marker = $124.45 value for $74.25 or – 9 Packs of Blendabilites + the Color Lifter Marker + Memento Ink pad + 20 Notecards & Envelopes = $124.40 value for $74.25 That is a 60% SAVINGS!
You’ll pay tax but your shipping is free!
You will receive an email once you check out giving you your password for the demonstrator website where you can start checking out all the inside scoop and demonstrator forums. Plus, any order you place in December will give you at least a 25% discount.
What are the requirements if I sign up? None! This is a no obligation, try it and see if you like it kind of thing. If you buy/sell $300 by March 2015, then you will continue to receive the perks of being a demonstrator for the following 3 months. At that point, you just need to sell/buy $300 each quarter to maintain your active status.
What if I don’t meet the minimums in a quarter? Your active demonstrator status is dropped and you keep everything you’ve earned or purchased and just continue crafting and creating however you;d like. There is no penalty at all!
What are the perks of being a demonstrator? Get 35% off your first order of $150 or more, get 25% off all your purchases in December, earn money on anything anyone orders from you, be connected with other enthusiastic stampers through the Stampin’ Connection demonstrator forum, my team’s Facebook group, see the spring catalog and sale-a-bration promotion first and even order from it in December with your discount, be the first to hear about Stampin’ Up news and share your excitement with others and be inspired in your crafting. Plus I’m here to help you navigate it all and get what you want out of your experience.
Don’t need Blendabilities? Pick anything you want for the $125 value! Plus, get 25% off all your orders in December if you get your starter kit during the sale.
Today over on the Stylin’ Stampin’ Inkspiration blog, we are sharing some quick and easy cards for you. So, I thought I’d share one of the cards I created for my Stamp Club this fall.
I kept it quick to go together thanks to my handy Big Shot and the Scalloped Tag Topper punch, so that we could focus on playing with the Blendabilities!
Tips for making this card
By using an embossing folder for your contrasting color of paper, it keeps your simple card interesting to look at without overwhelming the stamped image.
Dimensions for this card: Hello Honey cardstock – 8.5” x 5.5” folded in half Lost Lagoon cardstock – 5.5” x 1.75”, which is just right for two rows of the large polka dots on the Large Polka Dot Embossing folder Whisper White cardstock – 4.25” x 2”
Cut a piece of the Mossy Meadow ribbon and hold it in place by stapling it to the top of the tag
The flower images from the Bloom with Hope hostess stamp set are perfect for coloring with Blendabilities. In this case, we use the Night of Navy trio! Who knew the dark sounding color could be so light and pretty when you stick with the lightest color marker for most of your image?!
Just a small amount of stamping, a little embossing, and a little coloring and you have a pretty card that is perfect for any occasion.
Just a reminder, we are on week 3 of Gratitude Month and the special thank you gift this week is a bonus punch on your Northwest Stamper rewards card! Get to your free stamp set even faster this week when you shop online & use hostess code UCJDBQH4.
Finally, next week will be the kick off for the Holiday Shopping Sale! I’ll be getting details soon, but I know you’ll have the special Gratitude Month week 4 gift from me PLUS all the great deals from Stampin’ Up! If you want to be one of the first to hear about the details, make sure you are on my mailing list as I’ll be sending out the details once I have them so you are ready to go.


![NWstamper signature_thumb[9]](https://i0.wp.com/www.nwstamper.com/wp-content/uploads/ad87b4046c1e_C9F6/NWstamper-signature_thumb9.png "NWstamper signature_thumb[9]")


 Tip – This stamp set is a hostess exclusive set – which means you need to either host a party (online or in person) or place a personal order of $150 or more. There is still time to earn this for free, so let me know how I can help! Plus, hostess benefits are changing with the new catalog in June so consider doing your order now and get a little bit more for your $150 order!


