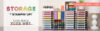
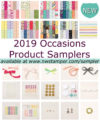
I’ve had multiple people ask if I was going to be offering product samplers from the new Annual Catalog that is coming out on June 3rd – and the answer is YES! We’ve learned that a number of the new products were in such demand with demonstrators loving them and wanting to preorder and shipping delays from COVID-19 that they may be at risk of going into backorder soon after the new catalog launches. So, I’m going to place the order for the Product Samplers early on June 3rd and expedite my order so they are in my hands right away. 🙂
That means if you would like to guarantee you get in on the initial product sampler list, you need to preorder today
RSVP DEADLINE June 2nd at 10pm

RSVP by filling out the reservation form using one of the buttons below and I will get an invoice out to you right away for your selections.
- Sampler Option 1 – Designer Paper ONLY
- Sampler Option 2 – Color Family Designer Paper ONLY
- Sampler Option 3 – Ribbons ONLY
- Sampler Option 4 – Accessories ONLY
- Sampler Option 5 – SUPER SAMPLER w/ FREE Bonus –
Designer paper, ribbons, & accessories - Sampler Option 6 – I WANT IT ALL SAMPLER w/ TWO FREE Bonuses – Designer paper, color family designer paper, ribbons, and accessories
Annual Catalog Sampler Option 1 –
Designer Paper ONLY

In this sampler, I provide a 6×6 sheet of each color or pattern in each new paper pack in the 2020 Stampin’ Up Annual Catalog.
Sampler includes 89 sheets from 13 different new paper packs
only $32.25 plus shipping if required
| Artistry Blooms 6 total sheets – 1 ea of 6 double sided designs |
| Flowers for Every Season (6×6) 12 total sheets- 1 ea of 12 double sided designs |
| Forever Greenery 6 total sheets – 1 ea of 6 double sided designs |
| In Good Taste 12 total sheets – 1 ea of 12 double sided designs |
| Ornate Garden Specialty (some sheets have gold foil in designs) 6 total sheets – 1 ea of 6 double sided designs |
| Peony Garden 6 total sheets – 1 ea of 6 double sided designs |
| Playing with Patterns (6×6) 12 total sheets – 1 ea of 12 double sided designs |
| Playful Pets 6 total sheets – 1 ea of 6 double sided designs |
| Whale of a Time (6×6) 12 total sheets – 1 ea of 12 double sided designs |
| World of Good Specialty (some sheets have brass foil in designs) 6 total sheets – 1 ea of 6 double sided designs |
| Color Velveteen Paper 3 total sheets – 1 ea of 3 colors (Cinnamon Cider, Highland Heather, Soft Sea Foam) |
| Brass Foil Paper 1 sheet |
| Rainbow Glimmer Paper 1 sheet |
Annual Catalog Sampler Option 2 –
Color Family Designer Paper ONLY

In this sampler, I provide a 6×6 piece of each of the monochromatic patterned paper in each design. The designs are new this year, so if you’ve gotten them before you will get new patterns in this sampler.
Sampler includes 100 sheets from 6 different new paper packs
only $36.25 plus shipping if required
| 2020-2022 In Color Family (6×6) 10 sheets total – 1 sheet ea of 2 double sided designs in 5 colors |
| 2019-2021 In Color Family (6×6) 10 sheets total – 1 sheet ea of 2 double sided designs in 5 colors |
| Brights Color Family (6×6) 20 sheets total – 1 sheet ea of 2 designs in 10 colors |
| Neutrals Color Family (6×6) 20 sheets total – 1 sheet ea of 2 designs in 10 colors |
| Regals Color Family (6×6) 20 sheets total – 1 sheet ea of 2 designs in 10 colors |
| Subtles Color Family (6×6) 20 sheets total – 1 sheet ea of 2 designs in 10 colors |
Annual Catalog Sampler Option 3 –
Ribbon ONLY

In this sampler I’ll provide 1 yard of all new ribbons and 2 yards of new twines in the 2020 Annual Catalog. They will be cut and then wrapped around a piece of cardstock and taped down to keep them from getting tangled with each other.
Sampler includes 24 yards of ribbon from 14 different ribbons/combo packs
only $20 plus shipping if required
| 2020-22 In Color 1/4″ Ribbon – Bumblebee 1 yard total |
| 2020-22 In Color 1/4″ Ribbon – Cinnamon Cider 1 yard total |
| 2020-22 In Color 1/4″ Ribbon – Just Jade 1 yard total |
| 2020-22 In Color 1/4″ Ribbon – Magenta Madness 1 yard total |
| 2020-22 In Color 1/4″ Ribbon – Misty Moonlight 1 yard total |
| 3/8″ Sheer Ribbon – Pool Party 1 yard total |
| Playful Pets Trim Combo Pack – Real Red 1/8″ Stitched Grosgrain, Black/White twist Baker’s twine 3 yards total – 1 yard stitched grosgrain, 2 yards twine |
| Ornate Garden Combo Pack – Old Olive & Terracotta Tile 1/4″ shimmer ribbon 2 yards total – 1 yard of each color |
| Gray Granite 1/4″ Shimmer Ribbon 1 yard total |
| Flowers for Every Season Combo Pack – Just Jade 3/8″ Gingham Ribbon, Whisper White 1/2″ Faux Linen Ribbon, Misty Moonlight/Silver Baker’s twine 4 yard total – 1 yard each of the Gingham & Faux linen, 2 yards of twine |
| Forever Greenery Trim Combo Pack – Vanilla 1/2″ open weave ribbon, Gold 1/16″ metallic trim 3 yards total – 1 yard Vanilla, 2 yards metallic trim |
| 1/2″ Faux Suede Trim – Early Espresso 1 yard total |
| Playing with Patterns Combo Pack – 1/2″ Purple Posy 2 toned ribbon, 1/4″ Coastal Cabana texture striped ribbon, 1/8″ Night of Navy ribbon 3 yards total – 1 yard each of the above colors |
| 1/4″ Bumblebee Gingham Ribbon 1 yard total |
Annual Catalog Sampler Option 4 –
Accessories ONLY Sampler

In this sampler, I’ll provide at least one or more of every color, size, and design of the following new embellishment sets. This allows you to see all the different sizes and designs, and be able to use whichever color you want to try them out!
Sampler includes approx 112 pieces from 10 different embellishment sets
only $12.25 plus shipping if required
| Gold Hoops 1 hoop |
| Butterfly Gems 20 total pieces – 2 ea of 2 sizes of adhesive resin butterflies in 5 colors: Pretty Peacock, Purple Posy, Rococco Rose, Seaside Spray, Terracotta Tile |
| Antiqued Corners & Slides 3 total pieces – Brushed Bronze 2 corners & 1 ribbon slide |
| Playing with Patterns Resin Dots 15 total pieces – Flat adhesive backed dots in 3 colors: Coastal Cabana, Crushed Curry, Purple Posy. 5 total in each color (2-4mm, 2-5mm, 1- 6mm) |
| Elegant Faceted Gems 12 total pieces – adhesive backed, 2 ea of 2 sizes in 3 colors: Clear, Petal Pink, Pearlescent White |
| Gilded Gems 9 total pieces – 3 ea in 3 sizes |
| Flowers for Every Season Gems approx 30 pieces – non-adhesive faceted gems and epoxy drops in Clear & Just Jade |
| Artistry Blooms Sequins 10 total pieces – 10 each of 4 colors: Calypso Coral, Coastal Cabana, Mango Melody, Rich Razzleberry – 5 each of 2 sizes |
| Playful Pets Trinkets 2 total pieces – 1 ea of 2 designs |
| 2020-22 In Color Enamel Dots 10 total pieces – 2 ea of 5 colors (Bumblebee, Cinnamon Cider, Just Jade, Magenta Madness, Misty Moonlight) |
Annual Catalog Sampler Option 5 –
SUPER SAMPLER w/ FREE BONUS
In this sampler you will get everything listed above EXCEPT the Color family designer paper. So, that will include:
- Designer Paper sampler – 89 6×6 designer paper and new specialty paper pieces
- Ribbon Sampler – 24 yards comprised of all the new colors/styles of ribbon and twine
- Accessory Sampler – 112 pieces and elements from the new embellishment packs
- **FREE BONUS** – NEW Foam & Basic Adhesive sheet samples!
Get one 6×6 piece of the new Adhesive sheets that make turning your intricate die cuts into stickers a breeze!
Plus, get one of the new Foam Adhesive sheets too. This is a new double sided adhesive piece of foam like our Stampin’ Dimensionals, but you can cut with scissors or use a die cut to make it a perfect match for your project needs!
That is a total of 225 pieces plus your 2 bonus adhesive sheet samples!
only $64.50 plus shipping if required
Annual Catalog Sampler Option 6 –
I WANT IT ALL w/ FREE BONUS
In this sampler you will get everything listed above from all the samplers. So, that will include:
- Designer Paper sampler – 89 6×6 designer paper and new specialty paper pieces
- Color Family Designer Paper Sampler – 100 6×6 designer paper pieces
- Ribbon Sampler – 24 yards comprised of all the new colors/styles of ribbon and twine
- Accessory Sampler – 112 pieces and elements from the new embellishment packs
- **FREE BONUS** – NEW Foam & Basic Adhesive sheet samples!
Get one 6×6 piece of the new Adhesive sheets that make turning your intricate die cuts into stickers a breeze!
Plus, get one of the new Foam Adhesive sheets too. This is a new double sided adhesive piece of foam like our Stampin’ Dimensionals, but you can cut with scissors or use a die cut to make it a perfect match for your project needs! - **FREE BONUS** – NEW Square Vellum Doilies!
Get 4 of the new 3″ square vellum doilies. These are perfect for layering behind your stamped images on your projects and perfectly sized for cards or scrapbooks.
That is a total of 325 pieces plus your 2 adhesive sheet samples and your 4 square vellum doilies!
only $100 plus shipping if required
I love these samplers because they are a great way to try a little bit of a lot of things without having to buy full packaged of everything just to see if you like it in your craft room.
If you have any questions, leave a comment or email me and I’ll get back to you shortly! 🙂


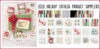
 Vellum Cardstock")


 Scalloped Lace Trim")
 Organdy Striped Ribbon")
 Reversible Ribbon")
 Scalloped Linen Ribbon")
 Scalloped Linen Ribbon")
 Scalloped Linen Ribbon")
 Scalloped Linen Ribbon")
 Scalloped Linen Ribbon")
 Denim Ribbon")
 Textile Ribbon")
 Woven Threads Trim")
 Gathered Ribbon")
 Crinkled Seam Binding Ribbon")
 Tricolor Ribbon")


 Striped Metallic Ribbon")


 Designer Series Paper")


 Designer Series Paper")
 Specialty Designer Series Paper")
 Designer Series Paper")
 Designer Series Paper")
 Designer Series Paper")
 Designer Series Paper")
 Designer Series Paper")

 Variegated Ribbon")
 Reversible Ribbon")
 Satin Ribbon")
 Flax Ribbon")

 Striped Metallic Ribbon")