Northwest Stamper

Tag: fall card

  • ICS Blog Hop–Season of Gratitude

    Welcome to November and fun new blog hop with the Inspire, Create, Share gals!  We’ve decide to do something a little bit different this month and we are pulling out our Paper Pumpkin boxes for this month (technically they are from October, but hey, November’s kits don’t ship until after November 10th, so you have time to sign up for yours!)

    As I often do, I create the design the way the instructions tell us to for the first project, and then I start exploring what other options I can do to change things up!  I usually stick with trying to figure out ideas that you can make using ONLY WHAT IS IN THE BOX.  So I don’t grab extra ink, paper, or punches when I’m starting out.  I want to give folks ideas of what they can do even if they don’t have a bunch of other supplies in their craft room.  So, check out what my favorite alternative turned out to be:

    October 2016 Paper Pumpkin Alternative Card Design

    Now, I’ll share what the cards in the kit are “supposed” to look like.  This is my first card created using the instructions as they were written for the kit.  You end up making a fall shaker card when you are done.  And it is kind of hard to tell, but that Vanilla paper is actually dry embossed, so those grooves are part of the paper.  Which made me want to bust out my sponges and try coloring it, which led to the second card version:

    It wasn’t my favorite, but I thought I would share it anyway.  Also, it leads me to a tip or reminder… depending on who you are.

    Paper Pumpkin Project Tip

    • When you are adhering the Window Sheet to the back of the leaf cut-outs don’t worry about putting adhesive on all sides of the window sheet!  I did that with my first one and totally ruined the window sheet because there wasn’t enough room without the adhesive being exposed through the die-cut holes.  And let me just say, an Adhesive Eraser is magic, except not so much on acetate sheets. Smile  They still smear all over the place!  So just put adhesive on the Vanilla Die Cut Sheet around the holes and press the window sheet onto that.  You just need to make sure the holes are covered, it doesn’t have to be perfect.
    • The instructions say to use the foam strips (to contain the sequins) on all 4 sides of the embossed Vanilla piece; and while that works, you often won’t see your sequins!  So, in the card above, I made my foam strips make a small rectangle just around where the die cut holes are.  That way, the sequins are almost always viewable.  Then I just added some extra foam along the far left edge to keep the paper balanced and steady.
    • Don’t forget to put your sequins on the bottom paper (in this case the card base) and NOT onto the window sheet.  By making little piles on the bottom sheet, you can place the top layer (with the holes) exactly where you want and still see what you are doing.

    But now, back to my final alternative that I really like!

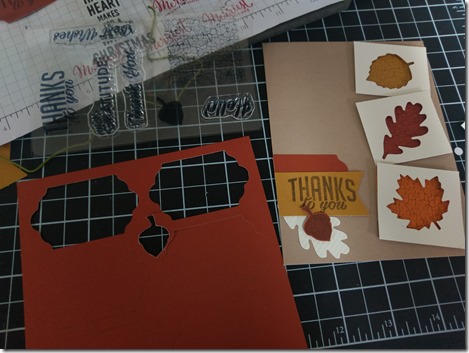
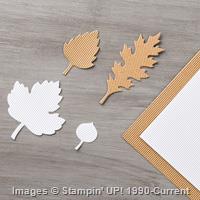
    I switched away from the Shaker card idea and instead started cutting out my favorite elements.  I cut out the die cut leave holes and then trimmed down some of the background colored paper to fit behind them.  I loved the crackle stamp for the cool effect that you get for the leaves, so I had to keep that in there – and now you can see it even better because you don’t have to look through sequins!

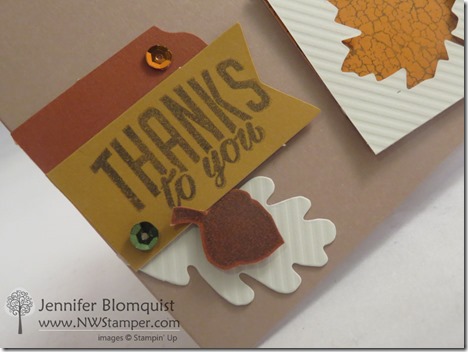
    I used Stampin’ Dimensionals to raise the die cut holes over the stamped paper, and then glued those down directly to the card base.  Then it was time to figure out the sentiment.  I used the same die cut shapes and just layered them a little bit differently:

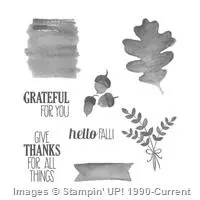
    But I didn’t want it to be too plain, so I layered back in one of the die cut pieces that popped out to make my shaker card and added a stamped acorn from the stamp set that comes with this month’s Paper Pumpkin kit.  And you may remember me telling you that when I do these alternative cards, I don’t grab extra papers and inks from my stash, so want to know where I got the paper for that acorn?  Check it out – it’s the left over paper in between the Cajun Craze tags!

    2016-11-02 15.24.35

    Then just add a few extra sequins and you are done!

    I hope you have enjoyed this Paper Pumpkin kit alternative idea!  Keep on hopping and check out what Andrea has in store for you, for even more great ideas.

    And don’t forget, if you like these ideas – you can always get MORE of the kits by purchasing refills in the Online Store!

    • If you are a current Paper Pumpkin subscriber, you get exclusive access to refill kits for past months as a great price.  see them here
    • And if you weren’t a subscriber before, you can always join now and get immediate access to be able to purchase refill kits, plus you’ll be all good to go to get this cute Holiday Exclusive box in your mailbox for November!

    14917149_1784322711825603_4425822216026875299_o

    Thanks for hopping!

    NWstamper signature_thumb[9]

    order online button for sig 3_thumb[4]

    14947527_10153874106165776_4026858921570814699_n

    November Premium Tutorial Pack Hostess Code – YG62GG6C

    NEW! I’ve joined with a group of amazing talented demonstrators – many of whom have been designers for the Stampin’ Up display boards at the Conventions with me, plus Artisan Design team members, and other talented folks, to create a set of great project tutorials just for you featuring the stamp sets that are on sale this month!  You can get your free copy of this SET of great project ideas by either:

    Place a $50 Stampin’ Up order with me (either directly or in my online store using the hostess code above) in the month of November

    Join my Fun n’ Crafty Stampers!  My team gets a copy of this Tutorial Pack for FREE!

  • ICS Fall Fun Blog Hop

    It is fully October, if you couldn’t tell from all the Pumpkin Spice EVERYTHING that is in the stores and restaurants!  And that means that we are ready to head out of summer and jump into fall.  To help get you in the spirit and thinking of changing leaves, pumpkins, and all things warm and cozy… the gals at the Inspire, Create, Share blog hop group have put together another fun hop to share with you lots of Fall themed projects!

    I wanted to break out some of the great designer paper I had ordered from the Holiday catalog and break out those fall color combinations.  And while I was thinking about what to create, I suddenly remembered this oldie but goodie stamp set – Wonderous Wreath!  Check it out:

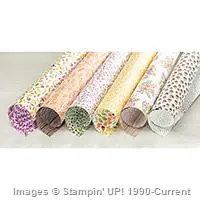
    Usually you see the wreath with Christmas or winter colors, but there is no reason why it can’t be fall instead!  I just grabbed my Petals & Paisleys designer paper and flipped it over to the back to look at the label where the professionals at Stampin’ Up have already come up with a great color combination.  I just use it as my crib sheet! Smile  Try this combo on for size:

    TAMS Color Builder (1)

    So, I just used those colors to create my wreath!  The coordinating wreath and bow dies made it a cinch to cut out and then I just needed to start layering it onto my card. 

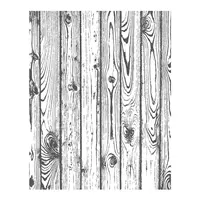
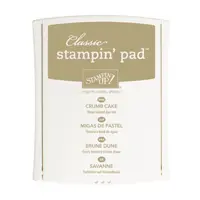
    Since I had used the colors from the Petals and Paisley designer paper, it was a no brainer to pick my favorite patterns to layer on the left of the card.  Then I wanted to add just a touch of texture so I cut a piece of Crumb Cake cardstock and embossed it with the Woodgrain embossing folder for the perfect backdrop for the wreath itself (don’t forget to sponge the edge of the embossed paper with Soft Suede ink to really distress it!)

    Then I just needed a sentiment and I’m so super in love with this one from the Suite Seasons stamp set in the Holiday Catalog.  You’ve seen me use this sentiment on Very Vanilla cardstock and color in the decorative piece.  But since I didn’t want that accent to take away from the wreath, I left it simple and subtle with Soft Suede ink.

    This card showcases a fun way to use some of your favorite patterns from the designer series paper.  Right now many of the papers are buy 3 get 1 free!  Woo hoo!  I totally spaced and forgot this was a specialty paper, so it isn’t in this sale, but change this up for the Presents and Pinecones designer paper that IS on sale, and make the wreath holiday and you are good to go!

    I hope you have enjoyed this Fall inspiration idea!  Keep on hopping and check out what Candy has in store for you, for even more fun fall ideas.

    Thanks for hopping!

    NWstamper signature_thumb[9]

    order online button for sig 3_thumb[4]

    October Online Stamp Club Hostess Code – YG62GG6C
    Get free exclusive tutorials each month and even get the supplies in a Make & Take kit with your order over $40 when you use the monthly hostess code!

    Project Measurements:

    • Crumb Cake cardstock – 5 1/2″ x 8 1/2″, 2 3/4″ x 2 3/4″
    • Very Vanilla cardstock –3 1/4″ x 3 1/4″, 2″ x 2″
    • Petals & Paisleys designer paper  – 1″ x 5 1/2″, 1 1/4″ x 5 1/2″

    Product List

  • Sneak Peek of the Thoughtful Branches Class by Mail!

    I’ve been playing a lot with my Thoughtful Branches bundle that I order last month… see, it always takes something sitting on my shelf for at least 2 or 3 weeks before I seem to percolate enough to start busting it out and getting it inky.  Know the feeling? 

    Well, I’m lucky that I got my groove on because this fabulous set is only available for about 4 weeks!  Yep, that is right!  The stamp set and dies just came out yesterday as a limited time offer and are only available while supplies last or August 31st, whichever comes first.  So, I’m getting my playing done while I can still show you how fun it is AND then you can still pick up your own copy…. ‘cause you know you are going to want to play with it too! Smile 

    To help get you some inspiration and to make it easier to get started playing once you get your own set, I created this fun class by mail just for you!  I wanted to show how versatile the stamp set is and give you the supplies to get going.  So for this month, I’m GIVING YOU the class kit for FREE when you purchase the bundle from me! 

    Say what?!?

    Yep, that is right!  Get the supplies to make 8 of these cards for FREE!  Or purchase the class kit or instructions if you already have your bundle.  Here is the scoop:

    Thoughtful Branches Class by Mail

    The class kit includes all the precut paper and embellishments to make 8 cards (2 each of 4 designs), plus envelopes and full color PDF tutorial set emailed to you.  You can get yours one of three ways:

    • GET IT FREE! – order the bundle from me and I’ll include the class kit for FREE!  You just pay the shipping to get it to you. Smile  Bundle price with class kit shipping – $69
    • Just need the kit supplies?  No problem!  Get just the class kit for only $25 and get the supplies and instructions for all 8 cards
    • Or pick up the PDF instructions for $6.95 

    Class Options


    Note – class kits will be mailed the week of 8/15.  PDF instructions will be emailed out mid-week of the first week of August.

    Get even more ideas!  Check back later (around 6pm PT on Wednesday), as I’ll be participating in a fun Blog Hop all about framelits and I have a bonus card using this Thoughtful Branches bundle to share with you!


    NWstamper signature_thumb[9]

    order online button for sig 3_thumb[4]

    Product List

  • Grateful for You Thank You Card with Touches of Burlap

    This week has really been a real life lesson for me on gratitude.  I have been blessed by some amazing people who came out of the woodwork and helped me survive this week as I was starting to get super stressed out midway through!  I am one of those people who have a hard time asking for help and I was shown how amazing friends and community can be. Smile  So today’s card share is my virtual way of sharing my gratitude for them!

    See, Thursday morning, I was helping decorate a table for a Ladies Christmas Dinner with my MOPS group and I was starting to freakout just a little.  Hubby was out of town, so I was single parenting and still needed to get ready for card class the next night, plus clean and finish planning my daughter’s birthday party on Sunday.  And lets just say my house was a disaster and I didn’t really know what I was doing for the party.  Oh, and I knew I would be out late that night because I would be at the Christmas dinner.  So I was just seeing a lot to do and not enough plan to know how I was going to do it!

    But by the end of the night, I had one friend, Trisha, who was helping with the Christmas dinner offer to come over the next day to help me finish cutting for card class… then that afternoon, my friend Chrissy had me over to help me get my mind straight about the party and put together a plan – but even more, she sat there with her Cricuit and cut out a BUNCH of decorations for the party while we were talking!  So I went home not only with a plan but with many of the decorations done!  Then in the evening I was overwhelmed when another friend, Lisa, sent me a picture of a fondant Hello Kitty she had made me for on top of the birthday cake (Caitlin had asked for a “Hello Kitty” cake and while I can make anything with paper… designing with frosting is not quite my forte Smile)  And my evening timed out that I could clean my kitchen and by the time I went to bed, I was starting to feel like I could do this after all!  So to all of you – THANK YOU!

    Tips for making this card:

    • Frame it up with simple layers – I always love how clean everything looks when you use simple layering to mat your card elements.  I find that a 1/8” mat is the perfect size most of the time, and really easy to cut on your trimmer.  Just cut your matting cardstock 1/4” larger in both directions than your smaller piece.  So for example, in this card:
        –  Card base as a mat: 4 1/4” x 5 1/2”
        –  Crumb cake piece: 4” x 5 1/4”
        –  Soft Suede square mat: 3 1/2” x 3 1/2”
    •   –  Very Vanilla piece for stamping: 3 1/4” x 3 1/4”
    • Use those busy patterned papers for accents – I used one of the patterns from the Into the Woods designer paper for a pop of color and an accent.  The pattern is one I like but busier than I would normally use for a big piece, so use it for a smaller layer and tuck it under one of the elements for just the right accent piece.
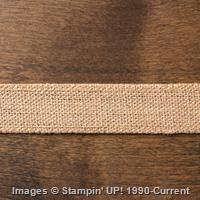
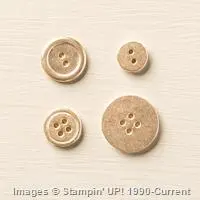
    • Get creative with your Burlap Ribbon – I love my burlap ribbon… like use it all the time!  But I wanted to soften it up a bit when I was making this card, so we changed it up a bit.  First, trim off the stitching from one side of the ribbon.  Then pull out 3 threads from the top of the burlap ribbon before gluing it down to your card front.  (I recommend tape runner applied to the cardstock on the card for taping down the ribbon).  Then use the threads for other accents on your card!  I used two like twine across my Very Vanilla piece and then threaded the third through a Gold Button and tied a bow.
    • Make a Shadow for your images – No lining up required!  One fun way to play with your stamp images is to use two different colors to create a “shadow” image.  The nice thing is, since you want them to be slightly offset, you don’t have to worry about lining things up.  So, you can get a little messy and it looks great everytime!  In this case, I stamped the background rectangle from the For All Things stamp set in Crumb Cake in, and then stamped the leaves in Soft Suede ink over the top as my main image.  Then stamp the shadow in Cajun Craze ink by stamping close to my original spot but not exactly the same position.

    I’m happy to say, thanks to the help earlier this week and then my mother-in-law coming over to help clean as I was baking for the party yesterday, I think we are all ready for our Princess Party!  Princess Caitlin is all ready to go!

    2015-12-06 08.06.24

    So hugs to all of you and thank you to everyone who takes the time to share their talents and time to help make every day just a little bit more survivable and a little more magical!

    NWstamper signature_thumb[9]

    order online button for sig 3_thumb[4]

    Use Hostess Code BEFX37ZS at check out to get a special thank you from me!

    See all the tutorials & classes by mail here

    Check out the Holiday Catalog Retiring List & Sold Out Updates

    Save 25% on the Latest Weekly Deals

    Don’t miss up to 60% off in the online Clearance Rack!

    Project Supplies Used on this Card:
    Click any image for more details or to shop!  Use hostess code BEFX37ZS when shopping to get a special thank you from me!


  • Happy Scenes & the Leaflets Framelits make Fun Thank You Cards!

    I know we are getting into Christmas time and lots of wintery projects, but I still have a few fall themed projects that I loved and so I wanted to share with you – including this thank you card I made for recent customer thank you cards. 

    I had seen the idea for using a cut out hole with the Leaflet framelits and thought it would be cute trying stamping on the leaves themselves!  So I tried that and it ended up being a fun project.

    Tips for making this card:

    • Stamp your scene first! With photopolymer stamps, you can often see what you are doing when it comes to stamping in a very specific spot on your paper (which is why I love them so, so much!) but in this case, I found it easier to stamp my scene first from the Happy Scenes stamp set and then position my framelit so that everything lined up the way I wanted it to and cut out.
    • Layer your die cuts – Make a cool shadow or accent effect by cutting out the same shape as your stamped focal point only in solid color cardstock and slightly offset behind the stamped image.  In this case, I stamped on Whisper White and then cut out a second leaf in Cajun Craze cardstock.
    • Have fun with your Aqua Painter  – After you cut out your shape, have fun letting your inner artist (or kindergartener as the case may be!) and play with coloring things in!  Use your aqua painter (a special brush-tip pen that the barrel is filled with water that you can use to paint on your ink) by picking up ink from the LID of your ink pad (squeeze the closed ink pad if you need to get more ink on the lid) and paint it onto your scene.  It doesn’t have to be perfect, so just have fun layering your colors and making your own personal sunset image.  Everyone will be different!
    • Wide ribbons don’t always have to be wide! – I wanted some ribbon and loved the texture of burlap, but didn’t need the weight it added of having the full width of the burlap ribbon.  So, don’t be afraid to pull out your scissors and cut the ribbon in half!
    • Mix and Match your stamped image for all seasons – I made this card with the fall theme, but use the snow scene or spring scene from the Happy Scenes stamp set and make it a whole new card!
    • Check the Holiday Retiring List before your favorite sells out – The Happy Scenes stamp set and Happy Haunting paper are both on the Holiday Catalog Retiring list and so are only available while supplies last.  There are more awesome items that are saying goodbye this month, and two items that have already sold out!  So make sure to check your list before December is over.

    NWstamper signature_thumb[9]

    order online button for sig 3_thumb[4]

    Use Hostess Code BEFX37ZS at check out to get a special thank you from me!

    See all the tutorials & classes by mail here

    Check out the Holiday Catalog Retiring List & Sold Out Updates

    Save 25% on the Latest Weekly Deals

    Don’t miss up to 60% off in the online Clearance Rack!

  • Acorny Thanks with a Bit of Glitz! Plus new Weekly Deals too

    *******************************************
    Don’t Forget!  Only 3 More Days of the 15% off ALL Stamps Sale!
    Shop in my online store and you’ll automatically see the discount
    Use hostess code FHRCKER7 to get a special thank you from me!
    (excludes hostess stamps, bundles – because they already are discounted, and rotary stamps)
    *******************************************

    A lot of times when I’m working on creating a card for classes or just for my own fun, I start out by getting the mojo going by searching on Google Images or hoping around Pinterest or some of my friends blogs.  Usually, I see a few cards that inspire me in different ways and I combine my favorite elements into a card that is something new.  Like, maybe I love how the first card uses an embossing folder in the background, and I love the color scheme from a second card, and in a third card, I love how a set of punches are layered together.  I’ll mix and match all of those elements into one card that makes me happy.

    But then sometimes, I find a card that I love so much that I have to recreate it exactly how I see it.  And today’s card share is one of those cases… or should I say CASEs. Smile  (see what I did there?  some crafting humor Smile)  I was inspired by the very talented Ilina Crouse and her original card here, to create this card to give out as thank you cards… now if only I can figure out what I did with my completed cards I would be very happy!

    I think my favorite part of the card is the hint of glitter along the edge of the white sentiment layer!  Here is what I did:

    • Adhere a strip of the Into the Woods designer paper along the left edge of the card base
    • Adhere a 1/4” strip of Gold Glimmer paper to the back of a 3 3/4”x5 1/2” piece of Whisper White cardstock so that only about 1/8” of the gold is showing.
    • Mount the white and gold paper to the front of the card using Stampin’ Dimensionals
    • Decorate the front of the white cardstock. 

    This gives just a touch of gold and adds some fun dimension that is subtle.  One tip though, I did this on a card that had the crease at the top (so a 4 1/4” x 11” piece of base paper folded in half) but when I gave people this card, because of the dimension on the front, they wanted to open the card from the side.  So I recommend using a standard card base with the crease on the left (so a 5 1/2” x 8 1/2” piece of paper folded in half)

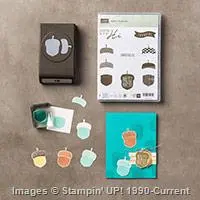
    For the front, I grabbed the super fun Acorny Thank You stamp set.  Here are a few tips for the front of my card:

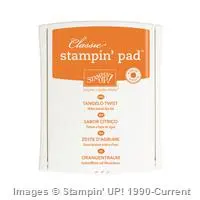
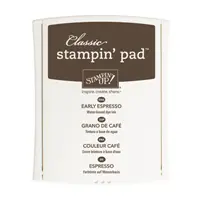
    • Tangelo Twist and Early Espresso make a great fall color combination!  That is what I used on my acorn.
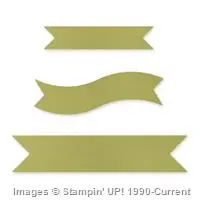
    • You can cut out your Thankful banner really easily using the Bitty Banners framelits!
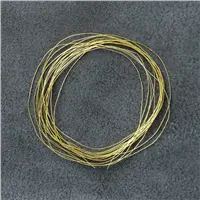
    • Cover the back of your acorn with SNAIL or other tape runner, and then create loops from the Gold Metallic Thread and press them into the back of your acorn so that the tape covering the back holds them in place.
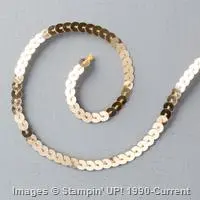
    • Add a few gold sequins from the Gold Sequin Trim for some extra glitz using glue dots

    I just totally love this card and may have to make it in other colors and designs.  Don’t you love it?

    Yesterday was also the start of some new Weekly Deals too!  A few fun and festive items are on sale…

    12112162_10205496976172890_1971421608440231933_n

    Shop the weekly deals here

    And while you are there, don’t forget about the Big Stamp Sale too!

    15 off stamps promo_NWStamper

    NWstamper signature_thumb[9]

    order online button for sig 3_thumb[4]

    But use Hostess Code FHRCKER7 to get a special thank you from me!

    Product Supplies Used:

  • Feeling Thankful on a Friday with Acorny Thank You

    Whew!  We made it to Friday!  Some weeks blow by and others I am just grateful it is almost the weekend.  I’m not sure which it is for you, but even though I’m a mom of small children and so weekends don’t mean quite the same thing they did a few years ago…I look forward to not HAVING to be anywhere in the morning and so we have a little more flex in our day which is nice.  This week is also a time of transition for Stampin’ Up demonstrator as Stampin’ Up announced at the beginning of the year that they were making significant changes to the business structure for demonstrators (like what our titles are, criteria for how much we are paid, what incentives are offered) and that all kicked off this week as they changed to a new fiscal year starting in October.  Lots of good changes, but lots of brain power required to shift from the old system to the new system. Smile

    So, today I am thankful.

    – Thankful that I am able to stay home with my kids – even when it is stressful.

    – Thankful that I am able to create cute projects and share them with my friends and customers – even when I realize that I wasn’t paying close enough to the calendar and the class I thought was a week away was only a couple days away and I wasn’t ready!  (Thank goodness for pinterest to get the mojo going on short notice!)

    – Thankful that I have amazing men and women who share this experience with me as members of my amazing Fun n’ Crafty Stampers demonstrator group and as the sweetest customers I know!

    So, the card I have to share with you today is another of my beloved Acorny Thank You cards… all about being Thankful.

    A couple punches, some patterned paper, and a deep breath to relax and enjoy the creative process and you get this lovely card.

    Tips for making this card:

    • Create your center piece of the card using your favorite designer papers and colors.  In this case, I used the Into the Woods designer paper for both the yellow square AND that leafy acorny circle.
    • Yep, that is right, that leafy spray behind the acorn is as easy as grabbing your 2-1/2” Circle Punch and punching out one of the clusters from this great paper from the Into the Woods paper pack.into the woods dsp
    • The yellow pattern is a 3”x3” piece (makes for extra efficient use of your 12”x12” pieces of paper!) layered onto a 3-1/8” x 3-1/8” piece of Rich Razzleberry cardstock.
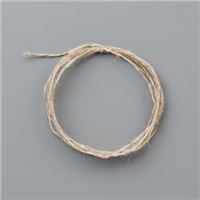
    • Run some linen thread around and tie a bow before layering down your 2-1/2” circle.
    • Stamp your acorn base in Early Espresso and the acorn top in Rich Razzleberry and they are super easy to punch out with the Acorn punch!  (Get the punch with the stamp set in a bundle and save 15% off both!)
    • Did you know?  You can cut out the sentiments from this stamp set using the Bitty Banners Framelits?  It’s true!  That is what I used to cut out this Thankful sentiment and it layers over the top perfectly.
    • Finally, for the last touch, I had to get into my Corrugated Cardstock!  This awesome paper is totally lost in the Stampin’ Up Annual catalog but once you start playing with it, you will love it.  It is an easy way to add texture without the need of any tools!  Plus it is bumpy on one side and flat on the other so it glues down like a dream.
    Just add a few dimensionals to pop everything up and you have a great card that looks so much cooler than those grocery store cards!
    Flurry of Wishes Card Class Instructions are going out today!

    If you purchased my Flurry of Wishes Holiday Card class by mail or just the pdf instruction sheets, I wanted to let you know that the instructions are being emailed out this afternoon!  One more round of kit supplies are being ordered this afternoon, so the kits themselves will start shipping out mid next week.

    Haven’t ordered your copy yet?  You can!  Just click here –> Flurry of Wishes Class by Mail to sign up!


    NWstamper signature_thumb[9]

    order online button for sig 3_thumb[4]

    Project Supplies Used:
    use Hostess Code FHRCKER7 to get a special thank you from me!

  • So Many Holiday Catalog Sneak Peeks–Can You Pick A Favorite?

    holiday catalog 2015 copyOk, here is the scoop.  I know a bunch of you out there are totally curious about the Holiday catalog coming out… and let me tell you, it is a good one this year, just ask my credit card company Winking smile.  But while I wait for my preorder to arrive, I thought I would do one more post because I realized I took a lot of pictures of the new holiday products on the Convention Display boards but never actually posted most of them! So enjoy and imagine getting all your holiday crafting done BEFORE the craziness of the holidays has hit.  Wouldn’t that be awesome?!

    Now – if you see something you love, you have a couple options:

    1. Watch for your catalog to arrive in the next few weeks if you are one of my customers, and then get your wishlist started so you can shop Sept 1st when the catalog goes live
    2. Host your own preview party!  I’ll have many of the items in the catalog and you can host a craft night for you and your friends at the end of this month or early next (online or in person) and I’ll plan projects for you to do or share using the newest fun stuff.  PLUS you’ll earn free credit to pick out some of the items to get for free!  How sweet is that?
    3. BEST DEAL YET!  If you join my Fun n’ Crafty Stampers group anytime this month, you can get your favorites NOW!!  Pick out up to $125 in product from the Annual catalog OR ANYTHING in the Holiday Catalog to get for only $99, skip the shipping… and start playing next week.  Start shopping for your kit here.

    Ok, with that, check out all the fun goodies:

    IMG_0397

    There are super cute kits coming, from shaker cards to a set of gift tags!  I’ll be running classes on these for sure… so keep an eye out for those popping up on the schedule.

    IMG_0406

    Plus lots of fun Halloween items:

    IMG_0400

    IMG_0401

    IMG_0402

    Can I just say that I NEEDED this owl?  I don’t do Halloween items much but I knew it would be cute for treats, scrapbook pages, and even cards if I chose.  So, guess what was one of the first things on my preorder list?  Yup!  This guy!  Can’t wait for him to arrive. Smile

    IMG_0404

    IMG_0403

    IMG_0405

    And of course lots for fall:

    IMG_0407

    IMG_0408

    IMG_0410

    IMG_0411

    IMG_0412

    IMG_0506

    IMG_0496

    And TONS of good stuff for Christmas and Winter time:

    IMG_0415

    If you are someone who loves Project Life, there are some great new kits including the Hello December kit that is perfect for documenting your life and traditions through the month of December.  I made one last year and it was my favorite album yet and so I know I’ll be making another for this year!

    IMG_0420

    IMG_0421

    IMG_0422

    IMG_0381

    IMG_0426

    IMG_0427

    IMG_0428

    IMG_0429

    IMG_0430

    IMG_0431

    IMG_0432

    IMG_0433

    IMG_0434

    IMG_0436

    IMG_0437

    IMG_0438

    IMG_0439

    IMG_0441

    IMG_0442

    IMG_0515

    IMG_0546

    And some items that are good for all seasons or even just tools for throughout the year:

    IMG_0413

    IMG_0414

    IMG_0418

    You may not be able to tell, but that birch tree background is an embossing folder!!

    IMG_0424

    There is a new punch that punches 2 different corners plus the straight slot!

    IMG_0417

    And a pillow box thinlit too!

    Plus almost all of these dies are available as part of a bundle where you can save 15% off the price of the die and coordinating stamp set.  Total score, right?!

    And YES!  If you decide to pick up the starter kit, you can totally take advantage of those bundles and discount pricing so you can save even more!  Plus, once you’ve signed up by purchasing your starter kit, you’ll actually get 20% off all your future orders from the Holiday catalog too.  You know, just an FYI. Smile

    So what is your favorite?  See anything you can’t wait to make room for at home?

    NWstamper signature_thumb[9]

    order online button for sig 3_thumb[4]

  • Wondrous Wreath Gratitude Card for the Fun n’ Crafty Blog Hop

    Wondrous Wreath Gratitude Card for the Fun n’ Crafty Blog Hop

    Fun n Crafty Blog Hop badgeIn keeping with the theme of Gratitude this month, a few of us from the Fun n’ Crafty Stampin’ Up! demonstrator team put together a mini-blog hop based around the theme of Gratitude.  This was my card I wanted to share with you today!


    I LOVE this Wondrous Wreath stamp set and matching framlits, especially because you can easily cut out your wreath both outside AND IN and have all the little leaf shapes. Smile

    For this card, I used more “Fall” colors instead of the reds and greens like I did on my Christmas Wreath card.  I used the following colors:

    • Hello Honey ink for the full wreath stamp with all the leaves
    • Soft Suede ink for the partial wreath stamp with about 1/4 of the leaves
    • Blackberry Bliss ink for the berries and the bow

    And speaking of the bow, how awesome is it that you don’t have to hand cut that either! Smile  I stamped my bow and cut it out with the matching die but I’ve seen super pretty cards using glimmer paper for the bow or just plain cardstock as well.  Gotta love having options.

    Then you can kind of see the card base is stamped as well.  I used the Hardwood background stamp ….
    (TIP – I love my clearmount stamps, but when it comes to background sized stamps, I ALWAYS recommend to my customers to get them in wood.  Sure, you save a little space when you get it in clear, but then you have to get the $17 clear block to use with it, and in the case of a stamp like this, it is pain in the rear to get the sticker on right onto the back of the stamp!  I just think it is way easier and often more economical to get the background stamps in woodmount.  Though I’ll still love you if you decide you want it in clear. Smile )

    but anyway, I used the Hardwood background stamp in the same color as the paper, which in this case was crumb cake.

    I also made this card the same except for using Sahara Sand as my background instead of Crumb Cake.  Both are pretty… not sure which I like better, actually.  Swing by my Facebook page and cast your vote which paper you like better!

    And now, check out a few more ideas for sharing gratitude this month!:

    10353106_10204078100138887_7954284539736439010_n

    We don’t have a long list this this month so it’s easy to check everything out and enjoy the inspiration!  And please leave Sara and Pam some love on their blogs… I know it would mean a lot to them. Smile

    NWstamper signature_thumb[9]

    order online button for sig 3_thumb[4]

    Gratitude Month Week 1 Free Tutorial – Kinda Eclectic Thank You Card

    use hostess code UCJDBQH4
    See the Catalogs online – Annual Catalog  |  Holiday Catalog  |  Holiday Supplement
    Save more when shopping – Weekly Deals  |  Clearance Rack

    Card Supplies Used:
    (if you are reading this in email, click here to see the list of supplies)

  • A Fall Colors Thanks with Seasonally Scattered

    Do you ever have one of those cards that seems like a great idea in your head… you start to put it together, and it just doesn’t exactly work out like you were picturing.  Then when you are done, you just don’t quite love the card – even though it looks totally fine to everyone else BUT you? 

    Well, this card is one of those for me.  I made it AGES ago but something never quite turned out the way I was hoping – not that I could tell you what that something was, I just knew something was bugging me.  So I set the card aside and moved on, and now, I can look at the card and start to like it again.

    See, not bad…. actually has some fun parts to it really. Smile 

    Tips for making this card:

  • Yes, I colored those flowers and leaves with markers. And yes, it took a while. But I found it to be very calming and relaxing which was nice.  I sat there with my 2014 In Color marker collection and patiently colored all the leaves, flowers, and lines.  It is worth it in the end!
  • Make your letters of your sentiment stand out more by outlining them with a marker – in this case with the Hello Honey marker.
  • Use the stamp again, only this time stamped with Crumb Cake ink to form a decorative border around the outside mat area!  Since the center will be covered up, you can have the word part be in the middle of your Crumb Cake cardstock and just cover over the “thanks” part with your White stamped cardstock.

    • Tear the edges of the Crumb Cake cardstock for a more rustic look to your card.
    • Wrap a piece of Blackberry Bliss ribbon around the front of the card and slightly under the bottom edge of your stamped sentiment.  Then tie your bow with a DIFFERENT piece of Blackberry Bliss ribbon and attach to the ribbon on the front of your card with glue dots.  Keeps it all nice and clean and smooth.

    You can mix and match this same design with different colors and stamps for lots of fun different looks for your card!  In fact, I actually rejected this card for my Convention Display Board submissions because I thought it was an almost identical design to this love card!  If you don’t look closely they don’t seem the same, but check out the layers and elements and you’ll see what I mean!

    NWstamper signature_thumb[9]_thumb

    order online button for sig 3_thumb[4]_thumb

    Card Supplies Used:

  • Holiday Catalog Project Inspiration from the Fun n’ Crafty Stampers

    I am so incredibly grateful for my Fun n’ Craft team of demonstrators.  They are an awesome group of crafters and just overall wonderful people.  In our group, we have Pam Wu who has started organizing card swaps for our team each time a new catalog comes out.  We usually have a good amount of people participate and let me say… the cards are off the charts awesome!  So today we thought we would do a little mini-blog hop to share them with you.

    Here is my simple card that I swapped:

    Tips for creating this card:

    • The new Fall Fest stamp set makes this card quick and easy to create because the leaves and pumpkins are all part of the same set.  Plus, with matching framelits, cutting them out is a snap!  So, definitely grab the bundle and save 15% while you are at it.
    • Use the same color ink as your card base for stamping the little leaves randomly all over the front of the card.  This gives you a nice tone-on-tone look without being too busy or overwhelming your card.
    • Cut out both pumpkins with the framelits and pop them up on dimensionals for dimension to your card while still keeping it super simple


      Use a small strip of the Burlap Ribbon to give it a real fall look.

    And for the sentiment, I used the Host Special stamp set – Good Greetings!

    Good_Greetings

    This set is fabulous, especially for holiday cards and you still have time to get it free!  Host a party (it can be in person or an online only party) or place a $300 order and you’ll get it free on top of your regular hostess benefits.  Email me at jennifer@nwstamper.com if you would like to set something up so you can get it! Smile

    See more amazing Holiday Catalog samples here –

    We had 4 more people participate in the swap (just for one reason or another, they weren’t able to participate in our little blog hop) , so I’ll be sharing their cards here on the blog tomorrow!  I hope you can come back and join me!

    spaced shop now sig bar

    Hostess Code:  C2HYWWQM Use this Hostess Code and receive a free gift!
    (Please do not use the Hostess Code if your order is $150 or more)

    Card Supplies Used:

  • Holiday Catalog Sneak Peek–Seasonally Scattered Thank You Card

    I know, I know… I’ve been super slow about getting more Holiday Catalog sneak peeks up!  Eek, my bad!  Well, I have one for you today and I’m sure I will have more for you next week – my holiday catalog preorder just arrived!  In the meantime, here is a card I put together for the Stampin’ Up 2014 convention display boards using one of the sets we were given at convention called Seasonally Scattered.  This is one of the new sets from the Holiday catalog and has this Thanks image along with a “Merry” and a “Love” image with background images speckled behind the letters.

    Tips for making this card:

    1. When I got this set, the first thing I wanted to do was heat emboss (which I did… a lot) but then I wanted to do something different and this image screamed at me to color with my markers. 
      Which I admit took a little bit of time, but it comes out soooo pretty.  The only thing is that there is no outline for the letters.  So I found that to make them extra readable, I outlined the letters with my Hello Honey marker for a subtle emphasis and separate of the letters from the rest of the image.
    2. Add your own little flower element too by punching out a couple flowers using the Itty Bitty Accent Punch Pack and offsetting them for a pretty dimensional touch.
    3. Grab the Autumn Leaves Bigz Die to finish out the fall look and layering them behind your image.
    4. By keeping it all in the 2014-2016 In Color family, you can add lots of accents but not have them get too busy because you know the colors will all coordinate!

    I have lots more projects where this came from with this set and while this set was a little hard to get started with, let me just say there are no end to the ideas and inspiration I saw that make me not sad at all that I have it. Smile 

    Special Invitation to Seattle Area demonstrators

    If you are a demonstrator in the Seattle area and like the idea of getting together with other demonstrators to chat, share ideas, get some new tools and class ideas, then I’d like to invite you to my teams Stamp & Share.  This year I’ve started a new event for my group called a Stamp & Share where we get together for essentially a mini-regional (on a much smaller scale).  We hang out for an entire afternoon (12:30-5pm) and there are stamping demonstrations and presentations, a business presentation, card contest, games, make & take that you can use as a class idea, and of course, Prizes!!  I always feel the more people there to share the better but as I’m getting this started I’m confined a bit on space.  That said, we have room for a few more folks join us and I’d love for you to join us. 

    We’ll be meeting August 23rd at 12:30 in the Newcastle/South Bellevue area.  If you’d like to join us, just register here and I’ll make sure you have all the info!

    spaced shop now sig bar

    August Online Stamp Club Hostess Code – TT2NETD4
    Use this code to get free exclusive tutorials & project kit! Learn more

    Card Supplies Used: