Northwest Stamper

Tag: jennifer blomquist

  • Happy Scenes Wonderful Winter Window Christmas Card

    I hope you don’t mind me sharing another Christmas Card with you today! I know, I know, Halloween has only just passed us by and we still have some time in Fall and Thanksgiving before Christmas time really hits… but well, I just loved this card and since I have it all edited and ready to go, I thought I would share it today instead of making you wait while I work on editing my other card pictures. Smile  Because more craft ideas are better than none, right?  Always so many fun idea to try and to share!

    So, I absolutely loved this card.  It was cased from Amanda Bates (her card is here) but I just loved it so much I had to make it and share it with my folks in class recently.

    Tips for making this card:

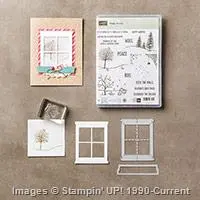
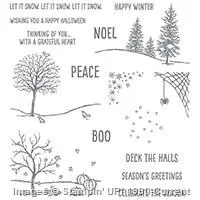
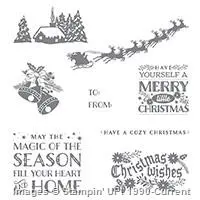
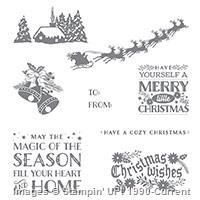
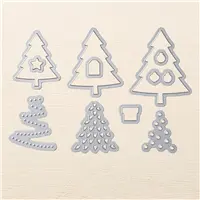
    • Start by stamping your background image of the trees using the trees from the Happy Scenes stamp set.  This set is awesome because it perfectly fits with the Hearth and Home thinlits to create the window frame.  From the spiderweb or frost for the corner of the window, to the fall and winter scenes to fit behind the window frame. image
    • But don’t feel like you have to keep your background constrained to the window!  Let them break free and stretch across the page!  In this case, I stamped the trees three times to make it reach all the way across the card front.
    • Add the falling snow using smoky slate ink and the snow fall stamp in the same Happy Scenes stamp set.
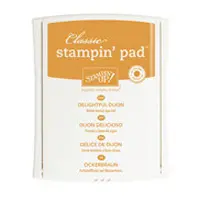
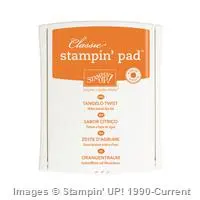
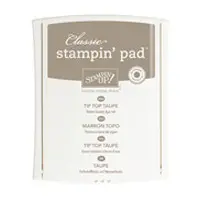
    • Add some color by sponging with Soft Sky using a yellow Stampin’ Sponge over the background to really set the scene.
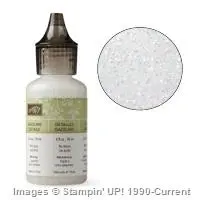
    • Finally I added a little of the Dazzling Details glitter glue to the snow on the trees and along the black lines of my snowy hills.
    • Did you notice?  The “let it snow. let it snow. let it snow” is the exact right length to fit below the window frame?! 
      Tip – since this stamp set is in Photopolymer, so you can see right through it.  Adhere your window frame FIRST using Stampin’ Dimensionals and THEN stamp your sentiment below.  That way everything lines up all nice and pretty. Smile
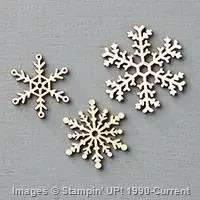
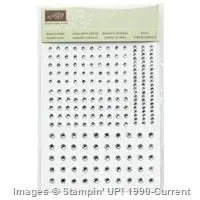
    • I needed a little more though, so we added the Wooden Snowflake Element to the corner of the window frame with the rhinestone in the center.

    Easy, peasy and oh so pretty!  I think I may be making a bunch of these for my holiday card!

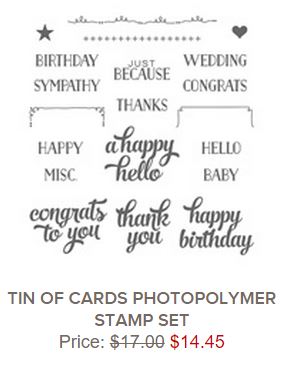
    PS – don’t forget! you can get the stamp set and the window frame die together in a bundle and save 15% off both!  And who doesn’t love a good deal? Smile 

    NWstamper signature_thumb[9]

    order online button for sig 3_thumb[4]

    But use Hostess Code FHRCKER7 to get a special thank you from me!

    Product Supplies Used:

  • Vintage Santa Cozy Christmas Card

    Happy yesterday Halloween!  I don’t know about your part of the woods, but even though it was blustery and rainy most of the day, we still went out and had lots of fun!  Not a lot of trick or treaters in our neighborhood, but I’m doing my part to help keep the tradition alive by taking my family around.  They are just getting old enough to really start getting having a lot of fun with it – and still small enough that everyone loves seeing them. Smile  And now today, with the start of November, I’m seeing lots of people posting and talking about their 30 days of gratitude and sharing each day something they are thankful for.  It something that I think is so good to do these days when we get caught up in what is frustrating or hard in life, or just being way to focused on ourselves!  So, I figured I’d kick off the month sharing something I’m thankful for…. my family!

    IMG_1261

    I’m so grateful for my awesome kiddos and that they love to craft with me!  My mom who is as much of a craft-a-holic (or even more so than me!) so we can share fun projects and ideas whenever we are together… and my dad who is always so supportive and fun, even if it is putting up with mom and I going on and on about some new technique or project. Smile  And my hubby, who makes it possible to not only have these amazing kids, but supports me running my Stampin’ Up business and staying home to be the mommy I want to be! 

    What are you thankful for?

    Well, as Halloween has gone by and we are gearing up for Thanksgiving and Christmas, I thought I’d share this fun Christmas card that I made based on an idea shared at Convention this summer using the Cozy Christmas stamp set  and Home for Christmas designer paper.

    So many fun layers and textures, it is a sweet little card that uses the heck out of your designer paper!

    Tips for making this card:

  • Start by picking your favorite patterned paper.  This one is fun because all the designs come from the same paper pack – Home for Christmas.  Grab two different patterns to create you background layers and cut one rectangle and then cut the second piece to be 1/2” longer and 1/4” shorter than the first piece to give you the look on this card.
  • See that santa?  Isn’t he fun?  No, I’m not some amazing colorer (yeah, I know you didn’t think so, but I’m going to pretend you were thinking I colored him in anyway Smile), he is from one of the patterns of designer paper in the same Home for Christmas pack!  It is a full 12×12 sheet of vintage santas!  Just pick your favorite and cut him out – yes you have to cut him out by hand! – and then just plop him down on the front of your card using a dimensional.  Quick and cute!
  • Add in some of the neat embellishments from the Holiday Catalog to go with your santa including the beautiful subtle striped Vanilla Satin Ribbon.  I just folded over one end of the ribbon piece and used my SNAIL tape runner to hold it in place behind the Whisper White cardstock.  Then cut a banner end out of the dangling side of the ribbon.
    Pro tip – Fold the top of the ribbon FIRST and then ADHERE the ribbon to your white cardstock.  THEN, trim the end of the ribbon (or even wait until then to cut your length of ribbon off the spool!).  That way you can see how much ribbon is showing below the cardstock.  If you cut your ribbon end too early, it may not look as nice when you go to adhere it to the back of your cardstock only to discover you cut your ribbon just a little too short!
  • Grab one of the Pointsettia buttons from the Home for Christmas designer button pack – it even has etching on the top to look like a flower – and run your Old Olive baker’s twine through before tying into a bow and adhering to your card front with a glue dot.
  • Hate trying to thread twine through button holes?  You can always cheat!  Tie your bow first and then just use a glue dot to adhere the twine to the front of the button over the holes!  Most people won’t even notice the difference. Smile
  • Adhere your layers with Stampin’ Dimensionals and then stick to the front of a Garden Green cardstock base that you’ve embossed with the Decorative Dots embossing folder and you are done!
  • So, thank you again for stopping by.  Like what you see?  Please leave me a comment and letting me know!  Or swing by my Facebook page and say hello there!  I always love hearing from you!

    NWstamper signature_thumb[9]

    order online button for sig 3_thumb[4]

    But use Hostess Code FHRCKER7 to get a special thank you from me!

    Product Supplies Used:

    Supply List

    Built for Free Using: My Stampin Blog

  • A Howl-o-Ween Trick or Treat Bag

    My kids are so excited that Halloween is just a day away – and after some last minute Halloween candy shopping, I think we are all ready to go!  Now if you are looking for something fun to do for your Halloween party or favorite trick or treaters, I thought I would share this little goodie bag I put together using the fun Howl-o-Ween bundle with my oh so favorite adorable owl!

    A few runs through the Big Shot and this comes together really easily.  Here are some Tips for making this bag:

    • Make life easy on yourself and start with the Kraft Tag-a-Bag gift bags.  They are packs of 10 ready-to-go bags that are food safe for only $3.50.  Perfect for stamping or embellishing!
    • Pick your highlighted element – the star of the bag if you will… for mine, it was the owl from the Howl-o-Ween Treat stamp set & bundle:image
    • I stamped the “treat” from the “trick or treat” sentiment onto a piece of scrap cardstock and then sponged it with Delightful Dijon ink.  Rip the ends of the white strip for a more interesting “rough edge” look before sponging!
    • Then stamp your owl and cut him out using the matching framelit.  Gotta love things that make it easy to cut out!  Now, the one thing you will notice once you do that is that when you layer your sentiment over your owl, his feet are covered up!  Now that is no good!  But it is an easy fix!Do a little surgery on your owl by cutting him in half along the top of his tummy stripes.  Then glue him to the back of your sentiment so that his arms are holding the sign and his feet are sticking out the bottom! 
    • And do you see his eyes?  How fun are those?!  Just take the White Perfect Accents and place one on top of each of his eyes, then color in the centers with a black sharpie.  Easy, almost-googlie eyes in seconds!
    • My owl needed a fun hat too… so back to the Howl-o-ween stamp set I went, and stamped the hat in Rich Razzleberry and then added some fun accents by adding Black Glimmer paper stars over the white stars!How did I get those stars you ask?  Just grab your Star confetti punch and a scrap of Black Glimmer paper and punch away! Pick up a few of the confetti pieces and glue down using the Fine Tip Glue pen or your favorite liquid glue.

      image
    • Finally layer everything down on your treat bag including some strips of your favorite patterned papers.  I used the In Color Envelope Paper in Delightful Dijon to add some stripes, then a tiny strip of Black Glimmer Paper covered by a piece of the Into the Woods Razzleberry ribbon.  Seriously people! This ribbon is so yummy to work with!!
    • Stamp the rest of the “Trick or” above your striped paper, add some extra confetti stars, and of course the Jack-o-lantern from the Howl-o-Ween bundle for our owl to collect his treats in! Smile 

    And if you don’t have this stamp set yet… it is still worth the add!  I know I’ll be using it for scrapbook pages since all the images are a really good size for layouts.  Plus, I’ve already seen some fun ideas that I’m going to start playing with for using the owl and hat die for Christmas and even Thanksgiving pilgrims!  So stay tuned for that!

    Reminder – Holly Jolly Christmas Card Kits are going out this weekend!  Is yours?

    Just a quick reminder that those of you who have told me you were planning on ordering your kit, don’t forget to sign up today so I can get your kit out with the rest that are going out this weekend!

    You have a few options too – kit w/ stamp set, just the kit, pdf instructions only.  So pick your favorite and RSVP now.
    NWstamper signature_thumb[9]

    order online button for sig 3_thumb[4]

    use Hostess Code FHRCKER7 to get a special thank you from me!

    Price: $7.00

    Supply List

    Built for Free Using: My Stampin Blog

  • Have a Holly Jolly Christmas–Fun Card with Foiled Vellum, Glimmer Paper, and More!

    So, yesterday I was (correctly) chastised for getting behind on posting on the blog. Smile So, I had to hop-to and get another one of my recent favorites up to share with you.

    Today I have another card from my Holly Jolly Greetings Class by Mail, it has lots of little details but I love how they come together!

    A few tips for making this card:

    • The candy cane striping is from the Holiday Fancy Foil designer vellum.  You get 3 patterns in the pack – green foiled christmas trees, silver foiled snowflakes, and red foiled stripes.  I wanted the red color for this card, but also wanted it to be striking!  So, all you have to do is layer a piece of Whisper White cardstock behind your vellum and you get a bold POP of contrast between the foiled pattern and plain vellum!
    • Layer your foiled vellum onto an accent piece of the full sheet of Red Foil sheets for even more shine!
    • Help your sentiment stand out by popping it up on a plain white 2 1/2” Circle punch.  Want to take it a step up?  Grab the Updated Essentials Piercing Pack and use the circle template to pierce holes all the way around the circle.  Then grab your Tip Top Taupe marker and connect the dots to create a fun Faux Stitched look.
    • And since I’m so onto red right now.  Why not add in more sparkle with the GORGEOUS Red Glimmer paper?  Perfect for the “Jolly” from the Christmas Greetings thinlits that are bundled with the Holly Jolly Greetings stamp set.
    • Add some pearls in different sizes on your card to bring it all home.  See those 3 pearls by the Jolly?  Those are part of those strands of connected-together pearls that are always left over on your pearl or rhinestone sheets… Smile  Cut a few off and they are perfect here!

    See, totally fun and don’t you love the texture that White Jute ribbon gives to the card too?

    Want to make this at home?  The class kit is still available!  I’ll be mailing more out this weekend, so make sure your name is on the list.  You’ll get pdf instructions for this and 4 other cards along with supplies to make 2 each of all 5 cards.  Here are all the cards:

    Sign up for your Holly Jolly Greetings Card kit here

    Oh, and I almost forgot!  Today is Tuesday which means there are NEW Weekly Deals!

    12188928_10205528193593306_4220536223974106088_n

    Check out these deals in the online store here

    So, thank you Heather for the kick in the pants to get a fun new card up on the blog.  Now to get the rest written and posted to share!  Guess I know what I’m doing this week. Smile  I really do appreciate you taking the time to check out my posts and I love the feedback you share in comments, on my facebook page, and in email!  Keep it coming!
    NWstamper signature_thumb[9]

    order online button for sig 3_thumb[4]

    use Hostess Code FHRCKER7 to get a special thank you from me!

    Price: $4.00

    Price: $5.00

    Price: $110.00

    Price: $7.00

    Supply List

    Built for Free Using: My Stampin Blog

  • Gold & Burlap Rustic Christmas Card from the NEW Holly Jolly Greetings CLASS BY MAIL!

    I have been having so much fun creating for my Holiday Card Series this fall and when I put the finishing touches on the Holly Jolly Greetings class, I couldn’t wait to share it with everyone.  This was one of my personal favorites from the class, but you’ll have to tell me which is your favorite! Smile

    I had a heck of a time photographing it because one of my favorite touches was the subtle sparkle on the trees from where we lightly painted on Dazzling Details glitter glue!  You can kind of see it in this picture… it is only on the raised parts of the trees.  We ran a thin line of Dazzling Details down the center of each tree and then smeared it around with our finger to make a lightly sparkling tree and something that would dry quickly too!

    We used a few stamps from the Holly Jolly Greetings stamp set (which was the focus of the class) but added lots of neutral touches like the different browns in the cardstock (Crumb Cake & Early Espresso with Very Vanilla) along with the strip of Burlap Ribbon which I’m just loving this year.

    But we also needed some glitz and cheer for the holidays too!  You can’t have Christmas without a little sparkle, right? Smile  So I added some of the Gold Sequin trim along with that Dazzling Details schmear. A full strand of sequins below the embossed paper and then individual sequins for ornaments.  And I had to continue the tree theme between the Woodland embossing folder and the Perfect Pines framelits!

    A little bit of sponging with Garden Green ink, some stamping and layering and you have yourself a fun card!

    I ran this first as an in-person class, and everyone made 2 of this card and the other 4 cards, and if you sign up for this class by mail, you’ll get supplies to make 2 each as well – for a total of 10 cards!  Like I said, this probably was my favorite, which of these cards is yours?

    Sign up for the class by mail and you’ll get:

    • Precut supplies & accessories for 10 cards – 2 of each of the 5 designs
    • Pre-punched & embossed elements for the cards
    • Holly Jolly Greetings Stamp Set (clear mount)
    • PDF instructions walking you step-by-step through how to complete each of the cards
    • Priority shipping of your kit to you
    • (optional) Add on the Christmas Greetings thinlits (what we used to create the “peace”, “jolly”, and “merry” for only $16.  That is LESS than the catalog price!  <— BEST VALUE ADD-ON  — 

    Live outside the US or don’t need the kit – PDF instructions ONLY option is also available


    Kit choices


    >>> See all the classes in the Holiday Card Series here <<<


    Don’t forget about the Big Stamp Sale too! —TODAY IS THE LAST DAY!  —

    So visit the online store or grab your catalog and wishlist and let me know by 10:30pm PST/11:30pm MST what you want and we’ll get you that 15% off savings!

    15 off stamps promo_NWStamper[5]

    NWstamper signature_thumb[9]


    order online button for sig 3_thumb[4]

    But use Hostess Code FHRCKER7 to get a special thank you from me!

    Product Supplies Used:

    Price: $110.00

    Price: $5.00

    Price: $2.50

    Price: $5.25

    Supply List

    Built for Free Using: My Stampin Blog

  • Acorny Thanks with a Bit of Glitz! Plus new Weekly Deals too

    *******************************************
    Don’t Forget!  Only 3 More Days of the 15% off ALL Stamps Sale!
    Shop in my online store and you’ll automatically see the discount
    Use hostess code FHRCKER7 to get a special thank you from me!
    (excludes hostess stamps, bundles – because they already are discounted, and rotary stamps)
    *******************************************

    A lot of times when I’m working on creating a card for classes or just for my own fun, I start out by getting the mojo going by searching on Google Images or hoping around Pinterest or some of my friends blogs.  Usually, I see a few cards that inspire me in different ways and I combine my favorite elements into a card that is something new.  Like, maybe I love how the first card uses an embossing folder in the background, and I love the color scheme from a second card, and in a third card, I love how a set of punches are layered together.  I’ll mix and match all of those elements into one card that makes me happy.

    But then sometimes, I find a card that I love so much that I have to recreate it exactly how I see it.  And today’s card share is one of those cases… or should I say CASEs. Smile  (see what I did there?  some crafting humor Smile)  I was inspired by the very talented Ilina Crouse and her original card here, to create this card to give out as thank you cards… now if only I can figure out what I did with my completed cards I would be very happy!

    I think my favorite part of the card is the hint of glitter along the edge of the white sentiment layer!  Here is what I did:

    • Adhere a strip of the Into the Woods designer paper along the left edge of the card base
    • Adhere a 1/4” strip of Gold Glimmer paper to the back of a 3 3/4”x5 1/2” piece of Whisper White cardstock so that only about 1/8” of the gold is showing.
    • Mount the white and gold paper to the front of the card using Stampin’ Dimensionals
    • Decorate the front of the white cardstock. 

    This gives just a touch of gold and adds some fun dimension that is subtle.  One tip though, I did this on a card that had the crease at the top (so a 4 1/4” x 11” piece of base paper folded in half) but when I gave people this card, because of the dimension on the front, they wanted to open the card from the side.  So I recommend using a standard card base with the crease on the left (so a 5 1/2” x 8 1/2” piece of paper folded in half)

    For the front, I grabbed the super fun Acorny Thank You stamp set.  Here are a few tips for the front of my card:

    • Tangelo Twist and Early Espresso make a great fall color combination!  That is what I used on my acorn.
    • You can cut out your Thankful banner really easily using the Bitty Banners framelits!
    • Cover the back of your acorn with SNAIL or other tape runner, and then create loops from the Gold Metallic Thread and press them into the back of your acorn so that the tape covering the back holds them in place.
    • Add a few gold sequins from the Gold Sequin Trim for some extra glitz using glue dots

    I just totally love this card and may have to make it in other colors and designs.  Don’t you love it?

    Yesterday was also the start of some new Weekly Deals too!  A few fun and festive items are on sale…

    12112162_10205496976172890_1971421608440231933_n

    Shop the weekly deals here

    And while you are there, don’t forget about the Big Stamp Sale too!

    15 off stamps promo_NWStamper

    NWstamper signature_thumb[9]

    order online button for sig 3_thumb[4]

    But use Hostess Code FHRCKER7 to get a special thank you from me!

    Product Supplies Used:

    Price: $5.00

    Price: $110.00

    Price: $40.00

    Price: $5.25

    Supply List

    Built for Free Using: My Stampin Blog

  • 5 Days Only! Get 15% off ALL Stampin’ Up Stamps!

    5 Days Only! Get 15% off ALL Stampin’ Up Stamps!

    Ok, seriously, who doesn’t love a good sale?  I know I do… especially when it is on items that pretty much never are on sale.  Sure Stampin’ Up will put stamps on sale, but usually when they are being discontinued or it will be a couple in a sale… but starting today and going through Friday, they are offering ALL STAMPS for 15% off!

    15 off stamps promo_NWStamper

    Sale Details:

    • What’s Included:  Save on ALL stamps in the catalogs and online with the exception of hostess sets and the rotary stamps.
    • What about bundles? Stamps in bundles are already discounted 15% along with the discounted punch/framelits/project life kits, and so continue to be at the bundle price.
    • How can I get even more savings?  If you have been thinking about signing up for the Stampin’ Up starter kit or just like the idea of getting $125 of product of your choice for only $99… Get a no obligation demonstrator kit – you can select $125 in product of your choice (to include the discounted stamps this week – so that is up to an extra $18.75 free ON TOP of the $125!) for just $99 – and then you can keep on savings with our demonstratro discount. Truly NO OBLIGATION to take advantage of a good deal – just lots of opportunities to enjoy as a Happy Shopper! JOIN HERE

    So, check those wishlists… especially for those stamps you’ve been eyeing that aren’t included in bundles!

    Here are a few stamps that I would not expect to see on sale normally that are great options to take advantage of in this sale:

    image image

    image

    image
    image tin of cards

    But remember… you can pick you YOUR FAVORITES to save on!  So head over to the online store and start saving now!  Use hostess code FHRCKER7 for a special thank you gift from me!

    OR

    Consider joining my Fun n’ Crafty stampers and save even more with the starter kit!  Pick out your $125 in product including the discounted stamps and get it all for $99 and free shipping.  Get started here

    NWstamper signature_thumb[9]


    order online button for sig 3_thumb[4]

    But use Hostess Code FHRCKER7 to get a special thank you from me!

  • Season of Cheer Cards from the Northwest Crafty Escape Weekend

    Season of Cheer Cards from the Northwest Crafty Escape Weekend

    Its finally here!  We kicked off the Fall Northwest Crafty Escape Weekend yesterday with a fun low key Friday evening of crafting till late in the evening.  One of the things all-weekend attendees get is a goodie bag full of fun stuff.  This time I decided to design some cards using only what they got in the goodie bag… plus stamps, ink, adhesive.

    Here is what I came up with:

    Crafty Escape Weekend goodie bag cards

    Using only the cardstock paper, paper and accessories from these goodie bags:

    crafty escape weekend goodie bag

    Then I issued a challenge that they had to create any project using 2-3 of the supplies from the goodie bag for a project or three Friday night for a contest.  Everyone including all the Saturday only attendees will vote today and we’ll pick a winner tonight!

    Didn’t they do awesome?

    crafty escape weekend challenge cards

    Now today we have a couple classes and an evening pajama party!  Should be a fun day.

    And while we are here, it is a good time to start brainstorming ideas for the new Stamp Sale starting on Monday!!

    12143327_10206840842691290_3843111973478393220_n

    Monday 10/19 – Friday 10/23
    ALL Stamps are 15% off!

    Yep, all the stamps in the catalog – not including hostess sets or bundles – are 15% off!

    Even better?  You can take advantage of this in the Starter kit too!  Pick out $125 of product, pay only $99… and if the stamp set is 15% off, then you get even more for your $125. Smile Learn more about the starter kit here

    Get your wishlist’s ready – then shop in my online store
    Use hostess code FHRCKER7 for a special thank you from me

    NWstamper signature_thumb[9]

    order online button for sig 3_thumb[4]

    use Hostess Code FHRCKER7 to get a special thank you from me!

  • Beautiful Buttons and Fun Christmas Card w/ Masking Ideas

    So, when Stampin’ Up posted the weekly deals yesterday, I was initially surprised that there were fewer than in previous weeks.  But after looking at the items, I realized that just because there were fewer, didn’t mean they weren’t great items!  I LOVE some of these buttons and the masks and heck 25% off is still 25% I don’t have to pay – right?  And who doesn’t love a sale?  Smile 

    So today, I thought I’d share a few project ideas using the fun goodies on sale this week:

    image

    Metal Rimmed Pearls – Easiest cute accessory around!

    I love these little embellishments because they are super cute and did you know – they come with adhesive already on the back?!  Talk about making it so easy even my kiddos can do it!  In fact they did – here is the card I made for a recent class.  Check out  the matching blog post to see my kiddos recreate this card all by themselves and turning out pretty darn well, I would say too. Smile

    Beautiful Bunch birthday card – check out the details on this blog post

    Hearts & Stars Mask – Cute in any season

    The hearts and stars mask is a great way to easily make your own custom background in any color you like!  I have use it a few times but this was one of my favorite and most popular designs.  Perfect for easy Christmas cards!

    Festival of Trees Christmas card – get all the details in this blog post

    Classy Designer Buttons – Perfect accents for any card!

    I also really like the Classy Designer Buttons.  I know I used them on a few cards lately but it appears I haven’t posted them to the blog yet.  So instead, I thought I’d share this cute card from my Stampin’ Up website (that page of mine with my class calendar, promotions, and all about the perks of joining my fun group as a demonstrator!)  Anyway, I love how this card is great for any paper you may have lying around.  It is just so easy to cut or punch a few squares, stamp a sentiment and embellish with some linen thread and the classy buttons!

    image

    Baby Girl card – get all the details here

    Ok, off to do a little more prep work for my Northwest Crafty Escape Weekend coming up on Friday!  I have the goodie bag supplies being delivered today and their wrappings and baggies all made and ready to go!  Now to finish up some samples for some of the on site classes and we will be rockin’ and rollin’.  I can’t wait! 

    ** Make sure you are a fan of my Northwest Stamper Facebook page so you can see all the fun and inspiration as it happens! **

    NWstamper signature_thumb[9]

    order online button for sig 3_thumb[4]

    use Hostess Code FHRCKER7 to get a special thank you from me!

  • A Not Necessarily Holiday All Your Presents Joy Card

    Once again, I find that when I see products in a Holiday Catalog or promotion, I find my brain immediately going to that holiday and everything I see made with that item is pretty much based around that holiday.  So, when I see the Your Presents stamp set, I think of it as a Christmas stamps set.  But here is the great thing…. people give presents all.year.long.  Smile  Crazy, right?  So when I pulled out this card that I had the chance to make at Convention this summer, I immediately thought “Christmas Card”.  But who wouldn’t be happy about getting a present and getting a little joy at their birthday any time in the year?

    This card is an awesome way to use up scraps too!  All you need is your card base and then some:

    • Scrap strip of vellum cardstock
    • Scrap strip of Dazzling Diamonds glimmer paper
    • Scrap of baker’s twine
    • Scrap of your favorite ribbon, like this Garden Green striped ribbon
    • Scrap of whisper white cardstock to stamp on and punch out your image

    Mix in some different pattern papers you love or ribbons that you have bits and pieces of and you can totally change up this card to be perfect for your recipient!

    I also LOVE the touch of using the Stampin’ Up handheld stapler to tack down your little ribbons.  No messy adhesive to deal with and a subtle horizontal accent to break up the long vertical strips of paper.  Plus, seriously, how stinkin’ easy can you make it when it is just staple – staple – done. Smile

    This was also the card that made me fall in love with the new Archival Basic Black ink pad.  Can you see how rich and deep black it is?  Especially over other colors… totally a must have!  Make sure it is on your Christmas wish lists, because what better stocking stuffer?  Well other than a gift certificate for even more crafting goodies!

    (ps – if you want to tell your family now, I do offer Stampin’ Up gift certificates, they can get the details here)


    NWstamper signature_thumb[9]

    order online button for sig 3_thumb[4]

    use Hostess Code FHRCKER7 to get a special thank you from me!

    Project Supplies Used:

    Price: $10.00

    Supply List

    Built for Free Using: My Stampin Blog

  • Amazing Birthday Gold & Vellum Wow Card

    So, you see… I love cards with Vellum on them.  The slightly translucent cardstock adds a touch of elegance to pretty much anything you make with it.  Well, when they came out with Foiled Vellum, I thought it was super pretty, but sometimes I struggle with what to do with it.  So when I saw this card I just had to put my own version together.  And I have been trying to find the original card that inspired this card, turns out I forgot to save it.  So if it is your card, let me know – and thank you for the lovely inspiration!  Here is my version where I changed up the colors and added a couple touches…

    image

    Tips for making this card:

    • The gold foiled vellum makes such a great touch – both for backgrounds as well as trim on the matching envelope!  Layer it over different colored cardstock for different looks.
    • Vellum can be tricky when it comes to adhering since you can usually see the adhesive through the paper.  The Foiled Vellum is great because it has big pieces of the foil to hide your adhesive behind.  Just DON”T USE LIQUID adhesives behind the foil!  It can cause the foil to soften and wrinkle depending on how much glue you use.  Much less pretty look! Smile
    • I used 2 images from the Amazing Birthday stamp set… the banner and the large sentiment.   These layer together fabulously and you can even use the Banner Framelits to cut out the banner so no fussy cutting!image
    • Use markers to get different colors on your sentiment, or – in this case – stamp multiple times and trim out for dimensional layers!  Stamp the whole image in the new Archival Black ink for a rich background.  Then stamp the top of the sentiment on scrap paper in Black and the bottom of the sentiment in Calypso Coral.
    • To compliment the vellum in the background, I punched out a vellum butterfly using the Elegant Butterfly punch.  Notice how I added a candy dot to the center?  That isn’t just a cute accent for the butterfly, it also hides a glue dot that holds the butterfly to the card front!
    • Finally, I wanted to add a little bit more gold to the top of the card by putting a small strip of the 1/8th Gold Taffeta ribbon behind the popped up “make” oval.
    • I always love these cards where a few items come together for a WOW of a card!  And don’t forget to add a bit of the same accents to the envelope to really pull it all together! Smile


    LAST CALL Weekend for the Northwest Crafty Escape Crop!

    Next weekend is my Northwest Crafty Escape Weekend and we will be having lots of fun spending the whole weekend crafting, laughing, and having a great time!  I have a seat or two left, so if you were thinking of coming, RSVPs have to be in by the end of the weekend so I can get lunch orders finalized and in to the hotel for the weekend.  See details and RSVP here!


    NWstamper signature_thumb[9]

    order online button for sig 3_thumb[4]

    use Hostess Code FHRCKER7 to get a special thank you from me!

    Price: $110.00

    Price: $40.00

    Price: $5.25

    Supply List

  • Make Your Own Punch Art Bats for Halloween

    So if you receive my Newsletter, this will look familiar because it was one of the tutorials that I shared recently. 

    And if you aren’t on my newsletter list… see what you are missing? Smile  Better hurry up and sign up here!

    But I thought with Halloween around the corner, I’d share this on the blog so that everyone can add a little batty, spooky fun to their projects.  Like this super simple Halloween card:

    Halloween bats with butterfly punch

    All it is is a few punches, some black glimmer paper, and some ink.  But the fun part is making your own bats…. check it out:

    How to make a bat from butterfly punch

    See?  Isn’t that super easy and fun?

    Give it a try and then let me know what you think!  I’d love to hear or SEE what you created.  Feel free to leave a link to your project in the comments and I’d love to come check it out.

    Just a few reminders:

    • I’m getting ready to finish ordering the supplies for the upcoming Northwest Crafty Escape Weekend, so if you are thinking of coming, make sure you are registered!  Get details here
    • New weekly deals were posted!  Check them out here along with a few project ideas.
    • Join the cause and support Breast Cancer Research!  Make sure you are signed up to receive the October Paper Pumpkin project kit by mail & Stampin’ Up will donate $1 to the Breast Cancer Research Fund.  If you are a new subscriber, they’ll donate $2!  Learn more and sign up here

    NWstamper signature_thumb[9]

    order online button for sig 3_thumb[4]

    use Hostess Code FHRCKER7 to get a special thank you from me!

    Price: $18.00

    Supply List

    Built for Free Using: My Stampin Blog