Welcome! Its time for another Inspire, Create, Share Blog hop! This month we are trying to help get you inspired to finish up those love notes and treats for Valentine’s Day! I have this fun card for you – so please, keep reading and check out more about how I made it. Then leave me a comment letting me know what you think before hopping off to see what other awesome projects the rest of the gang made for you. 🙂 (more…)
Category: Valentines Day

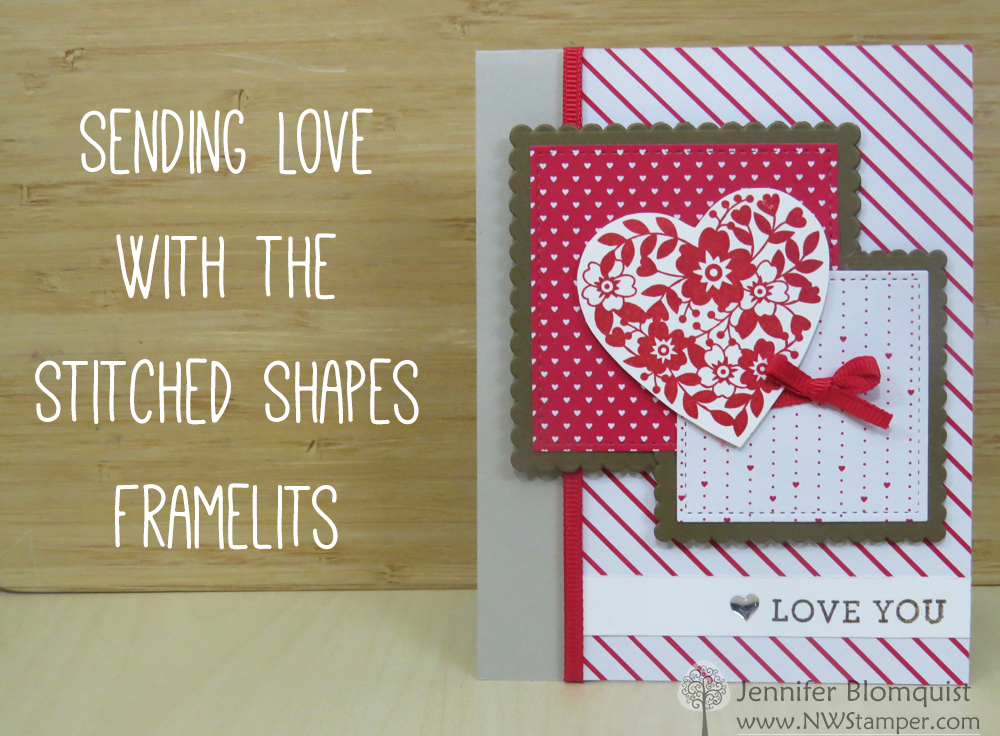
Valentines with Love Sparkles & a Blog Hop!
Lets keep the blogging streak going (because you know 2 days out of 2 is something! ha ha!) and today is a fun day because it is Blog Hop day! I’m joining forces with some of my Fun n’ Crafty Stampers team to share with you some fun Valentine’s Day project ideas! (more…)
Are You Ready! It’s Sale-a-Bration Time!
Well, today is an exciting day, but it started off with a bit of a big BANG! That sound was the sound of all of Stampin’ Up’s servers crashing meaning not only could I not get my launch day order in, but I can’t even call in and chat with the fabulous demonstrator support folks. But, while we wait for the servers to come back up – don’t worry I’ll post here and on my Facebook page when they are back – I can still share a couple project ideas and the catalogs so you can work on your wishlists and make sure you’ve gotten all your favorites down and ready to go.
Like check out this super sweet Sending Love suite that is perfect for all your love notes and special valentine’s treats!
Beautiful Bloomin’ Heart Butterfly Card (VIDEO TUTORIAL)
Oh my goodness you guys! I’ve been so excited to share this Bloomin’ Heart Butterfly card with you… and I’ve even got a VIDEO TUTORIAL for it too! I almost forgot how much I love doing videos. Now to take some time this afternoon to try to record some more!
But in the meantime, can we talk about how pretty this butterfly is…and the secret is to make it using the new Bloomin’ Heart thinlit die!

I first saw the idea to cut out a butterfly from the Bloomin’ Heart die by fellow demo Kirsteen Gill and I knew I just had to try it for myself. I tried repeating what I saw her do – tone on tone heart diecut over the butterfly, but decided I wanted to make some changes to brighten it up a bit. And I just LOVE how it turned out.
From Heart to Butterfly in one Quick Step
The secret to this card is that you can fit the outline butterfly from the Bold Butterflies thinlits over the Bloomin’ Heart die cut. So, you can just exactly cut out this pretty lacy butterfly. So, die cut heart… to butterfly… done!
I wanted to really show off that floral pattern though, so I layered it over a contrasting color (Crumb Cake) butterfly and then stepped it up even more by adding some flowers cut out of the Blushing Bride glimmer paper. Don’t they look so pretty behind the Very Vanilla pattern?

Once I had my butterfly, I put together the rest of the card using some of the rest of the Love Blossoms Suite
- Add an extra pop of color by adding some patterned paper from the Love Blossoms designer paper
- Sponge the edges of the cardstock and designer paper using Crumb Cake ink to make it more vintage
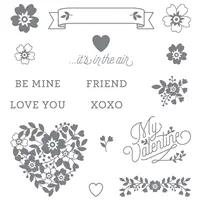
- Stamp a sweet sentiment from the Bloomin’ Love stamp set! I figured “love, its in the air” went well with the butterfly theme

- Keep the shimmer going, add some Clear Wink of Stella to the heart for the perfect final touch. Can you really go wrong with Wink of Stella? No… I didn’t think so.

See how to make this Step-by-Step plus LOTS of tips & tricks too
Want to see how to make it, get all the project dimensions, plus lots of tips and tricks? Check out this video tutorial I made, just for you!
Note – if you are reading this post in email, click here to view the video
I walk you through everything, its like you are hanging out with me in my craft room.


One Week Left for these Sale-a-Bration freebies
Just a quick reminder too, we are in the last week that these products will be available as a free choice from the Sale-a-Bration catalog:

So, if you love any of these items, make sure to grab them while you can! Any $50 order will let you pick on to have included for free. –> Shop Online and Get Yours here!
There will be 3 new options available starting February 16th (you can see them here), but I didn’t want you to miss out on one of the cuties above!
![NWstamper signature_thumb[9]](https://i0.wp.com/www.nwstamper.com/wp-content/uploads/ad87b4046c1e_C9F6/NWstamper-signature_thumb9_thumb.png?resize=322%2C118 "NWstamper signature_thumb[9]")
![order online button for sig 3_thumb[4]](https://i0.wp.com/www.nwstamper.com/wp-content/uploads/ad87b4046c1e_C9F6/order-online-button-for-sig-3_thumb4_thumb.png?resize=307%2C45 "order online button for sig 3_thumb[4]")
Use Hostess Code TNCXV4MP at check out to get a special thank you from me!
Pick a FREE item with every $50 you spend! See the Sale-a-Bration catalog.
See all the tutorials & classes by mail here
Save 25% on the Latest Weekly Deals
Built for Free Using: My Stampin Blog
Bloomin’ Love Valentine’s Day Card in Pinks
Friday was my day for card classes, I had one in the morning and one in the evening… which was lots of fun, because each class had it’s own personality and style. But the thing that is always interesting to me when I’m running my classes is to see which cards are the most popular from the group. I did 3 Valentine’s cards in the morning and then one repeat and 2 more cards in the evening. When I was planning my cards for the evening class, I decided to pick one from the morning to share as the Valentine’s Day themed card and then do two others. I picked what I thought would be the favorite, but turns out one that I DIDN’T pick was the surprise hit! So I thought I’d share here:

I think what everyone loved was how simple this card is to put together, but the gorgeous heart from the Bloomin’ Love stamp set just makes it extra pretty! I got this overall design idea from a card swap I participated in at the beginning of the year. Sadly, in the chaos of getting ready for my class, the original designers name got separated from the card sample, so if it was you, let me know!
Make it simple, and then step it up!
I did step it up a little from the original because you know me… I LOVE my Wink of Stella! I added some of the Clear Wink of Stella to my flowers in the heart. Bonus – if you have any spots where the stamp didn’t quite give you 100% coverage, the wink of stella brush helps even out the ink for you! Then I added a few small rhinestones to the center. Isn’t it pretty?!

Want to make this at home, here are the dimensions you need:
- Whisper White cardstock – 5-1/2” x 8-1/2” (cardbase), 2-1/2” x 2-1/2”
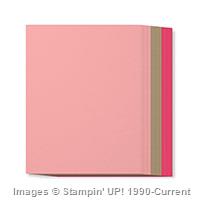
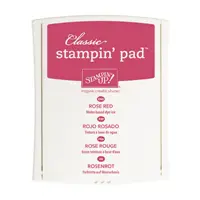
- Rose Red cardstock – 5-1/4” x 4”, 2-3/4” x 2-3/4”
- Blushing Bride cardstock – 5″ x 3-3/4″
- Love Blossoms designer paper – 1” x 5”
It’s quick easy, and oh so cute! So give it a try and let me know how it goes.
Last chances to order for Valentine’s Day project is tomorrow. So make sure to get those last minute supplies – shop at your convenience 24/7 in the online store.
Use Hostess Code PGHMVNJM at check out to get a special thank you from me!
Pick a FREE item with every $50 you spend! See the Sale-a-Bration catalog.
See all the tutorials & classes by mail here
Save 25% on the Latest Weekly Deals
Built for Free Using: My Stampin Blog
It’s a Love Thing! Inspire Create Share Blog Hop
Holy mackerel! Valentine’s Day has snuck up on me and I can’t believe we are less than a couple weeks away! Good thing is… there is still time to make your Valentine’s Day treats and cards. And yes, there is still time to order those last minute supplies and get them in time to play before the holiday!
 So, to get you all fired up and inspired for all the love-filled creations, I’m joining up with the Inspire, Create, & Share crew on a Blog Hop all about Love!
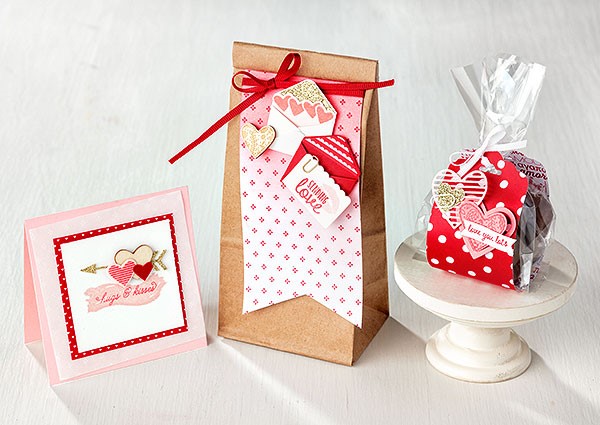
I’m one of 14 stops on the hop, so if you are joining me from Darla’s blog, welcome! I have a fun project to share today… a Valentine’s Treat Pouch I made as a bonus project for my Stamp Club. It is fun to make and quicker than you might think!

Jennifer’s Project Tips:
- It all starts with an adorable owl – The very first thing I designed for this project was the Owl. If you haven’t used the Owl Builder punch before, you are missing out on so many cute projects! From owls, to penguins, to reindeer, it is a super versatile punch!
But even when you are making a simple owl, don’t hesitate to dress her up! I used the small flower flourish from the Bloomin’ Love stamp set and stamped it onto a scrap of Pink Pirouette cardstock before punching out the tummy for my owl. It is like she is wearing a pretty dress! Then punch out two of the hearts from the same punch and glue them together over her ear for instant bow. BAM! Cute or Super Cute??
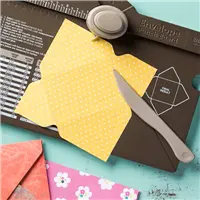
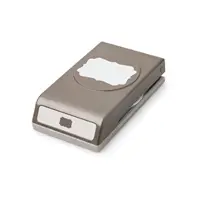
- Create a custom treat holder with the Envelope Punch Board – I was trying to decide what to put my owl on, when it hit me! I could use the envelope punch board along with the cute Love Blossoms paper stack to quickly make the treat holders.
– Start with a 6×6 piece of patterned paper (good thing this paper pack comes as a 6×6 pack!)
– Use the envelope punch board to create an envelope. Start at the 2 5/8″ score line and score and punch as normal.on all sides (video tutorial for the punch board).
– fold in 3 of the sides but do NOT fold and press the 4th side.
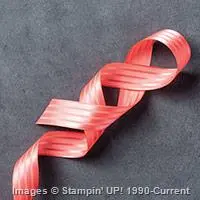
– decorate to your heart’s content! - Have fun with layers! I next created the sentiment – the banner stamp and the sentiment are both from the same Bloomin’ Love stamp set, but did you know? The banner has a matching framelit over in the Large Numbers framelit set! Or trim by hand. Either way works. I stamped my banner first and THEN added my sentiment. But then don’t stop there, add more layers! Try wrapping the treat bag with the Watermelon Wonder satin ribbon and then layering your sentiment and the owl.
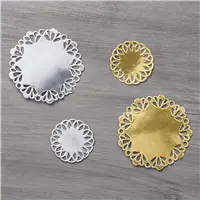
– Want extra credit? Keep it going! Add a gold metallic doily to the front of the bag and adhere a 2 1/2” Crumb Cake cardstock circle for a shiny backdrop.
- But what adhesive to use for what? I used a few different adhesives for this project so I thought you might like a quick guide for it:
– Holding together your treat bag = Fast Fuse, you want something stronger than your average tape to make sure your treat doesn’t come apart!
– Layering your Owl = 2-way glue pen, with all these small pieces you are trying to stick together, the glue pen is easy to handle and not messy with your little pieces
– Attaching your Owl = I used one Stampin’ Dimensional to keep her in place
– Everything else = viewers choice! Though my preference is for SNAIL or Fast Fuse, basically some kind of tape runner
So I hope you enjoyed my project and found some new ideas for inspiration! Click the next button below to see what Claudia has created for the blog hop! The next in your 14 stop hop full of love!

Use Hostess Code PGHMVNJM at check out to get a special thank you from me!
Pick a FREE item with every $50 you spend! See the Sale-a-Bration catalog.
See all the tutorials & classes by mail here
Save 25% on the Latest Weekly Deals
Built for Free Using: My Stampin Blog
- It all starts with an adorable owl – The very first thing I designed for this project was the Owl. If you haven’t used the Owl Builder punch before, you are missing out on so many cute projects! From owls, to penguins, to reindeer, it is a super versatile punch!
Some Love and a Blog Hop
I’m so excited!
 The Fun n’ Crafty monthly blog hop is back and with new chic graphics too! I am very lucky to have the talented Stacey Lane in our group who graciously offered to take over running this hop. She has super ideas for the next 5 months of hop themes and we have more folks getting excited to participate, so you won’t want to miss it each month! And if you ever want to join us and be a stop on our hop, all you have to do is hook yourself up with a Starter Kit from myself or one of the awesome folks from across the US in our group and get a great deal on your supplies and then tell us you want to be a stop on the hop and you are in!
This month, our theme is LOVE and I have a couple ideas to share with you then make sure to check the list at the bottom of the blog to see even more great ideas!

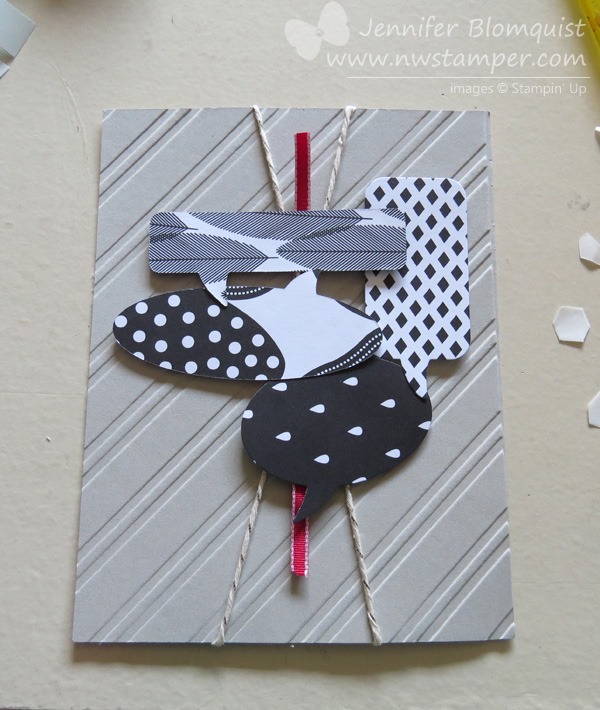
I had extra scraps and a half idea after putting together my Stacked with Love class and so I started playing around and just having fun and this sparkly card came out!
Project Tips:
- The Stacked with Love designer paper stack gives you a ton of patterns all in the same black/white/red color scheme, so it is fool proof to pick and choose a couple patterns to use on your card and know they will complement each other.
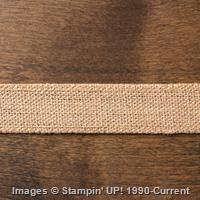
- Add a softer touch of burlap by cutting off the seamed edges of the ribbon and then pulling threads to get a soft fringe look.

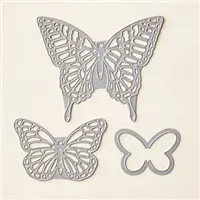
- Use the Red Glimmer Paper to cut out a sparkly butterfly (the Butterfly Thinlit die set)! Not only does it look pretty, but the paper is really stiff and sturdy, so it is really easy to work with in this intricate die. No wax paper required!

- And speaking of the pieces from the intricate die, you don’t have to throw them all away! Grab a couple and layer them together to create a cute little heart that is a perfect tiny accent for your sentiment.

Fun right?
Then the next card, I had to share. I know, I know… you’ve seen my other versions of this card, but I got the idea to do it for a class and so for my technique class on using designer paper, I pulled this together and I think it is my favorite version yet!

Project Tips:
- You’ve heard most of the tips before with my prior cards, but like usual, pick out your 5-6 patterns of designer paper and lay them out BEFORE you start gluing down. This makes sure you like the effect you get with the smaller pieces of the patterns.
- Glue your strips onto a scrap piece of cardstock, so you can then use it however you like as one big piece instead of having to continue to futz with the little pieces.
- Adhere your complementary cardstock piece first and then add your strip of custom designer paper near the TOP edge of the cardstock. If you have it to close to the bottom of the cardstock strip, when you add your sentiment it will overlap too much of the patterned paper and you stop being able to see them.

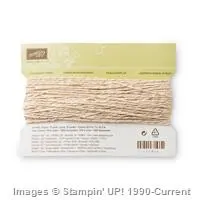
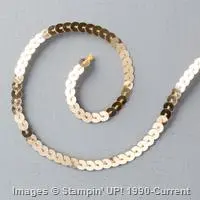
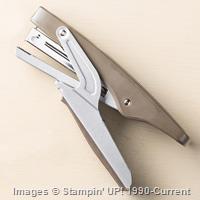
- And when you are doing white/black/red as your color combination, GOLD is always a great choice! Add some gold baker’s twine and then use our mini stapler to staple some gold sequin trim to the top of the card. Bam, you got bling!
Love it!
I hope you enjoyed my ideas. These lovely ladies have also put together projects to inspire you. So make sure to check them out and if you wouldn’t mind, leave them a comment along the way. I love these ladies and hopefully you will enjoy all the ideas they have put together for you.
Fun & Crafty Blog Hop
- Pam W. of Stinky Tofu
- Jennifer B. of Northwest Stamper
- Stacey L. of A Work of Carte
- Tobe B. of The Craft Sea
- Susan S. of Stampin’ By The San Francisco Bay

 Happy Hopping!
Project Supplies Used:
click any image below for more details or to get it now in the online store!Built for Free Using: My Stampin Blog
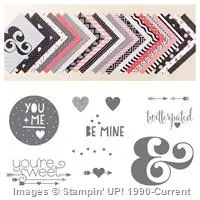
Twitterpated Valentine’s Card from the Upcoming Stacked with Love Class by Mail
Anyone ready for some Valentine’s? I had so much fun working with the new You Plus Me stamp set and Stacked with Love paper stack (LOVE that you can get them in a BUNDLE!) that I just had to put together a class showing a number of fun different options you can do using just a few supplies. Right now I’m up to 8 cards, so that is the offical count for the class… but I have a few more in the works and I’ll make sure to add them as bonus ideas to the instruction set as I finish them.
 In the meantime, I wanted to share today one of the cards I really liked from the set:
I like how clean and simple it is and still isn’t a boring card. Would you agree?
Tips for making this card:
- Mix and match the patterns from the Stacked with Love designer paper stack to create interesting patterns on your card. This card uses 3 papers: the Coral linen paper under the sentiment, the red stripes, and the XOXO piece – all from the same pack of paper.
- Use your stamps to add extra touches like the hearts and arrows, which come from the You Plus Me stamp set.
- Keep things from looking too boxy by tearing the left edge of your sentiment. It is a subtle touch but keeps everything from being too squared off!

Here is a quick peek at the 8 cards I’ve already finished using this same stamp set and paper pack:

The class includes the following supplies:
- Stacked with Love designer paper pack
all required pieces for the 8 class cards will be precut for you plus you get to keep everything not used in those cards - 20 white notecards and envelopes
- Itty Bitty Accents Epoxy Stickers pack
- All precut cardstock needed for the 8 class cards
- All additional ribbons and accessories needed for the 8 class cards
- Photos of all the cards plus instructions for each card
- (optional) You Plus Me stamp set – save $3 from the catalog price when you add it with your class registration!
Kit by Mail Option: Instructions, all supplies, plus extras – all for only $25 plus shipping if required!
SAVE & add on the stamp set we use for all the cards for only $16 clear or $23 woodmount. That is $3 less than the catalog price!Instructions Only Option: Already have the supplies and just want the instructions?
I will have them to send out next week and you can order yours for only $3.95.If you are in the Seattle area, join me for this class in person on 1/17 at 7pm in Redmond,WA (register here)
Seasonally Scattered Valentine’s Box & NEW Product Shares!
You’ve probably seen my projects and others using Seasonally Scattered and many of them were focused on the Thanks and Merry sentiments. You know, because they fit so well for fall and for winter. But before the stamp set disappears in a couple days (last day to snag it is Jan 5th!) I wanted to share this project I created for the Convention Display boards this summer.
You may have seen this project on my blog from a long while back:

Seasonally Scattered Love Card blog post
And with that card I did heat embossing and sponging, but I had an idea to do something similar but wanted to really make the “LOVE” sentiment POP! So I started working and I kept grabbing for things I hadn’t used in a while and this box came out:


See?! Now do you see why I can’t believe this set is not continuing on for Valentine’s Day?
Anyway, I had lots of fun making this box and you could totally use bits and pieces from the box to make a card or make your own special box for someone you love.
Tips for making this project:
- Use the kraft gift boxes for your base. They are very inexpensive easy to pop together, and very sturdy for your box.
- Start by heat embossing your LOVE image onto a piece of Watercolor Paper using versamark and black embossing powder.
- Use the Aqua Painter and your Real Red ink pad to color in the paper EXCEPT for the “LOVE” sentiment.
NOTE – when picking up color with your Aqua Painter, make sure to pick up the color from your ink pad LID and not the surface of the pad itself to avoid diluting your ink pad in one spot.
- Cut out the sentiment using the Oval framelits and then cut out a bigger Oval from the white crepe filter paper. Fringe the edge of the larger oval and layer behind.
- Stamp around the edges and heat emboss another piece of watercolor paper for your top using just the scatter design portion of the LOVE stamp. This gives you the coordinating look on top.
- Add a spiral flower using the Spiral Flower die (use glue dots or liquid glue to hold your flower together) and add some watercolored scraps of the filter paper to the middle of the flower for filler.

- Did you know? You can color the Vintage Faceted buttons with your Blendabilities to make them custom fit your projects? That is what I did here with my Cherry Cobbler blendabilities!
And there you have it, a great little box for that special someone for Valentine’s Day or any time of the year.

Try it all out first with my Product Samplers!
The details are up! In 2 days (or as I get the shares filled), I’ll be placing the order for everyone’s samplers of the newest papers and accessories from the spring Occasions catalog! This is a great way to try it all out without breaking the bank paying for full packs of everything. Then once you see it in person, you can decide which items you love and which you are good with just a couple pieces.
 It’s a win-win!
BONUS – this year I’m offering a bonus to everyone who signs up for the “I Want it All” sampler and you get a bonus sampler of the coordinating Sale-a-Bration Paper, Ribbon, and Buttons! That’s a whole lot of goodies for only $26 (plus shipping if needed).

Check out my Product Shares page for more details
Email me at jennifer@nwstamper.com to reserve your spot today!
Project Supplies Used:
(if you are reading this in email, click here to see the list of supplies)Wonderful Word Bubbles for a I Love You Card
Today I have to share a card that I created for a set of Pictogram Punches stamp set focused display board cards for our Stylin’ Stampin’ Inkspiration convention board. I knew I had to get this set when I first saw it in the catalog, but when I had to create 4 different cards AND make sure they were cute enough to have on display next to some other very talented ladies… well, I knew I had to get creative. And somehow this came out:

YAY! Isn’t it a fun card? I often feel like I’m in a design rut when I’m staring at stamps and cardstock on my craft table and so I always get excited when I get my brain going in a totally different direction and something that isn’t a hot mess comes out!

Insight into the design process for this card:
- I started out with the idea that it would be fun to use the Word Bubble framelits (which by the way happen to be one of the dies that you can get FREE or discounted this month with the Big Shot special… just saying!)
Anyway, I knew I wanted to use the framelits, but I had to use the Pictogram Punches stamp set, so I set out figuring out which image would work and I liked how the I {heart} U image looked and fit in the squarish word bubble. So that settled that as my central image. - Then I decided to use more word bubbles to emphasis my sentiment.
So I pulled them all out and started experimenting with how to layer them together. I ended up with something like this:

- Awesome…. now to figure out paper.
I decided to use the Back to Black designer paper since I wouldn’t have to worry about it being too busy color-wise. I could just focus on mixing and matching patterns. I pulled out all the papers and picked 4 patterns that I thought would work in the small format of the die cuts and would go together ok. - Somewhere in here I decided that I needed to add some texture to the card… either that or I had an extra piece of Sahara Sand that had already been embossed with the Stylish Stripes embossing folder and I decided to use that.
I have a tendancy to do that… see something laying on my desk and jamming it into whatever project I’m working on at the moment. You might say I’m desperate to use up scraps that I can’t bear to recycle or toss! - I also thought that I needed a pop of color to break up the black and white, so here comes the Silver Baker’s Twine and then a splash of Real Red taffeta ribbon.
- Then I started putting down my die cut pieces. Here is what it looks like before the sentiment got added.
Yeah, I’m too lazy to actually trim off parts of the word bubbles so they just get flipped around so extra bits are hidden by the main sentiment.

- Finally, I stamped the sentiment and cut it out using my Word Bubble framelits. And for a final touch of color, I stamped again with Real Red ink and punched out the heart using the Itty Bitty Accent Punch Pack and layered that on top with yet another dimensional.

Each card is like a puzzle, you just have to keep moving and turning the pieces until they suddenly all fit! Eventually – and with a big enough hammer – they will fit for you.
And if you want to try this at home, don’t miss out on getting these framelits and the Somethin’ Somethin’ stamp set for FREE with the purchase of a BigShot or get the bundle for 15% off through the end of the month.

Thanks for stopping by and congrats to everyone with Stylin’ Stampin’ Inkspiration for making to 1 year of regularly awesome projects, ideas, and inspiration!
Now you can follow us on Pinterest or even like Stylin’ Stampin’ Inkspiration on Facebook!

August Online Stamp Club Hostess Code – TT2NETD4
Use this code to get free exclusive tutorials & project kit! Learn more
Card Supplies Used:
- I started out with the idea that it would be fun to use the Word Bubble framelits (which by the way happen to be one of the dies that you can get FREE or discounted this month with the Big Shot special… just saying!)
Word Bubbles Valentine or Spring Card–you choose!
I was working on finishing out the last card for Stamp Club tonight and I wanted to do something Valentines-y. So I was looking at my new stamps and just HAD to pull out my Just Sayin’ word bubbles stamp set and put something together. This is what I came up with for the first sample:

Now, I know not everyone needs a Valentine’s Day card at this point, so I wanted to give them some options for what they made (plus I didn’t have enough of the patterned paper for everyone to make this exact card) so I created a second variation of the card that could be used any time:

So, basically the exact same idea from the first card only with a few minor changes:
- Swap the pattern of paper out from the red waves to the colored stripes (though both patterns are part of the Fresh Prints designer paper stack)
- Swap the Full Heart punch for the Pansy Punch
- Change out the saying from the Just Sayin’ stamp set
But did you notice the coolest part?
Check out the background for the card base! NO it isn’t a rubber stamp! Can you guess how I made it? 🙂

Yup! An embossing folder!!
I took my Decorative Dots embossing folder (free with a $50 order) and inked it up with my crumb cake ink and then “stamped” it onto my card base. Burnish with your bone folder and you have a fun new background stamp!
Makes you look at your embossing folders a little differently, huh?
Join me in my Virtual Stamp Club!
As i mentioned earlier, I created these cards for my stamp club gals. I love my local stamp club, but know I have some friends and customers who aren’t able to join me in person each month because of distance or time. So, I wanted come up with a way to share the fun with them as well.
And so… I am starting a Virtual Stamp Club! Its easy to join and you can do it from anywhere in the US!
How does it work?
- Place an order in my Online Store that is at least $25 by the 25th of the month.
- Make sure you use the Virtual Club hostess code when you check out (I’ll post the code each month at the bottom of my blog posts)
- Within 48hrs, I will send you the password for an exclusive club page with links for PDF tutorials for the 2-3 projects we are making in Stamp club that month with full supply lists for all of the projects.
- If your order is $40 or more, then I will mail you a free class kit packet for the club projects so you can make them at home! Class kits will start going out by the 2nd Thursday of the month.
- PLUS – every time you spend $40 you also are getting a punch towards a free stamp set with my Northwest Stamper Rewards program!
There is no commitment and you can participate one month and skip the next!
And if you’ve been in the club at any time in the prior 4 months when a new catalog comes out, you will be sure to get one in the mail from me for free!
If you have questions, shoot me an email at jennifer@nwstamper.com.
Ready to go? Shop online and use the hostess code BNDDMDVU


Little Bit of Love
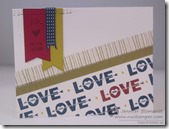
I have a few more cards to share that have a love theme and so as we work our way to Valentine’s Day in a few days I thought I would post them here for last minute ideas. Today’s card uses the stamp set that I was so excited to get at leadership and have been woefully slow at using – Love You to the Moon! I mean, look at these cute images:

Love You to the Moon – #133143 (clear)/ #133140 (wood)
I origionally started this card for a Stylin’ Stampin’ Inkspiration design team project themed on using your markers – but I had a little love/hate relationship with the card and ended up doing something completely different. But, I still like some of the details of this card so I thought I would share it anyway.


The very first thing that started this whole card off was the diagonal rows of “Love you” on the bottom half of the card. I stamped most of them in Midnight Muse and YES, I used the stamp-a-ma-jig! I am an imperfect stamper and am ok with things not being totally straight, but in this case I don’t think even I could have handled the randomness if I didn’t use the stamp-a-ma-jig! The lone red Love you was colored with markers. I used Raspberry Ripple for the “Love”, Midnight Muse for the “you” and even Chocolate Chip for the head and tail of the arrow. Then, to help pull it together, I used my Summer Starfruit maker to create little dots between each of the sentiments.

After I had the stamping done, I looked at the card and it wasn’t quite sitting right with me. I loved the look, but I didn’t have a plan for layering anything else on. So, I started by creating a border using the Watercolor Wonder gold washi tape (both the solid and the stripe patterns).
Great, that looked good, but now what?
Well, this is where things started getting haphazard! I started grabbing scraps of paper and ribbon and stamps and started playing around. In the end, I liked the pennant idea coming down from the corner so I put those one.
But they looked too plain, so I tried some faux stitching with my markers. That was ok, but it still needed something, so I added an additional sentiment to the Raspberry Ripple pennant for a final touch.

I won’t go so far as to say this is a favorite card of mine, but like I said, I think there are some fun elements to it. If you have any suggestions for tweaks or improvements, I’d love to hear! Leave me a comment and when I redo this card, maybe that will help make it look better.
On a side note –
If you don’t already get copies of my blog posts each day in email, you may consider Following my blog with Bloglovin. I currently help people get subscribed using Feedburner but Google has stopped supporting it and so it may stop working when I don’t expect it. So in the meantime, I’m checking out other options and one option I know a lot of people are liking is Bloglovin. I’m going to try as well and hopefully love it!
 Stampin’ Up! Supplies Used
Stamps – Love you to the Moon
Ink – Midnight Muse, Raspberry Ripple, Markers (Midnight Muse, Summer Starfruit, Raspberry Ripple, Chocolate Chip)
Paper – Whisper White, Summer Starfruit, Raspberry Ripple
Accessories – Watercolor Wonder washi tape, Stitched Satin Ribbon (Midnight Muse)


![NWstamper signature_thumb[9]](https://i0.wp.com/www.nwstamper.com/wp-content/uploads/ad87b4046c1e_C9F6/NWstamper-signature_thumb9.png "NWstamper signature_thumb[9]")


