Northwest Stamper

Tag: valentine’s day

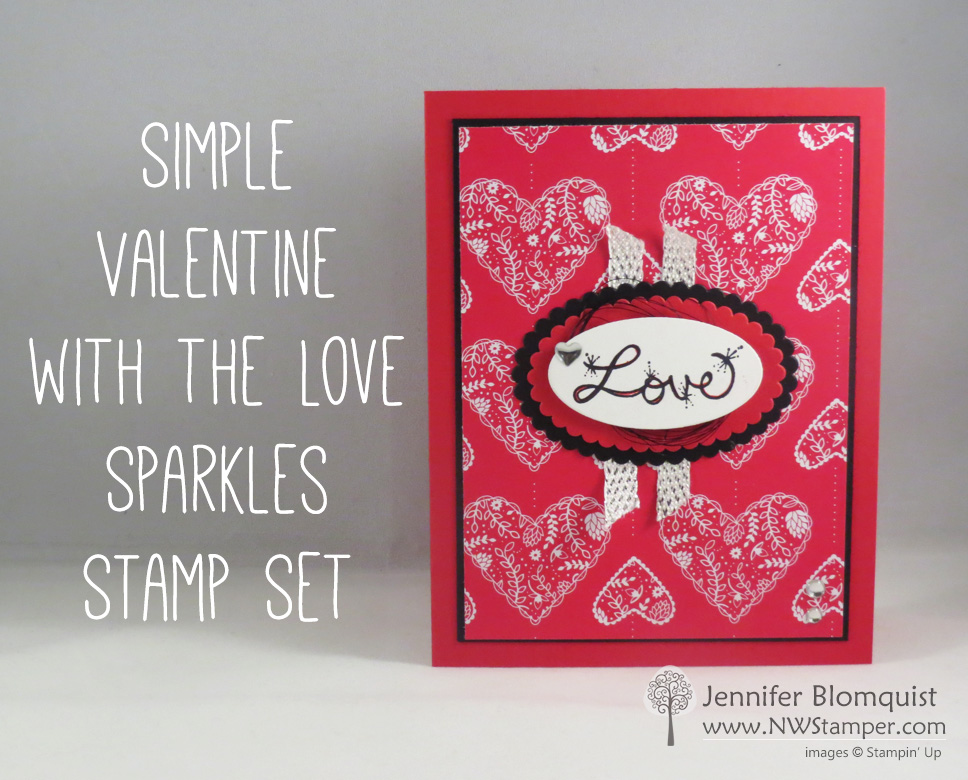
  • Valentines with Love Sparkles & a Blog Hop!

    Valentines with Love Sparkles & a Blog Hop!

    Lets keep the blogging streak going (because you know 2 days out of 2 is something! ha ha!) and today is a fun day because it is Blog Hop day!  I’m joining forces with some of my Fun n’ Crafty Stampers team to share with you some fun Valentine’s Day project ideas! (more…)

  • Bloomin’ Love Valentine’s Day Card in Pinks

    Friday was my day for card classes, I had one in the morning and one in the evening… which was lots of fun, because each class had it’s own personality and style.  But the thing that is always interesting to me when I’m running my classes is to see which cards are the most popular from the group.  I did 3 Valentine’s cards in the morning and then one repeat and 2 more cards in the evening.  When I was planning my cards for the evening class, I decided to pick one from the morning to share as the Valentine’s Day themed card and then do two others.  I picked what I thought would be the favorite, but turns out one that I DIDN’T pick was the surprise hit!  So I thought I’d share here:

    Bloomin Love Valentine's Card with Wink of Stella

    I think what everyone loved was how simple this card is to put together, but the gorgeous heart from the Bloomin’ Love stamp set just makes it extra pretty!  I got this overall design idea from a card swap I participated in at the beginning of the year.  Sadly, in the chaos of getting ready for my class, the original designers name got separated from the card sample, so if it was you, let me know!

    Make it simple, and then step it up!

    I did step it up a little from the original because you know me… I LOVE my Wink of Stella!  I added some of the Clear Wink of Stella to my flowers in the heart.  Bonus – if you have any spots where the stamp didn’t quite give you 100% coverage, the wink of stella brush helps even out the ink for you!  Then I added a few small rhinestones to the center.  Isn’t it pretty?!

    Wink of Stella Close Up on Bloomin' Love heart

    Want to make this at home, here are the dimensions you need:

    • Whisper White cardstock – 5-1/2” x 8-1/2” (cardbase), 2-1/2” x 2-1/2”
    • Rose Red cardstock – 5-1/4” x 4”, 2-3/4” x 2-3/4”
    • Blushing Bride cardstock – 5″ x 3-3/4″
    • Love Blossoms designer paper – 1” x 5”

    It’s quick easy, and oh so cute!  So give it a try and let me know how it goes.

    Last chances to order for Valentine’s Day project is tomorrow.  So make sure to get those last minute supplies – shop at your convenience 24/7 in the online store.

    NWstamper signature_thumb[9]

    order online button for sig 3_thumb[4]

    Use Hostess Code PGHMVNJM at check out to get a special thank you from me!

    Pick a FREE item with every $50 you spend!  See the Sale-a-Bration catalog.

    See all the tutorials & classes by mail here

    Save 25% on the Latest Weekly Deals

  • It’s a Love Thing! Inspire Create Share Blog Hop

    Holy mackerel!  Valentine’s Day has snuck up on me and I can’t believe we are less than a couple weeks away!  Good thing is… there is still time to make your Valentine’s Day treats and cards.  And yes, there is still time to order those last minute supplies and get them in time to play before the holiday!  Smile  So, to get you all fired up and inspired for all the love-filled creations, I’m joining up with the Inspire, Create, & Share crew on a Blog Hop all about Love!

    12417846_10153838682348048_338791290049439201_n

    I’m one of 14 stops on the hop, so if you are joining me from Darla’s blog, welcome!  I have a fun project to share today… a Valentine’s Treat Pouch I made as a bonus project for my Stamp Club.  It is fun to make and quicker than you might think!

    Love Blossoms Envelope Punch Board Valentine Treat Bag

    Jennifer’s Project Tips:

    • It all starts with an adorable owl – The very first thing I designed for this project was the Owl.  If you haven’t used the Owl Builder punch before, you are missing out on so many cute projects!  From owls, to penguins, to reindeer, it is a super versatile punch!
      But even when you are making a simple owl, don’t hesitate to dress her up!  I used the small flower flourish from the Bloomin’ Love stamp set and stamped it onto a scrap of Pink Pirouette cardstock before punching out the tummy for my owl.  It is like she is wearing a pretty dress!  Then punch out two of the hearts from the same punch and glue them together over her ear for instant bow.  BAM!  Cute or Super Cute??Valentine's Day Owl Builder Punch
    • Create a custom treat holder with the Envelope Punch Board – I was trying to decide what to put my owl on, when it hit me!  I could use the envelope punch board along with the cute Love Blossoms paper stack to quickly make the treat holders.
      –  Start with a 6×6 piece of patterned paper (good thing this paper pack comes as a 6×6 pack!)
      –  Use the envelope punch board to create an envelope. Start at the 2 5/8″ score line and score and punch as normal.on all sides (video tutorial for the punch board).
      –  fold in 3 of the sides but do NOT fold and press the 4th side.
      –  decorate to your heart’s content!
    • Have fun with layers!  I next created the sentiment – the banner stamp and the sentiment are both from the same Bloomin’ Love stamp set, but did you know? The banner has a matching framelit over in the Large Numbers framelit set!  Or trim by hand.  Either way works.  I stamped my banner first and THEN added my sentiment.  But then don’t stop there, add more layers!  Try wrapping the treat bag with the Watermelon Wonder satin ribbon and then layering your sentiment and the owl.
      – Want extra credit?  Keep it going!  Add a gold metallic doily to the front of the bag and adhere a 2 1/2” Crumb Cake cardstock circle for a shiny backdrop.Valentine's Day treat bag layers
    • But what adhesive to use for what?  I used a few different adhesives for this project so I thought you might like a quick guide for it:
      –  Holding together your treat bag = Fast Fuse, you want something stronger than your average tape to make sure your treat doesn’t come apart!
      –  Layering your Owl = 2-way glue pen, with all these small pieces you are trying to stick together, the glue pen is easy to handle and not messy with your little pieces
      –  Attaching your Owl = I used one Stampin’ Dimensional to keep her in place
      –  Everything else = viewers choice!  Though my preference is for SNAIL or Fast Fuse, basically some kind of tape runner

    So I hope you enjoyed my project and found some new ideas for inspiration!  Click the next button below to see what Claudia has created for the blog hop!  The next in your 14 stop hop full of love!

    12507113_10153838680978048_4014289948782387983_n


    NWstamper signature_thumb[9]

    order online button for sig 3_thumb[4]

    Use Hostess Code PGHMVNJM at check out to get a special thank you from me!

    Pick a FREE item with every $50 you spend!  See the Sale-a-Bration catalog.

    See all the tutorials & classes by mail here

    Save 25% on the Latest Weekly Deals


    Price: $18.00

    Price: $110.00

    Price: $40.00

    Price: $10.00

    Price: $4.50

    Supply List

    Built for Free Using: My Stampin Blog

  • A Valentine’s Day Card Idea using the Label Flipcard Thinlit & All About Embossing Folders with the Weekly Deals!
    A Valentine’s Day Card Idea using the Label Flipcard Thinlit & All About Embossing Folders with the Weekly Deals!

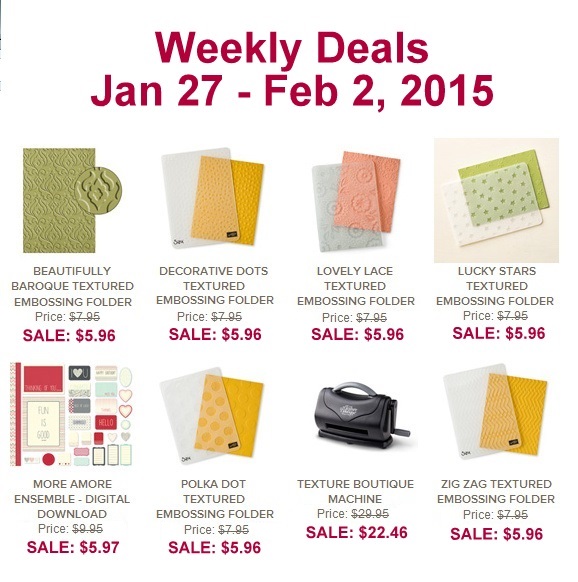
    Wow!  I checked out the Weekly Deals this morning and holy moly if you like embossing or have considered getting into Embossing folders, this is your week!

    weekly deals 1-27-15

    You can get

    • 6 Embossing Folders
    • the Texture Boutique machine to emboss your paper with them
    • a free stamp set, paper pack, or blendabilities of your choice from the Sale-a-Bration catalog

    All for only $58 this week!  Totally great deal!  Shop these deals online here.

    If you wanted an even better deal – consider getting the starter kit and you can get

    • 5 embossing folders
    • The Big Shot for embossing OR die cutting

    All for only $99 plus free shipping and then you’ll be a part of my Fun n’ Crafty demonstrator group and get a minimum of 20% off your future orders too!  Learn more here.

    Quick share today of a card I did in my Flip Card technique class where we used the different Flip Card thinlits.  For this sample, we used the Label Thinlit and the dies that came with it for this fun love card:

    Tips for making this card:

    • Start with a 5.5″x11″ piece of cardstock for your card base.
    • Place the thinlit die over the cardstock so that the left side of the die exactly matches the left side of the cardstock.  Then tuck the right edge of the cardstock OVER the right side of the die.  It will look like your paper is threaded through the die.  (under the left and the middle of the die, over the right end of the die).
    • After you run the paper through the Big Shot, you should have the flip part in the middle cut out and a score line on the right 1/3rd.  Fold in on that score line.
    • Use the Pictogram Punches stamp set to decorate the outside, and then the Perfect Pennants stamp set decorate the inside of the flip part.
    • Punch out a Crushed Curry scallop dotted ribbon and adhere along the INSIDE of the flipping edge so that half hangs over the edge (so you can see it when the card is closed).  Layer a white label die cut (that comes with the thinlit set) over the yellow ribbon cardstock to cover the middle.


    Well, tomorrow I leave for leadership… so watch for videos, pictures and more from me from the fun in Orlando!

    NWstamper signature_thumb[9]

    order online button for sig 3_thumb[4]


  • Twitterpated Valentine’s Card from the Upcoming Stacked with Love Class by Mail

    Anyone ready for some Valentine’s?  I had so much fun working with the new You Plus Me stamp set and Stacked with Love paper stack (LOVE that you can get them in a BUNDLE!) that I just had to put together a class showing a number of fun different options you can do using just a few supplies.  Right now I’m up to 8 cards, so that is the offical count for the class… but I have a few more in the works and I’ll make sure to add them as bonus ideas to the instruction set as I finish them. Smile  In the meantime, I wanted to share today one of the cards I really liked from the set:

    I like how clean and simple it is and still isn’t a boring card.  Would you agree?

    Tips for making this card:

    • Mix and match the patterns from the Stacked with Love designer paper stack to create interesting patterns on your card.  This card uses 3 papers:  the Coral linen paper under the sentiment, the red stripes, and the XOXO piece – all from the same pack of paper.
    • Use your stamps to add extra touches like the hearts and arrows, which come from the You Plus Me stamp set.
    • Keep things from looking too boxy by tearing the left edge of your sentiment.  It is a subtle touch but keeps everything from being too squared off!

    Here is a quick peek at the 8 cards I’ve already finished using this same stamp set and paper pack:

    The class includes the following supplies:

    • Stacked with Love designer paper pack
      all required pieces for the 8 class cards will be precut for you plus you get to keep everything not used in those cards
    • 20 white notecards and envelopes
    • Itty Bitty Accents Epoxy Stickers pack
    • All precut cardstock needed for the 8 class cards
    • All additional ribbons and accessories needed for the 8 class cards
    • Photos of all the cards plus instructions for each card
    • (optional) You Plus Me stamp set – save $3 from the catalog price when you add it with your class registration!

    Kit by Mail Option:  Instructions, all supplies, plus extras – all for only $25 plus shipping if required!
    SAVE & add on the stamp set we use for all the cards for only $16 clear or $23 woodmount.  That is $3 less than the catalog price!


    Class Options


    Instructions Only Option:  Already have the supplies and just want the instructions?
    I will have them to send out next week and you can order yours for only $3.95.


    If you are in the Seattle area, join me for this class in person on 1/17 at 7pm in Redmond,WA  (register here)

    NWstamper signature_thumb[9]

    order online button for sig 3_thumb[4]

  • Seasonally Scattered Valentine’s Box & NEW Product Shares!

    You’ve probably seen my projects and others using Seasonally Scattered and many of them were focused on the Thanks and Merry sentiments.  You know, because they fit so well for fall and for winter.  But before the stamp set disappears in a couple days (last day to snag it is Jan 5th!) I wanted to share this project I created for the Convention Display boards this summer.

    You may have seen this project on my blog from a long while back:

    Seasonally Scattered Love Card blog post

    And with that card I did heat embossing and sponging, but I had an idea to do something similar but wanted to really make the “LOVE” sentiment POP!  So I started working and I kept grabbing for things I hadn’t used in a while and this box came out:

    See?!  Now do you see why I can’t believe this set is not continuing on for Valentine’s Day?

    Anyway, I had lots of fun making this box and you could totally use bits and pieces from the box to make a card or make your own special box for someone you love.

    Tips for making this project:

    • Use the kraft gift boxes for your base.  They are very inexpensive easy to pop together, and very sturdy for your box.
    • Start by heat embossing your LOVE image onto a piece of Watercolor Paper using versamark and black embossing powder.
    • Use the Aqua Painter and your Real Red ink pad to color in the paper EXCEPT for the “LOVE” sentiment.
      NOTE – when picking up color with your Aqua Painter, make sure to pick up the color from your ink pad LID and not the surface of the pad itself to avoid diluting your ink pad in one spot.
    • Cut out the sentiment using the Oval framelits and then cut out a bigger Oval from the white crepe filter paper.  Fringe the edge of the larger oval and layer behind.
    • Stamp around the edges and heat emboss another piece of watercolor paper for your top using just the scatter design portion of the LOVE stamp.  This gives you the coordinating look on top.
    • Add a spiral flower using the Spiral Flower die (use glue dots or liquid glue to hold your flower together) and add some watercolored scraps of the filter paper to the middle of the flower for filler.

    • Did you know? You can color the Vintage Faceted buttons with your Blendabilities to make them custom fit your projects?  That is what I did here with my Cherry Cobbler blendabilities!

    And there you have it, a great little box for that special someone for Valentine’s Day or any time of the year.

    10885273_782080285173125_3511162684151308190_n

    Try it all out first with my Product Samplers!

    The details are up!  In 2 days (or as I get the shares filled), I’ll be placing the order for everyone’s samplers of the newest papers and accessories from the spring Occasions catalog!  This is a great way to try it all out without breaking the bank paying for full packs of everything.  Then once you see it in person, you can decide which items you love and which you are good with just a couple pieces. Smile  It’s a win-win!

    2015 Occasions Catalog Full Product Share

    BONUS – this year I’m offering a bonus to everyone who signs up for the “I Want it All” sampler and you get a bonus sampler of the coordinating Sale-a-Bration Paper, Ribbon, and Buttons!  That’s a whole lot of goodies for only $26 (plus shipping if needed).

    2015 Occasions Catalog Product Share Bonuses

    Check out my Product Shares page for more details

    Email me at jennifer@nwstamper.com to reserve your spot today!

    NWstamper signature_thumb[9]

    order online button for sig 3_thumb[4]

    Project Supplies Used:
    (if you are reading this in email, click here to see the list of supplies)

  • Word Bubbles Valentine or Spring Card–you choose!
    Word Bubbles Valentine or Spring Card–you choose!

    I was working on finishing out the last card for Stamp Club tonight and I wanted to do something Valentines-y.  So I was looking at my new stamps and just HAD to pull out my Just Sayin’ word bubbles stamp set and put something together.  This is what I came up with for the first sample:

    Just Saying Word Bubble Valentines

    Now, I know not everyone needs a Valentine’s Day card at this point, so I wanted to give them some options for what they made (plus I didn’t have enough of the patterned paper for everyone to make this exact card) so I created a second variation of the card that could be used any time:

    Just Sayin Word bubble flower card

    So, basically the exact same idea from the first card only with a few minor changes:

    But did you notice the coolest part?

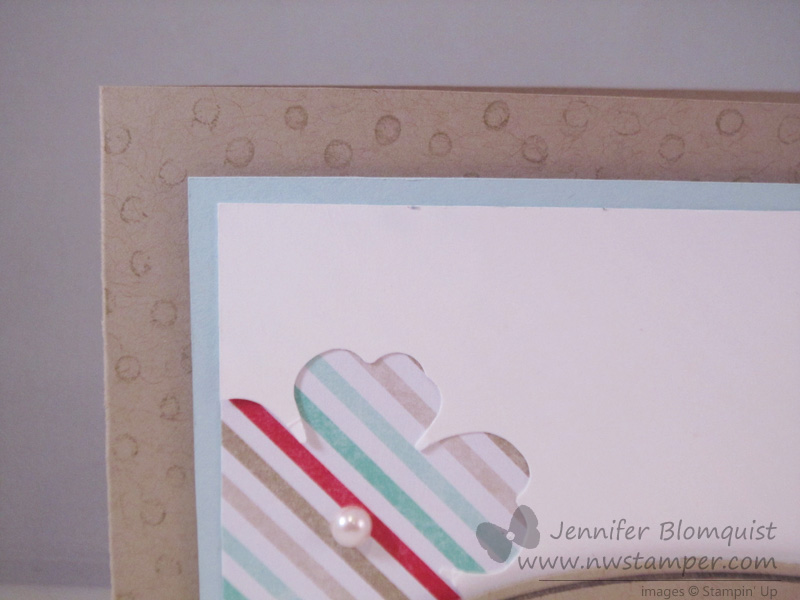
    Check out the background for the card base!  NO it isn’t a rubber stamp!  Can you guess how I made it? 🙂

    stamping with embossing folders

    Yup!  An embossing folder!!

    I took my Decorative Dots embossing folder (free with a $50 order) and inked it up with my crumb cake ink and then “stamped” it onto my card base.  Burnish with your bone folder and you have a fun new background stamp!

    Makes you look at your embossing folders a little differently, huh?

    Join me in my Virtual Stamp Club!

    As i mentioned earlier, I created these cards for my stamp club gals.  I love my local stamp club, but know I have some friends and customers who aren’t able to join me in person each month because of distance or time. So, I wanted come up with a way to share the fun with them as well.

    And so… I am starting a Virtual Stamp Club!  Its easy to join and you can do it from anywhere in the US!

    How does it work?

    1. Place an order in my Online Store that is at least $25 by the 25th of the month.
    2. Make sure you use the Virtual Club hostess code when you check out (I’ll post the code each month at the bottom of my blog posts)
    3. Within 48hrs, I will send you the password for an exclusive club page with links for PDF tutorials for the 2-3 projects we are making in Stamp club that month with full supply lists for all of the projects.
    4. If your order is $40 or more, then I will mail you a free class kit packet for the club projects so you can make them at home!  Class kits will start going out by the 2nd Thursday of the month.
    5. PLUS – every time you spend $40 you also are getting a punch towards a free stamp set with my Northwest Stamper Rewards program!

    There is no commitment and you can participate one month and skip the next!

    And if you’ve been in the club at any time in the prior 4 months when a new catalog comes out, you will be sure to get one in the mail from me for free!

    If you have questions, shoot me an email at jennifer@nwstamper.com.

    Ready to go?  Shop online and use the hostess code BNDDMDVU

    spaced shop now sig bar


  • Last Minute Valentine Card Ideas from Leadership
    Last Minute Valentine Card Ideas from Leadership

    I have had a TON of cards sitting on my camera begging to get edited and shared with the world, and finally I had time yesterday to spend most of the day editing them.  So, with Valentine’s day just around the corner, I thought I would share some of the great card swaps I received at Leadership that are perfect for giving to a loved one on Friday.

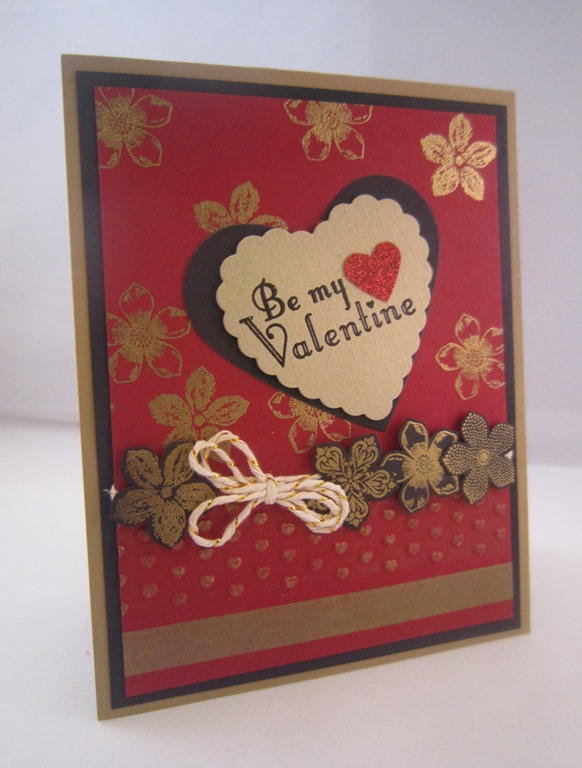
    created by Robbie Chandler

    Isn’t Red, Gold, and Black such an awesome color scheme?!  I love how she did a bunch of gold embossing over the red base and the black cardstock (that she then punched out with the Petite Petals punch).  Then add some gold washi tape and the gold baker’s twine and just a touch of red glimmer paper.  Very elegant!

    created by Kim Allen

    A less traditional card but really fun and whimsical.  I love the sentiment from the Love You to the Moon set and I think the punched out moon for the rocket to fly around is so cute (yes the moon is part of the stamp image but I like the layering with a different color of cardstock.  And the Razzleberry button with white bakers twine is a nice touch at the top of the banner.

    created by Dawn Walker-Randall

    And finally a more traditional Valentine’s Day card with the red and white, and hearts!  This uses the heart framelits and see that cool flower background on the bigger heart?  That is the Petals-a-Plenty embossing folder that embossed the Pool Party paper and then they inked it!

    Check out my video tutorial for coloring the embossed flowers with this folder here

    So some totally fun ideas to give you a few more ideas while you still have time to create!  I’ll have at least one or two more ideas for you this week, but hopefully this gets you started!

    spaced shop now sig bar

  • My Sweet Sanded Valentine

    I needed a card last week for my stamp club and I was getting stuck in a rut with always turning to flowers to stamp with.  But then my friend, Annie, came over and reminded me about the cute designer frames embossing folder set and I saw my Love You More stamp set and suddenly things started coming together.  I won’t tell you how long I futzed with the final elements trying to decide – should the bird have pink or just red, should the stamped frame be at an angle or straight, should the ribbon be near the top or down near the bird…. but eventually I settled on this!  : )

    I even broke out the Alphabet Press embossing folder (on sale this week with the weekly deals!) for the background.  I’ve had this folder for a while but keep forgetting to try it out.  Doesn’t it sand awesomely?

    And for the finishing touch, I just had to use the “Made with Love” sentiment from the same set to complete the card by stamping it on the back.

    Sweet right?

    Just a reminder, if you love this set, it is only available until January 27th.  It’s not in a catalog but you can find it in the Valentine’s Product’s section in the Online Store.

    Stampin’ Up Supplies Used
    Stamps – Love You More
    Ink – Real Red, Markers: Real Red, Smokey Slate, Basic Black, Blushing Bride
    Paper – Brights Core’dination cardstock (Real Red), Whisper White, Basic Black
    Accessories – Alphabet Press embossing folder, Big Shot, Designer Frames embossing folder, Sanding Block, Naturals Chevron ribbon, Stampin’ Dimensionals

    Oh, and want to see a cute variation that uses all the same supplies, just switching out the sentiment with one from Happy Watercolor?  Look what Saundra came up with at club night:

    You may me happy sanded alphabet card

    spaced shop now sig bar

  • Some Valentine Treat Fun for a Blog Hop

    Thank you so much for joining us for our January Stylin’ Stampin’ Squad Blog Hop!  Love is in the air and our talented group of design team members have a Whole Lotta Love Goin’ On as we are excited to be sharing some NEW Occasions Catalog goodies and some Valentine’s Day projects with you this month!

    As you hop along, please be sure to comment and show some love on every blog!  We are always excited to hear from our followers!

    You should have just left stop number 15 on the Stylin’ Stampin’ Squad blog hop – the fabulous Annie Lee. If so, you are in the right spot. If a link doesn’t work or you get off track, you will find  the full blog hop lineup below.

    —————————————————————————-

    So, for the blog hop today, I started and stopped on at least 2 different projects and designs.  Normally that wouldn’t be a bad thing, but with all the crunching to get ready for Leadership, it meant a little last minute creating.

    Thankfully the first project I have to share I was able to get done early!

    A “Wheely” Cool Valentine Card

    I recently got this Love You More Valentine’s Day stamp set and just love this globe image.  But the part that I really thought was fun with this card was the red flowers on the right side of the card front.

    Know what it is?

    Yup, a WHEEL STAMP!  Betsy’s Bloom is the name.  It’s been ages since I pulled them out, but they sure do make a striking background for your card sometime using exactly the color you want.

    Add a bit of ribbon for a finishing touch (and to cover up if you rolled your wheel a little less than exactly straight, ha ha! Winking smile )

    Send a Valentine Treat this Year

    I had one more idea that I wanted to create to share today.  It was an idea in my head that I didn’t have time to complete it before heading to the airport so I punched out a few shapes, grabbed some paper, ink, and stamps… and headed to Houston.

    Turns out, I got to my hotel and set out to create the idea in my head and I discovered that I left my paper trimmer at home.  Oops!  So, check out the ideas and don’t mind the not quite perfect cuts since I had to make due with my little paper snips for all the paper in the project other than the red Chevrons (Chevron punch) and the Heart (lg Full Heart Punch)!

    The idea for this project is a little treat you can send or give to a special someone.  It’s another stamp set from the Love You More set again… I was inspired by the arrow images and thought I would turn a small Hershey bar into it’s own love arrow!

    If you want to make your own, all you need to do is:

    • Wrap a chocolate bar with a patterned paper from the Fresh Prints designer paper stack in the new Occasions catalog and adhered the arrow images from the stamp set for my central point.
    • Stamp the same arrow w/ sentiment (“straight to my heart”) on a strip of Whisper White cardstock. 
    • Adhere a thin strip of Soft Suede cardstock (approx 3/8” strip) across the middle of your stamped image.
    • Punch out a set of chevron pieces from Real Red using the Chevron punch and a heart from Real Red using the Heart punch.
    • Adhere the Whisper White strip to a piece of Soft Suede cardstock for matting.
    • Adhere the wrapped chocolate over the center of the arrow so that it covers all but the “Straight to the Heart” sentiment.
    • Done!

    So I hope you enjoyed my projects today and check out more great projects on the hop using the links below.

    Blog Hop Participants:
    SSS blog hop next arrow

    1. Anastasia R. of Stampin’ Blondie
    2. Cynthia R. of Ink-a-Doodle Creations
    3. Dawn S. of Dawn’s Creative Chalet
    4. Kathy P of Katrina P’s Creative Corner 
    5. Pamela W. of Stinky Tofu
    6. Diana E. of Stampin’ Fun with Diana
    7. Darla R. & Nancy K. of Stampin With Darla and Sisters
    8. Jamie H. of Unique Ink
    9. Rose C. of Stamp with Rose
    10. Kim R. of Stamping with Kim
    11. Darcy J. of DJ’s Stampin’ Place
    12. Bree R. of Craft-Somnia
    13. Kristina M. of Mama’s Sanity
    14. Annie L. of Love Me Cards
    15. Jennifer B. of NW Stamper  <— YOU ARE HERE
    16. Tonya B. of Stampin’ with Tonya
    17. Heidi B. of Stuck on Stampin
    Interested in updates from Leadership 2014?
    I’ll be spending the next few days in Houston, TX getting filled with new project ideas and updates from Stampin’ Up!  I’ll be trying to share what I can
    via my Facebook page and then coming back in the evening and sharing a summary of what I saw. 

    So enjoy all the inspiration today and stop back by tomorrow to see what’s happening in good ol’ Texas!

    spaced shop now sig bar

  • Super Simple Valentine’s Card

    Alright, I’m back with another project using the stamp from the Happy Valentine Heart bundle.  I showed you yesterday a Valentine Treat idea but I wanted to play with the stamp for a card.  This was the first quick card idea I came up with:

    And as always, it is super hard to see but I used my 2-way Glue Pen and some Dazzling Diamonds glitter to fill in the little cupid heart.  Maybe this picture will show it a bit better?

    Or not… but you get the idea. Smile

    I swear I always start getting into a stamp/paper/embellishment right as it is going away.  So, reminder today is the LAST day to order this bundle or the My Little Valentine/Simply Sent bundle.

    See the details on these bundles in the online store

    But I think this stamp is kind of adorable so you may see it pop back up in the next few weeks between now and Valentine’s Day.

    To Order Stampin’ Up! Products Anytime, click here!


    Are you earning your Northwest Stamper Rewards?
    Every order gets you closer to your FREE stamp set!  Click here to learn more!

    Happy Valentine Heart Card
    Stamps:
    Happy Valentine Heart
    Ink: Raspberry Ripple
    Paper: Twitterpated designer series paper, Crumb Cake cs, Whisper White cs, Raspberry Ripple cs
    Accessories: Big Shot, Adorning Accent embossing folders, Full Heart punch, 2-way Glue Pen, Dazzling Details, Stampin’ Dimensionals

  • Happy Valentine Heart Treat Topper

    Anyone else out there a sucker for a good deal or at least cute things for a small price tag?  Anyone?  Smile

    Well, I don’t normally do little treat bags and toppers but when I saw the limited time Valentine Bundles that Stampin’ Up! was offering, I thought the Happy Valentine Heart was so cute and it was so cheap that I just had to go for it.  I mean, seriously, $5.95 for a stamp and 50 treat bags?? Everyone I know is going to get treats this year. hee hee

    So, this was the first project I created with my new goodies:


    Like I said, I hadn’t played with these 1”x8” cello bags before so I was totally winging it.   But I think it turned out pretty cute.  Wanna see the topper up close?  Well, here you go –

    I used my Window Frame framelits and some Core’dinations cardstock (I swear, I didn’t realize how much I love that stuff until I keep trying to grab it for my projects and I get sad I haven’t ~gasp~ ordered any of the new colors!  Guess what I’ll be fixing on my order on Tuesday? Winking smile)

    I made the topper so you could get to the treats without needing to destroy the topper.  I even made a video so you could see how I put this all together.

    REMINDER – This Bundle is only available through tomorrow (1/21)


    So, have fun and enjoy this project.  Let me know what you think too!  For my first project like this, I had a lot of fun. Smile


    Want a TON of Sale-a-Bration project ideas?

    After the fun of the 12 weeks of Christmas project newsletter, I’m gearing up to do a
    9 weeks of Sale-a-Bration project series.

    That’s right!  Get a new, exclusive project sent straight to your inbox every week giving you new ideas for using those FREE products you can get during the Sale-a-Bration.  The first project is coming out Wednesday.

    You won’t want to miss it!

    Make sure you are signed up and ready to get week 1 by making sure you are on my mailing list.  Sign up here.


    To Order Stampin’ Up! Products Anytime, click here!


    Are you earning your Northwest Stamper Rewards?
    Every order gets you closer to your FREE stamp set!Click here to learn more!