Northwest Stamper

Tag: stampin’ up

  • Release Date for Blendabilities and More Stampin Up Updates!

    Release Date for Blendabilities and More Stampin Up Updates!

    Popping in for some quick updates for you… including an announcement about Blendabilities, yay!

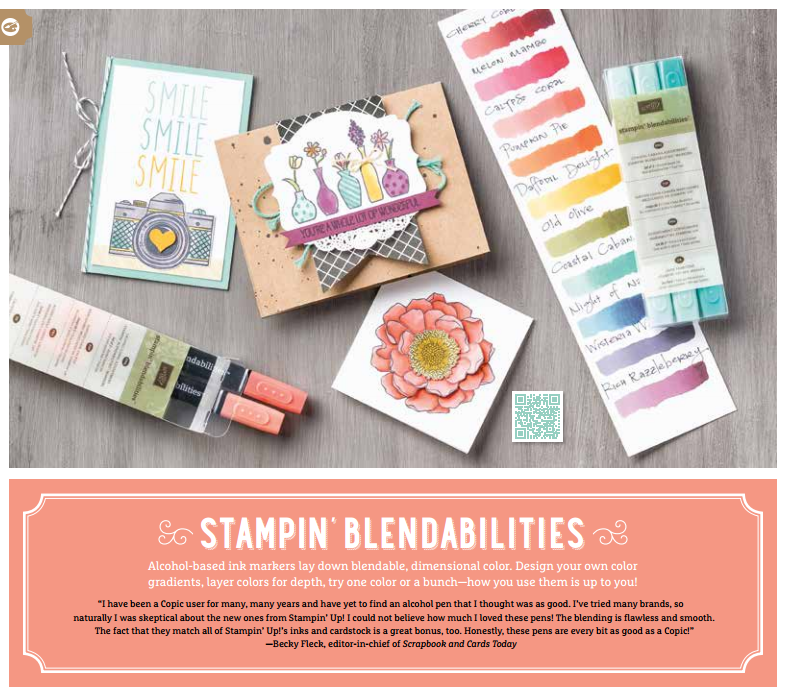
    Release Date Update for Stampin’ Up! Blendabilities – 7/1/2014

    Stampin Up Blendabilities Samples

    I’m so happy they finally officially gave us a release date.  I’m happy to share that they are releasing the following items on July 1st!

      • Cherry Cobbler (item #130995)
      • Coastal Cabana (item #131000)
      • Daffodil Delight (item #130998)
      • Old Olive (item #130999)
      • Pumpkin Pie (item #130997)
      • Rich Razzleberry (item #131003)
      • Skin Tone Assortment (item #129370)

      In addition, the following accessories will also be available:

      • Memento Ink Pad (item #132708)
      • Memento Ink Refill (item #133456)
      • Color Lifter (item #129369)

    If you are a demonstrator – or join between now and August – starting July 1st, we will be able to order one of each of the ADDITIONAL colors:

    • Calypso Coral
    • Crumb Cake
    • Melon Mambo
    • Night of Navy
    • Smoky Slate
    • Wisteria Wonder

    These colors will be available to everyone starting on August 1st.  And let me tell you, I think you are going to LOVE them!  I know I do! Smile 

    One Week Left for the $50 Starter Kit!

    Join Stampin' Up for only $50

    Get started ordering yours here

    Just a quick reminder that there is only one week left  to take advantage of the $50 starter kit.  This is a great way to try out the world of being a demonstrator from

    • the discounts on your orders
    • free convention registration (through friday only)
    • access to demonstrator only forums
    • be a part of my Fun n’ Crafty stamper team facebook page with project sharing, news, and tips
    • monthly group calls or get togethers
    • bi-monthly maagazine with stamping and business tips and how-tos
    • and a chance to make some money doing what you love!

    I’ve answered some Frequently Asked Questions here but I love chatting with you as well.  Email me at jennifer@nwstamper.com or give me a call and I’d be happy to answer any questions you have. 

    New Weekly Deals Start Today

    10457895_10202543532772925_5948898602771916161_n

    View the Weekly Deals Online here

    Ok, I think that covers the big ones today.

    Ps – I’ll be announcing an adhesive sale this week, so make sure to check back soon or get on my mailing list as I’ll be making sure to email there first!
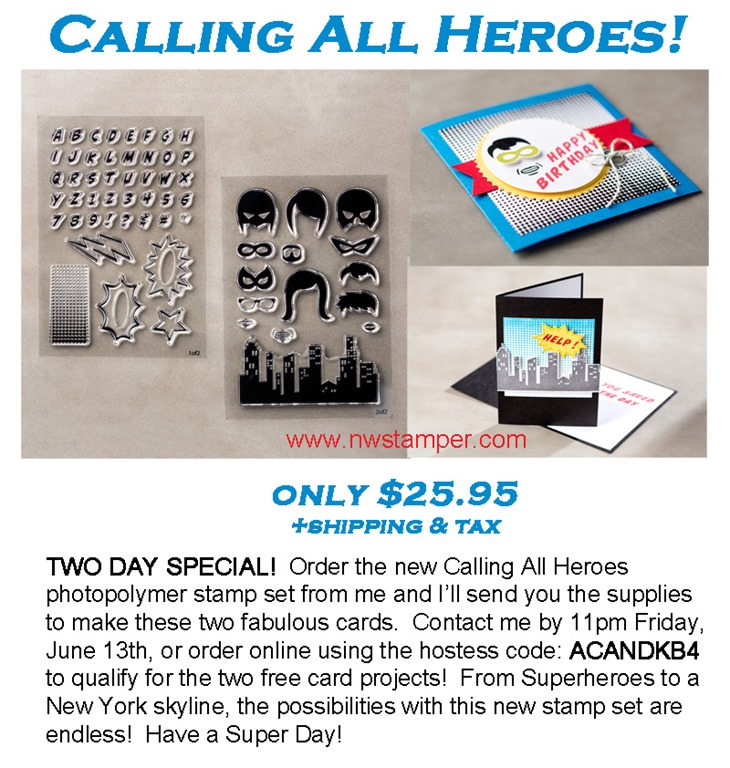
    spaced shop now sig bar

    June Online Stamp Club Hostess CodeACANDKB4
    Use this code to get free exclusive tutorials & project kit!  Learn more

  • Fun w/ Thinlits & a Flip Card Class

    Fun w/ Thinlits & a Flip Card Class

    I normally forget to post here on the blog reminders about my upcoming classes and events until the day before, not always the best time to advertise, huh?  But today I’m actually remembering and so I wanted to share a little about my next class that is coming up on Monday June 30th that is all about using the Thinlit dies in fun ways!image

    Beyond the Basic Flip Card

    6/30/2014 – 7pm at Panera in Redmond ~OR~ get the TO-GO class kit my mail
    RSVP here or email me at jennifer@nwstamper.com

    So the idea is that you have your basic flip card (shown above) where you pull open the left flap and the center circle or label shape flips over to reveal a message on the other side.  They are really cute and can be fun to decorate – and did I mention SUPER EASY thanks to the die!  Honestly, I had never tackled this type of card because I was nervous exact-o knives would be involved.  Smile  But once they came out with a die that did it all for me…. heck ya!  I was all over it!

    image

    The cool part is there are lots of variations you can do with these cards that are really fun and give you lots of variety with the single die.  So, in the class we’ll walk through the basics of using the die for the base card and then jump right in to some fun variations.

    • like changing the orientation of the card
    • to have a spinner in the middle of your flip shape
    • having an extra flap for more space to write your sentiments
    • to even doing a double flip (or more!) card!

    In class we’ll be using both the dies:

    imageimage
    Circle Thinlit DieLabel Thinlit Die

    I’ll have extra samples of flip cards to give you more ideas, but you’ll go home with completed cards that you made doing the different variations.

    image

    It should be a lot of fun and a nice change from your typical cards!

    I hope you can join me either in the class or virtually through class videos for the TO-GO option!  RSVP here or email me at jennifer@nwstamper.com


    spaced shop now sig bar

    June Online Stamp Club Hostess CodeACANDKB4
    Use this code to get free exclusive tutorials & project kit!  Learn more

  • Trying out Project Life By Stampin’ Up – My First Layout

    I know by now it is old news that Becky Higgins (creator of Project Life) has partnered with Stampin’ Up to create exclusive lines of Project Life cards, accessories, and even a corner punch.  I had been just starting to get into Project Life when this announcement came out and I was stoked!  Especially because I would now be able to have cards that coordinated both in patterns and colors with stuff I already had in my stash! So, here is the first layout I put together using my new goodies: Everything in this layout is from the Everyday Adventure kit and accessory pack.  Can I just say I LOVE, LOVE, LOVE the idea of an accessory kit!  Maybe someone else does it out there, but I haven’t seen it with the Becky Higgins kits and We R Memory Keepers card sets.  Why do I love them?  They give me a little bit of lots of awesome bits to embellish up my cards and I don’t have to think about what I have that would match.  See? image

    Everyday Adventure Accessory Pack

    (Do you notice a theme?  I love kits and don’t like having to think about which things match. Smile  Seriously, I love scrapbooking kits that come with paper, embellishments, and die cuts because I know I have a little bit of everything to put my layouts together!) So anyway, for the most part, I just used the cards from the Everyday Adventure card kit and then I may add on or two little accents to a handful of them.  Like in the close up below, you see that card in the upper right?  It looked exactly like that (minus my journaling of course) and I just added a bit of the blue washi tape along the top as a bit of trim. And then, of course, the green arrow and black letters that spell “maple classroom” are stickers from the accessory pack. Oh and that bit of orange at the bottom of the green card?  That is a little acetate (think window sheet) colored piece from the accessory pack.  The doodling look on that card?  Totally printed on, thank goodness! Smile And as my last trick, I used some of that same blue washi tape again to layer a 3×4 PLxSU card  (I’m just going to use the PLxSU to make it less typing when I’m trying to say Project Life by Stampin’ Up… sound ok?  Ok, cool!)  Anyway, I layered a 3×4 PLxSU card on top of a 4×6” PLxSU card and stuck with Washi Tape for a fun layered look.  And if you can’t read it, the quote says “Everyday is a new Adventure” which I thought was PERFECT for this layout because it was about Nicholas being a in a new class at school.  His new adventure. Stampin’ Up! Supplies Used

    And let me say, I’ve been using these cards for MORE than scrapbooking as well.  I made some cards and other fun non-scrapbooking/non-card projects using them for the display boards for convention… so I can’t share them until July, but I’m SO EXCITED to be able to share them then!

    –>>  Plus, stop by the Stylin Stampin Inkspiration blog for even more great ideas for the PLxSU kits (there are 5 different ones available!)  See all the great ideas here

    I hope this gave you some ideas and you can give it a shot yourself!

    spaced shop now sig bar

    June Online Stamp Club Hostess CodeACANDKB4 Use this code to get free exclusive tutorials & project kit!  Learn more

  • What to do When You Forget Your Clear Blocks

    What to do When You Forget Your Clear Blocks

    It is summer vacation here and so we are still figuring out how we are going to spend our time each day.  Yesterday, the kiddos really wanted to go to WiggleWorks, a local kids activity gym.  The nice part, it has a raised bar for the parents to sit at and watch the kids while being able to relax ourselves.  So, I thought it would be a great opportunity for me to get some thank you cards made while the kids ran around like monkeys.10402532_886220878060741_7309019827128172379_n

    I had everything I needed… that is until I went to start stamping and realized that I TOTALLY FORGOT my clear blocks!  OOPS!  So, I had to get a little creative and come up with a new solution, because darn if I wasn’t going to get some progress made on my cards! Smile 

    Now if you are ever in this situation, the one thing I know you will have is your clear block case!  And the nice thing… it is see through on the back side and you already know the stamps cling to it. 

    IMAG0718

    Turns out it totally works!  Maybe not as comfortably as using an actual clear block.  But in a pinch it will totally do it for you. Smile 

    Other suggestions I’ve heard recently are:

    • using a cell phone
    • using the bottom of a drinking glass
    • or just using your fingers (though I don’t think this option works as well as the others by far!)

    How about you?  What is the most creative way you’ve come up with to use your clear stamps when you didn’t have a block?  Leave a comment here or over on Facebook where we’ll be chatting about it and I’ll compile the suggestions for us all to have as tips in our back pocket.

    In the meantime, I was going to make sure you had seen the promotions going on this week.  Because you know, who doesn’t like a great deal?

    10487245_10202496578159089_8877309419064153442_n

    Shop the weekly deals here in the online store

    Only a little over a week left to pick up the limited time starter kit!

    50 starter kit

    This is a great deal and a great way to try out all the benefits of being a demonstrator.  From the online forums and facebook groups, to my Fun n’ Crafty group that swaps and shares ideas daily, to the discount or opportunity to earn extra money with your love of creating!
    YES!  You can get Blendabilities in your Starter Kit!
    Right now Blendabilities are only available as a limited preorder for demonstrators, but when you sign up and select your starter kit, you are able to take advantage of these promotions as well and so you can choose to have Blendabilities in your kit.  Sweet! 

    See my FAQ about joining Stampin’ Up here
    or if you are ready to go, pick out your favorites for your kit and get started here.

    spaced shop now sig bar

    June Online Stamp Club Hostess CodeACANDKB4
    Use this code to get free exclusive tutorials & project kit!  Learn more

  • Congratulations Card in Blue

    Congratulations Card in Blue

    Tis the season for graduations and transitions, so it is a great time to pull out your congratulation stamps and put together some fun congratulations cards.  Today’s card uses on of the new Photopolymer stamps from Stampin’ Up called Bravo – and if you are on my mailing list, you got the PDF tutorial for making this card in your latest newsletter.  If you aren’t getting my newsletters, you can sign up here and you’ll be all set for future tutorials and tips!

    Congratulations Card with Bravo stamp set

    Now you are totally going to laugh at me, but I saw the images from this stamp set long before I got the set (I earned it free as part of a promotion for demonstrators) and I thought,” Oh, this has some nice sentiments and fonts”.

    I knew the set was called “Bravo”, I saw the images… but somehow it wasn’t until I got it in the mail and went to go use it that it suddenly hit me that all of the sentiments were some form of congratulations! Smile  Doh!   How did that totally escape my notice? I had a good laugh for my blockheadedness and got to work on my congratulations stamp.

    Anyway, I did like the idea of using this set to create my own background image.  I started by laying out the stamps on my paper (image side down) until I had positioned everything to where I wanted it.  Then I grabbed my big clear block (block F) and placed it on top of my set of stamps so that when I picked up the block, I had everything exactly where I wanted them.

    2014-05-22 21.06.20

    Then all I had to do was ink and then stamp and my background is done!  Exactly how I wanted it. 

    Add some glimmer stars using the new Itty Bitty Accents punch pack and some ribbon and you are done.  Switch up the colors and you can use this for any school colors or event.  Yay for flexibility!

    Stampin’ Up Supplies Used

    You can do this idea with any of your clear mount stamps – arranging them on your paper first and them positioning the clear block to pick them up and keep them in just the right spot.  So, have fun and give it a try!

    spaced shop now sig bar

    June Online Stamp Club Hostess CodeACANDKB4
    Use this code to get free exclusive tutorials & project kit!  Learn more

  • A Couple Quick Creations Thanks to the Happenings Card Kit

    A Couple Quick Creations Thanks to the Happenings Card Kit

    With the release of the new Stampin’ Up catalog, it is always fun to chat with folks after they have had a little bit of time to flip through it a time or two (or four or twenty… ha ha!)  Always there is a stamp set or accessory or something that has been around for a while that we have TOTALLY MISSED and think are so stinkin’ cute.  And then there are the few items that you see but can’t really picture how cute they can be until you see someone else using them.  For example, this Happenings Card Kit.

    happenings card kit

    I remember completely skimming past it in the Occasions Catalog (yep, this has been around since January) but it wasn’t until they gave us a kit at the Leadership conference in TX that I started to notice it.

    Then finally the last weekend in May I put together a class using this kit which turned out to be a TON of fun!  Everyone got their own card kit- I brought the stamps, ink, and lots of samples for ideas; and we sat around creating our own versions of the 15 cards in the kit.  For example:

    Did you know that the sentiments from the Geometrical stamp set fit really well in the banners?  Since the circle, the banner, and the glimmer paper piece were all die cut – this card was as easy as stamping the sentiment and then assembling!

    Or you can get extra creative with what is left over once you punch out your die cut shapes.  Like this:

    I popped out the big green banner piece and set it aside for another card.  Then there was a little bit left of the green pattern printed on the die cut sheet and so I just grabbed my scissors and started trimming around the patterned shape to get that banner outline!  Totally fun, huh?

    And seriously, multiple people finished all 15 of their cards – each one being unique, I might add, in the 2 or so hours we had allotted!  So, kits can be great for that time saver crafting.

    Stampin’ Up Supplies Used

    I’ll have more projects to share with you using this kit… or if you order this kit from me, I’ll email you a PDF with all 15 of my unique samples!  Gotta make sure you have some fun inspiration to get you started.  Smile

    And if you want some more inspiration, here is one set created by Tanya Cabral at that stamping afternoon:

    Happenings Kit project ideas

    Enjoy and Happy Friday the 13th!

    spaced shop now sig bar

    June Online Stamp Club Hostess CodeACANDKB4
    Use this code to get free exclusive tutorials & project kit!  Learn more

  • Gorgeous Grunge Polaroid Birthday Card

    Gorgeous Grunge Polaroid Birthday Card

    One of the things I especially love about crafting is that two people can take the same supplies and turn out completely different cards with totally different styles.  As you may have noticed from my blog, my style tends to be more clean and simple cards that can be created pretty quickly.  That said, Rosemary Bryson is one of the gals in my downline and she can take the same products I have and seem to effortlessly turn them into stunning works of art!  For example, this card:

    I love how she combined the stamp sets and punches to create such a unique look!

    The hearts were stamped using the Perfect Pennants stamp set and then traced with a white gel pen and then covered in crystal effects.  she also added sequins and glimmer paper dots to add some extra sparkle and shine.  Such a fun idea!

    And it is really hard to tell, but she actually inked the entire paper (the polaroid frame) with versamark and embossed it with white embossing paper to give it that thick, shiny feel!  See, that is something I never would have thought to do.  And add some more embossing on the background paper with Gorgeous Grunge and you have a fun paint splatter effect to keep any part of the card from being boring. Smile 

    Stampin’ Up Supplies Used

    If you happen to be in the Pierce County (Tacoma/Bonney Lake/Puyallup), Washington area, you should definitely check out her classes she is starting up with a new meetup group called the Pierce County Paper Crafters.  I know I want to go myself and get to make some of her amazing creations!

    spaced shop now sig bar

    June Online Stamp Club Hostess CodeACANDKB4
    Use this code to get free exclusive tutorials & project kit!  Learn more

  • Calling all Heroes! And Last Call for In Color Club

    Calling all Heroes! And Last Call for In Color Club

    Whew, so I finally made it and got the last project finished for the Convention Display Boards yesterday… I’ve been heads down since this weekend (hence the lack of blog posts, sorry!) but I got the last one done and everything out the door last night, which feels awesome!

    In the meantime, I’m catching up on what I missed earlier this week and oh my goodness, have you seen the SUPER cute new stamp set that was just released yesterday?

    superheroes promo

    You can find it in the online store or shoot me an email at jennifer@nwstamper.com or call and I’ll get your set in with the group order!

    Last Day to RSVP for the 2014 In Color Club!

    I also wanted to post a quick reminder that today is the last day to let me know you want in for the 2014 In Color Club!  (I’m extending the deadline since I forgot to send out final emails yesterday, oops! Smile )

    image

    How does it work?
    The club runs from June through October and by the end of October, you will have received some of everything in the In Colors!  Each month you will receive the following items in the color of the month:

    • Ink Pad
    • 12 sheets of cardstock
    • Marker
    • Ink Refill
    • 2 In Color Clothespins
    • 2 yds of Ribbon
    • 4- 6″x6″ sheets of the In Color paper stack (2 each of 2 designs)
    • At least one card sample based on the color of the month!

    All for only $26 a month!
    If you aren’t local to me to pick it up, then it is just an additional $5 for priority mail shipping to you.

    With your first month, you will receive an In Color Bookmark & Stampin’ Up catalog (if you haven’t already received one) as well as a set of card bases from ALL the In Colors so you can try them all out from the beginning.

    SAVE YOUR SPOT NOW!
    email me at jennifer@nwstamper.com to save your spot in this club!

    spaced shop now sig bar

    June Online Stamp Club Hostess CodeACANDKB4
    Use this code to get free exclusive tutorials & project kit!  Learn more

  • Love My Layered Flower Punches and Burlap

    Love My Layered Flower Punches and Burlap

    Every month as I start working on cards for my monthly card class and stamp club, I remember why I love doing this.  It is always fun to create a card of a scrapbook page based on what I see, but for me, it gets even more exciting when I think about what I can share with others and how excited they will be to try it out themselves.  I think it challenges me to come up with something that is not only pretty but really fun to make. 

    Well, today’s card is one that I was soooo excited to try out and I loved it so much that I’m using it for some of my thank you cards this month as well as teaching it in my Cute & Classic cards class tonight and my stamp club next week!

    The card is inspired by a card created by my friend Julie Gunhus who was inspired by a card on the Stampin’ Up Incentive Trip cruise.  I’ve never seen the original and I changed up her version for mine, so if you know who made the original, tell them that I think they are brilliant!

    I made mine a skinnier size so that the proportions looked right to me, so the end result is a card that is 3-1/2” x 5-1/2”. 

    I used the new Itty Bitty Accent punches for the smaller flower to go with my Petite Petal flower.  Seriously, when the Petite Petals stamp & punch came out earlier this year I thought it was the smallest flower I would need… but boy do I love the new itty bitty punch pack! 

    This card is so quick and simple to make and just looks gorgeous, don’t you think?  My burlap is just a 1-1/2” piece that I adhered my twine and flowers to the front with glue dots.

    Stampin’ Up Supplies I Used

    I also used the colors Strawberry Slush, Crisp Cantaloupe, and Blushing Bride for my flowers.  If you want to come make this card with me, I’d love to have you join me at my card class tonight in Redmond, WA.  Let me know by RSVP’ing on my calendar or email me at jennifer@nwstamper.com and I’ll reserve one of my extra spots for you!

    spaced shop now sig bar

    June Online Stamp Club Hostess CodeACANDKB4
    Use this code to get free exclusive tutorials & project kit!  Learn more

  • A Long Version of the Pop Up Card in a Box

    A Long Version of the Pop Up Card in a Box

    I planned to post this yesterday but had forgotten about our Fun n’ Crafty Blog Hop (if you haven’t seen the projects CASE’d from the new catalog, you should totally take a look!)  But never fear!  I’m back with my customized version of the card in a box so that it will be a long card AND you can use an 8-1/2” x 11” piece of cardstock.  Here is the card I made as my prototype:

    If you recall, my other card in a box was skinnier and taller.  This was the default size I saw all over the web.  But I really wanted something longer and so I started futzing with the dimensions and other example I saw online.  The important thing for me was to have it only use an 8-1/2” x 11” piece of paper.  Most of the dimensions I kept coming up with would have made me use a 12×12 piece of cardstock, which is totally fine, but I have WAY MORE letter sized paper and so I wanted to use that.

    It still fits in a regular envelope….

    And when you pull it out, it lays flat… see the white looking edges around the cardstock.  Did you know if you sanded Core’dinations cardstock just on the edges you get this cool border look without needing any ink?

    And for the back, I didn’t know what I wanted to say, so I just added more of the Flower Shop and Petite Petal flowers to perk it up.

    I used a TON of tools on this card but that is the fun of this type of card.  You can keep embellishing and decorating to make it as fun and fancy as you want.   I loved the touches of the Hardwood stamp on Crumb Cake cardstock in the background to make it look like a fence.  And making the grass by taking a strip of Pear Pizzazz cardstock and tearing off one edge (the long edge) and then cutting down with the fringe scissors.  It makes it look so much nicer than if you don’t tear and then just cut with the scissors.


    I’ve decided to post my instructions for how to make this card/box. They don’t include the decorating instructions for the card above, but it gives you the templates and directions for making both sizes of the base box.  From there you can decorate in whatever way your heart desires!

    Get the PDF Instructions for the Card in a Box

    If you are going to make this type of card at home you can use the supplies you have lying around, but I HIGHLY RECOMMEND you use the following for the best effect on your card:

    imageimage
    Sticky Strip – for making sure everything holds together because you will be folding and opening and moving it a LOTWindow Sheets – So your pop up elements can have some movement and take center stage without cardstock strips getting in your way


    So, I hope you enjoy this card and tutorial – and if you do, leave me a comment and let me know!  I don’t normally do tutorials but I thought you might like this one.

    spaced shop now sig bar

    June Online Stamp Club Hostess CodeACANDKB4
    Use this code to get free exclusive tutorials & project kit!  Learn more

     Stampin’ Up Supplies Used
    Stamps – Flower Shop, Petite Petals, Hardwood, Delightful Dozen (retired)

    Ink – Chocolate Chip, Daffodil Delight, Blushing Bride, Primrose Petals (retired), Pool Party
    Paper – Crumb Cake cardstock, Whisper White cardstock,  Subtles Designer Series Paper Stack, Raspberry Ripple Core’dinations cardstock (retired), Pear Pizzazz cardstock, So Saffron, Window Sheets
    Accessories – Pansy Punch, Petite Petals Punch, Fringe Scissors, Decorative Label Punch, Wide Oval punch, Bitty Butterfly Punch, Subtles candy dots

  • Check out that NEW Fun n’ Crafty Blog Hop!

    10383580_10204078098778853_972456530417495748_n
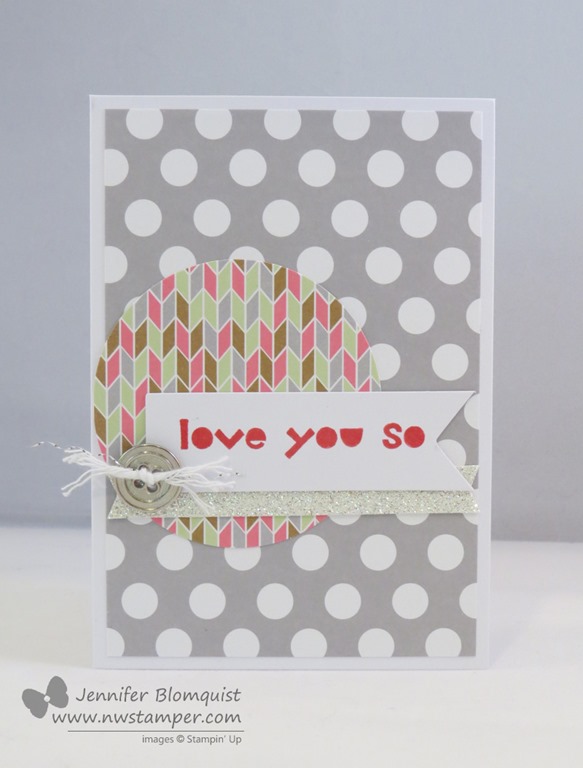
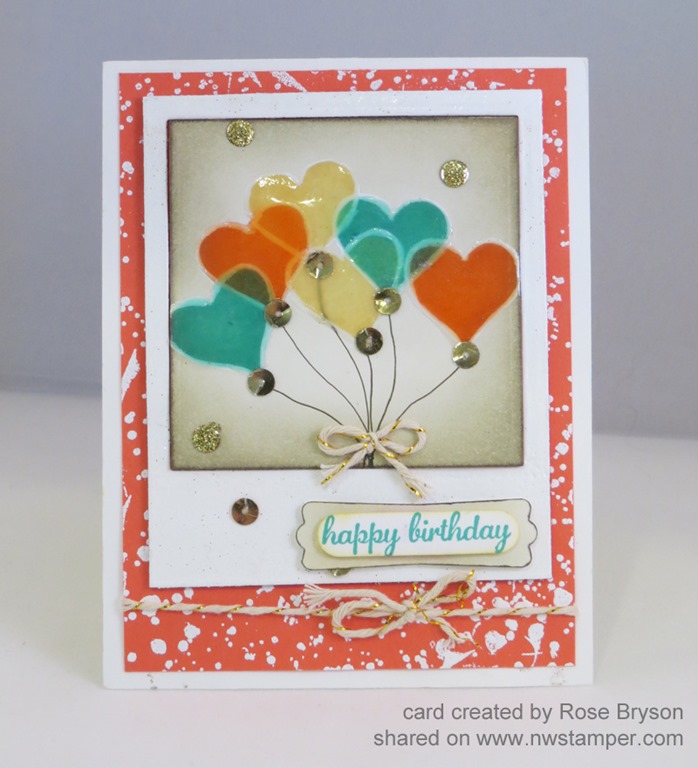
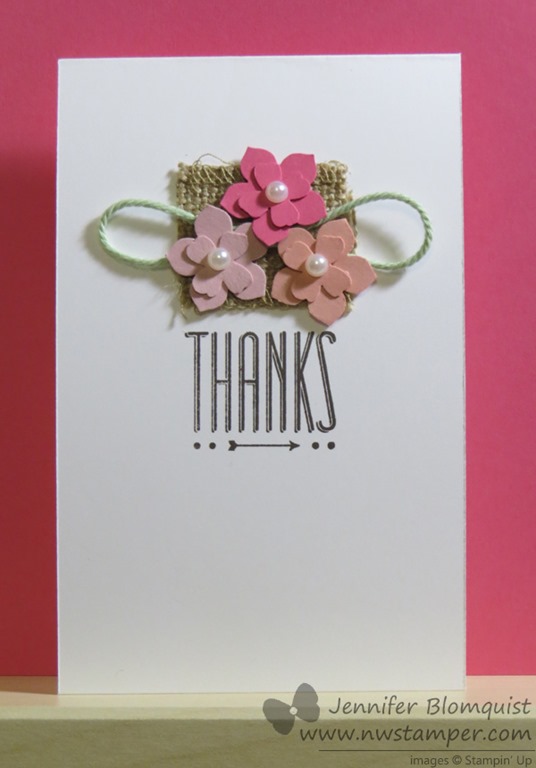
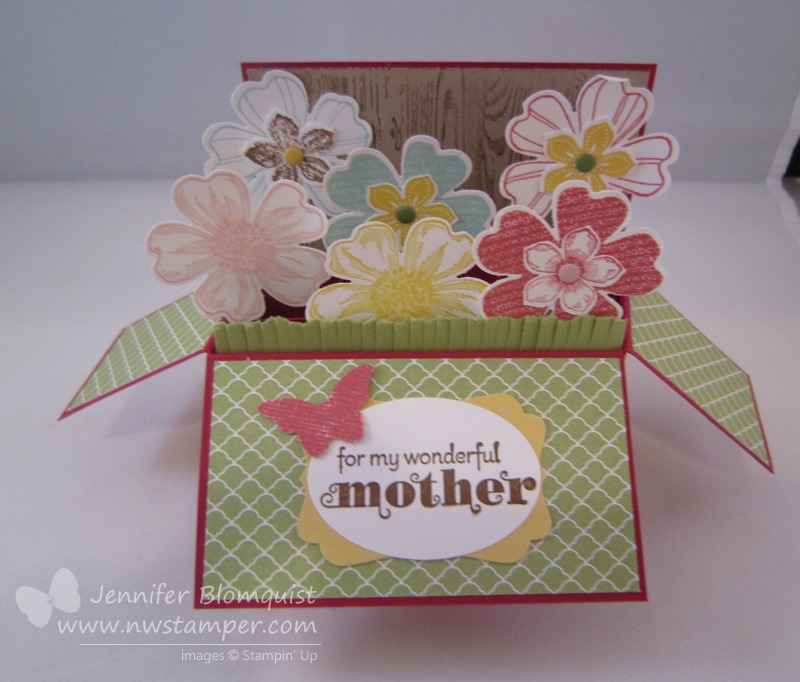
Welcome to the Fun n’ Crafty Blog Hop for June! I’ve been seeing the amazing talent of the folks in my Fun n’ Crafty group of demonstrators and I thought it would be fun for us to start a monthly hop to showcase everyone’s work and give you lots of ideas around different themes.

    I’m so excited for this inaugural blog hop and hope you enjoy all the inspiration.  This month we will be showcasing project ideas from the NEW Stampin’ Up annual catalog. So make sure to check out the list of stops on the hop at the bottom of this post to see them all!

    So, here is my contribution… a lovely catalog CASE only my card is using the new Blended Blooms stamp.

    Here is my inspiration for the card… you can find it on page 170 in your catalog.  It is showing the new Sweetbriar Rose stamp, which I don’t have…and I don’t have the paper yet either.  But that is ok, you just make it work with what you have!image

    There were lots of cards and projects that I saw that I really wanted to try but this one jumped out at me and I had to give it a go.   I liked the idea of coloring directly on a non-white cardstock and I figured it was a good excuse to bust out my Blendabilities markers.  (Stampin’ Up’s new alcohol ink markers ~ available now to demonstrators and coming soon to everyone later this summer)

    And I’m pretty excited because this is my first real attempt using my Blendabilties and I think it turned out pretty well.  Now imagine how this would look on white cardstock!

    I loved all the little touches in this card too.  From the bit of White Tea Lace Doilies to the faux stitchiing at the edge of each piece of designer paper… because you KNOW I don’t have a sewing machine or the time to do much of any hand stitching. 🙂

    Now one thing you’ll learn from using Blendabilities is that they do bleed through the paper.  Thankfully, in some cases, it actually looks pretty pretty on the inside. Don’t you think?

    I made one more card but in the interest of time, I’ll share it later this week so you can move on to see some of the other great projects in the hop!

    So make sure you visit the links below and make sure to leave them some love by commenting and letting them know what you think of their interpretations!

    Blog Hop Participants:


    And if you are thinking of joining Stampin’ Up (or just want to get your hands on Blendabilities now!) take advantage of the $50 Starter Kit promotion through the end of June.  And if you join with myself or one of the folks on the blog hop, we’d love to welcome you into our Fun n’ Crafty stampers group and invite you to participate in our hop too!

    spaced shop now sig bar

    June Online Stamp Club Hostess CodeACANDKB4
    Use this code to get free exclusive tutorials & project kit!  Learn more

     vintage-Blended-Blooms-thank-you-card.jpgStampin’ Up Supplies Used
    Stamps – Blended Blooms, Hip Notes

    Ink – Memento Black, Mossy Meadow, Blendabilities Marker sets (Daffodil Delight, Pumpkin Pie), Crumb Cake marker
    Paper – Crumb Cake cardstock, Whisper White cardstock, Regals Designer Series Paper Stack
    Accessories – Banner punch, Tea Lace Doilies, Essentials Piercing Pack, Piercing Pad, Piercing tool

  • Pop Up Card in a Box featuring Create a Cupcake

    Pop Up Card in a Box featuring Create a Cupcake

    The new Stampin’ up catalog is here and while I excitedly placed my first order from it yesterday, I thought I would show a few projects today and tomorrow that feature some fun ideas and products that are going away after tomorrow.  The first project (well both today and tomorrow) will be card in a box – just in two different sizes!

    This one features the Create a Cupcake stamp set that is retiring after tomorrow.  I’m a bit sad because I really like the sentiments that go with this set…. here is the sentiments I used from the set for the backside of the card.

    Now you may be thinking… how is this considered a CARD when it looks like a BOX?  Check it out, here is what it looks like in an envelope:

    Crazy, right?!  It totally fits!  That is the brilliance of this card design.  It folds down flat to be a mailable card but when the recipient pulls it out of the envelope it pops open to be a box with fun jiggly bits that can sit on their table or shelf.

    This is what it looks like when it is collapsed flat after they pull it out of their envelope.

    I thought my outside needed something which is why I added the Coastal Cabana cardstock with some stamping from the Perfect Pennants stamp set.  I also used that same set for the front “Make a Wish” sentiment too.  So happy this set at least is continuing on into the new catalog. Smile

    And if you like the cupcakes, (they really do make fun birthday cards)… or as one person said, muffins for her holiday baking.  You have two options right now:


    Create a Cupcake Stamp Set (retiring 6/4)~OR~  Cupcake Partyboth of which coordinate with the Cupcake Punch
    imageimageimage


    These cards aren’t hard to make, just time consuming to decorate if you get fancy.  Smile  I have to find my instructions for putting them together but I’ll post them TOMORROW if you want to stop back by to see the other horizontal design for this style of card.


    I’m getting ready to close my first Product Sampler / Product Share for the new catalog! If you are interested in samplers for the new designer papers or ribbon, make sure you let me know ASAP!  Details can be found here.

    spaced shop now sig bar

    June Online Stamp Club Hostess CodeACANDKB4
    Use this code to get free exclusive tutorials & project kit!  Learn more