Northwest Stamper

Tag: jennifer blomquist

  • Lightly Sponged Woodland Thanks Card

    As we are winding down our Thanksgiving holiday weekend, I’m trying to get back to my computer and back in the groove of getting all of these project photos off my camera and up on the blog to share.  Because, making projects is fun… sharing them is even MORE fun!

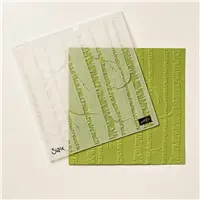
    Today, I have a card I put together using the Woodland embossing folder and some simple sponging!  We were told the night before Thanksgiving that this embossing folder is close to selling out permanently, so if this was on your wishlist, I wouldn’t wait too long to get it!   I’m waiting to see when Stampin’ Up opens tomorrow if we have an update on it, but for now you can still orders yours in the online store.

    Tips for making this card:

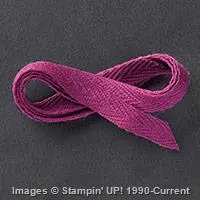
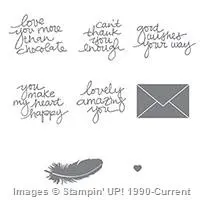
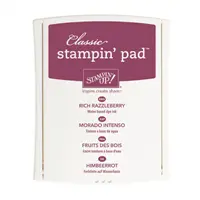
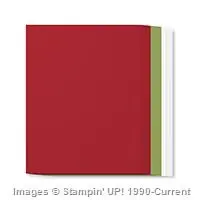
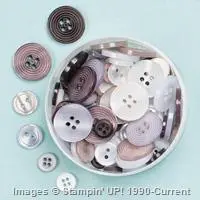
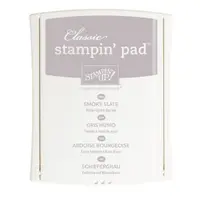
    • Keep the colors simple – You know me, I love clean and simple cards.  The trick is to pick a couple neutral colors and one to two brighter colors to add the POP of color!  In this case, I stuck with Very Vanilla, Soft Suede, Gold, and Rich Razzleberry for my pop!
    • Try sponging your embossing folders – The woodland embossing folder is perfect for this technique!  Run your paper through the embossing folder and then when it comes out, use a sponge dauber to lightly rub ink over the raised areas!
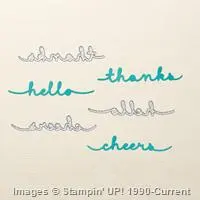
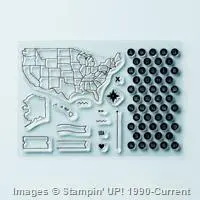
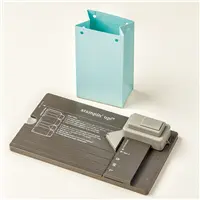
    • Help the word die cuts pop out quick & easy – I waited to share the Precision Plate for the BigShot with folks in my class until I could really see why it made a difference.  And using these thin word dies, I DO see a difference!  I find the words are much easier to pop out when I use the precision plate, as well as especially when you are using easily dentable paper like the foil papers, you don’t get the “polka dot effect” of the paper pushing up into the holes in the die.  So, now I ALWAYS use my precision plate when cutting out thin word dies.
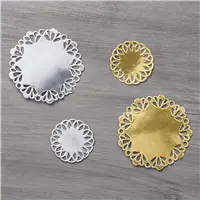
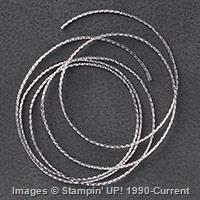
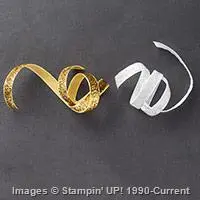
    • Extend your Metallic Doilies to the perfect size – I have been loving the Metallic Doilies (and love that they are 30% off through tomorrow in the Online Extravaganza sale!) and they often give me the right touch of shine on my card.  But sometimes you need them to be just a little bit bigger than they are.  So, grab those scissors and snip away!  I cut one of the smaller doilies in half and stretched it out so some peeked out above and below my sentiment!
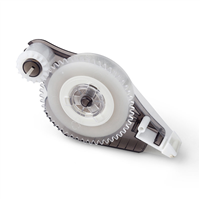
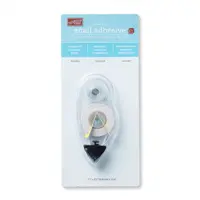
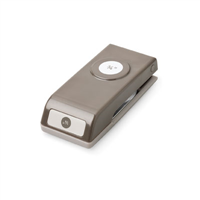
    • Use the fine tip glue pen for glueing details diecuts a breeze – the thin lines of the words and the metallic doilies can sometimes be a challenge to glue.  Thankfully, the Fine Tip glue pen makes it easy to get it all glued without the glue showing!
      Here is the trick:  Use the glue from the fine tip glue pen sparingly!  Don’t draw the lines of the paper with the glue, instead place dots of glue in areas with larger spots of paper and use the tip of the glue pen to spread the glue out along the finer lines!  This keeps the glue from smooshing out the sides.

    Don’t forget!  The online extravaganza ends tomorrow with one more set of 24hr deals!

    Just a reminder that the deals end tomorrow of when they sell out!  Tomorrow they will be adding 3 sale items:

    • Project Life Starter Bundle!  You get a 12×12 album, This is the Life card kit, This is the Life accessory kit, and page protectors in a bundle for 30% off!  Everything you need to get your pictures from your last vacation or just the last year, in an album and off your computer or phone.  It makes it easy and cute without too much thinking!
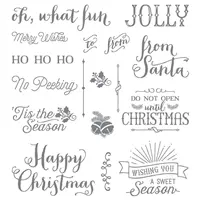
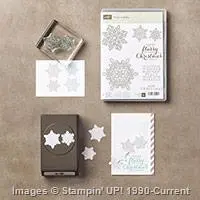
    • Christmas Tagables Bundle!  Get a set of a TON of christmas gift tag stamps plus the Scalloped Tag Topper together in a bundle for 20% off.  Just add some of that paper you may or may not have been hoarding at home Winking smile and you are ready to go!
    • Tiny Triangles embossing folder.  And just to be different, they added an embossing folder for 20% off on Monday only!  Add fun geometric designs to your projects.

    I’ll be updating my list once I get an update from Stampin’ Up!  But you can see all the sale items here:

    Online Extravaganza Sale List!  Only available through Monday

    NWstamper signature_thumb[9]

    order online button for sig 3_thumb[4]

    Use Hostess Code PU2EYZJY at check out to get a special thank you from me!

    See all the tutorials & classes by mail here

    Check out the Holiday Catalog Retiring List & Sold Out Updates

    Save 25% on the Latest Weekly Deals

    Don’t miss up to 60% off in the online Clearance Rack!

    Project Supplies Used:

  • Top 10 Picks from the Holiday Online Extravaganza Sale

    So, what do you think of the Online Extravaganza this year?  Lots of great deals on both fun & flashy items along with what I consider staples for my craft room.  So to help you filter through all the fun and cute stuff, I put together my top 5 fun items and top 5 craft room staples for you.  I even put together a video so you could hear more about why I put them on my list along with a few samples. Smile I’ll share some of it here, but feel free to check out the video too!

    Top 5 Fun Items from the Online Extravaganza

    1. Lovely Amazing You stamp set – this stamp set is so versatile and has some great sentiments.  I fell in love with it when I first saw it and have never regretted the purchase!
    2. Mini Treat Bag Thinlit & Accessories – the perfect size for gift card holders, candy/sweets treat bags, or just little love notes.  Plus all the accessories make it a great value.
    3. Metal Rimmed Pearls – easy to use and oh so classy!
    4. Map it Out stamp set – great for “we’ve moved”, “I miss you” or just we were here cards and scrapbook pages.
    5. Sweetheart Punch – just a great heart shape and 50% off!

    Price: $15.00
    20% off
    SALE $12.00

    Price: $40.00
    40% off
    SALE $24.00

    Price: $5.00
    40% off
    SALE $3.00

    Price: $14.00
    30% off
    SALE 9.80

    Price: $16.00
    50% off
    SALE $8.00

    Top 5 Craft Room Staples from the Online Extravaganza

    1. Magnetic Platform – makes your life so easy when you have those thin dies, especially ones you want to have line up perfectly with a stamped image!
    2. Fast Fuse adhesive refills – a super strong adhesive that is great for cards & 3D items
    3. Memento Black Ink Pad – my go-to black ink for use with my photopolymer stamps and coloring with alcohol ink markers
    4. Metallic Doilies – a classy touch with no fuss
    5. Satin Ribbon – at 50% off, these classic ribbons are perfect for any project!

    Price: $40.00
    40% off
    SALE $24.00

    Price: $7.50
    40% off
    SALE $4.50

    Price: $6.00
    40% off
    SALE $3.60

    Price: $4.00
    30% off
    SALE $2.80

    Price: $7.00
    50% off
    SALE $3.50

    Check out the video as I share these items along with some samples using them!  (reading this in email, click here to view the video)


    2015 Online Extravaganza – See What’s On Sale! pdf

    NWstamper signature_thumb[9]

    order online button for sig 3_thumb[4]

    Use Hostess Code PU2EYZJY at check out to get a special thank you from me!

    See all the tutorials & classes by mail here

    Check out the Holiday Catalog Retiring List & Sold Out Updates

    Save 25% on the Latest Weekly Deals

    Don’t miss up to 60% off in the online Clearance Rack!

  • It’s an Online Extravaganza! Up to 50% off over 80 items starts NOW!

    It’s an Online Extravaganza! Up to 50% off over 80 items starts NOW!

    If you are on my newsletter, hopefully you printed out your wishlist and browsed the sneak peek list I sent you because NOW IS THE TIME!  Smile  No need to brave the crazy parking lots (and let me tell you, I didn’t realize how brave you have to be until attempting Costco on the Sunday afternoon before Thanksgiving yesterday!  Eek! That was a mad house!)

    image

    If you still need a wishlist, you can print out your own and feel super organized as you are going through all the deals!  And figure out what you are getting now and what you are going to email your family and let them know to get for you this week for early Christmas shopping. Winking smile

    Download your wishlist here
    wishlist

    A few things to know about the sale:

    • The sale runs MONDAY November 23rd – 30th
    • There are BONUS sale items in two 24hr sale times
      – Bonus time #1:  November 23rd  (buy 3 get 1 free select designer paper & select punch boards)
      – Bonus time #2:  November 30th  (select product bundles & tiny triangles embossing folder)
    • Online Extravaganza sale prices are while supplies last… so don’t wait too long
    • Have a list that is over $100 in product?  Consider making your purchase through the Stampin’ Up starter kit!  You can not only increase your savings by being able to select $125 in product for only $100, but then you will also be set to join my Fun n’ Crafty Stampers group, get in on the December spring catalog preorder, get 20% off future purchases,and more!  email me for more details.

    TODAY ONLY!  24hr Special bonus deals – MONDAY 11/23 ONLY!

    There is so much good stuff, but I wanted to make sure you didn’t miss out on some of the specials that are only good through today:
    image

    >>> Click here to see pictures & SHOP EVERYTHING on sale in the Online Extravaganza! <<<

    Use Hostess Code PU2EYZJY at check out to get a special thank you from me!

    I’ll be back tomorrow with a few ideas for my top 5 items that are part of the online sale!  So check back for more great ways to use your favorite supplies!

    Additional Ways to Save & Score!

    Got questions or want a personal shopper to take care of everything for you?  Email me at jennifer@nwstamper.com and I’ll get you all set up!

    NWstamper signature_thumb[9]

    order online button for sig 3_thumb[4]


  • Sparkly Sleigh Scene with the Sleigh Ride Edgelits

    I remember when I first saw the Jingle all the Way stamp set and Sleigh Ride edgelits, I wasn’t sure what I thought about them.  But after playing with them a bit, I think they can pull together rather stunning cards and projects… don’t you agree?

    PS – these dies & stamps are on the Holiday Catalog retiring list, so make sure to grab them before they are gone!

    I wanted to use these dies in a project for my Stamp Club but wanted to do something a little bit different than the normal, 3 strips of paper across the full cardfront with the die cut edges.  So I got the idea in my head to go for a snowglobe effect and this card started coming together!  Let me share a little about how I made it:

    • I started by cutting out a circle using the Circle Framelits to use as my background piece on which I would be layering everything else.  I also used that same sized circle to cut out a piece of Crumb Cake cardstock, but when I cut the Crumb Cake cardstock, I also layered the NEXT-SMALLEST circle framelit inside so that I was cutting using 2 framelits at the same time, both nested together when cutting.  This gave me the brown frame to go around the outside of my snow scene.
    • Then it was just cutting the pieces for the different layers.  You need:
      – a piece of Dazzling Diamond glimmer paper
      – 3 strips of Very Vanilla cardstock: 2 with the edge cut using the tree edgelits & 1 with the edge cut using the sleigh edgelit
      – 1 strip of Crumb Cake cardstock with the edge cut using the sleigh edgelit.
    • TIP – Use the Precision Plate when cutting out your sleigh ride edgelits!  It makes them come out of the dies so much easier and WITHOUT breakage of skinny pieces of paper!
    • Trim off the sleigh and horse from the Very Vanilla piece and then start layering your strips onto your Very Vanilla circle you cut out in the beginning. Trim the parts that hang over the edge of the circle and then glue the frame down!
    • Then I just used my Hardwood background stamp to give a pattern to the circle I cut out from the middle of the Crumb Cake cardstock and cut it in half to place behind my main circle.
    • Add the retiring Snowflake elements piece with an Iced Rhinestone in the center and you have a gorgeous scene!

    If you were at the OnStage event in Vancouver, I had this card up on the almost artisan display board.  And you’ll agree it is even prettier and more sparkly in person!

    So, don’t forget to get the Sleigh Ride edgelits on your wishlist before they are gone!  Smile  Or bump it up to the bundle and save with the Jingle All The Way bundle that includes the edgelits and coordinating stamp set!

    Get your Wishlists Ready! The BIG Online Extravaganza is Coming!

    I just learned the details of the big “Black Friday” sale that Stampin’ Up is holding this year.  They will be starting Nov 23rd (Monday) and going through Nov 30th (the following Monday) with One-Day Doorbusters each Monday!  Plus lots of awesome items for 20-50% off!  I’ll be sending out email with more details and easier ways to look (not on the mailing list? join here!), but you can get a peek now using this SALE LIST:

    2015 Online Extravaganza – See What’s On Sale! pdf

    NWstamper signature_thumb[9]

    order online button for sig 3_thumb[4]

    Use Hostess Code PU2EYZJY at check out to get a special thank you from me!

    Through 11/18 – Get a free Class by Mail tutorial with every $35 purchase! See all the classes by mail here

    Check out the Holiday Catalog Retiring List & Sold Out Updates

    Save 25% on the Latest Weekly Deals

    Don’t miss up to 60% off in the online Clearance Rack!

  • Fun at OnStage & a Few 2016 Occasion Catalog Sneak Peeks

    Get ready for it!  The cone of silence has been lifted and I can finally share more about what I saw at OnStage this weekend and all the crazy cute stuff I saw while I was there!  I still can’t show you the inside of the catalog for a while, and my first preordered items won’t be getting here until later this week… but I bet there is enough here to at least give you a fun fix for now!

    Ok, but before I get to the “Coming Soon” Stuff, I want to quickly mention the new things that are more “Now” and time sensitive in nature. Smile  I’m very sensitive that way… hee hee

    Holiday Catalog Retiring Product List is Released!

    Stampin’ Up announced yesterday the full list of items in the Holiday Catalog that will be discontinued at the end of the catalog period.  But the most important part is that they are WHILE SUPPLIES LAST!  So, don’t wait until January 4th to get your favorites.

    stampin up holiday retiring list 2015

    You can also check out the list in PDF form … either organized by Catagory or listed by Catalog Page Number
    I’ll keep you posted as things sell out, but grab your must haves early so you won’t be disappointed later!

    Shop the Holiday Catalog online here

    See the Holiday Catalog in PDF form here

    New Weekly Deals too!

    And since we love deals, how about the new Weekly Deals too?

    11693846_10205621061234939_8007339934914946127_n

    See the weekly deals online here

    Monthly Hostess CodePU2EYZJY – enter this at checkout and receive a special thank you from me!

    Ok, back to the sneak peeks!

    Like I mentioned before, OnStage is Stampin’ Up’s new event to replace Convention and Leadership.  I went into the weekend not really knowing what to expect.  They had been fairly hush hush about what exactly would be happening but they promised a great time and the chance to get the Occasions Catalog and Sale-a-Bration catalogs in our hot little hands first!  And you KNOW I’m a totally sucker for deals and for sneak peeks!  One thing they didn’t change though, was Stampin’ Up’s habit of starting event days EARLY!  Like, check in starting at 7:30 and festivities were on by 8:30!  And though I had stayed up until almost 1am on my sugar high from going out with my mom, Tanya, and Janet Wakeland to Voodoo Doughnuts…mmm so good…

    2015-11-14 07.34.072015-11-13 22.29.52

    I was still able to get my butt out of bed (barely) and get over to the event location.

    2015-11-14 08.02.02

    Thankfully, I had a few friends who got there extra early and were able to snag a table for our group.  It wasn’t too full… the venue had a lot of space, but it was still 400 crazy stampers eager to find a seat and start seeing what was new and coming soon!

    IMG_1347IMG_1348

    See those tables in the front of that bottom picture?  That was ROWS of Big Shot machines!  So much amazing stuff we got to try that goes with the Big Shot!  If you don’t have one now, make sure to put one on your Christmas list!  And then give your family my email (jennifer@nwstamper.com) to make sure you get it and all the perfect complimentary pieces in time for gift giving. Winking smile

    2015-11-14 08.38.58

    It was fun to have Greg Pitt be our MC.  Though his official title is Director of Distribution Services (getting our goodies from the warehouse to a box to us!) as soon as he started talking I recognized his voice – he is the voice of Stampin’ Up convention!  Like the “please welcome to the stage…” guy.  So, that was fun and he had a good humor too!

    IMG_1285

    We started out with a video from the OnStage Live event in Brussels where we heard about the company stats and goals for the next year… and then on to the good stuff!  Stamping presentations and the Occasions Catalog reveal!  Lets just say we were super duper swooper excited to get our catalogs and see the new stuff!

    2015-11-14 11.12.26

    And since that is a terrible picture if you are trying to see the cover of the catalog.  Here is an only slightly better picture. Smile  Really, I was trying for you, but it was dark out when I realized the first picture was blurry!

    2016 Stampin Up occasions catalog cover

    SPOILER ALERT! 

    Ok, if you don’t want to see anything new that is coming up… look no further!  I don’t know who you are… I could not have your restraint Smile But if that is you, come back tomorrow for more fun non-spoiler projects!

    So, we started out with video stamping presentations… including one by the Stampin’ Up president Rich Jutkins.  Turns out he is funny AND can stamp!

    2015-11-14 09.46.20

    Here is his card using a new hostess set from the Occasions catalog (which starts Jan 5th as an FYI)

    IMG_1325Oh, and love how he did this tag

    IMG_1327

    We have some cool new pop-out dies for the inside of your cards:

    2015-11-14 09.12.40

    IMG_1382

    And just so many great stamp/die or stamp/punch combinations.  Seriously people, watch for those bundles because there is lots of great stuff and lots of saving to be doing.  Didn’t I tell you earlier I’m a sucker for a deal? Winking smile

    It was such an exciting morning filled with stamping, prize patrols, and sweets… I had one more voodoo doughnut with me for the drive home, but I just couldn’t wait and had to keep the adrenaline and sugar high going!  FYI – the Grape Ape donut and new stamps are an excellent combination!2015-11-14 10.20.39

    So I know you are here for the sneak peeks, so here are a TON for you!

    IMG_1328IMG_1331Isn’t it so cute!  That card was a combination of Sale-a-Bration stamp set and cut Honeycomb embellishments in the Occasions catalog.  I can’t believe I forgot to take a picture of my FAVORITE image from the Sale-a-Bration set, a cute chick!  It was the very top Sale-a-Bration wishlist item for me!

    And speaking of Sale-a-bration, how about another card idea using new papers and dies from the Occasions catalog with a coordination stamp set from the Sale-a-bration catalog:

    Fun fact, the stamp set that coordnates with the flower die above, actually ALSO coordinates with the Designer Paper!  Look, you can stamp added details onto you paper!  Compare the left and right sheet.

    IMG_1345

    New stamp set with matching punch

    New ribbon

    New project kits

    New sunburst die

    New stamps

    Another new die and BLUSHING BRIDE GLIMMER PAPER!  Swoon!

    More new goodies

    Yes!  These are stamped images using a 3 step stamping set like the past Lotus Blossom!

    Dies you HAVE TO HAVE

    And lots more

    In the end, everyone won a prize patrol, and I was so happy that Stacey (on the left) won the stamp set she wanted most of all from the catalog!  How perfect was that!

    2015-11-14 16.10.48-1

    I was so grateful to have a number of my Fun n’ Crafty Stampers with me to stamp with, debate, discuss, and share the experience.  Plus my many new and long time stamping friends from across the region.


    Want to see the whole Occasions Catalog and Sale-a-Bration Catalog Now?

    Unfortunately, I can’t share the catalog for a while now, but all demonstrators as of today are able to view the catalogs online and starting December 3rd we will be able to ORDER from them too as part of a preorder!

    But that doesn’t mean you can’t join in on the fun!

    Just pick our your favorite wishlist items for a custom Stampin’ Up starter kit and for only $99 you can join the Stampin’ Up demonstrator family and get to pick out $125 in product to be shipped to your house (free shipping on your kit too!).  Plus, you’ll get to start preordering the newest stuff on December 3rd and all the while, participate in our awesome Fun n’ Crafty team community through our Facebook group or connecting with us at events or with others in your area. Smile  We’d love to welcome you!

    join my team

    NWstamper signature_thumb[9]

    order online button for sig 3_thumb[4]

    Use Hostess Code PU2EYZJY at check out to get a special thank you from me!

    Through 11/18 – Get a free Class by Mail tutorial with every $35 purchase! See all the classes by mail here

    Check out the Holiday Catalog Retiring List & Sold Out Updates

    Save 25% on the Latest Weekly Deals

    Don’t miss up to 60% off in the online Clearance Rack!

  • See what is Retiring from the 2015 Stampin’ Up Holiday Catalog

    So, Stampin’ Up is trying something new with the Holiday Catalog, and that is giving us a heads up what items will be carrying over (or still available to purchase after the Holiday Catalog is done) and which items will be going away for good as soon as January 5th hits.  The big thing to note though by telling us this, is that they are also making these retiring items only available while supplies last.  Which means I’m sure some items will sell out.  So since I just got this list this morning, I wanted to make sure you had it as well in case there is something you HAVE TO HAVE and you want to make sure to guarantee getting it.

    So without further ado…

    Holiday catalog retiring list 2015

    See what is going away in these lists:

    >>> NEW!  Photographic View!  See everything with pictures and links <<<

    PDF list (sorted by type)
    PDF list (sorted by catalog page number)

    I have a couple items that I was sure would be sticking around and so I’m sad to see they are only available for a limited time more.


    And while I’m not surprised, I’ll be sad to see Happy Scenes go too.  You know the stamp set from this card (and those snowflake elements)

    see the blog post for this card here

    I’ll keep you posted as things sell out, but grab your must haves early so you won’t be disappointed later!

    Shop the Holiday Catalog online here

    See the Holiday Catalog in PDF form here

    Did you miss it?  Pick any of my Classes by Mail and get the tutorial free when you shop with me through Wednesday!

    I have had folks asking for a place to see all of my classes by mail and project tutorials.  Well, I finally have them all consolidated into one place.  I’ll still be making some changes and improvements to the layout of the page and adding some more descriptions, but they are up and ready for you!

    >>> Available Classes by Mail and Tutorials <<<

    Just email me with your order or
    shop online at www.nwstamper.com/shop with hostess code PU2EYZJY
    (if your order is over $150, skip the hostess code and you’ll get the benefits & the tutorial!)

    Then email me with which tutorial you would like sent to you for FREE!
    Offer good through 11/18/2015

    NWstamper signature_thumb[9]

    order online button for sig 3_thumb[4]

    But use Hostess Code PU2EYZJY to get a special thank you from me!

  • OnStage Vancouver Bound!

    OnStage Vancouver Bound!

    It’s the day I’ve been waiting for, the first of the new style of company event from Stampin’ Up called OnStage!  This is the new convention (OnStage Live) coordinated with 1 day regional events in the countries in the company.  So OnStage Live was held in Brussels and so, since I wasn’t making that flight, I am attending one of the one day OnStage Local events – this time in Vancouver, WA.

    12250013_10207775432326618_8206344903753067904_n

    After a crazy drive from Seattle Friday afternoon (seriously people between traffic and CRAZY rains, what I was expecting to be 2 1/2 hrs turned into 4!) we made it into town in time to drop off my travel companions – my mom and my downline Tanya at our hotel and then I headed over to the event center for a leaders dinner and training!

    2015-11-13 18.28.07

    I got to chat with some great ladies and have some yummy food (should have taken a picture of the cheesecake… sooo good!).

    2015-11-13 19.09.10

    We also got a sweet gift and got to pick up our Sneak Peek stamp set a little early. 

    And while I’d love to share with you the picture of the sneak peek stuff, SU is making us stay mum until Monday night.  So I can tell you though, that I’ve already jumped up and down clapping in excitement for at least one thing!  And I haven’t even seen the upcoming spring catalog yet!  So, I’ll keep you posted after seeing all the goodies today. Smile

    Now it is off to join up with my team for a FULL day of fun and prizes!  If you want to follow along, feel free to join me over on my Facebook Page – http://facebook.com/nwstamper where I’ll be posting throughout the day. 

    I stayed up late last night working on my swaps, so I’ll be back soon to blog about mine and other great swaps I get when I’m there.
    2015-11-14 00.31.39
    Here we go!
    NWstamper signature_thumb[9]

    order online button for sig 3_thumb[4]

    But use Hostess Code PU2EYZJY to get a special thank you from me!

  • A Clean and Simple Embossed Happy Hello with Blended Bloom

    Sometimes I get all caught up in the fun of playing with all my punches, ribbons, and accessories, that I forget to go back to the basics…. ink, stamps, and paper!  But I shared this card with my Stamp Club recently and loved the elegance of it and the simplicity. 

    Tips for making this card:

    • Pick your favorite color and feature it on your card and then stick to simple neutrals to break it up.  In this case, I just used Rich Razzleberry and Whisper White… and it turns out, that is all the color you need!
    • Keep it from being too flat by spicing it up with two of my favorite tricks:  Heat Embossing and Sponging!
    • I started by heat embossing the Blended Bloom flower in the lower left corner of my Rich Razzleberry cardstock.  To do this:
        –  Lightly wipe over the area with the Embossing Buddy (it is a little cloth pouch with powder inside), this de-statics the paper and makes sure the embossing powder only sticks to the stamped lines and doesn’t give you speckles in other places!
        –  Stamp your image using Versamark Ink (the clear watermarking ink)
        –  Generously dump embossing powder over the stamped image to make sure all the ink is covered in powder.
        –  Tap off any excess powder onto a piece of computer paper or the grid paper mats are perfect for this!  And then dump the excess powder back into the container.
        –  Use the heat tool to blow hot air over the embossing powder to melt it into the shiny awesome raised image that you want!
    • Once you have your embossed flower, tap a sponge dauber into Rich Razzleberry ink and then swirl it over the center of your flower to get the darker middle.  Easy as that!
    • Sponge all the way around the edges of the stamped card for a darker edge.
    • Do the same thing with the sentiment by heat embossing, I used the “A Happy Hello” from the Tin of Cards stamp set (LOVE IT!) and added a bit of the trim from the same stamp set in Rich Razzleberry ink.
    • Then just adhere your layers and you are done!

    See, I told you easy… and fun too!

    Hmm… speaking of easy, this is inspiring me. I think I may use this same general idea to create some swaps for OnStage Local – Stampin’ Up’s new live events that is the replacement for Convention and Regionals!  I’ll be headed to Vancouver, WA tomorrow for this fun event starting with a leaders dinner Friday night and then the main event on Saturday!  We’ll be getting a sneak peek at what is coming new in January 2016 with the spring Occasions catalog and Sale-a-Bration!  Woo hoo!  Can’t wait to see and then share. Smile

    And in other exciting news….

    Class by Mail Page is Up! See available kits and tutorials from past classes now!

    I have had folks asking for a place to see all of my classes by mail and project tutorials.  Well, I finally have them all consolidated into one place.  I’ll still be making some changes and improvements to the layout of the page and adding some more descriptions, but they are up and ready for you!

    >>> Available Classes by Mail and Tutorials <<<

    I also wanted to do something to say thank you as part of my own personal Gratitude week, so I’m offering a free tutorial as a thank you gift for you.

    Just email me with your order
    or
    shop online at www.nwstamper.com/shop with hostess code PU2EYZJY
    (if your order is over $150, skip the hostess code and you’ll get the benefits & the tutorial!)

    Then email me with which tutorial you would like sent to you for FREE! 
    Offer good through 11/18/2015

    NWstamper signature_thumb[9]

    order online button for sig 3_thumb[4]

    But use Hostess Code PU2EYZJY to get a special thank you from me!

    Project Supplies Used:

  • Easy and Classy Watercoloring with Remarkable You

    As I go to post this picture, I realized that if it was a poppy, it would have been even more perfect for Veteran’s Day today.  But that is ok… it is still fair to say to all the men and women who have joined our Armed Forces and been willing to do what is needed to protect our country and folks who cannot protect themselves around the world… thank you.  You are remarkable!

    Isn’t this such a pretty card!  It just makes me happy when I see it.  And I’ll tell you, I can’t really take the credit for it.  While I did make this copy you see here, it is a CASE from the lovely Diane Dimich and you can see her original here.  But I needed an idea for card class and wanted to use this stamp set because I LOVE watercoloring with it, and I just loved the colors and how easy to put together this card is.

    Tips for making this card:

    • One of the best things about this card is how easy it is to put together… here is all you need for it:
        –  Basic Black cardstock for the base – 5 1/2’ x 8 1/2”
        –  Whisper White cardstock – 4” x 5 1/4”
        –  Polka Dot designer paper from the Neutrals Designer Paper stack – 1 3/4” x 5 1/4”
        –  Melon Mambo stitched satin ribbon – 6”
    • Just adhere the designer paper to the bottom of the Whisper white cardstock and then wrap the ribbon over the seam before adhering to your card base!
    • When you are doing watercoloring, you will want to stamp your image onto Watercolor Paper – this is a special type of paper that is thicker and the fibers are designed to be able to handle lots of water going over them without the paper pilling up or wearing a hole through. 
    • And make sure you are using Staz On ink for your stamping!  You don’t want the ink to start bleeding into your image as you are coloring. Smile
    • Once you’ve stamped your image, you can just start layering on the color until it looks the way you want.  YES!  You can go over the same area over and over again to get it darker if needed.
    • TIP – if you’ve never done watercoloring before, it is really easy!  Here is what you need to know:
        – Start by stamping your image onto watercolor paper with StazOn ink (both are available in the Stampin’ Up online store)
        – Take the ink color you want to color with and SQUEEZE the ink pad so that ink transfers to the TOP of the ink pad
        – Open your ink pad and use an Aqua Pen and use it like a paintbrush to pick up the color from the lid – NOT from the surface of the ink pad.  You don’t want to pick up the ink from the ink pad because you will end up diluting the ink in your pad and getting funny spots where you were getting the ink. Smile
        –  Brush on your color over your image and repeat until you get it looking how you’d like.  If your color isn’t spreading on smoothly when you are coloring, squeeze the barrel of the Aqua Pen slightly to get more water to the tip of the brush.
    • After you like how it looks, we just cut it out and adhered to the front of the card using dimensionals.  Add your sentiment and some rhinestones and it looks great!

    Fun and easy, right?

    Don’t forget the savings on my Flurry of Wishes Class by Mail!  Through Monday 11/16!

    Just a reminder that since the Snow Flurry punch is on sale this week as part of the weekly deals, I’m passing the savings on to you with my Flurry of Wishes Class by mail!  Purchase either the class kit & punch or the best value bundle and I’ll take $4.50 off your class fee! 

    Sign up here!

    NWstamper signature_thumb[9]

    order online button for sig 3_thumb[4]

    But use Hostess Code PU2EYZJY to get a special thank you from me!

    Project Supplies Used:

  • Inspiring Weekly Deals & save on the Flurry of Wishes Class by Mail!

    When I woke up this morning and checked out the weekly deals, I was expecting one or two cool things and a couple that I could take or leave… but man was I pleasantly surprised to see a lot of awesome up this week! 

    Check it out and if you aren’t inspired by something… well, you will have to tell me what DOES inspire you.Smile 

    11201941_10205590681675469_3676096873224387746_n

    So, lets break it down… shall we?

    Festive Flower Builder Punch… cute for Holiday Pointsettias or just make cute flowers for any time of the year!

    image

    Want to see how to make this Pointsettia?  Check out this video to show you how!

    I also love this White version created by Peggy Noe!  You can check out her beautiful card on her blog post here.

    Metallic Foil Doilies… Can I just say I’ve already gone through at least 2 packs of these Smile  LOVE them!

    image
    Though, embarrassingly, I just realized that apparently I haven’t photographed my recent pictures with the doilies so I’ll have to get on that! 🙂  I did use them though for a recent Project Life album I was working on!

    metallic doilies in Project Life scrapbook albumPerfect Pines Framelits… Good with or without the stamp set!  (if you want to see the coordinating stamp set, you can see it here in a bundle)
    Like this with card that was from my Holly Jolly Greetings Class by Mail!

    Or check out this cute card made by Jennifer Frank at our recent Northwest Crafty Escape Weekend as an entry into one of our challenges!

    Perfect Pines christmas card challenge card

    Snow Flurry Punch… this is one of my FAVORITES!  I love it alone but again, especially with the coordinating stamp set.  You can see the bundle here

    I also did a class by mail using this punch, and so I’ll pass the savings on to you!  Purchase the punch as part of the Flurry of Wishes Class by mail and I’ll give you $4.50 off the class fee!  Just sign up here and I’ll refund you the $4.50 after either seeing your purchase of the Snow Flurry punch or when you sign up for the best value class bundle!

    NWstamper signature_thumb[9]

    order online button for sig 3_thumb[4]

    But use Hostess Code PU2EYZJY to get a special thank you from me!

  • Christmas or All Year Cards with Season of Cheer Designer Paper

    At the Northwest Crafty Escape Weekend last month, I gave everyone who was attending on Friday a goodie bag that included a number of items including the Season of Cheer designer paper pack and some of the Old Olive Baker’s Twine (which is one of the weekly deal this week – booyah!)  I used this paper for their make & take projects and had fun designing 4 cards – 2 of which were Christmas Cards and 2 which were anytime of year cards!  Because I loved how even though this paper is in the Holiday Catalog and shown doing lots and lots of Christmas projects, it has patterns that are great for after the holiday season is over as well!

    image

    I tried to make that graphic so you could more easily see the patterns in the pack.  As you can tell, there are definitely “Holiday” patterns – from the hand painted ornaments or colored lights, to the holly berries and pointsettias.  So, you can make fun cards like this one:

    I just mixed two of the patterns and a little bit of coordinating cardstock to create a quick holiday card.  I just love the hand painted look of these ornaments.  Just makes it feel cozy and homey to me. Smile  Want to make your own?  Here are the dimensions for the paper for this card:

    • Whisper White cardbase – 4 ¼” x 11”, score at 5 ½”
    • Old Olive cardstock – 3 ¼” x 4 5/8”, 1 ½” x 2 7/8”, ¾” x 5 ½”
    • Snowflake paper – 3 1/8” x 4 ½”
    • Ornament paper – 1 3/8” x 2 ¾”

    But like I said, this paper pack doesn’t have to be just for Christmas.  Check out this Birthday card that we made using the same papers!

    I just used some of the more generic patterns and mixed in some stamps from the Tin of Cards stamp set (see it is awesome even outside of that cute project kit!)

    We cut bigger pieces of paper and adhered them onto our card front at an angle to get the look that we wanted.  Then just trim off the parts of the paper that hang over the edge to clean it up!  I also wrapped more of the Old Olive baker’s twine and added a little cardstock star using the Itty Bitty Accents Punch Pack.  See, fun Birthday card you can use for anyone at anytime of the year!

    Want the dimensions for this card too?  You got it!

    • Whisper White cardbase – 4 ¼” x 11”, score at 5 ½”
    • Multi-colored Hexagon paper – 3 ½” x 5 ½”
    • Yellow diamond paper – 1” x 5”

    In the Seattle area and want to come stamp with me?

    I regularly host events and classes in the Bellevue/Redmond/Seattle area and would love to have you join me!  Stay up to date on the latest events and classes by joining my Meetup Group – the Bellevue/Redmond Card Makers!  We always have a great time and would love to have you join us!

    NWstamper signature_thumb[9]

    order online button for sig 3_thumb[4]

    But use Hostess Code PU2EYZJY to get a special thank you from me!

    Product Supplies Used:

  • Fun Ideas with the Flower Medallion Punch–part of the Weekly Deals!

    It’s Tuesday which means new Weekly Deals!  And I just love the punch that is on sale this week, so I thought I would take time today to share a couple different types of ideas with it!

    But first, here is what is on sale this week:

    12189070_10205560290435707_5024214854627555697_n

    For real, I love them all.  And I have some samples to share later this week with the Old Olive Baker’s Twine since that was one of the goodie bag items from my recent Northwest Crafty Escape Weekend and so we had make & takes with it!  But today, I’m focusing on the Flower Medallion Punch.

    This punch is a perfect match for the flower in the Crazy About You stamp set, and doesn’t it look so cute on this quick and easy treat bag?

    image

    But it isn’t just for flowers… did you know?  It also is designed to fit with one of the snowflakes from the Flurry of Wishes stamp set?  I used it here in my Flurry of Wishes Class to Go (kits are still available here!)

    Or just use the punch to punch out your favorite pattern paper or pretty background designs to create your own custom flower or shape!

    Like these ideas?  Check out the Weekly Deals online here and grab your favorites.

    Last week for Extra Hostess Benefits too!

    Just a reminder too that next Monday is the last day to earn the extra Stampin’ Rewards for personal or group orders of $300 or more!  Get some friends together, plan your holiday cards while looking at the Holiday Catalog and then place all your orders together in one order and you can earn an extra 3% in free credit on your order.  That gives you 15% Stampin’ Rewards on that order – that’s $45 in free products of your choice!  Email me at jennifer@nwstamper.com to get all set up or start shopping in my online store for your own personal order!

    NWstamper signature_thumb[9]

    order online button for sig 3_thumb[4]

    JBut use Hostess Code FHRCKER7 to get a special thank you from me!

    Product Supplies Used:

    Price: $4.50

    Price: $5.25

    Supply List

    Built for Free Using: My Stampin Blog