Northwest Stamper

Tag: Cards

  • World Card Making Day fun

    I meant to get this post up sooner but my camera suddenly did not want to talk to my computer and so the photos were in limbo for a while.  Thankfully, after much massaging, sweet talking, and cajoling, my camera finally decided to let me pull off the pictures. Smile 

    Did you do something fun for World Card Making Day this last Saturday?

    I met with some folks to create some cards to donate to Operation Write Home and send our cards out to the troops overseas.  We ended up with a small group, but it was still a very fun group and we enjoyed hanging out for a couple hours and just letting our creative sides loose.

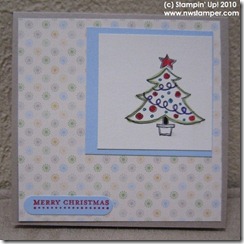
    This was the first to two cards I designed for the day.  However, instead of cutting all the same paper for everyone, I cut a bunch of different color cardstock and designer series paper in the dimensions needed for the cards.  Then everyone could use the same basic design but get creative on color combinations, stamps, and even the layout.  I have to say, I got some new fun ideas from what everyone made.

    So from that, folks mixed and match and came up with some fun variations on this card.  Here are some examples of what folks did using the same dimensions of base layers:

    Bethani’s Cards   

    Karolina’s Cards

    Pam’s Christmas Card

    Kind of neat how the same idea could be used in different ways?  Later this week, I’ll share the other designs we made on Saturday. 

    What did you make on World Card Making Day?  Leave me a comment and share what you did!
  • Tons of Tools Card and Embellished Envelope

    Sunday was this month’s Technique Night with my meetup group and by request, I did a night that was focused on going over many of the tools you might encounter on your crafting journey including:

    • The BigShot
    • Aqua and Blender pens for water coloring
    • Crimpers
    • Bone Folders
    • Paper Piercing tools
    • Heat and Dry Embossing
    • the Crop-a-Dile for eyelet setting and hole punching
    • the Stamp-a-ma-jig for exact stamp image placement
    • Color spritzers
    • And paper punches

    So, we ended up using all of these tools on the following two projects.

    First we used a Whisper White envelope (since it uses the same type of paper as Whisper White CS, these envelopes take ink and stamping really well!) Trim off 1 1/4” from one of the short sides of the envelope.  Then we used the scallop edge punch on the smaller piece.  For the larger piece, we stamped and used the color spritzer to scatter Soft Suede ink on both sides of the envelope.  Then we ran the big piece through the crimperWatercolor the stamped image using the covers of classic ink pads and a watercolor pen, add a punched out scallop square, and adhere and you are pretty much done.  We punched two holes through both the top and bottom pieces of the envelope so we could run ribbon through to tie the envelope closed.

    Next we made this card:

    This card used the BigShot for making the dots on the white paper.  Then we used the brayer to lightly go over the dots to give them some color.  We did dry embossing on the Rich Razzleberry CS using some holes I punched out some Chipboard with the Simple Alphabet Dies for the BigShot.  We stamped the flower image from the Vintage Vogue stamp set, used the Stamp-a-ma-jig to place the text below the flower and then heat embossed using black embossing powder (don’t forget to use the embossing buddy to ensure you don’t get stray embossing powder flecks!).  Used the crop-a-dile to set the jumbo eyelet; and then finally used the super, awesome mat pack and paper piercer to punch the row of holes below the Rich Razzleberry CS.  Oh, and we used the bone folder and the groove in the paper cutter to score the card so we had a nice crisp fold.

    Whew!  That’s a lot of tools, but it was lots of fun.

    If you are interested in any of the tools used for these projects, you can get them now through my online store .  Plus –  if your total is $25 or more you will be entered into my drawing for a $50 gift certificate!

    My favorite tools are the BigShot and the Mat Pack.  What are yours?

  • A Handmade Wedding Book and Card

    I’m back!  I had such a blast in Vegas. This was my first vacation since having my son, and though I missed him, it was great to have adult time and he got some quality time with Grandma. We also lucked in to a crazy room upgrade – we got a room on the “50”th floor looking at the Bellagio fountains! Amazing!

    vegas hotel room view

    We were there for our friends wedding and so I had made them a book to save the photos and memories of this trip.  I got the supplies and learned the binding technique at a store demonstration when visiting my mom.  Now that I get how it works, I’m going to see if I can replicate it with Stampin’ Up! supplies.

    I had the book all ready to go, but still needed to make a card, so I took my supplies with me and planned to put it together in Vegas.  Well, I discovered when unpacking that I completely forgot my clear mounts!  So I had to get a little creative so I could mount my sentiment. Smile Turns out, if you are desperate, you can use the stamp case as a mount.  It doesn’t work as well as a clear block, but it will work!

    But in the end, I was able to pull together a card that I love and was so happy to give to them while celebrating this awesome time for them.

    Wedding Card Recipe:
    Stamps:
    Baroque Motifs, Occasional Quotes
    Ink: Blushing Bride, Chocolate Chip
    Paper: Whisper White CS, Chocolate Chip CS, Blushing Bride CS
    Accessories: Adhesive Back Pearls, Victoria Crochet Trim Ribbon, Small Heart Punch

  • A Letterpress Card for the Stamping 411 Challenge #168

    If you’ve seen the holiday mini, you’ve seen one of the new products Stampin’ Up! just released – the Letterpress Plates.  These plates are made to use with your BigShot and instead of embossing your image by causing the pattern to raise up off your paper, these plates deboss your image – making empressed images that go into your page.  Add some craft ink, and you get imprinted colored images to spiff up your project.

    At convention this year, Stampin’ Up! unveiled the plates and then offered a special convention bundle of all the letterpress plates at a discount for convention attendees.  Yet another awesome benefit of being a demo (see even more benefits here).  So, I decided to try them out and after getting my bundle, spent some time this weekend playing with them.  So, today, here is the first card I made with the Northern Trim plate for the Stamping 411 sketch challenge.

    I’ve also been playing with different types of papers and inks, so check back later this week as I’ll be posting my results and offering tips for what I’ve found from using the plates.  Until then, here is the video Stampin’ Up! released to show you more possibilities with these plates.

    Oh, P.S. – if you are a demo or become a demo when attending their regional seminar, they have another special bundle just for attendees!  Contact me at jennifer@nwstamper.com for more info or find out how to be my guest when I go to the Portland Regionals in October.


    Demonstrating the Letterpress Dies

    Kind Thanks Recipe:
    Stamps:
    Thank You Kindly
    Ink:  Always Artichoke Classic ink, Always Artichoke Craft Ink, Rose Red Craft Ink
    Paper:  Elegant Soiree DSP, Basic Black CS, Rose Red CS, Confetti White CS, Always Artichoke CS
    Accessories:  Basic Black Satin ribbon, Scallop edge punch, Basic Rhinestones, Styled Vanilla Hodgepodge Hardware, Modern Label punch, glue dots, Stampin’ Dimensionals

  • Halloween Punch Art blog hop

    Man, can you believe the stores are already putting out their Halloween decorations and candy?  I guess that means the holiday season is creeping up on us.  But that also means fun holiday projects like a ton of fabulous Halloween Punch art.  I’m participating in a blog hop with 13 other extremely creative folks.  I had a ton of ideas and they are mostly half done on my craft table.  So, while I work on figuring out what to do with my little creatures on the table, here is a quick card I created after being inspired by a skull image I saw online.

    I have to say that Mr Bones here  looks even cuter in real life. 🙂 I made his head by punching out a 1 3/4″ circle and then using the word window punch to cut out the sides of his face for cheeks.  I used a few different circle punches to get his eyes and the small heart from the Heart to Heart punch to make his nose.  His jaw is made using the wide oval punch.  You punch out an oval from white cardstock and then punch the center of the oval out using the wide oval punch again.  His bow tie is the modern label punch that I trimmed in the top and bottom to make the bow tie shape and then added some additional circles for the knot.  Kinda snazzy, huh?  I love what a few basic punches can do!

    Check out these other amazing projects that folks have posted for you today.

    Paper Punch Addiction
    Blinkin’ Thinkin’ & Inkin’
    It’s A Stamp Thing
    Kelli’s Korner
    Northwest Stamper
    Ink Paper Stamps
    Gwen’s Paper Expressions
    Stamping My Life Away
    Gettin’ Crafty
    Krafty Kate’s Kupboard
    Brenda’s Stamping Corner
    Beth-a-Palooza
    Bonnie’s Creative Place
    Craft Chaos
    Stamping with Heather


    Mr Bones Recipe:
    Stamps: Teeny Tiny Wishes
    Ink: Rich Razzleberry
    Paper: Basic Black CS, Whisper White CS, Rich Razzleberry CS, Old Olive CS, Wicked Fun DSP
    Accessories: 1 3/4″ circle punch (head), wide oval punch (jaw), 1/2″ circle punch (black eye, razzleberry bow tie), itty bitty shapes punches circle (white eye,black bow tie), crop-a-dile 3/16″ punch (sm black eye), Heart to Heart punch (nose), Modern label punch (bow tie), word window punch (sentiment, cheeks cut out), Stampin’ Dimentionals

  • A few Fur-ever Friends

    Well, I didn’t get my farewell to the Summer mini card done before the catalog retired, so while I finish that card and start breaking out my new Holiday mini goodies, I thought I would share a couple cards I made with the Fur-ever Friends stamp set.  I liked being able to make totally different cards using the same stamp set.  I also have one more, completely different card using this set up on my Facebook page.


    Also, there is still time to enter my Blog Candy!  I’d love to hear from you!

    In My Thoughts Recipe:
    Stamps:
    Fur-ever Friends, Word Play
    Ink:  Early Espresso
    Paper:  Cajun Craze CS, So Saffron CS, Whisper White CS
    Accessories:  Perfect Polka Dots embossing folder, Bone Folder, Cajun Craze marker, So Saffron Marker, Early Espresso Marker, scallop edge punch

    Pawsing By Recipe:
    Stamps:
      Fur-ever Friends
    Ink: Chocolate Chip, Basic Grey
    Paper:  Melon Mambo CS, Peach Parfait DSP (hostess), Whisper White CS
    Accessories:  Watercolor pen, Melon Mambo marker, Regal Rose marker, Pink Pirouette marker, Rose Red marker, Stampin’ Dimensionals, Large oval punch

  • More baby gifts – thank you card set and a frame

    It seems like I know a lot of people having babies right now.  I reconnected with a friend recently on Facebook and learned she was due at the end of August with her first child.  I was so excited for her, I decided to make her a few things to send in addition to a gift card – what i call the light weight version of baby wipes. 🙂

    First I created this photo layout for her using a 5×7 frame.  I started with the baby feet wheel and built the layout from there.  I found the DSP in my scrap pile and started layering pieces together.  After I had it assembled, I wanted to give the stamped image a little kick, so I inked up the wheel in Rose Red and wheeled out some more feet so I could cut them out and glue on top of part of the Chocolate Chip image.  Finally, I added one of the Sherbet designer buttons from last catalog.

    Then I created a set of simple thank you notes so she has something fun Io send folks who give her little girl baby gifts.  I love the Fox and Friends stamp set for baby stuff and so had to use a variety of critters from the set for these cards.

    I also stamped the envelopes to match the cards.  It was a good reminder about how the quality of paper you stamp on affects your image.  I was out of Stampin’ Up! envelopes so I used some of the value pack envelopes that I got from Michaels a while back.  Definitely doesn’t grab the ink nearly as well as Whisper White paper, but it works ok.

    Baby Thank You Cards recipe:
    Stamps: 
    Fox and Friends, Thank You Kindly
    Ink: Chocolate Chip
    Paper:  Whisper White CS, Melon Mambo CS
    Accessories:  Stampin’ Write Markers, Delicate Dots embossing folder, 1 3/8” circle punch, Scallop Circle punch

  • Baby brag book and photo frame

    My friend Sue was so excited to share the news of her new baby granddaughter born a couple weeks ago.  This is her second grandbaby and it was her daughter who gave birth and everytime I talked with her you could hear the excitement and pride in her voice.  So, I had to make her a couple gifts to have some personalized spaces to show off her family.

    First was a brag book to carry in her purse.  I bought one of those slim photo books from Target and pulled out the boring papers that served as the front and back covers.  I then created new custom inserts using mostly paper and embellishments that would be slim (so the inserts would actually fit in the plastic sleeves for the front/back covers.  i used the Rough Type Alphabet (so sad it is retiring at the end of the month!) to create the front label and layered that on some punched cardstock and then Pink Pirouette that had been texturized using the Square Lattice folder in the big shot.  The back cover I added some pearls to the Butterfly to add a bit of bling wthout making the page too thick.  Finally, I used sticky strip to add some ribbon to the spine to add a simple finishing touch that wouldn’t get ripped off if she tossed this into her purse.

    I have to say, the trick for picking up the adhesive back pearls using your paper piercer works super well!  It makes it really easy if you use the pointy tip of your piercer to get under the glue on the page and then the pearl sticks to the point until you place it down on your image.

    The second thing I made her was a magnetized photo frame.  This used a photo mat that had been pulled out of a Costco photo frame.  i then added DSP and embellishments to the frame to personalize it.  I then cut some thin chipboard and used sticky strip on three sides of the chipboard to adhere it to the back of the frame.  Finally, I cut some magnet pieces (I am so excited about the new magnet sheets for the BigShot, i may have to make some more projects in the future with this!) and glued the magnets to the back of the frame and it is ready for a photo and to be placed on the fridge.

    Brag Book Recipe:
    Stamps:  Rough Type Alphabet, Occasional Quotes
    Ink;  Rose Red, Chocolate Chip
    Paper;  Basic Black CS, Rose Red CS, Pink Pirouette CS, Whisper White CS, Lavender Lace CS
    Accessories:  Scallop Edge Trim punch, small heart punch, rose red marker, chocolate chip marker, two way glue pen, Dazzling Diamonds glitter, Crystal Effects, Grey Satin ribbon, 1 3/4” circle punch, Extra large scallop circle punch, lattice die, rose red 1/4” ribbon

  • Training the trainer – an introduction to stamping

    Last week, I had the fun of introducing a friend to awesome world of stamping and paper crafting.  Nikki is my personal trainer from the gym (gotta kick out those last few pounds of baby weight!) and she has been very curious to check out Stampin’ Up!.  Since she wouldn’t be able to get a workshop scheduled until September and she was going back to Hawaii to celebrate her Grandpa’s 100th birthday in a few weeks, I invited her over to create a card and gift for her Grandfather.  We had a blast playing with everything and helping her create something that she loved and was going to be special for her Grandfather.

    So, we created a card and then an 8×10 photo page.  She attached a photo of her Grandpa and Grandma and we left the space under the photo blank so she could hand write a message to him.   Aren’t they the cutest couple?? 🙂


    I loved helping her try everything out and create something special and she can’t wait to take it to show off to her family. 😉 

    Birthday Photo Layout Recipe:
    Stamps:  Whimsical Words (Sale-a-bration 2010 set)
    Inks:  Night of Navy
    Paper:  Whisper White CS, Night of Navy CS, Bashful Blue CS, Pink Flamingo DSP
    Accessories:  So Saffron 5/8″ ribbon, Corner Rounder punch
    Paper:

  • Stampin’ Up! Convention 2010– Punch happy swaps

    I had a few more swaps that I had to share so here is one more post including my second swap I took to convention.

    So, you remember my first swap I showed you (recipe in this post) –

    Well, after punching out the leaves and the flowers from the BigShot, I was going to recycle the scraps when I looked at them and said, “I could totally punch out stuff using these scraps”.  So, I started punching out little hearts using the small heart punch and managed to actually get 5-6 hearts per scrap.  So, from there was born the idea for my second swap.

    This card uses the new Occasional Quotes hostess set.  It is a perfect set for an outside and matching inside sentiment for your cards.  Anyway, I had made 40 swaps and so had 40 of each color scrap, I watched a movie with my hubby and drove him crazy punching out hundreds of these little hearts.  Then, the night before I left for convention, I punched out the scallop rectangles using the new Scallop Rectangle Clearlits die and then did the assembly from my hotel room.  These took a bit of work to assemble but again, I felt very happy with them.

    hearts swap
    Finally here is another round of some of my favorite convention swaps.  Pretty cool huh?

    card by Mary Booker                                       card by Valerie Taylor

    card by Lorri Heiling                                     card by Jill Kelley

    card by Kathy Kuffel                                      card by Diana Curtis

    card by Terry Bolender

    Hearts Swap Card Recipe:
    Stamps: Occasional Quotes (hostess)
    Ink:  Concord Crush classic ink
    Paper:  Concord Crush CS, Pear Pizzazz CS, Whisper White CS, Crumb Cake CS, Chocolate Chip CS, Blushing Bride CS
    Accessories: Small heart punch, Scallop trim border punch, Scallop rectangle clearlit

  • Stampin’ Up! Convention 2010 – Swaps, Shelli, and my new goal

    I really do have way too many pictures to share from convention, but I wanted to share a few more with you.

    On the last day, mom and I were able to meet the celebrity of the hour – Shelli Gardner, co-founder and CEO of Stampin’ Up!  I hadn’t realized that she had been spending almost all of the lunch break for 3 days sitting and taking pictures with one demonstrator after another.  Of course she was very sweet and was happy to chat with everyone who met her.IMG_4286 

    Like I said before, convention is not only a time for fun, friends, and fabulous ideas, but it is also a motivational time for me.  IMG_4172With a new baby and moving earlier this year, I’ve been slow to get moving on getting my Stampin’ Up! business rolling.  However, with the enthusiasm of convention and the announcement of a new awesome incentive trip – I’ve decided my goal is to work towards Disneyworld 2012.  That means I’ll be working on scheduling workshops and building my team over the next year.  Its an exciting time for me and I’d love to share that excitement with you.

    Oh, and I have to give a shout out to my dad as well.  He came along to Salt Lake City and ended up helping carry our Memento Mall haul and babysitting Nicholas for my make and take sessions.  Thanks Dad!  You’re the best!IMG_0863

    Finally, as promised, here are some of the amazing swaps I got while at convention.  I can’t wait to try them out myself now that I’m home.

    card by Sharlene Mitchell                             card by Teresa Payne-Neal

    card by Laura Tollander                                card by Kathy Thisted

    card by Janine Verster

  • Stampin’ Up Convention 2010 – Display boards and more

    I just finished going through all my pictures from convention and was reminded of all the fun looking things to try and make over the next few months.  There are always so many amazing ideas, business tips, and sneak peeks (you might even spot one or two in the photos below ;)) .  I can’t wait to share some of these projects in upcoming classes and workshops.  Want to try it out yourself? Contact me to learn more about scheduling your own workshop!

    IMG_1010We were up early each day to get over for general session.  I was so grateful that Stampin’ Up! supports families and so I could take Nicholas with me to session.  They even offered a Mother’s Lounge so moms could feed/diaper their babies and still see and hear the speaker.


    We saw lots of awesome demonstrations.  I think my favorite was the Halloween decorations…but then again there were some awesome hostess gift ideas that were super cute as well.

      IMG_0926IMG_4175

    Then during lunch and at the end of the day, we got to wander around The Gathering Place and look at some awesome displays and ideas boards.  This year they had an area called The Sweet Shop where they had so many amazing displays that looked like candy and other treats but was really made entirely from paper, ribbon, and buttons!  Stampin’ Up! really has some amazing artists and designers.

    IMG_1026IMG_1023

    IMG_0968 IMG_4258