Northwest Stamper

Tag: aqua pen

  • Easy Watercoloring with Birthday Blooms

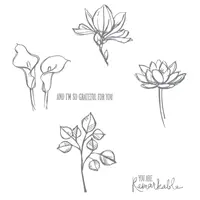
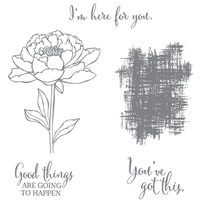
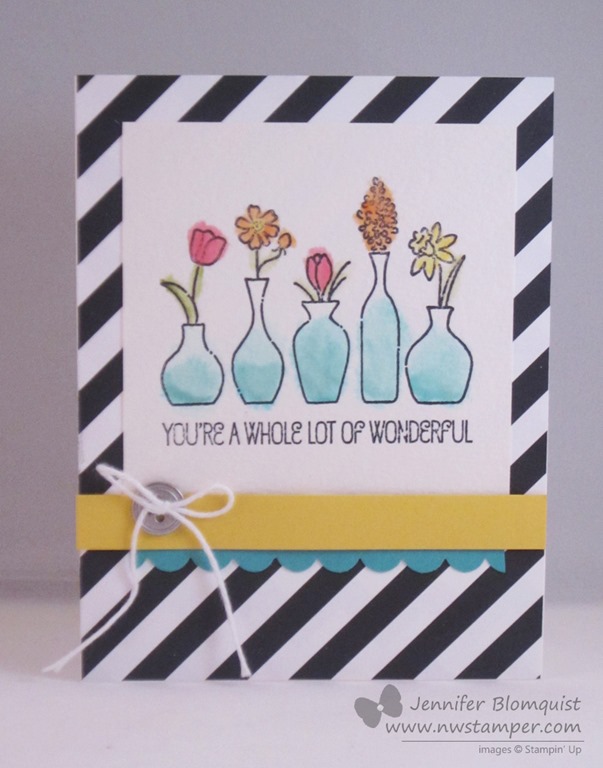
    So, just last week I had my Terrific Techniques class focused on heat embossing.  I always forget how fun and how many options you get with heat embossing and when I remembered this card I made recently, I figured it was another great way to share one of the awesome things you can do with heat embossing – make watercoloring gorgeous and really easy!  Check out this idea with the Birthday Blooms stamp set –

    Watercolored Birthday Blooms by stampin up

    White Embossing Powder + Aqua Painters = Gorgeous Watercoloring!

    I love how this flower seems to be this fragile, delicate image on the card.  It is all thanks to the white embossing powder I started with!  Heat emboss your image by stamping in Versamark Ink and then coating in White embossing powder.

    TIP – Don’t forget to wipe the area first with your Embossing Buddy!  This is REALLY important for images with fine lines and details!  The embossing buddy de-statics your paper and makes sure stray embossing powder doesn’t stick to parts of your card that you don’t want it at.

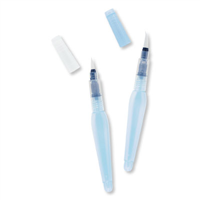
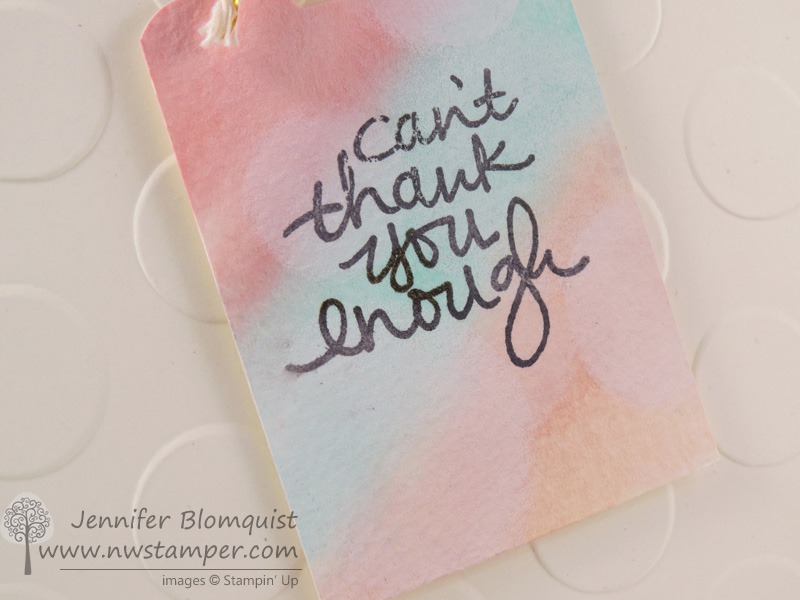
    Once you’ve heat set the embossing powder, it then acts like a guide for your watercoloring.  I told the folks in class, it is like bowling with the bumpers down in the gutters!  Smile  Use your Aqua Painters to pick up color from the lid of your ink pad and color over your image.  You don’t have to worry about the ink sticking to the embossed areas, so just color straight over the top of them.

    close up of heat embossing and watercoloring of Birthday Blooms

    Since the embossed areas resist the ink, you end up with an amazing delicate result!

    Don’t forget the finishing touches!

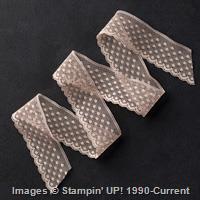
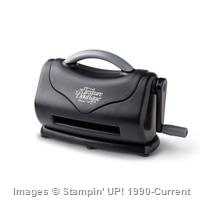
    I pierced the edge of the my embossed cardstock … an no it isn’t hard to do!  Grab the Essentials Piercing Pack and place the template with the rows of dots along the edge of your cardstock and start poking to your hearts content!

    updated essentials piercing pack

    And yes, I realize there are dies out there now the do the poking for you, which is awesome… unless you have a piece of cardstock that you want to be a different size, or you want your dots to be closer or further from the edge. Smile  Just saying, it is nice to have options!

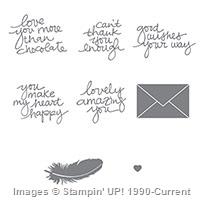
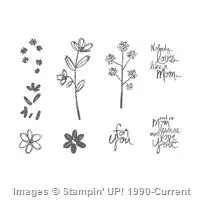
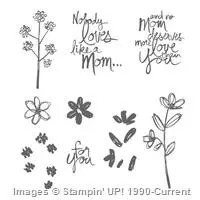
    And then I had to punch out the sentiment from this same Birthday Blooms stamp set because I wanted to sponge the edge in Wisteria Wonder to match the flower and the card base.  And then I just balanced out the flower by layering my sentiment over one of the small gold Metallic Doilies from the annual catalog.  Seriously, why aren’t you all using these more… they rock!

    metallic doilies as accents
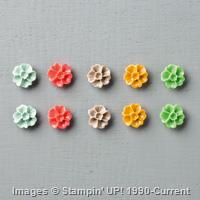
    Oh, and don’t forget to add the White Perfect Accents to the upper corner for the finishing touch.  They come with adhesive on their back, so it is easy to just grab and go.
    birthday blooms friend card

    What I Used to Make This project
    Click any picture below to shop or see it in the online store 

    What do you think?  Like the watercoloring with white embossing powder?  Try it with different colors and see what comes out!

    NWstamper signature_thumb[9]

    order online button for sig 3_thumb[4]

    Use Hostess Code Z4ZAG9TD at check out to get a special thank you from me!

  • Watercoloring Thinking of You Card with the Rose Garden Thinlit

    Have I mentioned yet how super pretty the Rose Garden thinlit is?  I swear there are so many different idea and techniques you can use with it to make super fun and pretty cards.  After I started playing with it recently, I just knew I had to try the idea of watercoloring behind the outline.  So, when I needed to come up with project ideas for a Stampin’ Secret Sister swap I was in, I knew it was the perfect time to get to playing.  This is what I came up with:

    Not only was it pretty to look at… it was FUN to make!  If you haven’t tried watercoloring, it is such an easy and relaxing technique and you can be messy and it isn’t a mistake – it is a design!

    Jennifer’s Project Tips:

    • Use an outline thinlit as your guide!  This Rose Garden die just begs to be colored, but make it easy on yourself by not having to worry about coloring in the lines by watercoloring underneath.  I set the die onto a piece of watercolor paper so I could see where to get started and then started coloring.  Every so often, I would hold the cutout over my colored areas on the paper to see where I needed to add more or where I needed to stop.  It isn’t perfect, but that is part of the charm!
    • Watercoloring basics – There are a few different ways to do watercoloring, but I find the easiest method is with the Aqua Pen!  The barrel of the pen has water in it (and is refillable) and so there is no drippy water on your craft table (I know I would spill that before I was done Smile) and you have lots of control over what you are coloring.  Here is my favorite technique:
         1.  Choose the ink color you want to color with and squeeze the ink pad while it is closed so that some ink transfers to the inside of the ink pad lid
         2.  Open the ink pad and leave the underside of the lid exposed
         3.  Squeeze the Aqua Pen gently to make sure the bristles are nice and wet.  I also sometimes brush over my watercolor paper lightly to get it a little wet as well to help the ink spread/blend
         4.  Brush the Aqua Pen in the ink on the LID of the ink pad (DON’T pick up ink from the surface of the pad itself), and start coloring
         5.  When you are done coloring and/or are ready to change colors, scribble with the aqua pen on a piece of scratch paper until no more color is coming off.  Then you are good to go!

    • Have fun layering stamps with sentiments – I love the Watercolor Wings stamp set.  I always say it doesn’t show well in the catalog, but it is another one of those amazing stamp sets that you can mix and match and layer the stamps and they almost always look great!  In this case, I inked the row of polka dots with Tip Top Taupe ink, stamped onto a scrap paper, and then stamped onto my paper!  Then I could stamp my sentiment over the top, just to keep the rose from making the card too bottom heavy.

    • Use sketch lines instead of a bold mat – as I was finishing up the card, I decided it needed something to ground the main image, but I just didn’t want to add another color as a mat for the card.  I liked the spacing of the White and the Mint Macaron card base.  So I fell back on an old favorite – sketch lines!  I grabbed my Tip Top Taupe marker and drew quick lines just inside the edge of the watercolor paper on all the sides.  If you are nervous your line will be not straight enough for you, just grab a ruler and use that to guide you on all sides.

    Did you know?  Now is an AWESOME time to give being a Stampin’ Up Demonstrator a try?

    Why would you want to try it out?

    • There is no obligation when you try it out.  You can take advantage of all the perks and see how it works for you.  Love it?  Awesome keep it going!  Not quite right?  That is ok too!
    • You get an EXTRA $30 of free product in your starter kit… that is $155 in product for only $99 plus free shipping!  And you get to pick what is included in that $155
    • You’ll get 20% off all your personal orders including the PREORDER from the Annual catalog in May!
    • Be the first to see what is new and coming out in future catalogs!
    • Connect with our online community of demonstrators and my team group and training with the Fun n’ Crafty stampers
    • Make friends and get inspired… and have a lot of fun!
    • And seriously, you can run workshops or classes… but if you want to do this just for you, you totally can!  Let me help you get the most out of it in a way that is right for you!

    Check out more details here – http://nwstamper.stampinup.net/jointhefun

    or email me at jennifer@nwstamper.com to chat more and get all your questions answered!

    join my team

    NWstamper signature_thumb[9]

    order online button for sig 3_thumb[4]

    Use Hostess Code PGHMVNJM at check out to get a special thank you from me!

    Pick a FREE item with every $50 you spend!  See the Sale-a-Bration catalog.

    See all the tutorials & classes by mail here

    Save 25% on the Latest Weekly Deals

  • Easy and Classy Watercoloring with Remarkable You

    As I go to post this picture, I realized that if it was a poppy, it would have been even more perfect for Veteran’s Day today.  But that is ok… it is still fair to say to all the men and women who have joined our Armed Forces and been willing to do what is needed to protect our country and folks who cannot protect themselves around the world… thank you.  You are remarkable!

    Isn’t this such a pretty card!  It just makes me happy when I see it.  And I’ll tell you, I can’t really take the credit for it.  While I did make this copy you see here, it is a CASE from the lovely Diane Dimich and you can see her original here.  But I needed an idea for card class and wanted to use this stamp set because I LOVE watercoloring with it, and I just loved the colors and how easy to put together this card is.

    Tips for making this card:

    • One of the best things about this card is how easy it is to put together… here is all you need for it:
        –  Basic Black cardstock for the base – 5 1/2’ x 8 1/2”
        –  Whisper White cardstock – 4” x 5 1/4”
        –  Polka Dot designer paper from the Neutrals Designer Paper stack – 1 3/4” x 5 1/4”
        –  Melon Mambo stitched satin ribbon – 6”
    • Just adhere the designer paper to the bottom of the Whisper white cardstock and then wrap the ribbon over the seam before adhering to your card base!
    • When you are doing watercoloring, you will want to stamp your image onto Watercolor Paper – this is a special type of paper that is thicker and the fibers are designed to be able to handle lots of water going over them without the paper pilling up or wearing a hole through. 
    • And make sure you are using Staz On ink for your stamping!  You don’t want the ink to start bleeding into your image as you are coloring. Smile
    • Once you’ve stamped your image, you can just start layering on the color until it looks the way you want.  YES!  You can go over the same area over and over again to get it darker if needed.
    • TIP – if you’ve never done watercoloring before, it is really easy!  Here is what you need to know:
        – Start by stamping your image onto watercolor paper with StazOn ink (both are available in the Stampin’ Up online store)
        – Take the ink color you want to color with and SQUEEZE the ink pad so that ink transfers to the TOP of the ink pad
        – Open your ink pad and use an Aqua Pen and use it like a paintbrush to pick up the color from the lid – NOT from the surface of the ink pad.  You don’t want to pick up the ink from the ink pad because you will end up diluting the ink in your pad and getting funny spots where you were getting the ink. Smile
        –  Brush on your color over your image and repeat until you get it looking how you’d like.  If your color isn’t spreading on smoothly when you are coloring, squeeze the barrel of the Aqua Pen slightly to get more water to the tip of the brush.
    • After you like how it looks, we just cut it out and adhered to the front of the card using dimensionals.  Add your sentiment and some rhinestones and it looks great!

    Fun and easy, right?

    Don’t forget the savings on my Flurry of Wishes Class by Mail!  Through Monday 11/16!

    Just a reminder that since the Snow Flurry punch is on sale this week as part of the weekly deals, I’m passing the savings on to you with my Flurry of Wishes Class by mail!  Purchase either the class kit & punch or the best value bundle and I’ll take $4.50 off your class fee! 

    Sign up here!

    NWstamper signature_thumb[9]

    order online button for sig 3_thumb[4]

    But use Hostess Code PU2EYZJY to get a special thank you from me!

    Project Supplies Used:

  • A Watercoloring CASE of You’ve Got This

    I’ll be the first to admit that sometimes you want to make a cute card but have NO IDEA what to create.  So what’s person to do?  Why hit up Pinterest and blogs… and if you are a Stampin’ Up demonstrator, check out the sample projects Stampin’ Up has created and shared for us to use! Smile  Today’s card was one that I saw during the new catalog preorder and I LOVED the use of the new lace trim that I had to make it myself.  Isn’t it cute?

    Tips for making this card:

    • Don’t be afraid to grab that watercolor paper!  If you haven’t ever ordered some, you would not be disappointed if you picked some up for cards like this (and so many others!).  The awesome thing about watercolor paper is that you can keep adding color or going back over an area to get it right and your paper will stay flat, not pill up, and take the color awesomely!
    • When watercoloring you will want to make sure you have:  Stazon black ink (for stamping the outline image), an Aqua Painter (for coloring in your image using everyday water – got to love that they are refillable!), watercolor paper, and your favorite dye-based ink pad (like any of the Stampin’ Up classic pads).
    • I colored with Mint Macaron for the flower head, Delightful Dijon, and Old Olive for the stem.
    • And btw – isn’t this You’ve Got This stamp set perfect for watercoloring??
    • The lace trim is wide… like 1” wide, but that doesn’t mean you have to use it full width!  Try tucking it under a layer and just peeking out for a cute effect.
    • Add some subtle sparkle with gold or silver baker’s twine and then finish with a pop of color with the new In Color Blossoms.

    Well, today is the day that some of my Fun n’ Crafty team members are coming over as we stamp, chat, and get our swaps all finished up for convention next week!  I’m so excited and can’t wait to hit Salt Lake City next week to say hello to so many friends I haven’t seen in a while and get to share the awesome experience of convention for the first time with many in my group.  It will be a blast!

    Don’t forget to follow me over on Facebook for real time posts and then stop by the blog each morning as I share a recap of the prior day. Smile 

    Visit me on Facebook

    And if you want to take advantage of the fabulous starter kit deal (get $125 in anything you want for only $99 plus free shipping!) you automatically be a part of my Fun n’ Crafty group – be in on the sharing I’ll be doing on our team Facebook group, PLUS have access to LIVE STREAMING from convention at all the main stage presentations!  So if you can’t be there in person, you can be there virtually for part of it for free. Smile  

    our convention 2014 crew!  Our group is over 50 people strong though and all over the US!  Come join our community – we’d love to have you!  Join us today

    NWstamper signature_thumb[9]

    order online button for sig 3_thumb[4]
    Project Supplies Used:

  • Wednesday Walkthrough: Watercolor Wash meets Beautiful Bokeh Techniques with this Lovely Amazing You Card

    I just love, love, love the font in the Lovely Amazing You photopolymer stamp set, and I thought it just went perfectly with this pretty way to get a background with the Watercolor Wash technique!  So today I just had to share this card with you, and I’ll have the video for the Wednesday Walkthrough posted too below! But for now, check out this cutie –  Smile

    Featured Retiring Products:

    Get them before they are gone by the end of the month!

    Tips for making this card:

    • Emboss your background piece of Very Vanilla cardstock using the Big Polka Dot embossing folder to complement the Bokeh circles you create on top of the tag.
    • Watercolor Wash makes an awesome background for your bokeh cards.  You will want to make sure you use an Aqua Painter NOT a Blender Pen, and you want to be using Watercolor Paper NOT your basic cardstock because you’ll be using lots of water to help let your colors spread on the background.
    • Stamp your sentiment on AFTER you have done your bokeh circles.
      HEADS UP!  This stamp set is one of the monthly photopolymer releases and so is NOT in a catalog.  It is guaranteed available from Feb 2015 to July 2015, so don’t wait too long to pick yours up!

      image
    • Punch the top with the Scalloped Tag Topper and then wrap some of the thick baker’s twine through to make a tassel top.
    • Get that extra tassel-y top by untwisting the baker’s twine so all the individual threads are fluffed out!


    Want to see how to make it?  Check out the Walkthrough Wednesday video:


    (reading this in email, click here to watch the video)

    New Product Samplers/Shares are Coming!  Save your spot today!

    2015 Sampler

    I’ve posted the details for my Annual Catalog product shares.  I’ll be ordering to fill the first round of people on June 2nd, so make sure your name is on the list if you want your samplers of a little bit of all the ribbons and papers the first week of the new catalog!

    Details and sign up here

    NWstamper signature_thumb[9]

    order online button for sig 3_thumb[4]

    Project Supplies Used:

  • One More Mother’s Day Idea With Mother’s Love

    One More Mother’s Day Idea With Mother’s Love

    Have I mentioned how much I enjoy the Mother’s Love stamp set?  Well, here is another card I made with it that was so much fun to put together:

    The stamp set in Photopolymer makes it so easy to look great everytime and add the dash of a watercolor background and you have a beautiful card full of love.

    Tips for making this card:

    • Use watercolor paper for your white paper on the front!  This allows you to create a watercolor wash background by picking up ink with your Aqua Painter and painting the background of your card.
    • Let your background dry and THEN stamp your images on top.  You can use your standard classic ink pads if you’ve let your background dry for the most part (it doesn’t have to be perfectly dry)
    • Stamp the outlines of your flower image in black and then use the stamp for the insides of the flower – coloring with a stampin’ write marker.
    • When you stamp your leaf & petals, if they are speckly, use your aqua painter to fill them out.
    • Add a few pearls for an elegant touch!
    • Don’t forget the inside of your card!  Add some ribbon (like this Venetian crochet trim) or matching stamps to finish it out.

    It’s a few simple steps for a great impact!

    Just a Note

    I wanted to take a minute to thank you so much for orders from many of you.  But I also have noticed a number of people placing orders and not checking the box to allow your demonstrator to contact you.  This means that I can’t send you a thank you card or any other incentive as part of any special offer I may be running.

    So when you are checking out, please make sure to check this box so I can send you a note of thanks! Smile

    image

    I appreciate your orders and support and want to make sure I can send you something cute as thanks!

    NWstamper signature_thumb[9]order online button for sig 3_thumb[4]

    Project Supplies Used:

  • Watercoloring a Card for Hope with Vivid Vases

    I love my blendabilities but I wanted to play a little with another form of coloring- watercoloring.  And what better stamp to play with for that than the Vivid Vases set!

    Tips for this card:

    • When watercoloring with water-based ink (so using your blender pens or aqua pens) make sure to stamp your image with Stazon ink onto Watercolor paper!  This keeps your lines crisp and the watercolor paper is thicker and made to stand up to the extra moisture you get when watercoloring.
    • The Vivid Vases stamp set has a sentiment right under the vases.  If you decide you don’t need that sentiment, you can always just cover it up with some ribbon, like this 1/4” cotton ribbon from Stampin Up.
    • Cut one of the Bracket Label punch outs in half for a neat sentiment shape.  Since I stamped with a photopolymer stamp (from the Bravo stamp set) , it was easy to see where I was stamping to position it just right on the smaller shape.
    • Break up the long stretch of Soft Sky cardstock with a row of pierced holes.  You can keep them straight and even using the Essentials Piercing Pack template! Easy Peasy!

    Are you part of the conversation?

    I love sharing here on the blog, but did you know I mail out newsletters during the month to make sure you are posted about the latest – Get on the newsletter list

    Or chat with me over on Facebook on my page – Northwest Stamper on Facebook

    NWstamper signature_thumb[9]

    order online button for sig 3_thumb[4]

    Project Supplies Used:
    (if you are reading this in email, click here to see the list of supplies)

  • Seasonally Scattered Valentine’s Box & NEW Product Shares!

    You’ve probably seen my projects and others using Seasonally Scattered and many of them were focused on the Thanks and Merry sentiments.  You know, because they fit so well for fall and for winter.  But before the stamp set disappears in a couple days (last day to snag it is Jan 5th!) I wanted to share this project I created for the Convention Display boards this summer.

    You may have seen this project on my blog from a long while back:

    Seasonally Scattered Love Card blog post

    And with that card I did heat embossing and sponging, but I had an idea to do something similar but wanted to really make the “LOVE” sentiment POP!  So I started working and I kept grabbing for things I hadn’t used in a while and this box came out:

    See?!  Now do you see why I can’t believe this set is not continuing on for Valentine’s Day?

    Anyway, I had lots of fun making this box and you could totally use bits and pieces from the box to make a card or make your own special box for someone you love.

    Tips for making this project:

    • Use the kraft gift boxes for your base.  They are very inexpensive easy to pop together, and very sturdy for your box.
    • Start by heat embossing your LOVE image onto a piece of Watercolor Paper using versamark and black embossing powder.
    • Use the Aqua Painter and your Real Red ink pad to color in the paper EXCEPT for the “LOVE” sentiment.
      NOTE – when picking up color with your Aqua Painter, make sure to pick up the color from your ink pad LID and not the surface of the pad itself to avoid diluting your ink pad in one spot.
    • Cut out the sentiment using the Oval framelits and then cut out a bigger Oval from the white crepe filter paper.  Fringe the edge of the larger oval and layer behind.
    • Stamp around the edges and heat emboss another piece of watercolor paper for your top using just the scatter design portion of the LOVE stamp.  This gives you the coordinating look on top.
    • Add a spiral flower using the Spiral Flower die (use glue dots or liquid glue to hold your flower together) and add some watercolored scraps of the filter paper to the middle of the flower for filler.

    • Did you know? You can color the Vintage Faceted buttons with your Blendabilities to make them custom fit your projects?  That is what I did here with my Cherry Cobbler blendabilities!

    And there you have it, a great little box for that special someone for Valentine’s Day or any time of the year.

    10885273_782080285173125_3511162684151308190_n

    Try it all out first with my Product Samplers!

    The details are up!  In 2 days (or as I get the shares filled), I’ll be placing the order for everyone’s samplers of the newest papers and accessories from the spring Occasions catalog!  This is a great way to try it all out without breaking the bank paying for full packs of everything.  Then once you see it in person, you can decide which items you love and which you are good with just a couple pieces. Smile  It’s a win-win!

    2015 Occasions Catalog Full Product Share

    BONUS – this year I’m offering a bonus to everyone who signs up for the “I Want it All” sampler and you get a bonus sampler of the coordinating Sale-a-Bration Paper, Ribbon, and Buttons!  That’s a whole lot of goodies for only $26 (plus shipping if needed).

    2015 Occasions Catalog Product Share Bonuses

    Check out my Product Shares page for more details

    Email me at jennifer@nwstamper.com to reserve your spot today!

    NWstamper signature_thumb[9]

    order online button for sig 3_thumb[4]

    Project Supplies Used:
    (if you are reading this in email, click here to see the list of supplies)

  • Fun with Vivid Vases

    Fun with Vivid Vases

    This week, I thought I’d share some inspiration for some of the fun new stamps from the Spring Catalog.  In my downline group (the demonstrators in my Fun n’ Crafty group) all created some amazing cards and I wanted to make sure everyone got a chance to be inspired by them!

    Today, I wanted to share a stamp that I LOVE that is also great because it is a single stamp, so it doesn’t take up much space, is inexpensive, and can be used a number of ways (even in ways that may surprise you).  For now, though, I thought I would share a couple ideas to get you started!  I’m talking about Vivid Vases.

    This was a make & take from Leadership this year and I loved how they used the geometric paper because I sometimes have a hard time figuring out how to use bold patterns but I loved this as a basic black and white striking background for the card.

    But really, the main thing we got to play with for this card is watercoloring the flowers and vases.

    When you want to do watercoloring like this, it works best when you start by

    1. Stamp your image with Stazon ink on watercolor paper.  By using watercolor paper, it lets you use extra moisture to get the mottled and diffused look without it tearing or pilling up your paper.
      Plus it gives your cards a fun texture because the watercolor paper is thicker and textured.
    2. Squeeze your desired ink pad while it’s closed so a little bit of the ink transfers to the top of the ink pad.  Use that like a paint pallet and pick up the ink with an Aqua Pen.
    3. Color your image with the pen like you would with a marker.  Add more color if you need.
    4. When you are done with that color, scribble your pen on a piece of scrap paper until no more color shows on the paper.  Then you can move on to your next color.

    Cute, right?

    Or get more fun colors by using paper piecing like my friend, Liz Mitchell!  Check out her great idea with this stamp set.

    I love how she took contrasting designer paper patterns (in this case from the Gingham Gardens paper pack) and made a mat for her card base and then cut out a smaller piece that she cut an oval out with the Oval framelit.

    Doesn’t it make a perfect picture frame?

    Then to add an extra pop of color with the vases, she stamped the stamp image again on scraps of patterned paper and then just cut out the individual vases.  Then you just glue them down to your main stamped image on a piece of white paper!

    Color in the flower buds with markers and you have a bright cheery card!

    spaced shop now sig bar

    Virtual Stamp Club Hostess CodeBNDDMDVU
    Use this code to get free exclusive tutorials & project kit! Learn more

    Stampin’ Up! Supplies Used
    Stamps – Vivid Vases
    Ink – Stazon, Melon Mambo, Daffodil Delight, Pumpkin Pie, Tempting Turquoise
    Paper – Watercolor paper, Daffodil Delight, Tempting Turquoise cardstock, kaleidoscope designer paper
    Accessories – Scallop edge punch, Aqua Pen

  • A Watercolored Sympathy Card Sneak Peek

    Like I mentioned last Thursday, I had the privilege of being tapped to be a guest designer for Cute Card Thursday!  They have some really fun themes and challenges each week, and I love that they are so open that you can really get inspired based on anything you have in your stash.

    This week the theme is:

    Something Blue

    I mean, there are so many ways to interpret that and believe me, I went through a number of different ideas myself.  But in the end, I ended up coming back to this card.

    I just got this new stamp set – Simply Sketched as part of my preorder from the new Stampin’ Up! catalog that comes out at the end of the month.  This is actually a hostess set, but I LOVE the sketched images in the set and the font of the sentiments, that I had to get it early. 

    Anyway, the flower from this set is what started it all!  I knew I wanted to watercolor it and make it blue and then I started grabbing other supplies from around my craft room that went with the blue theme.

    So, my stamp is a sneaky peek… but the rest of the card is an homage to the retiring items.  I grabbed one of my last few scraps from my Comfort Café designer paper for the patterned papers in the card.  I used the retiring Certainly Celery paper for a mat and then added one more shade of blue with the retiring Marina Mist scallop dotted ribbon (the dots are on the backside Winking smile).  Oh, and retiring ink colors for my stamped image too!  Certainly Celery, Bashful Blue, and Baja Breeze.

    That is a LOT of blues!

    The nice thing is that they all went together and, while thankfully I don’t have an occasion that calls for a sympathy card right now, I now have a card that I would feel good sending out to a friend or loved one who needs a personal note of support.

    But if you have a different idea (or even something similar) that you have bouncing around in your mind for the challenge this week – Something Blue – hop on over to Cute Card Thursday and join in the challenge fun!


    To Order Stampin’ Up! Products Anytime, click here!

    See the Latest Availability & PDFs of all the retiring stamps and accessories here

    Supples Used
    Stamps
    – Simply Sketched
    Paper – Watercolor Paper, Crumb Cake, Certainly Celery**, Comfort Cafe designer paper**
    Ink – Stazon, Baja Breeze**, Certainly Celery**, Bashful Blue**
    Accessories – Aqua Pen, Large Oval Punch, Scallop Oval Punch, Marina Mist Scallop Dotted Ribbon**, Stampin’ Dimensionals
    **Item retiring June 3rd or when supplies run out

  • My Little Valentine with Greeting Card Kids

    You may remember my somewhat recent watercoloring on glossy paper posting using this adorable Greeting Card Kids stamp set.  Well, I’m back at it again, this time with a Valentime’s Day theme.  I just loved this cute little girl and thought she needed to be colored up for the holiday.

    It was the same idea, heat emboss the stamped image – this time in black – and grab my neglected aqua brush and get to work coloring and blending on glossy paper.  I tried my hand at shading with mixed results.

    But then I preceeded to distract from… ahem, I mean highlight, the coloring with some brightly colored accents on the card. Smile  From the Real Red polka dot dsp from the Polka Dot Parade pack, to the wrapped Cherry Cobbler bakers twine… and just a touch of bling in the corner.  All adds up (I think) to a sweet little card that needs no sentiment at all.

    And if you know me and how hard of a time I have leaving a card front sentiment-free, you know this is a big deal for me! ha ha!

    So, grab your aqua pen and give it a whirl.  I promise it’s fun!


    To Order Stampin’ Up! Products Anytime, click here!

    Need a Spring Catalog or Sale-a-Bration brochure?

    shoot me an email to jennifer@nwstamper.com with your contact info and I’ll make sure one will be making its way to your mailbox shortly!

    Are you earning your Northwest Stamper Rewards?
    Every order gets you closer to your FREE stamp set!Click here to learn more!

  • Back and Blogging Again!

    Hello again!  Thanks for visiting again after my recent blog hiatus! :)  For those of you that didn’t know, I just finished a big move from California to Washington state.  Its been a crazy couple of weeks for finishing getting ready to go, driving myself, my hubby, my son, and 3 cats in a minivan up to the Seattle area, and then wading through too many boxes!  I still don’t have my craft room really unpacked, but I do have a bunch of projects that I can’t wait to share with you! 

    See I was smart, I finished a bunch of cards before I left and then I kept those projects out and with me so I could share photos when I had a chance post move.  Plus there have been a ton of new promotions and cool things Stampin’ Up! launched at the beginning of the month.  So, I’ll try not to overwhelm you in this post but will share lots of projects and info this week while I finish getting my craft room in working order again.

    So, to start you off, I thought I’d share a card I did for a swap at my team meeting last month.  It uses the new Flower Garden embossing folder from the Summer Mini.

    This is actually a really simple card to make… ok, assuming you count cutting around the embossed flowers simple… but otherwise, really easy to do!  I embossed a piece of Whisper White paper with the Flower Garden embossing folder.  Then I trimmed away the paper on the left side of the flowers.  I used an aqua pen to color in the flowers and then added a bit of bling by using a 2-way glue pen to add adhesive to the center of the flowers and sprinkling with gold glitter.  Attach to Pear Pizzazz paper and a So Saffron base and you have a fun and different card.

    Click here to shop online 24/7 and start earning your NW Stamper rewards!


    Thanks for Being a Friend recipe
    Stamps: 
    Happy Greetings (summer mini)
    Ink:  Blushing Bride, Pear Pizzazz, Chocolate Chip
    Paper:  Whisper White CS, Pear Pizzazz CS, So Saffron CS
    Accessories:  Flower Garden embossing folder, Aqua pen, 2-way Glue Pen, Galaxy Glitter pack, Big Shot, paper snips