Happy 4th of July to you! Especially if you are in the US with all the fireworks and festivities, hope you have a safe and fun time with family and friends.
I thought I’d share a flashback card from last fall that is perfect for this red, white, and blue holiday.
In the meantime, I’m spending the weekend getting in some family time. My family took some time to explore the amazing scenery that is just outside Seattle this weekend.
So I hope whether you are creating or just getting in some family time…you have a wonderful weekend and find time to relax and enjoy yourself !
Happy Stamping! Jennifer
Do some holiday shopping in the online store and earn more entries in my Summer Spectacular Promotion! Shop online here
Happy Friday! And to everyone here in the US, happy holiday weekend!
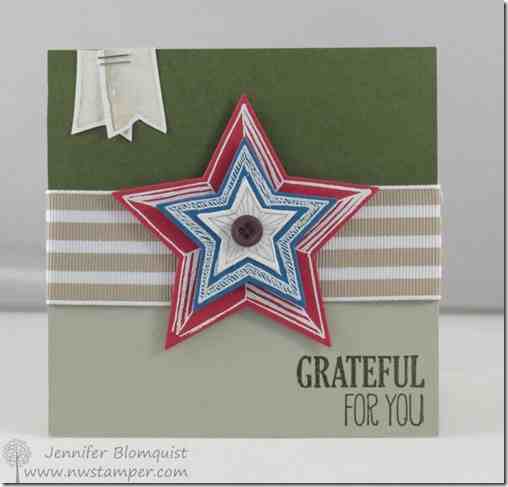
Quick share for you today! This is one of the cards I initially shared as one of six card ideas using only supplies one could pick out in a new demonstrator starter kit (see them all here). But I liked how this one turned out so I wanted to give it a little more time in the sun!
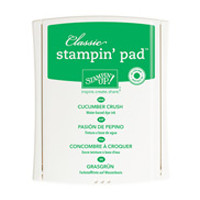
I always struggle with how to use really bright papers – like the Cucumber Crush from the new 2015 In Colors – but I found this was a good way to have fun with the bright colors without needing to pull out your sunglasses!
Tips for making this card:
When you have bright cardstock that you want to use, you can make it more interesting & mute it down a little bit by stamping over it with the coordinating ink color. In this case, I used the crosshatch stamp from the You’ve Got This stamp set in the same Cucumber Crush ink to darken it up a little and add some interest to the card.
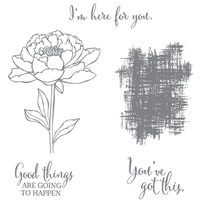
And speaking of which… many people didn’t realize that YES this crosshatch stamp image is INCLUDED with the You’ve Got This stamp set. So, you get a great background stamp along with the pretty flower image all in one set.
Another way to use those bright colors is coloring directly on your stamp with markers! The line art image gives you great balance of white and the bright colors which really POP!
Color all the parts of the stamp at one time using your markers – in this case I had the In Color Marker set and used the Cucumber Crush for the stem, Watermelon Wonder for the flower head, with the Delightful Dijon for the center of the flower. Use the brush tip at an angle (don’t try to color with the tip).
Oh, and when using light colors next to darker colors… start with the lightest color first! This will keep from you getting dark ink on the tip of your light color marker if you accidentally go over where you already colored with the dark color.
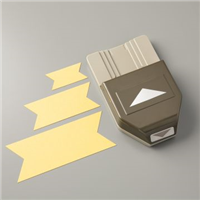
Use the new Triple Banner Punch to make perfect banner ends to your sentiment and pop it up on dimensionals for the finishing touch.
This idea of using stamps to mute your bright cardstock (or just liven up a plain piece) looks great with any color so grab a piece and give it a try!
The best part is that everything is precut, you get great printed card bases, AND you get this awesome EXCLUSIVE stamp set that is ONLY available in the kit!
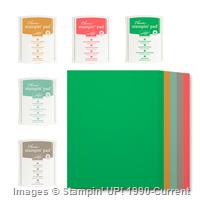
This is everything you get in the kit for only $35…
20 cards total Folded card sizes: 4″ x 4″, 3-1/2″ x 5″, 4-1/4″ x 5-1/2″ 12-piece photopolymer stamp set 20 card bases Die-cut accents Cardstock flag stickers Night of Navy and Watermelon Wonder Classic Stampin’ Spots Washi tape Giftable Kraft box 50 sequins Wood die cuts Stampin’ Dimensionals Acrylic stamp block
That is only $1.75/card and a FREE stamp set!
Seriously, how can Hallmark compete with this cute of card for that price? Plus you get the pride and your recipient gets the warm fuzzies that YOU MADE IT! Handmade from the heart, right?
Want to see more about the kit? Check out this video that Stampin’ Up put together. Since the kit only became available yesterday, I don’t have mine…YET! I will be ordering mine today or tomorrow… but check this out to see it in action!
(note- if you are reading this in email, click hereto view the video)
Perfectly Giftable!
This is perfect for giving to friends and family since everything but your basic glue is included. Get one for you and one for a friend and then plan a fun crafting day. You don’t have to drag out a ton of supplies or find a big open space. Just grab the kit, a tape runner, and find a kitchen table or coffee shop table and create and gab!
Local folks – Since I’m going to be ordering mine shortly, so I’ll open up a GROUP ORDER for anyone who wants in to save a little on shipping. Contact me by Friday afternoon at jennifer@nwstamper.com to get in on the group order!
New Summer Spectacular Promotion Hostess Code!
You can still earn entries for my Sizzling Summer Spectacular promotion! I’ll be announcing the June winners for the bonus drawings shortly.
If you are shopping and your order is less than $150, please use hostess code XXEAYE4S
Hey everyone! Just popping in for a quick minute to say a big THANK YOU to everyone who has been visiting and supporting me. Yesterday was the last day of the Stampin’ Up fiscal year, which meant the last chance for me to earn points to earn an all-expense paid Mediterranean Cruise for me and my hubby! It was a busy whirlwind day complete with a Fun Folds Technique class in the evening! I also was so blessed to have some folks decide to take the plunge and join my Fun n’ Crafty group yesterday as well, so turns out I was going full throttle yesterday and didn’t get a chance to finish up my Walkthrough Wednesday yet.
But………
We did it!!!
Thanks to the support – cheering and orders – and the hard work of my Fun n’ Crafty Stampers group, May of next year I’ll be on that boat!!
So, now I’m going to take a day to reintroduce myself to my family and soak it in! I’ll be back tomorrow and it may be this week’s Walkthrough Wednesday is just going to have to come on a Thursday!
But from the bottom of my heart, thanks for stamping with me, chatting with me, or just taking the time to visit my blog here! Its been an amazing year and I can’t wait to keep it rocking and rolling into the next!
I can’t even believe it is already the end of June! It’s been a busy busy month around here and things are still hopping as the month comes to a close! So, while I’m finishing getting the last few things ready for my Fun Folds Class tonight, I wanted to make sure to remind you of the special deals that are ending today!
LAST DAY to get TWO FREE STAMPS of ANY Value!!
I know some of you had been on the fence… but today is your last chance to hop on down onto the FUN side! 😉 Here are just a few reasons to consider giving it a shot:
TODAY ONLY! Pick out 2 Free Stamp sets of ANY Value to get added to your starter kit!
Your Starter Kit is YOUR CHOICE of any $125 in product for only $99
Did I mention there is FREE Shipping?
TODAY ONLY! Today is the last day to sign up for the starter kit and be grandfathered in to the New Recruit Bonus! You get30% off your first qualifying purchase instead of the standard 20%!
NO OBLIGATION! NO SELLING REQUIRED – This is a no risk, only opportunity thing! You can purchase the starter kit and use it however makes you happy! Play with it all yourself and make something awesome… or share with your friends by hosting and open house or class. You have 3 months to determine if you want to stay active or not! If you decide not, I still love you anyway. 🙂
Plus you’ll have me as your upline and resource as you get going and have access to our awesome Fun n’ Crafty stampers group with our chatter, swaps, project sharing, and support for each other!
>>> Get started picking your starter kit and jump in! We’re waiting for you! <<<
PS – If you need some ideas for your starter kit, check out this blog post where I shared a suggested starter kit & 6 projects you can make with that kit for an entire class!
LAST DAY for my Paper Pumpkin Prepaid Special!
Did you know? You can get a prepaid subscription and use it to cover your existing subscription, start a new subscription, OR give a subscription as a gift?
LAST CHANCE! Get a free gift from me with ANY prepaid subscription! If you purchase a subscription by June 30th you’ll receive some nice rewards for doing so!
Purchase a 1 month subscription $19.95 plus tax & receive a free sheet of dimensionals.
Purchase a 3 month subscription $59.85 plus tax & receive a free snail refill and dimensionals.
SAVE – Purchase a 6 month subscription $113.70 plus tax & receive a snail refill, dimensionals and liquid tombo glue (SAVE $1 a month on your pumpkin plus get all the freebies)
BEST DEAL! – Purchase a 12 month subscription $215.40 plus tax & receive a snail refill, dimensionals, liquid tombo glue and $21.50 in FREE product! YOU CHOOSE the free product from anything in the Stampin’ Up catalog and online store. (BEST DEAL you save $2 a month on your pumpkin plus get all these freebies)
I just created a Facebook group for all things Paper Pumpkin and would love to have you come join the conversation. Post pictures of what you’ve been creating and I’ll share ideas and tips from my creating adventures as well! Join the Paper Pumpkin Fun with Northwest Stamper group.
NEW! Weekly Deals, Bonus Deals, and Clearance Rack Updates
They have also updated the Clearance Rack and the Weekly Deals!
Bonus Deals will run June 30th-August 3rd
Each week – 30% items will be part of the usual Great Weekly deals (normally 25% off)
Some new Clearance Items have been added to kick off the sale and more will be added beginning of July. Clearance rack items are up to 60% off.
Some of my favorites? The Maritime designer paper, Alphabet Press embossing folder, and Washi Tapes for $1.99!
Ever have one of those days where the mojo just couldn’t seem to get in gear? That was me yesterday, I think it took me 4 cards before I started coming up with something I liked! But this all stemmed from a fun challenge I came up with yesterday…
Pick out a Stampin’ Up starter kit and create class samples that a new demonstrator could use for their first event using just what they got in their starter kit!
I often get people asking me,”What should I get in my starter kit?” and I have a general list of what to get and where to get started, but I thought I’d try to put together one that uses the kit to it’s full potential. Especially, when you have promotions like the Two FREE Stamp Sets with Starter Kits ordered by 6/30 (that’s TOMORROW!) But this is what I came up with:
See?? I told you it was an amazing deal… especially because it comes with no obligation and just lots and lots of opportunity! So, on to the opportunity part, I told you I was having some Mojo struggles yesterday, but thankfully about 4 cards in I started putting together this card and I just LOVED IT!! What do you think?
Tips for making this card:
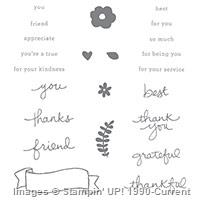
Grab the Endless Thanks stamp set and your favorite ink colors and you can use the curved vine to make your own custom wreath!
Stamp the larger flower with Watermelon Wonder onto a scrap of Watermelon Wonder cardstock and then cut out by hand for a wreath focal point. (Its only one little flower so it isn’t that bad for all you folks who don’t like fussy cutting! )
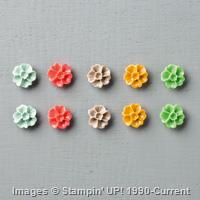
Spice it up by adding one of the In Color Blossom Accents. You’ll want to use a Glue Dot to adhere your Accent to the cut flower.
The sentiments come mix & match style in the stamp set, so have fun and mix & match your ink colors! Here I have Memento Black and Delightful Dijon.
Use different colors for your wreaths to fit different times of year! Add more leaves in orange, red, and yellow for the fall…navy, soft sky, and sahara sand for winter, etc. This summery combo is just the 2015 – 2017 In Colors – Mint Macaron for the vine, then Cucumber Crush, Watermelon Wonder, and Delightful Dijon.
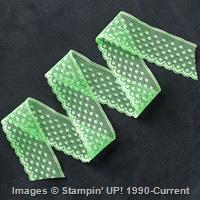
If you cut your cardbase to be 5.5” x 8.25” and fold in half, you can easily wrap some of the Cucumber Crush dotted lace trim around the front of the card and tie into a pretty knot to the left of your wreath.
This would make an easy card for a class or workshop. If you want to make it slightly more economical for a large group, instead of using the Blossom Accent, cut out the large flower and then add a rhinestone in the middle. Voila! A pretty flower for your wreath!
Now, I told you, I was trying to come up a few cards you could make with this starter kit. I mean, really, what is the point of getting a starter kit of lots of fun stuff if there is only one thing you can do with it? So, while I will not claim these are all my best samples ever, they are all ones you would be great for some classes or workshops. Plus, with your starter kit, you would have supplies to make LOTS of all of these cards – So invite lots of people to join you for your kick off event! You could even do 2 or 3 at your first event and then do 2-3 more at your next event…how is that for planning?!
If you decide to join my Fun n’ Crafty Stampers group, I’d be happy to send you close up pictures of all of these cards and cutting dimensions for all of the paper pieces. I also give everyone in our group copies of my class by mail project tutorials each month. So you’ll continue to get more class and project ideas throughout the year too! We can’t wait to welcome you to our group! Get started by ordering your Starter Kit here
Coming to my Playing with Color – Meet the In Colors Class or getting it as a kit by mail? I’ll be including the supplies for this as a bonus card for you! I just loved it so much and you’ll have all the ink, so I figured why not add it in to the class! RSVP here or order your kit by mail!
Suggested Starter Kit items & item numbers:
2015-2017 In Color Ink Pad & Cardstock Bundle (#138358)
2015-2017 In Color Ink Refills (5 colors – #138329, #138332, #138331, #138330, #138328)
2015-2017 In Color Markers (#138333)
Whisper White Cardstock (#100730)
Memento Black Ink (#132708)
Notetag Punch (#135860)
In Color Blossoms Accents (#138383)
Dotted Lace Ribbon (Cucumber Crush -(#138423)
Rhinestones (#119246)
Stampin’ Dimensionals (#104430)
Glue Dots (#103683) Endless Thanks Stamp Set – FREE w/ June 2015 Promotion (photopolymer #138796)
You’ve Got This Stamp Set – FREE w/ June 2015 Promotion (wood mount – #139572, clear mount -139575)
Shipping – FREE!
Business supplies (catalogs, order forms, event invite postcards, and more)
Starter Kit Value
kit value – $179.50 plus tax & $17.95 in shipping… Cost by June 30th?ONLY $99+ tax. That’s a $98.45 SAVINGS! It’s 50% off!!
I don’t know about where you are in the US but up here in the far Northwest, we are trying not to melt! We have been hit with a week of 85+ degree weather… which wouldn’t be too bad except none of the houses here have AC! And I’ve spent the last 2 days outside in my Garage running my Craft Garage sale. But now today I get to stay inside in our basement and cool off and craft, craft, craft! I’ll be making all the samples for my Fun Folds Technique class on Tuesday & the Playing with Color – Meet the In Color class on 7/7!
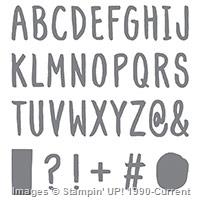
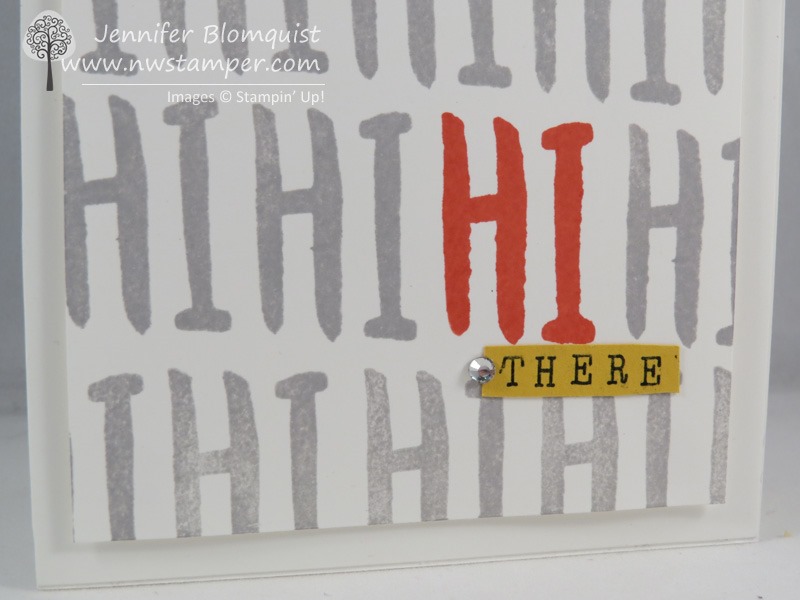
But for today, I have a card to share that is one of my favorites using the new Layered Letters alphabet stamp set…. check it out:
This card is so easy to do and has a totally fun vibe to it! Here are some tips for making it at home:
Tips for making this card:
The new Layered Letters stamp set is one of the Photopolymer cling sets. The nice thing is that the letters are really closely cut, so you can place both the “H” and the “I” on the block at the same time and have normal spacing!
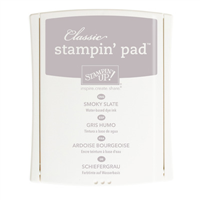
When you put the “H” and “I” on your block at the same time, stamp your Watermelon Wonder (red colored) Hi first, then clean off your stamps and then start inking with Smoky Slate and then just stamp in rows starting with the “Hi” to the left and to the right of your red “Hi”
Stamp on a slightly smaller than your card front piece of Whisper White cardstock (this was 3 3/4” x 5” paper)
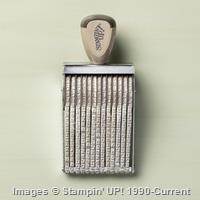
Stamp any extra words, like the “there” onto a contrasting cardstock color like this Delightful Dijon cardstock. Make your own custom words to you can say exactly what you want by using the Alphabet Rotary Stamp for that extra word – you get 13 letters, numbers, spaces, or symbols to work with!
I added a little rhinestone for just a little touch of sparkle…always have to have a little sparkle!
Pop your stamped layer up on Stampin’ Dimensionals before adhering to your card and you are good to go!
Ok, now I’m off to stamp! I’ll be back tomorrow with more fun ideas… specifically, I’m going to try to come up with some great ideas you can use if you decide to take advantage of the TWO Free Stamps when you get the Starter Kit deal! So you can get an idea for all the awesomeness you can get in your starter kit PLUS what you can make with those goodies!
Oh my word, it’s been crazy around here for the last few days. As you may know, every summer I run my annual Craft Garage Sale and last year I started my “Trade-in Program” where you can sell you craft supplies in my sale and turn them into credit for shopping for something fun and new in the latest Stampin’ Up catalog! This year, we had a lot of folks participate and so the tables have been piled high this year!
If you are in the Seattle area, you should totally come check it out!
Craft Garage Sale – Jennifer’s House in Bellevue, WA 16870 ne 24th Pl, Bellevue 6/27 (Sat) from 9am – 2pm
Once we finish up the sale, I’ll be getting straight to work finishing up samples for my next 2 classes happening in the next couple weeks. I’ve had some interest in folks getting these as kits by mail, so I thought I’d share them here in case anyone else is interested in coming or ordering the kits:
**buttons for ordering are at the bottom of the post**
Class 1 – NEW Fun Folds Card Class – June 30th or by mail
I’m going to share some cool new card folds that I haven’t done in classes before. We’ll also use the newest papers and stamps, so its going to be all about new, cute, and WOW! We’ll do a pop out swing card, a pinwheel fold card, and stand up step card Here are some examples of the styles of cards we’ll be making (I’m still making our exact samples):
These are not my designs but were my inspiration to get started creating!
Class is $15 or free with a $35 order. You can purchase a kit to go for $15 shipped or place an order in my online store using hostess code ZKGTCW6U and let me know you would like a kit mailed to you and I’ll send it to your for free!
Class 2 – Meet the In Colors! Playing With Color – July 7th or by mail
Have fun playing with color as we get together at Panera and make 5 FUN & DIFFERENT projects showcasing the new Stampin’ Up In-Colors. You’ll get some great card ideas as well as see some great combinations using these coordinated colors… PLUS you’ll be going home with your own set of ink pads & extra cardstock so you can make more projects later!
Here are examples of the new In Colors and we will probably make this as ONE of cards… along with 4 other projects.
Class is $39 (FREE class with the purchase of the In Color kit) Add $5.50 for flat rate priority shipping for this by mail.
Sign up for one or both classes by emailing me at jennifer@nwstamper.com or using the paypal button:
I’m so proud of myself for actually finishing a Paper Pumpkin kit in the same month that I got it. I have to admit, I’ve gotten really bad about getting a kit in the mail and being so excited to make the project… and then letting the box get buried on my desk only to be dug out weeks later.
But no more! I just launched a new Facebook group to share Paper Pumpkin project kit tips, alternate ideas, and the occasional great deal! So now I have to start making my kits on time so I can share in the group when everyone gets their kits. Feel free to join us here – Paper Pumpkin Fun with Northwest Stamper. Anyway, this was a fun kit and I thought really cute. I especially loved the thin wood accents on the banner card!
PSST – Did you know that you have the option to either (1) subscribe monthly to Paper Pumpkin, but you also can (2) prepay your subscription for you OR as a GIFT?? Prepaid subscriptions for 6 month or 12 months actually get you discounts, can be combined with other catalog purchases, and can even earn you hostess benefits!! (check out prepaid subscriptions online here)
Ok, back to today… it is also Walkthrough Wednesday and so I thought I would share my alternative card ideas I came up with from the kit and help walk you through them too. So here are the alternative cards:
And you can check out the video about Paper Pumpkin and how to make these cards here:
(note – if you are reading this blog post in email, click here to view the video)
But here are a few close ups of the cards – each using only the supplies from the kit. So you don’t have to have anything else in your craft room, or with you, to make these variations!
Flower Card – Alternate
Instead of laying out those stickers on the front of the white cardstock, I layered them BEHIND to make a fun background pattern. Add some extra stamping and tie on some of the thick twine and you get a fun country card.
Banner Card – Alternative
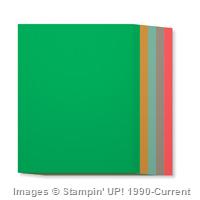
I also wanted to mix things up a bit with the banner card too. So I started by squeezing all the triangles together which left me just enough space at the top for a sentiment! And where did that green background paper come from you might ask? Well, the kit included envelopes and envelope liners – so I just repurposed PART of an envelope liner! You still can line the top of your envelope and still have enough to make this cute background. And no extra white cardstock required either! I just trimmed the bottom of one of the banner card bases. Check out the video for all the exact measurements and cutting instructions.
And so for comparison… the card on the left is the one from the instructions in the kit and the card on the right is my alternate version:
And if you have received your kit but haven’t put it together yet, you can follow along with my Paper Pumpkin June edition walkthrough video where I share tips for making the default cards in the kit… check it out:
(note – if you are reading this blog post in email, click here to view the video)
Ready to get started with Paper Pumpkin or give one as a gift?
You have 2 options to get these great kits sent direct to you AND have access to purchase past kits and refills (see all the kits available here)
Start a Monthly Subscription No obligation, you can cancel at anytime, or just skip a month when you know you will be busy. (learn more)
Purchase a Prepaid Subscription – Perfect for SAVING you or the perfect gift for someone else! Prepay for a 1,3,6, or 12 month subscription and get EXTRA benefits! (check them out)
One Week Special! Get a free gift from me with ANY prepaid subscription! If you will purchase a subscription by June 30th you’ll receive some nice rewards for doing so!
Purchase a 1 month subscription $19.95 plus tax receive a free sheet of dimensionals.
Purchase a 3 month subscription $59.85 plus tax receive a snail refill and dimensionals.
Purchase a 6 month subscription $113.70 plus tax receive a snail refill, dimensionals and liquid tombo glue (SAVE $1 a month on your pumpkin plus get all the freebies)
Purchase a 12 month subscription $215.40 plus tax receive a snail refill, dimensionals, liquid tombo glue and $21.00 in free product YOU CHOOSE the free product including hostess only items on page 178-181. (BEST DEAL you save $2 a month on your pumpkin plus get all these freebies)
Hold the presses! I had other plans for my blog post today but when I saw theWeekly Deals this week, I had to make sure you saw them too! Especially because one of my favorite dies right now is $10 off!!!
Seriously Folks – this is an awesome set of deals!
From the Stars Embossing Folder: see the blog post here
Switch up the colors and sentiment of this card to make it a fun Birthday Card!
But most especially, the Mini Treat Bag thinlit die set!
I love this die and have shown it a few times on my videos. Here is the official video though:
Plus you can see the accessories used with the complimentary You’re So Sweet stamp set for my recent Walkthrough Wednesdays!
If you are local, I’ll be doing a group order on Thursday so that folks have their deals in time for the Tuesday class, so let me know if you want in on that.
Or order your own and use hostess code – ZKGTCW6U – and be entered in my next Summer Spectacular drawing!
I’ve always thought Alphabet stamp sets were nice enough, but everytime I got one, I found I didn’t use it that much. Which is why I didn’t order the Layered Letters stamp set right away… but once again my Mom was wiser than me and ordered it. So I got to play with hers…and I think I’m in LOVE!
Yes, I’ve finally found the alphabet stamp set that I can totally imagine using on a regular basis! I think part of it is that it comes with an oval stamp and a rectangle stamp that makes it so you can stamp a background color and then stamp the letter inside the shape, giving you a TON of different options. Like this one (see the yellow behind the letters in “Smile”? It is a stamp!!):
But for my card share today, I kept it simple and just made a simple “HI”. Add some banners and bling and you are good to go!
Tips for making this card:
Keep it quick and simple by starting with just 2 patterns of paper cut to 1”x4-1/4” and 1-1/2” x 4-1/4”. Trim the ends with the Banner Triple Punch in 2 seconds and layer together for the cute splash of color!
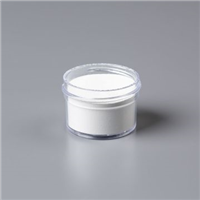
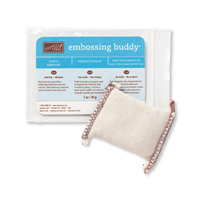
Go bold for your sentiment! Start with a bright color (like this Calypso Coral cardstock) and then heat emboss your letters using White embossing powder. If you haven’t done much heat embossing before, here are the steps: – rub the surface of your cardstock lightly with an Embossing Buddy to eliminate static and stray embossing powder – stamp your image using Versamark ink – cover generously with white embossing powder – tap off the excess powder… thanks to the embossing powder, it should all tap off except where you stamped – heat with your heat gun until all the powder melts and becomes nice and shiny
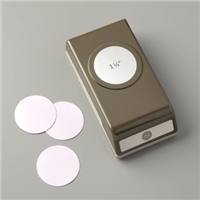
The new 1-1/2” Circle punch is PERFECT for punching out the word “Hi”
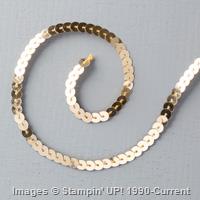
Add a few sequins dangling down for that perfect added shine. I just took a 4 1/2” strand and used glue dots to hold it to the back of my punched circle.
I have a bunch more Layered Letter cards to share so check back over the next week or so as I get them all posted up for you! But you won’t be sad if you decide to get this stamp set in the meantime!
Final day to get your name in the drawing for the first June Bonus! 50% off any item in the catalog!
As I posted last week, I’ve kicked off my Summer Spectacular with the big prize being the $100 Shopping Spree at the end of the Summer. But in the meantime, I’ll have little drawings along the way including the one tonight for 50% off any one item in the catalog! You have until tonight to get your name in the drawing!
Enter by either
placing an order (every $25 in product ordered gets you 1 entry),
In the process, I discovered a stash of awesome stamps from Sale-a-Bration and thought it would be fun to give them away to my amazing customers! So, I’m holding – a Second Chance Sale-a-Bration!
So if you missed a great stamp set, or just haven’t placed your new catalog order yet, NOW IS THE TIME! Check out what is available and get yourself a little bonus gift as a thanks from me for helping me out!
Get your pick of free goodies with your $50 Stampin’ Up purchase
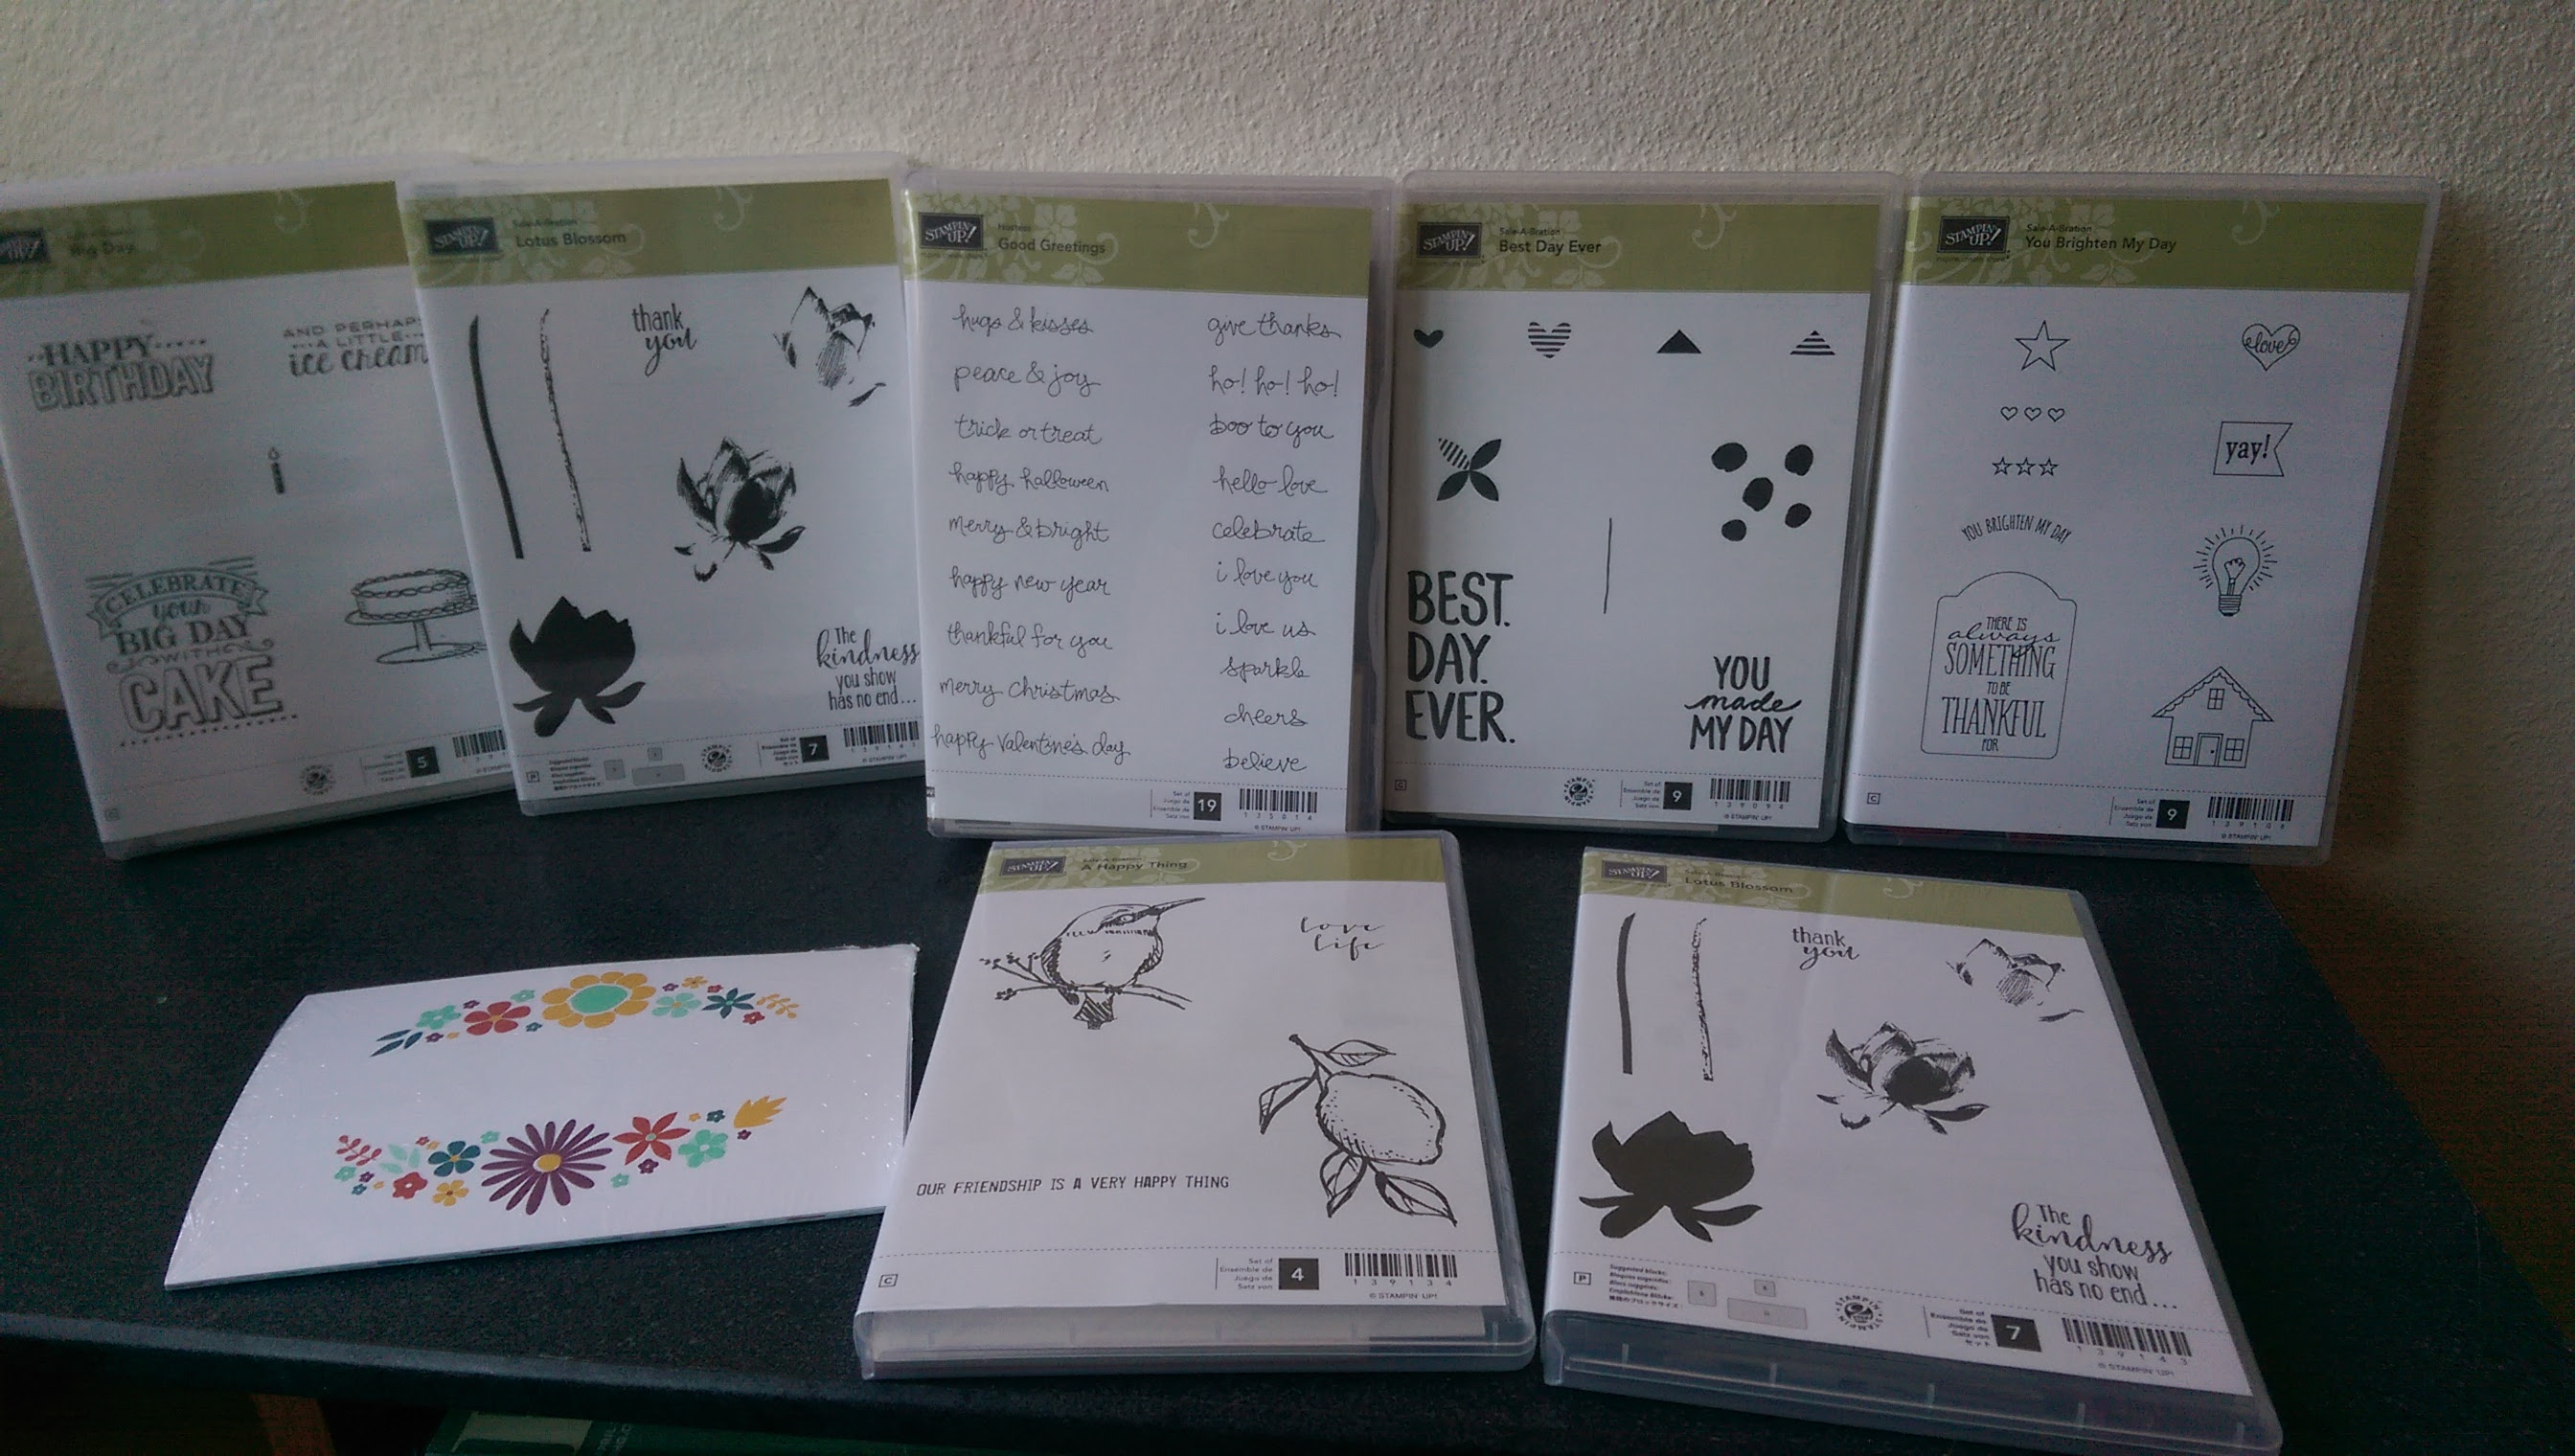
I found the following gems in my craft room that you can choose from as a thank you for your purchase:
Good Greetings Limited Edition Hostess Set (NEW, woodmount)
Lotus Blossom (NEW, photopolymer)
Lotus Blossom (gently used, photopolymer)
Best Day Ever (NEW, clearmount)
A Happy Thing (NEW, clearmount)
Big Day (NEW, clearmount)
You Brighten My Day (gently used, clearmount)
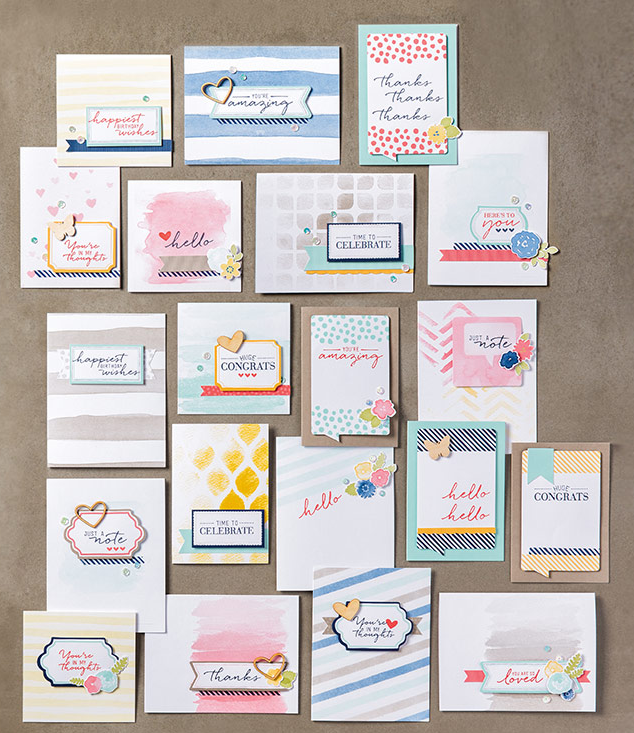
This Day Project Life mini card collection
(not pictured) NEW Go Wild 6″x6″ Designer Paper Stack from the new 2015-2016 Annual Catalog!
Place any Stampin’ Up order using the hostess code ZKGTCW6U of $50 or more and you can select one of the items above to get for FREE! The free items are FIRST COME, FIRST SERVE! So, when you place your order, please email me with your selection so I can set it aside for you.


![NWstamper signature_thumb[9]](https://i0.wp.com/www.nwstamper.com/wp-content/uploads/ad87b4046c1e_C9F6/NWstamper-signature_thumb9.png "NWstamper signature_thumb[9]")


 These are not my designs but were my inspiration to get started creating!


