Northwest Stamper

Blog

  • Using Crystal Effects

    babybestwishes_wm1So tonight was our Crystal Effects night, and I think everyone learned something new – myself included!  I ended up staying up late last night as I kept finding new ways to use crystal effects that I wanted to try.  If you haven’t heard of crystal effects, it is this great thick clear liquid laquer for using on craft projects.  The most straightforward use is to add a bit of gloss or shine to your projects by applying some Crystal Effects on top of a stamped image.  However, there are a ton of fun and creative other uses. 

    I made a few samples of some different techniques last night.  So we talked about those different ideas and then set to work making a few items to take home.  Tonight we made Faux brads, Laquered die cuts, and a card using colored Crystal Effects on a transparency.  However, here are some of the different ideas for how you could use crystal effects:

    1. Add a touch of gloss to a stamped image
    2. Use crystal effects as a base for glitter.  Drop some crystal effects onto a stamped image and then cover in glitter.  Tap off excess glitter and allow to dry.
    3. Create Faux Brads by punching out a circle of paper and placing it over a glue dot.  Add some crystal effects to the top and you are ready to go!
    4. Create dew drops by dropping some crystal effects onto wax paper or the backing for the stickers from your stamp sets.  Add a bit of reinker color to make different colored drops.
    5. Color with crystal effects by mixing some crystal effects and reinker, and then using a brush or toothpick, color in a stamped image for a colored, glossy effect.
    6. Make a 3D embellishment by drawing a shape with crystal effects on wax paper (or the sticker backing) and then pouring glitter on top.   Allow to dry and then pop-off.
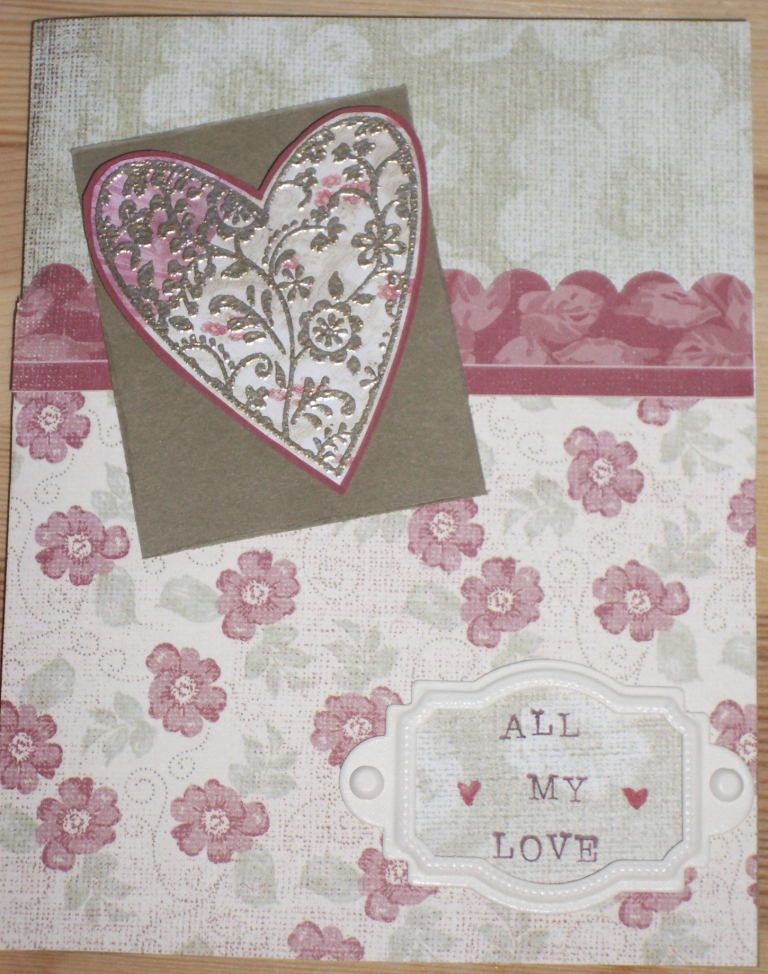
    7. Create laquered die cuts.  Cut out a shape in chipboard (in my case, I cut out the left over piece from a chipboard die cut after I popped out the die cut).  Glue the chipboard to a piece of designer paper.  Fill in the die cut space with crystal effects and allow to dry.
    8. Make glittering transparencies.  Mix some crystal effects with some reinker and dazzling diamonds.  Use a paintbrush to apply the colored crystal effects to the backside of a stamped transparency.  Allow to dry and attach to your card or project.

    techniquece

  • Congrats and Thinking of You Cards

    This weekend was a lot of fun.  I hosted an Open Scrap day at my home on Saturday.  I had planned on sitting an working on my personal projects while the other ladies worked on their projects; but of course, I was way to social for that. 🙂 I was playing with my new BigShot, showing folks how to use it, and other fun techniques.  So, it wasn’t until 5 of the 6 ladies had headed home that I finally sat down with my kitty scrapbook and started working.  But it was fun to have 6 crafters over.  So, I still have all my stuff out in hopes that I will make more progress on my scrapbook, but I have a feeling tonight will be filled with getting ready for my technique night tomorrow.  Tomorrow we are playing with Crystal Effects and I’m really looking forward to it! 

    Here are the other two cards I made for my card kits for Saturday.  These last two came together very quickly and have helped me be an even bigger fan of the SAB sets.  Oh yeah, and the paper in the SAB catalog is so yummy! 

    congrats_wm
    stamps:Congrats (SAB) paper:whisper white cs, night of navy cs, bashful blue cs, certainly celery dp inks:bashful blue, night of navy accessories:glue dots, fresh favorites II buttons


    sab_thinkingofyou_wm
    stamps: Polka Dot Punchs (SAB), Sincere Salutations paper:Very vanilla cs, bashful blue cs, delecate dots DP (SAB) inks:bashful blue, certainly celery, sahara sand accessories:certainly celery twill tape (SAB), circle scallop punch, 1 1/4" circle punch


  • One of the cards from this weekend’s card kit

    pinkgreydreamsdujuor_wnWhile I waited for my UPS delivery to arrive so I can finish my scrapbook layouts, I spent last night working on cards.  This card grew a bit organically from me starting with the grey base, then picking the pink, then finding a layout, and then deciding on the stamp set.  I don’t know quite how to classify the card (valentine’s day, for you, or what).  But I think it’s cute anyway.  🙂

    I just got home and my packages were here including my new BigShot!  Yay!  So, I’m going to leave this short so I can go play with my new goodies.  Have a fantastic week!

    And if you are in the Portland area, just a reminder that you are welcome to attend my FREE Open Scrap day tomorrow from noon until 6pm.  Bring a project of your own to work on or I will have kits available (a card kit, a scrapbooking kit, and a mini-book).  Contact me and I’ll send you the details!

    Recipe:
    Stamps:
    Dreams Du Jour
    Inks: Pink Pirouette, Basic Grey
    Paper: Basic Grey CS, Basic Black CS, Whisper White CS, Bella Rose DSP
    Accessories: Stampin’ dimensionals, Basic Grey taffeta ribbon

  • Two Stamping Challenges in One Card!

    bright_happiness_wm1I sat down this evening to get started on my card kits for Saturday.  And instead, I decided to try out a card sketch challenge.  Then, I decided to get more ambitious and checked out SCS to see what color challenges were up.  I haven’t participated in any SCS challenges before and I’ve been meaning to for a while.  Its funny, I actually had a moment where I felt like I was cheating by using a card sketch.  Then I had to laugh at myself and say “inspiration is a good thing”.  No need to reinvent the wheel everytime.  Especially if you don’t have a design sitting top of mind, itching to get down on paper.


    I ended up changing the sketch challenge that I used.  But thought it would work well with the stamps I choose.  And the colors… my oh my the colors!  I picked this recent bold bright challenge because I can never seem to get myself to use many of my Bold Brights (heck, my Gable Green was still in the shrink wrap and I’ve had it for about a year!)  I always gravitate towards the Earth and Jewel tones in Earth Elements and Rich Regals.  So, I figured I needed to do this challenge to break out of my mold.  I think the blue flowers are bit bright for me, but I decided to stick with it once I had it stamped. 


    Recipe:
    Stamps:
    Happiness Always
    Inks:  Tempting Turquoise, Lovely Lilac, Pink Passion, Gable Green
    Paper: Whisper White CS, Lovely Lilac, Pink Passion

  • Is it possible to craft without making a mess?

    Well, I’m going to have to make this post quick, but I thought I would post the progress I’m making on a project since it seems to be taking me a while to complete it.  🙂

    So, on Sunday (or was it Monday?) I started trying to get things together for my open scrap day on Saturday.  I’m putting together some kits for folks who aren’t going to be bringing their own project.  One of the kits is going to be a two page 12×12 scrapbook layout.  I thought “one layout shouldn’t be so hard” but when I sat down with my papers, I realized that the only 12×12 paper that I had enough for everyone (if everyone got a kit) for the base pages was Glorious Green.  So I started from there. and it turned out to be a more challenging color base than I expected.  scrapbook_pgsI because obsessed with creating this layout to the point that I keep futzing with it instead of moving on to my other kits. 

    Finally last night, I found my groove and got the layout close enough to done (I need my BigShot that is in transit to finish it completely) that I’m going to move on to other projects tonight.

    Now, my “craft room” is also mine and my DH’s office and it is complete disaster – never got fully unpacked and now is a mess of half unpacked boxes and stacks of paper, books, and knick knacks.  So, until I get that straightened up, I’ve been taking over my dining room.  Last night, when I got home from work, I walked into my dining room and saw this:

    messy_desk

    I’ve now decided that I can’t work on a project and have my space by clean.  I also don’t know how some of you work on dresser tops and coffee tables.  🙂 My paper, scrap, and accessory piles are too big for that.  Does anyone craft and stay tidy at the same time?

    messy_bookcase
    The bookcase that was supposed to be for books and instead is my SU storage space.
  • Sale-a-bration is here! Plus 15% off the demo starter kit!

    sab_2008
    See the full catalog!

    Its finally here!  Sale-a-bration is one of the most anticipated specials of the year for Stampin’ Up!  It’s the chance to get special exclusive stamp sets FREE!  Plus, unlike the regular hostess benefits, you can quickly get multiple free sets in addition to any free hostess sets you earn.  This year, you have the opportunity to not only earn stamp sets, but Stampin’ Up! is offering an exclusive ribbon bundle and paper pack (they are super cute). 


    So, what are all the ways your can earn free stuff on top of your regular hostess benefits?

    Customers: Receive a free Sale-A-Bration product for every $50 purchase.

    Hostesses:
    Receive a free Sale-A-Bration product with a $300 or more workshop, in addition to the normal hostess benefits.

    Recruits: Choose ANY retail stamp set (a value up to $47.95) from the current catalog when signing up during the promotion. Plus, get 15% off the regular $199 price of the Starter Kit–that’s $335 worth of products for only $169!  Sign up online today by visiting my website , clicking the Join Now link at the top of the page, and using the password – stampingplace!  I’d love to have you join the SU family with me!


    So, lets say you host a workshop and have $300 in sales, you get a free sale-a-bration stamp set, a free hostess stamp set, and $35 in any product you want! 

    Or, if you are like me, you decide to place an $150 order – you come away with 3 free Sale-a-bration stamp sets, 1 free hostess set, and $15 in any product you want!

    Quite a way to get more bang for your buck!  Contact me to schedule your workshop or to place your SAB order.

  • My last index card – Sweet Stems

    My last index card I needed to make for Splitcoast Stampers was for the stamp set Sweet Stems.  I was hesitent to buy this set because I had bought and regreted Pocket Silhouettes, another small flower set.  However, after looking at the stamp set and all the coordinating items (besides the stamp set you have matching paper – Tea Party – which has some cute designs, and an embosslit which will emboss one of the flower images), I’ve decided this set is more my style and a bit more fun.  I guess the natural looking sets are just not for me. 

    Anyway, as part of my new catalog order, I also ordered the small oval punch which I’ve been wanting for a while.  So, it all came together as a chance for me to try out this design I’ve been eyeing for a while.  Sure, I could have added a bunch of layers, but it was nice to make something really simple and straightforward.  I made sure to place the vases just below the bottom of the stamped image so what you see with the flowers is exactly what you get.  Oh yeah, and if you haven’t tried sponging yet, you totally should.  Its super easy, adds neat texture, and is fun to do!

     sweet_stems_index_wm

    And one other tip.  I have both blender pens and an aqua pen.  I most often use the technique of lifting color from the lid of an ink pad and coloring in a stamped image, and I never quite new which to use when.  So, I used this card as an opportunity to play with both of them. 

    What I realized is that the aqua pen is good for adding colors lightly and for a true watercoloring effect.  Blender pens are great for slightly richer colors (pink pirouette will actually show up using a blender pen) and are the right tool for the job when coloring in small spaces.  The aqua pen, being based on water, has a tendancy to bleed which is fine if you are coloring in a slightly larger space, but is not nearly so great for small dots and the like.  (I’m sure using real watercolor paper helps this though).  And I believe you can turn blender pens into markers by using a reinker to dye the end of the pen, though I haven’t tried this yet. 

    So, my tip – use blender pens for precision work, you will be much happier with the result.

  • And now for a little bit of muzak

    Well, I finished my last index card last night and had a lot of fun with it.  It is one of my rare, very simple cards.  No layers even!  Unfortunately, I waited until this morning to try to take a picture of the card before work (I’ve found the early morning light tends to be good lighting for pictures).  Sadly, we had a ton of fog and so none of my pictures turn out.  So, I’m waiting until tomorrow to try again.  Until that time…. here is my version of muzak — a non-stamping post.  I promise to get back to the stamping stuff tomorrow! 🙂


    My story of the new haircut:


    I’ve started getting into the bad habit of all of the sudden looking in the mirror, deciding my hair has turned into an emergency and I must get it colored/cut/styled asap.  That happened to me yesterday and so this afternoon I made an appointment for this evening for a haircut.  Of course, it being so last minute, I had no idea what I wanted other than “better than it is now”.  My stylist showed me a picture of a cute bob and I thought “what the heck” and said sure.  Unfortunately, the part I didn’t think about too well is that this hair style has bangs.  Not in the traditional blunt cut across the eyebrows way, but the sideswept, falling into your eyes kind of way.  I realized the full consequence of this when I saw all the hair falling to the floor and now am brushing my bangs to the side ever two minutes.  The worst part though, was that I was still adjusting to the haircut when my husband and I met up after he got off work.  His response? 

    Him: “Did you get your haircut?” 

    Me:  “Yep”. 

    Him:  “Um….okaay”.   Sigh. 

    I still don’t quite recognize myself in the mirror, but I think I’m going to like it tomorrow.  I think the problem is that this is a hipper haircut than I’m used to. 
    But what is true in crafting is true in hair — try something different and new, it may not be perfect the first time, but you may turn out with something great you never would have thought to try.

  • Thank You Kindly Index Card and the Philosophy of Card Fronts

    For a while now, I’ve been a member of the card front club.  That is, someone who participates in card front swaps and who creates card fronts when making new card projects.  I always told myself, “I’m saving cardstock this way” and some folks say it saves a lot of room when storing your cards.  cardfront_projectIt made perfect sense, right? Well, I realized that I’m not nearly as organized as I’d like to be and often I’m just grabbing a card last minute from my stash.  (Thankfully, I have a large enough stash, I can still tailor my choice to the recipient.)  In any event, I like to have my cards ready to go so I only have to write on the inside and put it in an envelope. 

    So, this weekend I started project “turn cardfronts into cards”.  Over the course of three nights, I cut, scored, folded, and glued card bases to 46 of my cardfronts.  And last night, I finished the last card.  It was during this time that I realized that I like how cards look better when I go ahead and use a half sheet of cardstock for the card base instead of making a card front and later trying to line-up the front on a separately cut base (I wasn’t so good at that sometimes).  Plus, while I might be saving a few cents not using as much colored cardstock, sometimes it really does look nicer to have the color for the base (I even used a half sheet of colored cardstock for some of my cardfronts – definitely using more cardstock that way!).  So, now I’ve swung over to the “just do it” camp and will leave card fronts for pretty much swaps and special uses only.  I’d love to hear other people’s thoughts on this topic though.  What do you like better?


    Once that was all done last night, I didn’t have much time or energy for much else.  So, I tried working on my index card project.  I picked up my Thank You Kindly and some paper and got to work. 

    thankyoukindly_index

    This was one of those times that you think you have a great card idea and as soon as you start stamping you realize that “great” isn’t quite the right adjective. 🙂  It also doesn’t help when you cut your cardstock and then realize you totally cut at the wrong sizes!  So, I kept tweaking it as I went until I got to the point where I knew it needed something but everything seemed too much.  So, I finally went with putting on the button latte buttons (I love, love, love these buttons!!!) because the empty space was driving me nuts.  So, while its not my most shining work, its not bad for a card that had to use every thank you sentiment in the stamp set and no other stamp set period.  I call this one good enough and will be moving on tonight to Simple Stems. I’m feeling a little more optimistic about that set.   


    And yes, for those of you who left comments about my Video Game Live concert experience.  You are right, I had a camera. 🙂 Though the host actually encouraged use of recording devices at one point, so I don’t really feel bad.  Unfortunately, my pictures were mostly blurry so I can really only share the costume contest line up.  These were concert goers who dressed up for fun, glory, or a prize.

    vglive_sm vglive2_sm

  • Blast from the past cards

    Yesterday, I was invited by a nearby demo to come stamp with her and a couple of her ladies in a casual afternoon of card making. (thanks, Lisa!)  I had never met her before, but I was excited to meet other stamping ladies from the area.  First off, I am so jealous of her workspace. 🙂  She has a large, long room that is all stamping, all the time in her upstairs.  Everything is perfectly put away in organized drawers, shelves, and hanging on the walls. Plus she had the coolest metal decortation on her wall that held cards. So everywhere you looked was something inspiring. I definitey need to do something like that.

    all-my-love

    I ended up making 4 cards using a mix of new and retired elements. I realized that I keep reaching for my new stuff when working on projects but that I have a lot of neat old stuff too. Just because something is retired doesn’t mean it isn’t great., right? Anyway, time for me to run to work. Happy Monday!

    wishingthebest

    always_sponged

    always_tag

  • My first blog award!

    blog_awardSo, this last week, I was honored to be nominated for my first blog award!  Thank you, Tracy, for the award, it really made my day! 🙂 

    Here are the rules for this award:

    • Add the logo to your blog
    • Link the person from whom you receive the award from (hi Tracy)
    • Nominate several people
    • Leave a message on their blog

    There are so many awesome blogs and talented folks out there, its hard to come up with a list.  But here are a few of the many that I find inspiration from:

    And, of course, all the many fantastic SCS blogs I have listed on the right hand column of my blog.  (You ladies are fabulous!)  You should check them all out.  🙂 

    Also, I’m always trying to figure out how to make my blog better and more interesting to visit, so if anyone has any tips or things you want to see, I’d love to hear your comments.   Happy Sunday!

  • A stamping snack to tide you over

    I finished my first week on the new job and then saturday did a day trip to Seattle to hand off some stampin catalogs and then go to the geekiest of all concerts – Video Game Live.  Yes, it is a concert at one of the large broadway theaters where there was a choir and orchestra performing soundtrack and theme music to video games of the last 15 years.  It was a complete blast!  My DH and I went with a large group of friends, which made it even more fun.  So, now I’m back and have designated Sunday “crafting day” where I am going to try to make progress on some of my projects.  But until I can get them posted, I wanted to say hello and leave you with a few more swaps I received that I think are great. 

    Created by Cindy Starns.  I love the use of the build-a-brad!
    Created by Cindy Starns. I love the use of the build-a-brad!
    Created by Michelle Canzano.  Ok, so where do I start on all the neat things about this card? The new cool Cosmo fine glitter? The great use of the hostess set itty bitty buds? (that was a lot of hand cutting, but it's a great effect) Of the way she used the large heart from the Love You Much stamp set as a background image.  Overall, a great card!
    Created by Michelle Canzano. Ok, so where do I start on all the neat things about this card? The new cool Cosmo fine glitter? The great use of the hostess set itty bitty buds? (that was a lot of hand cutting, but it's a great effect) Of the way she used the large heart from the Love You Much stamp set as a background image. Overall, a great card!