Northwest Stamper

Category: classes

  • Celebrate World Cardmaking Day – join me in crafting for a cause

    Did you realize that tomorrow is World Cardmaking Day?  That’s right, there is a holiday to celebrate creating and sharing handmade cards!  Many folks will be celebrating this occasion with stamping and crafting events, and I’m no exception.

    If you are in the San Francisco Bay area, join me as I celebrate World Cardmaking Day with a fun and FREE stamping event.  We will be making two cards, one for you to keep and one to donate to our Troops overseas.  No experience is necessary and I will be providing everything you need to create these cards.

    Here are the details:

    World Cardmaking Day Charity Event
    Roundtable Pizza – Mountain View, CA

    October 2nd from 1pm – 3pm 

    Create two fun and easy cards and choose one to take home and one to put in the box to donate for the troops.  All completed cards will be donated to Operation Write Home (http://www.operationwritehome.org/)  If you have extra completed cards you would like to donate, I’d be happy to accept them to send in.

    Cost: Free, so come try it out and bring your friends!  The more people we have the more cards we can create and donate!

    email me at jennifer@nwstamper.com to let me know you would like to come and I’ll be sure to have supplies ready and waiting for you!

  • Kicking it up with Interactive Scrapbooking

    At convention this year, I had the chance to participate in a class taught by Sherrill Graff on Interactive Scrapbooking.  It was one of those times when I found myself going, “WOW!” over something that was fairly easy but so cool.  So, when I got home, I knew I had to share it with others.  So, today I held an interactive scrapbooking class.  We made two 12×12 pages consisting of layering page protectors and filling them with designer paper.  It was so much fun and since everyone had picked different designer paper, it was cool to see how everyone put their pages together.

    So, here is the first layout we did.

    I loved this page because I thought the hinge using the Round Tab punch was so clever!  We cut a 9 1/2” x 11 inch piece of paper and glued that to our base 12×12 paper.  Then we punched 4 tab punches and folded them in half to make our hinges.  You glue half of the tab punchout to half of your 2nd punch out, then make the part that is not glued together (so it looks kind of like a mouth) glue it down to either side of your 6×6 page protector.

    Then we did the mother of all interactive layouts!  This uses one 12×12 page protector and 5 6×6 page protectors.  Is like a mini-album in your scrapbook!

    You adhere your 6×6 page protectors to the 12×12 page protector and then glue a 1”x6” piece of paper over the tab of plastic that has the holes for putting it in your album.  Its so fun because you can have elements from the lower pages be exposed on the right side when you first open to this page.  In my case, I have a curly label punch that says “Party Hearty” on page 2 and the CKC from page 3.  Here is what it looks like from the inside:

    Too much fun!

    And while we’re talking about fun and convention – did you hear that when you join the Stampin’ Up family you get this uber-cute tote bag for FREE!

    crafttote

    Yep, that’s right… not only do you get stamps, ribbon, buttons, adhesive, paper, and possibly even My Digital Studio for only $175 (a $330 value!), but you now get this awesome tote and shipping for it all FREE!  Check out all the details and everything you can get in the starter kit here.

    Whether you are looking for 20% off everything you buy, or you want to start earning extra money doing what you love.  Stampin’ Up! is an amazing company filled with so many opportunities to expand your creative horizons.  I’d love to tell you more!  Contact me if you have any questions or you can get started now (recruit password – nwstamper)

    Project Supplies:

    • 1 pkg 12×12 ring page protectors – item 104522 ($10.95)
    • 1 pkg 6×6 ring page protectors – item 104521 ($ 6.95)
    • 1 pkg designer series paper – I used Celebrations, item 117164 ($9.95)
    • round tab punch – item 119864 ($16.95)
    • sticky strip – item 104294 ($6.95)
    • snail – item 104332 ($6.95)
    • paper cutter – item 104152 ($24.95)

  • Technique night – Masking and Reverse Masking

    Last night was my August technique night with my meetup group and we focused on masking and reverse masking.  For those of you not familiar with masking, this is the technique for using paper to cover (or mask) the area you don’t want to get inked.  So, in this first card we did, you stamp the colored cupcake on your paper and then stamp another copy of the cupcake on scratch paper.  Cut out the scrap cupcake and place over your original stamped image and then stamp your next cupcake, overlapping the scrap paper and your original image.  This gives the illusion of one cupcake being in front of the other without seeing the overlapping ink.   We also used the scrap cupcake to mask the frosting area when we stamped the candle so that you could choose the height of the candle and not have it overlap the top of the cupcake.

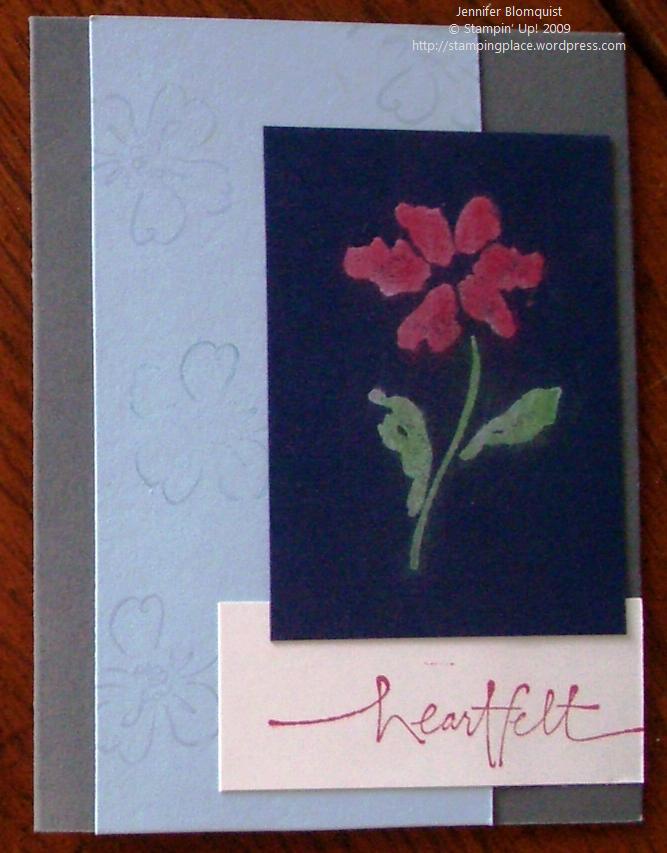
    Next we did reverse masking.  This is where you cut out your scrap image and set your image aside and use the cut-out frame to let you add ink to the inside of the framed area.  In this case we sponged first and then while still keeping the frame in place, stamped our leaves images. This card was inspired by a card I found on the Stampin Up demo resource – Stampin Cconnection.  The origional was created by Allison Ohran

    Finally we did one more card that combined both techniques.  We used reverse masking to make the sun and then placed the cut-out circle back on the sun and a scrap cutout of the treetop to mask the areas before sponging our sky.

    Now, some tips:

    Tip: When cutting out smaller shapes and circles, post-it notes work great for giving you something that can stick in place and then come up without leaving a mark.  For bigger shapes and frames, use a little bit of Dotto.  This adhesive lets you put your mask down and then pull it up an rub off any adhesive that gets left behind.

    Tip: While I normally recommend stamping on Whisper White cardstock because it holds ink much better than standard white cardstock and computer paper, for the scrap image you are going to use for your mask, I would recommend in that case to use computer paper.  Because the paper is thinner, you tend to be able to get ink closer to the edge of your mask and so get a cleaner look.

    Card Recipes:

    Cupcake Card Recipe
    Stamps:
    Party Hearty
    Ink:  Early Espresso, Crumb Cake
    Paper:  In Color pattern pack – Hostess set, Daffodil Delight CS, Whisper White CS, Pacific Point CS
    Accessories:  Peach Parfait marker, Daffodil Delight marker, Pacific Point marker, Early Espresso marker, Dotto

    Thank You Card Recipe:
    Stamps: 
    Just Believe
    Ink:  Wild Wasabi, Basic Black
    Paper: Wild Wasabi CS, Basic Black CS, Whisper White CS
    Accessories:  Dotto, Basic Black 1/4” grosgrain ribbon, snail adhesive, Stampin Dimensionals

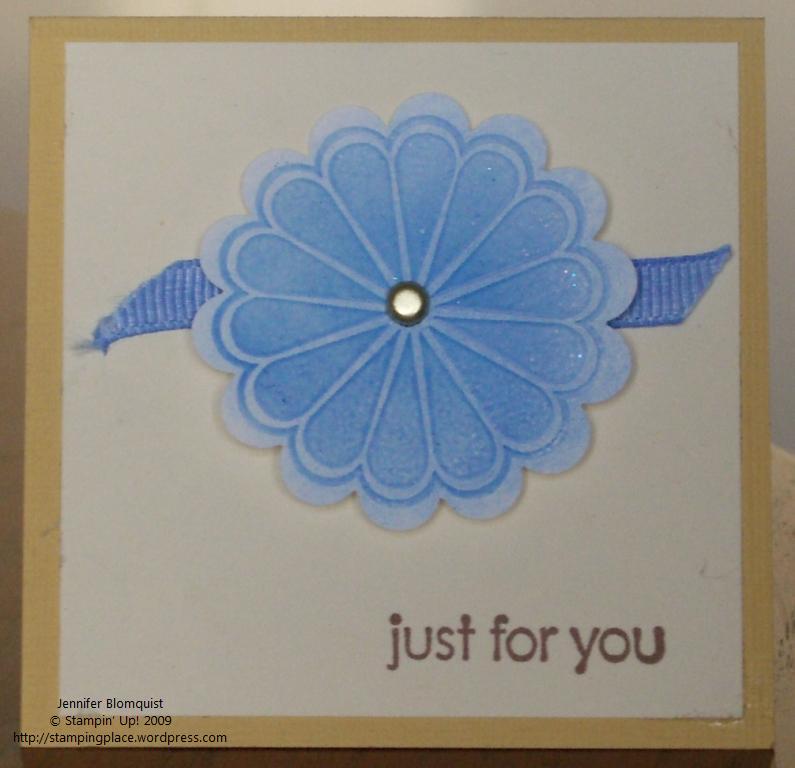
    Thinking of You Card Recipe:
    Stamps: 
    Bouquet Bunch, Teeny Tiny Wishes
    Ink:  So Saffron, Old Olive, Bashful Blue, Soft Suede
    Paper:  Bashful Blue CS, Soft Suede CS, Old Olive CS, Whisper White CS, So Saffron CS
    Accessories:  Adhesive back pearls, Dotto, 1 1/4” circle punch

  • A couple cards for my new Meetup group

    Since I’m pretty new to the Bay area, I recently decided to start up a Meetup group as a way to meet new folks and find some other like-minded crafty people.  Today was our first meetup, and so I planned a couple cards for us to work on over pie at Marie Callendars.  Between work and vacation, I hadn’t had much of a chance this month to do much card making so it was a lot of fun to create some cards and get everything ready to share with folks today.  It also gave me a chance to use some of my retiring items so I can start making room for the new goodies coming out in a few weeks.

    Here are the cards and if you happen to be in the Bay area, we’d love to have you come be a part of our group! 


    Father’s Day Card Recipe:
    Stamps
    : Teeny Tiny Wishes
    Ink: Chocolate Chip Classic
    Paper: Bermuda Bay CS*, Crushed Curry CS*, Whisper White CS
    Accessories: Chocolate Chip stitched ribbon*, Large Star punch, Small Star punch*, 1/16″ circle punch, gold brad, Snail

    Best Wishes Recipe:
    Stamps
    : Kind and Caring Thoughts*
    Ink: Basic Grey Classic
    Paper: Basic Grey CS, Whisper White CS, Pink Flamingo DSP*
    Accessories: Cameo Coral Marker*, Old Olive Marker

    * indicates a retiring item

  • Trying out the BigShot – a card, a box, and the matchbox

    I wanted to put up a quick post before I had to run into work.  This week has gone by so fast and has seemed so busy, but the rest of the week should be more relaxing.  On Tuesday, I was hosting a Technique Night focused on using the BigShot.  Unfortunately, that night I had some folks cancel because of illness, unexpected time conflicts, delays, and getting lost, so it ended up not happening.   One the upside, my friend Jennifer recently decided she wanted to make a baby book for her daughter but had been overwhelmed by where to get started.  So, since she had come over, I helped her figure out what she needed.  She ended up deciding to get the Stampin Up! Baby Girl simply scrappin kit, and after looking at it more closely, I can’t wait for her to get it because I think it is going to be so stinking cute.  Then last night we went to Michaels and picked out an album to go with it.  So, I’m feeling good that we got something productive done. 


    So, since the Technique Night didn’t happen this week, I rescheduled it for next Tuesday.  I’m trying something different this time.  I created a meetup group called Portland Card Makers recently and since some of those folks were going to come, I thought I would try out a public location that most people could easily get to and find parking.  So, I ended up finding a Round Table pizza that had side sections with long tables that you could reserve for free.  It may seem odd crafting in a pizza place, but I’ve been to an event at a Fuddrucker’s so, hopefully this will work out.  I guess we’ll see!


    Here are some samples I was playing with for the BigShot.  The first is a card using the Top Note die.  It was an interesting and different way to create a card since the inside of the card is the inside of the Top Note die.  Then, I was going to do a box/basket using the Scallop Envelope die and some ribbon.  The last thing we were going to do at the technique night was a card using texture plates and an embosslit but I’m reworking that card right now.  And then finally I thought I would share a box I made with the new Matchbox die.  It was sooo easy to make since everything is cut and scored for you.  You only need to use one piece of sticky strip or snail and its together!  Plus the die punches out the label that I stamped and put on top.  Easy peasy.


    bs_technight_wmbs_matchbook_wm

  • Get Connected Promotion plus upcoming events

    I suddenly realized that I hadn’t shared with you all the latest promotion from Stampin’ Up!  I don’t know about you, but I am always one for a deal and so I had to be sure you all knew about the latest deal from SU.  From now until April 30th, every $40 you spend from the new Occasions Mini catalog earns you free stamps!  How awesome is that.  I love it when I can get cool free stuff just for buying what I want anyway.  🙂  In this case, you have your choice of any of the under $10 stamps in the back of the catalog or one of the under $10 mini note kits.  I think those are definitely the best deal because you get stamps, note cards, envelopes, AND an ink spot… all Free!  If you host a workshop, every $150 worth of orders gets you another free stamp or note kit.  That could add up to a lot of free stuff. 🙂 So, here are the pretty pictures and details:

    occasions-mini1
    Peruse all the super cute new items
    free_stamps
    Spend $40 in the occasions mini and get anything on this page free!


    If you live in Portland, I’d love to have you join us for one of the classes in April.  Email me for all the details.

    BigShot Night – April 7th 7pm.  The first Tuesday of each month I host a technique night.  This month we will playing with the BigShot die cutting machine.  The BigShot can cut out over 50 different types of materials in fun shapes plus create embossed patterns and textures on your standard paper and cardstock.  Try it out and make a couple projects and samples.  RSVP with your $5 supply fee.


    Glass Etching with the BigShot – April 19th   2pm.  Create beautiful etched glass items from your home quickly and easily using the BigShot.  We will be using the BigShot to cut out the shapes that will then be etched on to your own glass.  I’ll provide all the supplies including a glass.  RSVP with your $10 supply fee by April 15th.


    Card Night – April 27th  6:30 pm.  Whether you are a card making pro or just starting out, come join us for laughter and fun as we make 4 cards using different stamps and fun embellishments. RSVP with your $8 supply fee by April 23rd.

  • Mom and Me stamping class this Saturday

    While I work on getting pictures taken and up from my most recent project, I thought I would mention here on my blog my next class which is happening this weekend in downtown Portland.  I’m hosting a Mom and Me event where you and your child (or you and your mom or you and your inner child), can come do some stamping techniques together.  I’ll have a few cards/projects available for you to do together and in a fun family setting.  Cost is $12 per family or $8 for individuals.  I’d love to have you join our group for this event!  Email me to save your spot!

    And for those of you from far away who can’t make it, I promise to post pictures after the fact. 🙂  Craft from home at the same time and it will be like tele-crafting. 


    Also, don’t forget you only have a couple more weeks left of Sale-a-bration time!  Every $50 you spend equals an extra stamp set, ribbon, or paper pack. 


    Like free stamps?     Right now, I’m offering the next 3 people who book a workshop will get a free stamp set on the day of your show.  Yep, its free just for hosting!  Contact me today to take advantage of this special offer!

  • Playing with Pastels

    ahhh… it feels good to back at the blog.  I just getting over a yucky cold and just in time because my technique night was last night.  We were playing with pastel chalks and between my cold and my half-cleaned craft room, I got a bit of a late start preparing for it.  However, I’m happy to report that I’ve made huge progress on my craft room (you can now fit chairs at the table and the table is cleaned off for the first time since moving here last fall :))!  Of course, in the process of prepping for the class last night, my craft table is a mess… so I get that straightened up and share it with you.


    But in the meantime, I thought I’d share what I whipped up as samples for some different techniques.  This was actually my first time in a long time that I had used my chalks and I discovered they are a lot more fun than I remembered.  And the girls did some awesome work with them – I just need to remember to take pictures of what they create!

    pastels_tt_wm2

    The techniques we focused on were popping pastels (the cupcake and the butterflies), coloring an embossed image (the blue scalloped flower), coloring ribbon (the blue ribbon), chalkboard technique (the red flower), and using chalks directly on the stamp to color a stamped image (some of the background flowers on the heartfelt card).


    pastel_ribbon_wmThe flower started out as clear embossing powder over versamark on whisper white paper. After you have embossed your flower, you can take a sponge to your chalk to pick up some color and then rub the sponge over the embossed image to color it. I recommend using brighter colors though because my first attempt with a light blue barely showed up. This card was made using the brilliant blue chalk. And with chalks it is very easy to layer colors. One person, used orange as a base color and then used rose red to color the edges.


    And yes, this is a white ribbon! Use the same sponge to apply color to your ribbon by rubbing along the white ribbon.  You can use sealent afterwards to keep it from rubbing off on your hands but it doesn’t rub off much if you don’t.


    chalkboard_heartfelt_wm This card used the chalkboard technique where you stamp with white craft ink on a dark paper and then pick up the chalk color using a q-tip or applicator.  Once you have the color, you want to tap your stamped image to apply the chalk.  Don’t rub or you will have a lovely smear of white and chalk in places you may not want. 🙂  Once you have applied your colors.  I tapped off excess power and then use a paper towel to lightly wipe off the excess color.  It turns out with a very lovely effect.


    Well, I’ll be back later with hopefully some new goodies to show you (my occasions mini preorder is supposed to arrive today!)  Have a happy wednesday!

  • Using Crystal Effects

    babybestwishes_wm1So tonight was our Crystal Effects night, and I think everyone learned something new – myself included!  I ended up staying up late last night as I kept finding new ways to use crystal effects that I wanted to try.  If you haven’t heard of crystal effects, it is this great thick clear liquid laquer for using on craft projects.  The most straightforward use is to add a bit of gloss or shine to your projects by applying some Crystal Effects on top of a stamped image.  However, there are a ton of fun and creative other uses. 

    I made a few samples of some different techniques last night.  So we talked about those different ideas and then set to work making a few items to take home.  Tonight we made Faux brads, Laquered die cuts, and a card using colored Crystal Effects on a transparency.  However, here are some of the different ideas for how you could use crystal effects:

    1. Add a touch of gloss to a stamped image
    2. Use crystal effects as a base for glitter.  Drop some crystal effects onto a stamped image and then cover in glitter.  Tap off excess glitter and allow to dry.
    3. Create Faux Brads by punching out a circle of paper and placing it over a glue dot.  Add some crystal effects to the top and you are ready to go!
    4. Create dew drops by dropping some crystal effects onto wax paper or the backing for the stickers from your stamp sets.  Add a bit of reinker color to make different colored drops.
    5. Color with crystal effects by mixing some crystal effects and reinker, and then using a brush or toothpick, color in a stamped image for a colored, glossy effect.
    6. Make a 3D embellishment by drawing a shape with crystal effects on wax paper (or the sticker backing) and then pouring glitter on top.   Allow to dry and then pop-off.
    7. Create laquered die cuts.  Cut out a shape in chipboard (in my case, I cut out the left over piece from a chipboard die cut after I popped out the die cut).  Glue the chipboard to a piece of designer paper.  Fill in the die cut space with crystal effects and allow to dry.
    8. Make glittering transparencies.  Mix some crystal effects with some reinker and dazzling diamonds.  Use a paintbrush to apply the colored crystal effects to the backside of a stamped transparency.  Allow to dry and attach to your card or project.

    techniquece

  • Congrats and Thinking of You Cards

    This weekend was a lot of fun.  I hosted an Open Scrap day at my home on Saturday.  I had planned on sitting an working on my personal projects while the other ladies worked on their projects; but of course, I was way to social for that. 🙂 I was playing with my new BigShot, showing folks how to use it, and other fun techniques.  So, it wasn’t until 5 of the 6 ladies had headed home that I finally sat down with my kitty scrapbook and started working.  But it was fun to have 6 crafters over.  So, I still have all my stuff out in hopes that I will make more progress on my scrapbook, but I have a feeling tonight will be filled with getting ready for my technique night tomorrow.  Tomorrow we are playing with Crystal Effects and I’m really looking forward to it! 

    Here are the other two cards I made for my card kits for Saturday.  These last two came together very quickly and have helped me be an even bigger fan of the SAB sets.  Oh yeah, and the paper in the SAB catalog is so yummy! 

    congrats_wm
    stamps:Congrats (SAB) paper:whisper white cs, night of navy cs, bashful blue cs, certainly celery dp inks:bashful blue, night of navy accessories:glue dots, fresh favorites II buttons


    sab_thinkingofyou_wm
    stamps: Polka Dot Punchs (SAB), Sincere Salutations paper:Very vanilla cs, bashful blue cs, delecate dots DP (SAB) inks:bashful blue, certainly celery, sahara sand accessories:certainly celery twill tape (SAB), circle scallop punch, 1 1/4" circle punch


  • One of the cards from this weekend’s card kit

    pinkgreydreamsdujuor_wnWhile I waited for my UPS delivery to arrive so I can finish my scrapbook layouts, I spent last night working on cards.  This card grew a bit organically from me starting with the grey base, then picking the pink, then finding a layout, and then deciding on the stamp set.  I don’t know quite how to classify the card (valentine’s day, for you, or what).  But I think it’s cute anyway.  🙂

    I just got home and my packages were here including my new BigShot!  Yay!  So, I’m going to leave this short so I can go play with my new goodies.  Have a fantastic week!

    And if you are in the Portland area, just a reminder that you are welcome to attend my FREE Open Scrap day tomorrow from noon until 6pm.  Bring a project of your own to work on or I will have kits available (a card kit, a scrapbooking kit, and a mini-book).  Contact me and I’ll send you the details!

    Recipe:
    Stamps:
    Dreams Du Jour
    Inks: Pink Pirouette, Basic Grey
    Paper: Basic Grey CS, Basic Black CS, Whisper White CS, Bella Rose DSP
    Accessories: Stampin’ dimensionals, Basic Grey taffeta ribbon

  • Is it possible to craft without making a mess?

    Well, I’m going to have to make this post quick, but I thought I would post the progress I’m making on a project since it seems to be taking me a while to complete it.  🙂

    So, on Sunday (or was it Monday?) I started trying to get things together for my open scrap day on Saturday.  I’m putting together some kits for folks who aren’t going to be bringing their own project.  One of the kits is going to be a two page 12×12 scrapbook layout.  I thought “one layout shouldn’t be so hard” but when I sat down with my papers, I realized that the only 12×12 paper that I had enough for everyone (if everyone got a kit) for the base pages was Glorious Green.  So I started from there. and it turned out to be a more challenging color base than I expected.  scrapbook_pgsI because obsessed with creating this layout to the point that I keep futzing with it instead of moving on to my other kits. 

    Finally last night, I found my groove and got the layout close enough to done (I need my BigShot that is in transit to finish it completely) that I’m going to move on to other projects tonight.

    Now, my “craft room” is also mine and my DH’s office and it is complete disaster – never got fully unpacked and now is a mess of half unpacked boxes and stacks of paper, books, and knick knacks.  So, until I get that straightened up, I’ve been taking over my dining room.  Last night, when I got home from work, I walked into my dining room and saw this:

    messy_desk

    I’ve now decided that I can’t work on a project and have my space by clean.  I also don’t know how some of you work on dresser tops and coffee tables.  🙂 My paper, scrap, and accessory piles are too big for that.  Does anyone craft and stay tidy at the same time?

    messy_bookcase
    The bookcase that was supposed to be for books and instead is my SU storage space.