Northwest Stamper

Category: Cards

  • Easter Punch Art & Why You Should Buy the Clearance Easter Egg Dye Kits

    Easter Punch Art & Why You Should Buy the Clearance Easter Egg Dye Kits

    Happy Easter!  I hope you have a wonderfully bright and peaceful day!  Today we’ll be hoping for sunny skies, family easter egg hunts, and spending time with our extended family in the area.

    But while we are doing that, I wanted to share an idea with you to consider as you see the Easter supplies go on sale in the stores starting tomorrow (or maybe even today).  Consider grabbing those Easter Egg dying kits while they are on clearance, and here is why…

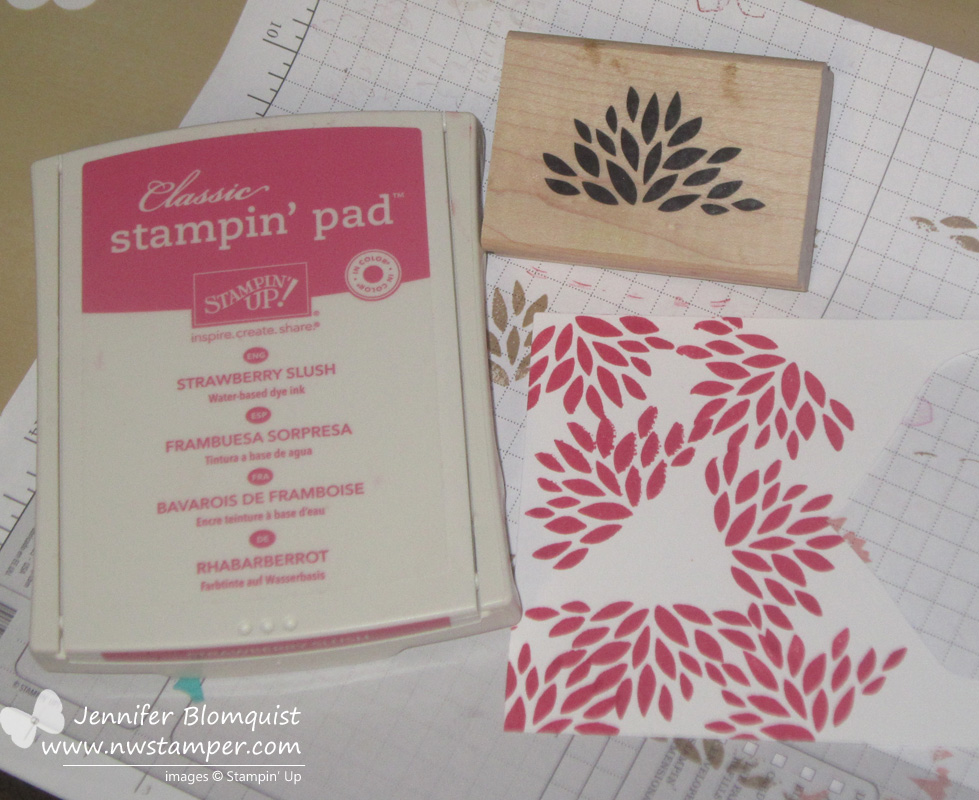
    So, last night we pulled out our eggs and coloring kit to start dying some eggs.  I needed something to cover our counter…. turns out my used Stampin’ Up grid paper made a nice lining. Smile  (See there is a reason I don’t throw them away after classes!)

    2014-04-19 20.01.03

    We made our eggs like normal… add 3 Tablespoons of Vinegar to a cup and drop the dye tablets in.  After they are done fizzing, add your 1/2 cup water to each cup.  Then dunk your eggs and let them soak and dye the shells.  I also couldn’t find the box the dye tablets came in, so I had to create my own egg holder!  I took a cereal box and kitchen scissors and cut 12 holes in the top of the box.  Then I could set each egg on top of a (poorly) cut hole to dry!

    2014-04-19 20.17.32

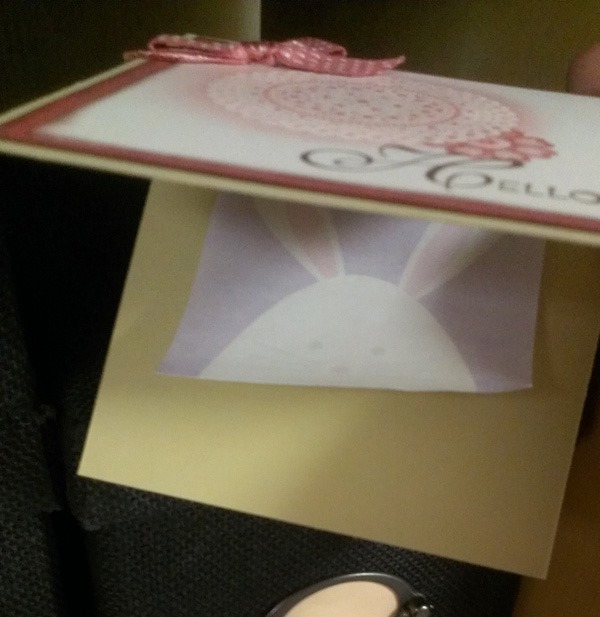
    Now, this is the fun part!  Once you are done with your eggs, you still have lots of dye left over.  So I grabbed some of my ribbon from my craft room and started throwing them in the cups and letting them soak up the color!

    2014-04-19 20.25.26

    In these cups, I have 4 pieces of the 7/8” Cotton Ribbon and 2 pieces of the White Organza Ribbon.

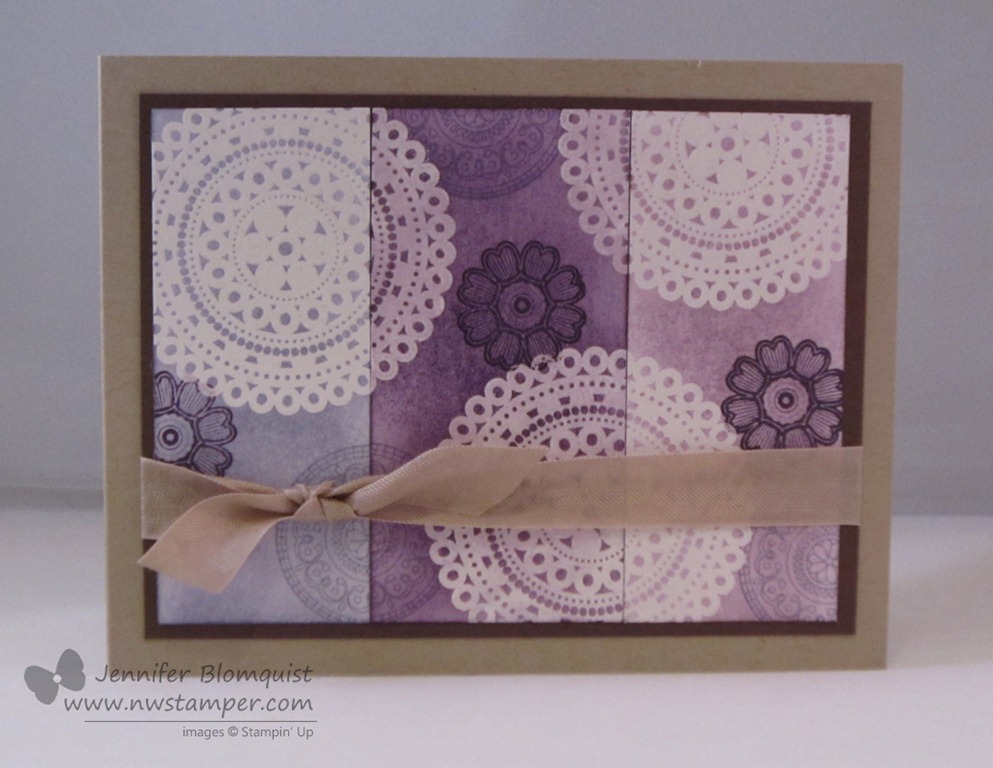
    And this is how they turned out:

    2014-04-20 10.46.35

    Pretty huh?  Now to create some fun projects with my custom colored ribbons! Smile

    I hope you have a wonderful rest of your weekend.  And a few quick reminders:

    Last Call for the Retirement List Prediction Contest!

    Don’t forget to get your guesses in by tonight for what 10 stamp sets you think will be retiring!  You have a chance to win your favorites from the retiring list for free.  Email me your guesses to jennifer@nwstamper.com and find out tomorrow who the winner is!

    FREE SHIPPING starts tomorrow!

    If you didn’t see on my Facebook page, Stampin’ Up will be offering Free Shipping tomorrow through Friday for all orders – which is perfect timing as the retirement list comes out on Monday!  So, get your orders ready and don’t forget to use hostess code G4VQJ7VB to received this month’s free online stamp club tutorials and if your order is over $40, you will receive the make & take project in the mail too!
    (note – if your order is going to be over $150, don’t use the hostess code so you can receive the hostess benefits!)

    spaced shop now sig bar

    April Online Stamp Club Hostess CodeG4VQJ7VB
    Use this code to get free exclusive tutorials & project kit!Learn more

  • The Wow Factor of Coloring on Natural Composition Specialty Paper!

    The Wow Factor of Coloring on Natural Composition Specialty Paper!

    Have you experienced the coolness of the Natural Composition Speciality Paper?  Once again, I have another project that I can’t believe I haven’t shared yet and my favorite part of it is how the Natural Composition paper makes it look!

    I created this card for a class last month and was playing with a few of my favorite things:

    • Core’dinations cardstock – I used the Pool Party core’dintations cardstock and ran it through my BigShot with the Perfect Polka Dots embossing folder.  Then I sanded off the top of the dots to help them pop a little bit more.
    • Petite Petals stamps & punch – I have to admit I’m totally falling in love with these little flowers!  And the fact that they are so easy to punch out is just awesome!
    • Gold Baker’s Twine – Turns out it just always is the perfect touch of subtle sparkle on your projects.  It took me months to start using it but now I LOVE using it!
    • Perfect Pennants stamp set – the sentiment is my favorite sentiment from the Occasions catalog!
    • and finally – Natural Composition Paper!

    The Natural Composition Specialty designer paper does not look very special in the main catalog and in fact, just about everyone I have in class that uses it tells me that they didn’t think it looked interesting in the catalog but they love it once they try it.  Because you can do things like this:

    So, the thing it it is a stiffer cardstock that looks a bit like cardboard or a stiff kraft cardstock.  But then on one side of the paper there is a clear embossed pattern.  So you can do cool stuff like sponging or coloring!

    In this case, we colored over the flower images with a Real Red marker and after it starts soaking in a little bit to the paper, it will wipe off the embossed image and you get a really cool defined image.  Don’t you think?’

    You can do this with any color or ink (if you want to sponge it) and it is pretty fool proof.  You can’t really mess it up.  Got to love that!

    spaced shop now sig bar

    April Online Stamp Club Hostess CodeG4VQJ7VB
    Use this code to get free exclusive tutorials & project kit! Learn more

    Stampin’ Up! Supplies Used
    Stamps – Perfect Pennants, Petite Petals
    Ink – Markers (Real Red, Basic Black), Real Red
    Paper –Pool Party cord’inations cardstock, Whisper White, Basic Black, Naturals Composition specialty designer paper
    Accessories – Big Shot, Pennants Framelits, Petite Petals punch, Gold Baker’s twine, Candy Dots (Subtles), Perfect Polka dots embossing folder, sanding block

  • A Sweet Card with an Envelope Full of Butterflies

    A Sweet Card with an Envelope Full of Butterflies

    Happy Sunday to you!  Today I have one of those cards to share that is a little bit of this and a little bit of that from around your craft room.  But in the end doesn’t it turn out to be such a sweet card?

    I had seen a photo of a card that had the idea of an envelope with lots of butterflies flying out from that and so I tried to capture that with the supplies I had at home.  So I started out with my Strawberry Slush cardbase and had to add a bit of texture and so I pulled out my much under-used embossing folder – the Fancy Fan embossing folder.  Then I layered on a strip of Smoky Slate cardstock edged with the Scallop Edge border punch and a piece of the Gingham Garden washi tape.  Again… why don’t I use washi tape more often??  It is so stinkin’ easy and so cute on your projects.

    Finally, the center piece of the card!  I created my own envelope using one of the smallest dimensions on the Envelope Punch BoardSee?  It isn’t just for envelopes for your card!  Put your envelope together, punch out a variety of butterflies and glue them on to look like they are exploding out of the envelope.  Not hard to put together but think of how much of a smile this will bring to someone’s face when they get it from you!  Smile  See, I’m smiling just thinking of mailing it out. 

    Have a wonderful Sunday! 

    spaced shop now sig bar

    April Online Stamp Club Hostess CodeG4VQJ7VB
    Use this code to get free exclusive tutorials & project kit! Learn more

    Stampin’ Up! Supplies Used
    Stamps – Hip Notes
    Ink – Markers (Strawberry Slush, Basic Grey)
    Paper –Strawberry Slush, Smoky Slate, Very Vanilla, Whisper White, Pink Pirouette Designer Paper
    Accessories – Word Window punch, Gingham Garden washi tape, Elegant Butterfly punch, Bitty Butterfly punch, Big Shot, Fancy Fan embossing folder, Scalloped Edge Border punch, Envelope Punch board

    Favorite products:

    134820s
    127821s
    132140s
    117273s
    132622s
    132622s
    132622s
  • Fun with Window Sheets and Rainbows for a Card

    Fun with Window Sheets and Rainbows for a Card

    Today I wanted to share another card I created for the Scrapyard Chicks Weekend Workshop (save 10% off your registration by using the coupon code NWstamper).  I’ll be teaching 6 different cards and I was trying to come up with designs that were fresh and a bit different than I’ve done before.  And I just love how this one turned out.

    So, you can make this card with any paper you have at home but I went for some fun rainbow colors that I punched out with a 1” circle punch and adhered to a Baked Brown Sugar cardbase.  But here is where it gets a bit different –

    We add a window sheet over the top and stamp it with White Craft ink!

    I cut my window sheet to 4” x 5-1/4” so it was a little smaller than the front of my card (and more efficient for cutting up your 12×12 sheet that they come in from Stampin’ Up).  I laid it over my card front and then stamped each flower using the Mosaic Madness stamp set on top of each circle and the White ink.  Then I stamped the “and I’m so very grateful” on the card base itself in brown ink.  I found it useful to stamp the “inside” sentiment first because then I could stamp the window sheet just above that brown stamped image.

    Finally, I glued down my window sheet and hid my adhesive by wrapping white baker’s twine around the top of the window sheet.  Add some tiny pearls in the middle of each flower and you are done!

    Tip:  I found that using the White Craft ink on the window sheets take a really long time to dry.  So the sample above is using White craft ink, but for my class I’ll be switching out for White Stazon ink instead!

    spaced shop now sig bar

    April Online Stamp Club Hostess CodeG4VQJ7VB
    Use this code to get free exclusive tutorials & project kit! Learn more

    Stampin’ Up! Supplies Used
    Stamps – So Very Grateful, Mosaic Madness
    Ink – White Stazon, Early Espresso
    Paper –Baked Brown Sugar, Calyspo Coral, Real Red, Pumpkin Pie, Daffodil Delight, Pistachio Pudding, Gumball Green, Midnight Muse, Tempting Turquoise, Raspberry Ripple, Window Sheets
    Accessories – White baker’s twine, pearls, heat gun


    Favorite Products:

  • A Masculine Card with Six Sided Sampler

    A Masculine Card with Six Sided Sampler

    Quick, name a stamp set that you just had to have but have since used once – or not at all!  For me, that has been the Six Sided Sampler stamp set.  I saw lots of cool things done with this set and I loved the hexagon punch that coordinated, so I picked it up last fall.  and I think I’ve used it about twice!  Thankfully, my friend Sarah Naber came to my rescue with this awesome inspiration that is great for guys or gals!

    You know me, I love clean and simple cards – especially if they have lots of great details that are subtle but really add to the card.  And boy does she deliver!

    It is a little hard to see in the first picture, but I like how she stamped the Cherry Cobbler cardstock with the Woodgrain stamp  and then she embossed the Island Indigo cardstock with the Alphabet Press embossing folder

    Add a touch of Linin Thread for one last bit of texture.  Such a great color combination (Crushed Curry, Cherry Cobbler, Island Indigo, Crumb Cake) and use of those hexagons.  I think I have some inspiration to play with again!

    spaced shop now sig bar

    April Online Stamp Club Hostess CodeG4VQJ7VB
    Use this code to get free exclusive tutorials & project kit! Learn more

    Stampin’ Up! Supplies Used
    Stamps – Six Sided Sampler, Teeny Tiny Wishes, Woodgrain
    Ink – Cherry Cobbler, Island Indigo, Crushed Curry, Crumb Cake
    Paper –Cherry Cobbler, Island Indigo, Crushed Curry, Crumb Cake, Whisper White
    Accessories – Big Shot, Alphabet Press embossing folder, Hexagon Punch, Linen Thread


    Favorite Supplies:

    132725s
    128763s
    127802s
    113439s
    130916s
    104199s
  • Have You Seen This in my Thank You Cards?

    Have You Seen This in my Thank You Cards?

    I send out Thank You cards to everyone who places an order with me – sometimes I get a little behind (like in February when we had health issues at home) but I try to make sure I get caught up.  Well, yesterday, I was finishing up the last batch of Thank You cards and getting them ready to mail when I realized I do something that may seem strange to some folks.  So, I thought I’d share a little background today.

    So, what is it that I do that is odd?  Well, when I send out my thank you cards, instead of writing my note on the inside like I normally do for birthday cards, congrats, sympathy, etc, I write my note on a post-it note and put THAT inside the card!

    post it note in thank you card

    I always thought it was clear why I did that… I want to send you a Thank You for your order, but I also want to GIVE you a card that you can use for ideas or for giving away to someone else!  So, I write my note on a post-it so you can pull out and reuse the card.  If you want to keep it for ideas or for yourself, that is awesome.  If you want to share it with someone else, that is great too.

    I was talking with someone I gave a card to recently and when I mentioned I had written on the post-it note so she could re-use it if she wanted, she was surprised and shared that she hadn’t even thought of that.  Smile 

    So, thank you for ordering with me… please enjoy your card, however you choose!  Oh, and want to see the front of this card?  I can’t believe I haven’t shared it yet!

    lovely and lacy emboss resist

    Love, love, love this Lacy & Lovely stamp set!  Pair it with Primrose Petals and some emboss resist technique and it is a really pretty card.  I think I need to spend some more time with my Primrose Petals papers and ribbon before they go away next month! 

    spaced shop now sig bar

    April Online Stamp Club Hostess CodeG4VQJ7VB
    Use this code to get free exclusive tutorials & project kit! Learn more

    lovely and lacy emboss resistStampin’ Up! Supplies Used
    Stamps – Lacy & Lovely
    Ink – Versamark, Primrose Petals, Early Espresso
    Paper –River Rock (retired), Primrose Petals, Whisper White
    Accessories – Heat Gun, Clear embossing powder, embossing buddy, Primrose Petals stitched satin ribbon, glue dots, sponges


    Favorite Supplies:

    122887s
    102283s
    103083s
    109130s
    129053s
    126844s
    101610s
  • Bright Retro Fresh card with Starburst Sayings

    Bright Retro Fresh card with Starburst Sayings

    It’s funny. I tell myself that I’m going to focus on getting caught up on some other tasks I’m behind on (like making sure the last few people who participated in my Online Stamp Club at the end of the month have their project passwords & make and take packets in the mail!)  So, I’m going to wait to edit photos and post on my blog for a few days.  But then after I haven’t posted for 2 days, suddenly I feel like its been AGES and I have the itch to get something to share. Smile 

    So, here I am, pulling out a card to share that I received from my fabulous friend Annie Lee, because YOU need something bright and cheery to send off your Friday! 

    Now, I normally shy away from orange as a main color… I don’t wear it, I rarely buy it…. but times like these remind me that it isn’t as bad as I think!  Smile  In fact, I think it actually makes the card.  It helps the patterns in the Retro Fresh designer paper and the sentiment stand out without needing them to be super bright themselves.

    And she reminded me about those Vintage buttons that have been sitting on my desk for the last 9 months and never been touched… remember those?  I swear, I never would have though to grab a “frilly”, vintage button to go with a modern retro card – but it works!

    And that, my friends, is why doing card swaps and sharing ideas is so great.  It helps you see the supplies you have in a whole new light and give you great ideas to try. 

    Want to swap and share ideas online with me and other crafters?

    I’ve been thinking of putting together a group for sharing ideas and possibly swapping (most likely a group on Facebook).  You wouldn’t have to be a Stampin’ Up demonstrator to participate as I’d love as many people to share ideas as possible.  If you are interested in joining a group like this, leave me a comment, post on my facebook page,000 or shoot me a mail.  If I have enough interest, I’ll get it going and make sure you are invited!

    spaced shop now sig bar

    April Online Stamp Club Hostess CodeG4VQJ7VB
    Use this code to get free exclusive tutorials & project kit! Learn more


    Supplies Used:

    134818s
    132993s
    129327s
    133520s
  • Lacy & Lovely Emboss Resist–Ombre Style!

    Lacy & Lovely Emboss Resist–Ombre Style!

    Heat embossing is one of those great techniques that always instantly makes a card just a little bit classier and more elegant.  That said, I totally forget about it a ton of the time!  Thankfully, I have my Lacy & Lovely stamp set which always gets me excited to do some embossing.  Especially because I LOVE doing the emboss resist technique with it.

    In the Seattle area?  Join me for my Embossing Technique class on Monday 3/31 at 7pm in Redmond, WA!  Get all the details here – I’d love to have you stamp with me!)

    Recently I was experimenting with some different card ideas and I ended up with this:

    It was supposed to be an ombre card – where the purples go from lightest to darkest – but I got too excited to start sponging and I forgot to make sure I knew which piece went where!

    So instead, you get something reminiscent of ombre… you get the idea. Smile

    How to make this card

    1. Start out with your Whisper White piece of cardstock and cut it into 3 pieces.  Lay them out on a piece of scrap paper so they form their origional rectangle.
    2. Stamp randomly with the large doily shape from your stamp set using Versamark
    3. Sprinkle clear embossing powder over the stamped images and heat with the heat tool
    4. Select 3 ink colors in different shades of the same color.  Grab one of the yellow sponges and start sponging each panel a different color.
      For best results – sponge in order from lightest to darkest!
    5. Randomly stamp different images from the stamp set in the colors you plan to sponge with.  (I stamped with Wisteria Wonder and Elegant Eggplant)
    6. Adhere your panels to a piece of cardstock for a matted frame.  Add embellishments, and you are done!

    The great thing is that the clear embossed areas will resist your sponged ink and so the white shows through no matter how dark of an ink you use to color with.

    Next time though, I’ll try to remember to sponge my colors in the right order!  Smile

    spaced shop now sig bar

    March Online Stamp Club Hostess CodeXEWP4DFD
    Use this code to get free exclusive tutorials & project kit! Learn more

    Stampin’ Up! Supplies Used
    Stamps – Lacy & Lovely
    Ink – Wisteria Wonder, Elegant Eggplant, Perfect Plum
    Paper –Crumb Cake, Chocolate Chip, Whisper White
    Accessories – Heat Gun, Clear embossing powder, embossing buddy, Crumb Cake seam binding ribbon, sponges

    Favorite Products

    122887s
    129053s
    103083s
    109130s
    122332s
    101610s
  • Weekly Deals for the last week of Sale-a-Bration

    Weekly Deals for the last week of Sale-a-Bration

    Happy Tuesday! 

    We are down to our LAST WEEK of Sale-a-bration, and so if you have been thinking of stocking up on supplies, picking up some wish list items, or just getting started on that project you’ve been thinking about for a while; you have one week left to get the stuff you need and get BONUS stuff you want for free. Smile 

    Stampin’ Up has also posted the weekly deals for this last week in March as well.  So, here is what is up on special this week:

    weekly deal 3-25-14

    See all the details and shop the sale here

    Love that core’dinations paper!  Its like cardstock, textured cardstock, and a cool sanding medium in one!  One of the color families that is on sale this week is the Subtles collection…wanna see it in action?  Check out this cute card by Breelin Renwick (she shared it with Annie Lee, who shared with me)!

    Those pretty colors are:  Pool Party, Wisteria Wonder, and Calypso Coral.  And when you emboss the Pool Party core’dinations cardstock with the Decorative Dots embossing folder, you can sand the bumps to show the lighter blue core instead.

    Also, love how she combined the Banner Blast stamp set (and Banner punch) with the Hearts a Flutter stamp set and framelits!  Don’t they layer so well together?

    And if you are trying to remember what all your options were for free stuff this month… here is the full list again! 

    Sale-a-Bration 2014

    This week, I’ll be sharing lots of projects using my favorites from the Sale-a-Bration flyer!  So, come on back throughout the week to help get more ideas for how you can use your fabulous freebies!

    spaced shop now sig bar

    March Online Stamp Club Hostess CodeXEWP4DFD
    Use this code to get free exclusive tutorials & project kit! Learn more

    Stampin’ Up! Supplies Used
    Stamps – Hearts a Flutter, Banner Blast**
    Ink – Pool Party, Wisteria Wonder, Calypso Coral
    Paper –Pool Party, Wisteria Wonder, Calypso Coral, Whisper White
    Accessories – Big Shot, Hearts a Flutter framelits, white baker’s twine, rhinestones, Itty Bitty Punch pack, small Heart punch, Decorative Dots embossing folder**
    ** item available as a free gift with a $50 order

    Favorite Products:

    113439s
    129252s
    130159s
    118309s
    133520s
    133551s
    133519s
  • Masculine Monday with Burlap, Woodgrain, and Word Bubbles!

    Masculine Monday with Burlap, Woodgrain, and Word Bubbles!

    I know many of us struggle with masculine cards.  I often find it so easy to reach for my flowers and rhinestones and pinks and whatnot; but when I need to make a card for a guy, those go-to items suddenly don’t seem to be quite the right fit.  Well, as luck would have it, today over on the Stylin’ Stampin’ Inkspiration blog, they are sharing some cards for Masculine Monday (and WOW are there some stunners!)  So, I wanted to participate with the design team and I wanted a guy card for my upcoming card class at the Scrapyard Chicks Spring Workshop, so I grabbed some burlap ribbon, some scraps of paper, and got to work!

    Can I just say… I LOVE how this turned out.  It has a lot of fun touches to it without being super over the top or fussy.

    The class I’m teaching in April focuses on 6 different techniques and for this card, I was showing off a neat different way to use your embossing folders…. as a stamp!  That is right, that grainy background on the card base – it is actually stamping using the Woodgrain embossing folder.

    So how does that work?

    1. You take your ink pad and slide it along the raised side of your embossing folder.
    2. Close the embossing folder over your card front so the ink is where you want it (basically, make it look like you are about to run it through the Big Shot)
    3. Do NOT actually run it through the Big Shot, instead use your bone folder to burnish the embossing folder and impress the ink onto your card base
    4. Open up the folder and admire your stamping work. Smile


    The other think I really liked about this card was the mixing and matching of the word bubbles.  I stamped the “Hey There” with the Just Sayin’ stamp set and then cut it out with the Word Bubbles framelits (and yes, get the bundle!  They are both cute Winking smile).

    But then I needed something more, so I grabbed some of the Gold Foil paper and cut out a different word bubble shape from the framelits.  Now, when you look at the paper that now has a word bubble sized hole in it, you will see that the framelit die embossed a faint line from the outer edge of the die (as opposed to the inner edge of the die where the cutting occurred).  So in this case, you can use that faint line as a cutting guideline and cut along that share to give you this cool metallic word bubble outline!

    Oh, and I actually did emboss the Chocolate Chip paper with my embossing folder… I like the contrast of the stamped woodgrain and the embossed woodgrain.

    So, what do you think?  I really liked how it turned out and can’t wait to share it at the workshop in a month!


    spaced shop now sig bar

    March Online Stamp Club Hostess CodeXEWP4DFD
    Use this code to get free exclusive tutorials & project kit! Learn more

    Stampin’ Up! Supplies Used
    Stamps – Just Sayin’
    Ink – Soft Suede, Chocolate Chip
    Paper – Sahara Sand, Old Olive, Island Indigo, Chocolate Chip, Whisper White, Gold Foil
    Accessories – Big Shot, Word Bubble framelits, Vintage Brads, Woodgrain embossing folder, Burlap ribbon

    Favorite products:

    134820s
    127821s
    132140s
    117273s
    132622s
  • My Favorite Banner Card Yet!

    My Favorite Banner Card Yet!

    I just realized this morning that I hadn’t shared this card yet and I love it so much that I figured I needed to fix that!

    This is my favorite card yet that I’ve made with the Sale-a-Bration set Banner Blast and I know a lot of it is the color… and the bling… and the sentiment.  Ahhh, don’t you just love it when a card comes together for you?!  Smile 

    Isn’t Bermuda Bay and Basic Black a GORGEOUS color combination??  I just loved the colors and so I wanted to keep the whole card to those tones.

    From the sentiment that I love from the See Ya Later stamp set – “I don’t believe it’s your birthday.  You don’t look any older than you did last year.”  to the clean white background to show off the banners.

    Now, I don’t know why it took this long for me to think of stamping one of the Banner Blast pennants onto colored cardstock… for some reason I kept only stamping a colored ink onto white cardstock.  But look at how great the black ink looks on the Smoky Slate cardstock:

    I also connected the banner by adding rhinestones instead of bakers twine or some other line.  Just the right amount of glitz.

    Yes, both of these stamps sets are only available during Sale-a-Bration, so don’t forget there is only 1 week left to get them free with a $50 order!  Shop online and then pick out your favorite free item(s) and they will appear in your box!

    spaced shop now sig bar

    March Online Stamp Club Hostess CodeXEWP4DFD
    Use this code to get free exclusive tutorials & project kit! Learn more

  • Create a Flower with Petal Parade

    Create a Flower with Petal Parade

    Turns out I’m the queen of last minute!  I knew that I was on-deck for a card for the Stylin’ Stampin’ Inkspiration design team this week and I really did keep meaning to create some fun flower for our “Create a Flower” theme today.  But next thing I know, it is 9:15 last night and I’m working away on a card for a workshop this weekend when I suddenly get the reminder to have my card posted.  Oops!

    Well, the card I was working on had a stamped flower, but it wasn’t a particularly unique use of the stamp.  So, I quickly put my thinking cap on for what was some flower I could create that was different than just the typical stamped flowers that you punch out.  (Don’t ask me why I didn’t think of using my new spiral flower die!)  But a hare-brained idea to create a layered punch art flower with the Petal Parade stamp set came to me and this is what turned out:

    petal parade punch art flower

    So, aside from the sentiment, all the stamping for this came from the Petal Parade stamp set!  Some mixing and matching of ink, stamps, and punches and it came together.

    For reference, here is what the stamp set looks like:

    petal parade SAB 2014

    First was the base layer of the flower – I stamped the half flower image from the stamp set onto white paper in a random pattern.  I actually tried to make a triangle out of the flower image and then fill in the gaps with random stamping to fill it out.

    Petal Parade flowers

    Then for the subsequent layers it was straight forward stamping and then punching it out.

    Top layer – The larger round flower in Strawberry Slush
    Layer 2 –  The daisy like flower in Crushed Curry
    Layer 3 –  The larger round flower in Calypso Coral
    Base layer – Random stamping of the half flower in Strawberry Slush

    petal parade punch art flower

    I to a white piece of paper and cut out of the middle a flower shape using the Floral Frames Framelit and sponged both the outside edge and the inner cut-out edge of the flower with some Crumb Cake ink.  Then I could just glue that to a Crushed Curry card base and glue down my flower punchouts to the middle of the flower.

    I made a couple leaves out of the artsy chevrons from the stamp set and cut them out and adhered them to the sides of the flowers.

    Then just add a few pearls, a sentiment, and some really bad random stamping (seriously, don’t look too close! 🙂 ) and you have yourself a card!

    So what do you think?  Ok for a last minute idea for a punch art flower?  Hopefully it at least gave you some ideas to try at home!

    spaced shop now sig bar

    March Online Stamp Club Hostess Code – XEWP4DFD
    Use this code to get free exclusive tutorials & project kit! Learn more


    Supplies Used:

    133602s
    127012s
    118874s
    119850s
    119861s
    129404s
    133188s
    119247s
    113439s