Northwest Stamper

Author: Jennifer

  • A Long Version of the Pop Up Card in a Box

    A Long Version of the Pop Up Card in a Box

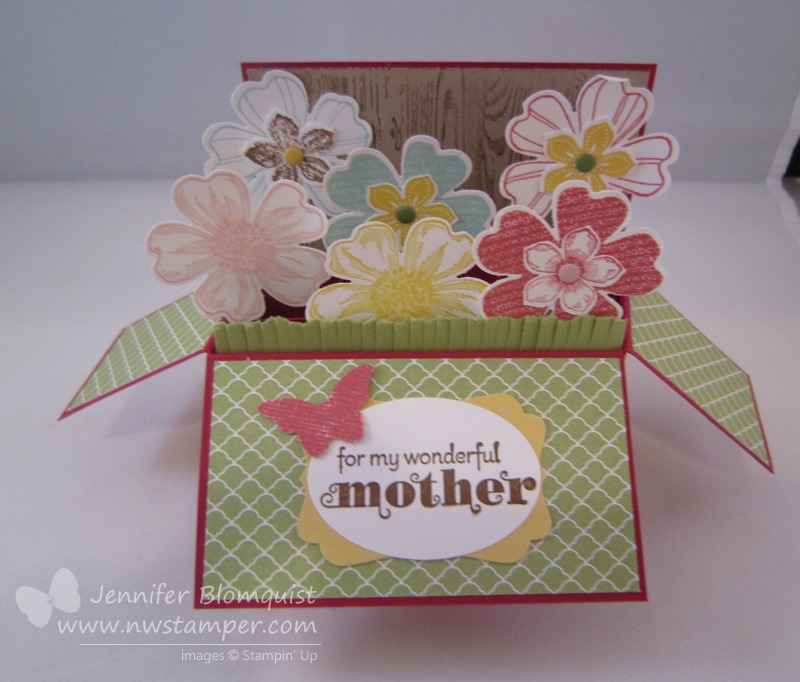
    I planned to post this yesterday but had forgotten about our Fun n’ Crafty Blog Hop (if you haven’t seen the projects CASE’d from the new catalog, you should totally take a look!)  But never fear!  I’m back with my customized version of the card in a box so that it will be a long card AND you can use an 8-1/2” x 11” piece of cardstock.  Here is the card I made as my prototype:

    If you recall, my other card in a box was skinnier and taller.  This was the default size I saw all over the web.  But I really wanted something longer and so I started futzing with the dimensions and other example I saw online.  The important thing for me was to have it only use an 8-1/2” x 11” piece of paper.  Most of the dimensions I kept coming up with would have made me use a 12×12 piece of cardstock, which is totally fine, but I have WAY MORE letter sized paper and so I wanted to use that.

    It still fits in a regular envelope….

    And when you pull it out, it lays flat… see the white looking edges around the cardstock.  Did you know if you sanded Core’dinations cardstock just on the edges you get this cool border look without needing any ink?

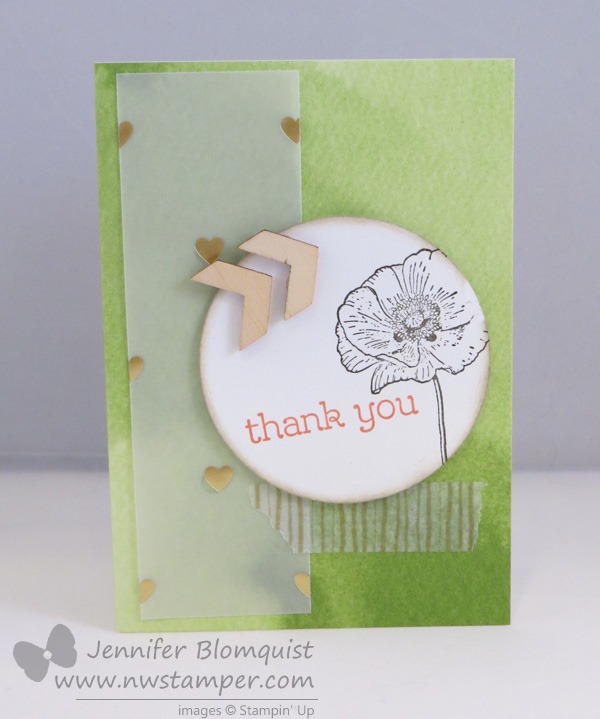
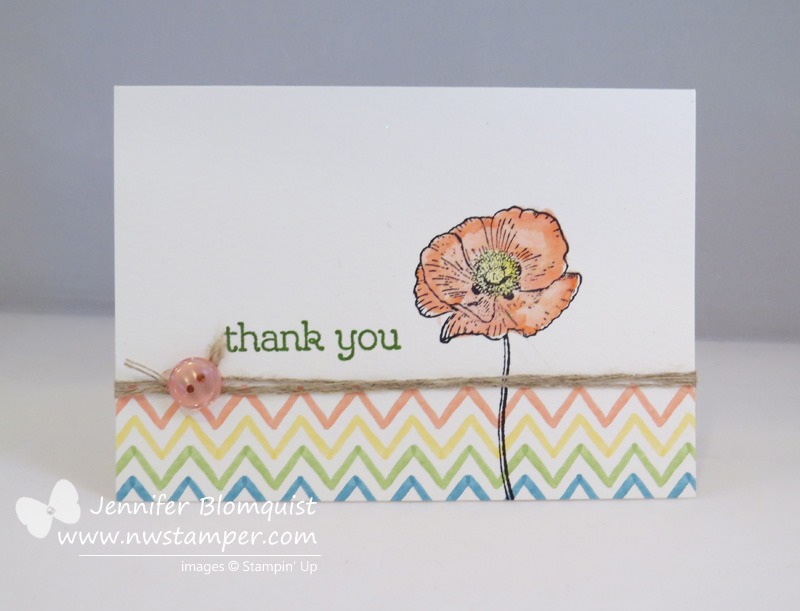
    And for the back, I didn’t know what I wanted to say, so I just added more of the Flower Shop and Petite Petal flowers to perk it up.

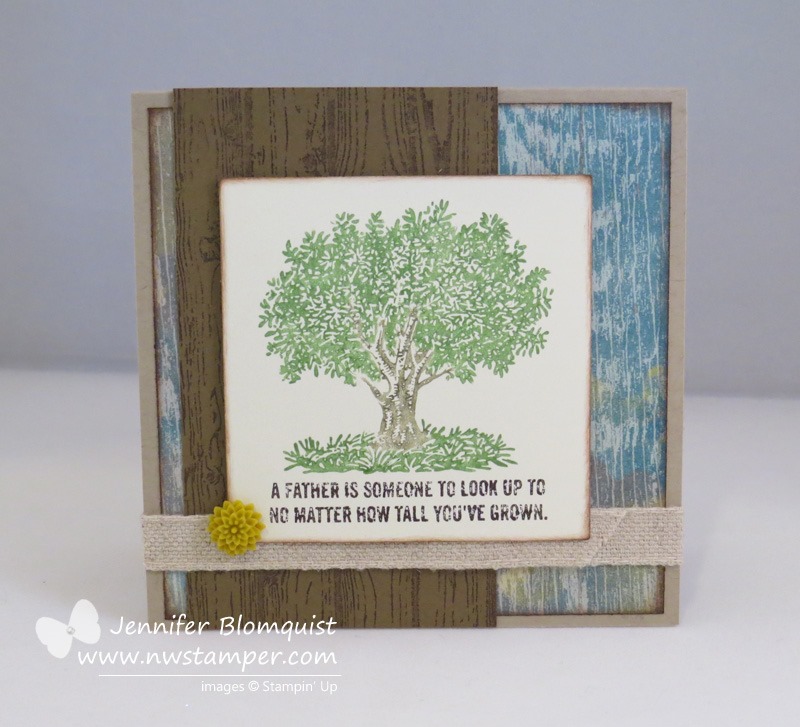
    I used a TON of tools on this card but that is the fun of this type of card.  You can keep embellishing and decorating to make it as fun and fancy as you want.   I loved the touches of the Hardwood stamp on Crumb Cake cardstock in the background to make it look like a fence.  And making the grass by taking a strip of Pear Pizzazz cardstock and tearing off one edge (the long edge) and then cutting down with the fringe scissors.  It makes it look so much nicer than if you don’t tear and then just cut with the scissors.


    I’ve decided to post my instructions for how to make this card/box. They don’t include the decorating instructions for the card above, but it gives you the templates and directions for making both sizes of the base box.  From there you can decorate in whatever way your heart desires!

    Get the PDF Instructions for the Card in a Box

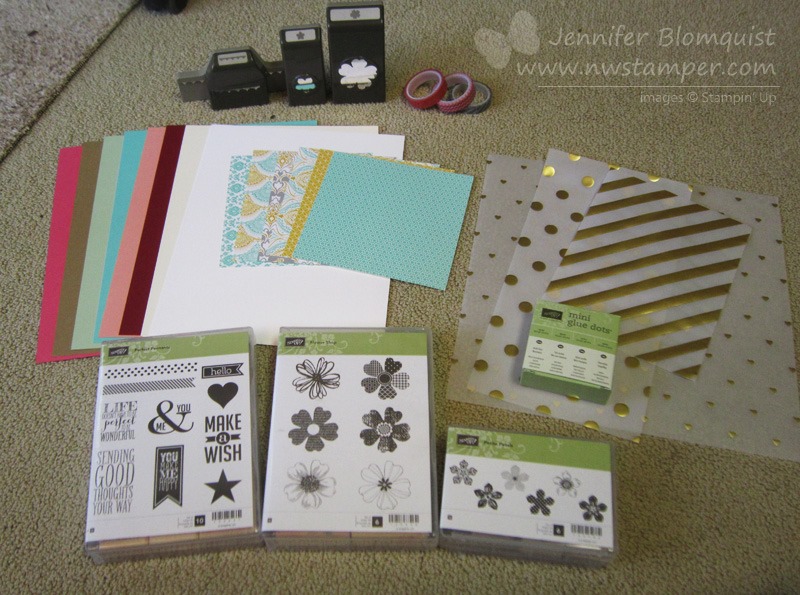
    If you are going to make this type of card at home you can use the supplies you have lying around, but I HIGHLY RECOMMEND you use the following for the best effect on your card:

    imageimage
    Sticky Strip – for making sure everything holds together because you will be folding and opening and moving it a LOTWindow Sheets – So your pop up elements can have some movement and take center stage without cardstock strips getting in your way


    So, I hope you enjoy this card and tutorial – and if you do, leave me a comment and let me know!  I don’t normally do tutorials but I thought you might like this one.

    spaced shop now sig bar

    June Online Stamp Club Hostess CodeACANDKB4
    Use this code to get free exclusive tutorials & project kit!  Learn more

     Stampin’ Up Supplies Used
    Stamps – Flower Shop, Petite Petals, Hardwood, Delightful Dozen (retired)

    Ink – Chocolate Chip, Daffodil Delight, Blushing Bride, Primrose Petals (retired), Pool Party
    Paper – Crumb Cake cardstock, Whisper White cardstock,  Subtles Designer Series Paper Stack, Raspberry Ripple Core’dinations cardstock (retired), Pear Pizzazz cardstock, So Saffron, Window Sheets
    Accessories – Pansy Punch, Petite Petals Punch, Fringe Scissors, Decorative Label Punch, Wide Oval punch, Bitty Butterfly Punch, Subtles candy dots

  • Check out that NEW Fun n’ Crafty Blog Hop!

    10383580_10204078098778853_972456530417495748_nWelcome to the Fun n’ Crafty Blog Hop for June! I’ve been seeing the amazing talent of the folks in my Fun n’ Crafty group of demonstrators and I thought it would be fun for us to start a monthly hop to showcase everyone’s work and give you lots of ideas around different themes.

    I’m so excited for this inaugural blog hop and hope you enjoy all the inspiration.  This month we will be showcasing project ideas from the NEW Stampin’ Up annual catalog. So make sure to check out the list of stops on the hop at the bottom of this post to see them all!

    So, here is my contribution… a lovely catalog CASE only my card is using the new Blended Blooms stamp.

    Here is my inspiration for the card… you can find it on page 170 in your catalog.  It is showing the new Sweetbriar Rose stamp, which I don’t have…and I don’t have the paper yet either.  But that is ok, you just make it work with what you have!image

    There were lots of cards and projects that I saw that I really wanted to try but this one jumped out at me and I had to give it a go.   I liked the idea of coloring directly on a non-white cardstock and I figured it was a good excuse to bust out my Blendabilities markers.  (Stampin’ Up’s new alcohol ink markers ~ available now to demonstrators and coming soon to everyone later this summer)

    And I’m pretty excited because this is my first real attempt using my Blendabilties and I think it turned out pretty well.  Now imagine how this would look on white cardstock!

    I loved all the little touches in this card too.  From the bit of White Tea Lace Doilies to the faux stitchiing at the edge of each piece of designer paper… because you KNOW I don’t have a sewing machine or the time to do much of any hand stitching. 🙂

    Now one thing you’ll learn from using Blendabilities is that they do bleed through the paper.  Thankfully, in some cases, it actually looks pretty pretty on the inside. Don’t you think?

    I made one more card but in the interest of time, I’ll share it later this week so you can move on to see some of the other great projects in the hop!

    So make sure you visit the links below and make sure to leave them some love by commenting and letting them know what you think of their interpretations!

    Blog Hop Participants:


    And if you are thinking of joining Stampin’ Up (or just want to get your hands on Blendabilities now!) take advantage of the $50 Starter Kit promotion through the end of June.  And if you join with myself or one of the folks on the blog hop, we’d love to welcome you into our Fun n’ Crafty stampers group and invite you to participate in our hop too!

    spaced shop now sig bar

    June Online Stamp Club Hostess CodeACANDKB4
    Use this code to get free exclusive tutorials & project kit!  Learn more

     vintage-Blended-Blooms-thank-you-card.jpgStampin’ Up Supplies Used
    Stamps – Blended Blooms, Hip Notes

    Ink – Memento Black, Mossy Meadow, Blendabilities Marker sets (Daffodil Delight, Pumpkin Pie), Crumb Cake marker
    Paper – Crumb Cake cardstock, Whisper White cardstock, Regals Designer Series Paper Stack
    Accessories – Banner punch, Tea Lace Doilies, Essentials Piercing Pack, Piercing Pad, Piercing tool

  • Pop Up Card in a Box featuring Create a Cupcake

    Pop Up Card in a Box featuring Create a Cupcake

    The new Stampin’ up catalog is here and while I excitedly placed my first order from it yesterday, I thought I would show a few projects today and tomorrow that feature some fun ideas and products that are going away after tomorrow.  The first project (well both today and tomorrow) will be card in a box – just in two different sizes!

    This one features the Create a Cupcake stamp set that is retiring after tomorrow.  I’m a bit sad because I really like the sentiments that go with this set…. here is the sentiments I used from the set for the backside of the card.

    Now you may be thinking… how is this considered a CARD when it looks like a BOX?  Check it out, here is what it looks like in an envelope:

    Crazy, right?!  It totally fits!  That is the brilliance of this card design.  It folds down flat to be a mailable card but when the recipient pulls it out of the envelope it pops open to be a box with fun jiggly bits that can sit on their table or shelf.

    This is what it looks like when it is collapsed flat after they pull it out of their envelope.

    I thought my outside needed something which is why I added the Coastal Cabana cardstock with some stamping from the Perfect Pennants stamp set.  I also used that same set for the front “Make a Wish” sentiment too.  So happy this set at least is continuing on into the new catalog. Smile

    And if you like the cupcakes, (they really do make fun birthday cards)… or as one person said, muffins for her holiday baking.  You have two options right now:


    Create a Cupcake Stamp Set (retiring 6/4)~OR~  Cupcake Partyboth of which coordinate with the Cupcake Punch
    imageimageimage


    These cards aren’t hard to make, just time consuming to decorate if you get fancy.  Smile  I have to find my instructions for putting them together but I’ll post them TOMORROW if you want to stop back by to see the other horizontal design for this style of card.


    I’m getting ready to close my first Product Sampler / Product Share for the new catalog! If you are interested in samplers for the new designer papers or ribbon, make sure you let me know ASAP!  Details can be found here.

    spaced shop now sig bar

    June Online Stamp Club Hostess CodeACANDKB4
    Use this code to get free exclusive tutorials & project kit!  Learn more

  • The New Catalog and New Product Shares are Here!

    The New Catalog and New Product Shares are Here!

    It is finally here!  The new catalog launches TODAY and starting at 12noon MST, everything will be in the online store and ready to order.  In the meantime, you can check out a copy of the catalog online and start picking out your must-haves.  🙂  I know I’m still trying to whittle down my list to what to get now vs later since my list is so long.

    Check out the PDF copy of the new catalog here

    REMINDER:  You can still order from the retiring catalog through June 4th, so check out the last call lists and combine any retiring favorites, clearance rack, and new stuff all at once!

    New Product Shares and Samplers Available!

    Just in time for the new catalog, I have a couple ways for YOU to try out many of the new goodies from the catalog without having to buy everything!  

    Every year I offer samplers to give you a chance to try out a little of each of the new items so you can see which you love and which not so much – because there is usually at least 1 or 2 that surprise you. :)  Here are this year’s offerings:

    Designer Series Paper Sampler
    2014 paper share

    Receive 78 samples from all of the new 2014 Designer Papers
    What do I get? 
    • 66 – 6″x6″ sheets of designer paper
      (one of each of the 6 patterns from the 10 new paper packs including the specialty patterned papers, plus 6 extra sheets from the new newsprint paper)
    • 12 – 4.5″x3.75″ sheets of designer paper
      (a half sheet of each of the 12 patterns from the 2 new paper stacks)

    That would cost $127.40+tax/shipping for all these papers – ONLY $19.25 for the sampler

    Specialty Paper Sampler

    Receive 13 samples from the new 2014 Specialty Papers
    What do I get? 
    • 13 – 6″x6″ sheets of specialty paper including
      • 1 – 6×6 sheet of each of the 5 glimmer papers (new silver, gold, champagne, red, and dazzling diamonds)
      • 1 – 6×6 sheet of each of the 2 foil papers (gold & silver)
      • 1 – 6×6 sheet of each of the 3 patterns from the 2 foil vellum packs (gold & silver)
      • 3 – 6×6 sheets of the new Kraft paper

    That would cost $54.80+tax/shipping for all these papers – ONLY $8.25 for the sampler

    ———————————————————-
    GET IT ALL Paper Sampler

     2014 paper share+
    Receive all 91 samples from both the new 2014 Designer Papers and the new Specialty Papers
    What do I get? 
    • All the papers listed in the two samplers above!

    That would cost $182.20+tax/shipping for all these papers – ONLY $27.50 $25.00 for the sampler

    Paper samplers for folks not local to me will have a $5.60 priority mail shipping charge

    ——————————————————–

    NEW Ribbon Sampler

    There are LOTS of new ribbons coming in the new catalog, so a sampler is a great way to see what they all look like in person without a big commitment!

    2014 ribbon share

    Receive samples from the 50 new ribbon styles/colors coming in the new catalog – a total of almost 70 yds!  This will include new colors in all of the following styles:

    • new Crochet trim (1)
    • Gold 1/8″ ribbon (1)
    • 5/8″ Satin ribbon (4 colors)
    • 1/8″ Taffeta ribbon (3 colors)
    • 1-1/4″ Striped grosgrain (5 colors)
    • Thick Baker’s twine (5 colors)
    • Stitched Satin ribbon (5 colors)
    • 1/4″ Cotton ribbon (12 colors)
    • 1/2″ Seam binding (7 colors)
    • Baker’s Twine (7 colors)

    –  for only $38.

    Double up! Double your sample and receive 2 yds of most ribbons (almost 140 yds total) for only $76 $70

    Ribbon shares for folks not local to me will have an additional $3 for shipping to you

    How these shares work –
    I will start reserving spaces in the shares now.  As spaces fill up, I will order the product and cut and divide everything up and ship out to you.

    I will send you information for collecting payment as shares fill up.  I expect to order the first set of shares on June 2nd, so they will be mailed to you the following week.


    Anchor
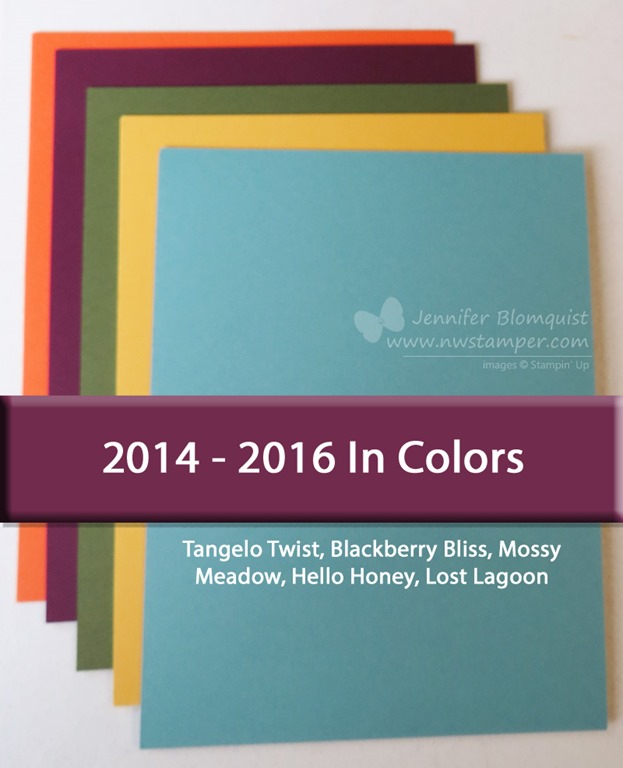
Get In with the 2014 In Color Club

    I know a lot of folks like to collect the In Color items and like the idea of having all the coordinating products to give you a chance to make lots of projects with matching elements.  So, this year I’m trying out a new idea – An In Color Club! .

    How does it work?
    The club runs from June through October and by the end of October, you will have received some of everything in the In Colors!  Each month you will receive the following items in the color of the month:
    • Ink Pad
    • 12 sheets of cardstock
    • Marker
    • Ink Refill
    • 2 In Color Clothespins
    • 2 yds of Ribbon
    • 4- 6″x6″ sheets of the In Color paper stack (2 each of 2 designs)
    • At least one card sample based on the color of the month!

    All for only $26 a month!
    If you aren’t local to me to pick it up, then it is just an additional $5 for priority mail shipping to you.


    not pictured  – clothspins, card, & designer paper
    With your first month, you will receive an In Color Bookmark & Stampin’ Up catalog (if you haven’t already received one) as well as a set of card bases from ALL the In Colors so you can try them all out from the beginning.
    SAVE YOUR SPOT NOW! 
    email me at jennifer@nwstamper.com to save your spot in this club!  Sign ups are due by June 10th.

    spaced shop now sig bar

    June Online Stamp Club Hostess CodeACANDKB4
    Use this code to get free exclusive tutorials & project kit!  Learn more

  • Group Project Creations from our Team Iron Stamper Challenge!

    Group Project Creations from our Team Iron Stamper Challenge!

    *** Reminder – Tomorrow (June 1, 2014) is the LAST DAY to order from the Occasions Catalog!  So make sure you’ve gotten your favorites before their gone by shopping online now. ***

    I have been so excited to watch my Fun n’ Crafty team grow and so I’ve been wanting to start doing more to try to provide opportunities for everyone to get together, learn from each other, and have fun stamping together.  So, I’ve started working on roughly quarterly group events I’m calling Stamp  & Shares.  This last time, I wanted to have some kind of game for everyone to play.  So, I came up with the idea of an “Iron Stamper” challenge for us to do early in the afternoon.  The idea was that everyone would be broken up into teams and we would have to work as a group to create projects using predefined supplies.  No one knew what the supplies would be ahead of time, so it was fun for everyone to brainstorm and create together on the fly! 

    The supplies they all had to work from were:

    They couldn’t use any other supplies than what was provided in the box and the only had 40 minutes as a group to design and create 2 projects using what was in their box.  I have to say, I was so impressed with the creativity that came out in that short amount of time! 

    Check out what they created:

    Team 1 – Liz Mitchell, Kathy Thisted, and Rose Bryson

    First they created a card.  And I love how they came up with using one of the petals from the Pansy punch to make a heart!  Way to work with what you have!  Plus I thought it was such a great idea to add Washi tape to the bottom of a piece of cardstock and THEN punch with the scallop punch.  Aren’t they clever?

    At the last minute, they realized the instructions for the challenge was to create 2 projects, so they pulled together this box very quickly:

    I loved how they stamped and punched the Flower Shop image and then punched out a piece of the Gold Foil vellum and used it as a punched overlay too.

    Team 2 – Tanya Cabral, Annie Lee, Jennifer Blomquist

    This group stuck more to cards but really got into the vellum paper.  And Tanya came up with the fun idea of stamping directly on the vellum for a central layer:

    For the second card, I thought it was cool how Annie came up with the layers of scallop edge punched designer paper on the left side… like a little layer of ruffles!  Then the combination of stamping under the vellum and adhering stamped images over the vellum.

    You can kind of see that the Petite Petals images and the Flower Shop punched flower are BELOW the vellum, and one of the punched out petite petal flowers is ON TOP of the Vellum.

    It was a great afternoon and I’m working on our next group demo event!  It is looking like I may hold it off until July so I can run it right after convention and share all the projects and details I learned at convention with everyone!  If you would like to be on the email list for more details for when the event is announced and registration opens, let me know at jennifer@nwstamper.com and I’ll make sure you are kept in the know!

    spaced shop now sig bar

    May Online Stamp Club Hostess CodeZUBHUEK6
    Use this code to get free exclusive tutorials & project kit!Learn more

  • Grungy Chic Winner for our Team Meeting Card Contest!

    Grungy Chic Winner for our Team Meeting Card Contest!

    I discovered that I had a bunch of pictures from my Team Stamp & Share event this spring that I never posted.  And as you can see from today’s card – they NEED to be shared!  So, today I thought I would share the winner from the card contest by Rosemary Bryson!

    Stunning, right?!

    Her card was so amazing in person with all the layers and detailing, I just had to show some of the cute elements, so that even if you don’t make this exact card, you can use some of these fun ideas.

    First up, I loved punching out this sentiment from the Yippee Skippee stamp set with the Wide Oval Punch (who knew it was a perfect fit?!)  But I especially love her embossing of the polka dots from the Perfect Pennants stamp set!  It looks like she mixed black and white embossing powder to create this cool frosty effect.

    And the owl from the Baby, We’ve Grown stamp set… I always saw that as a baby only set but she proved me wrong!  This is reminding me to look at my stamp sets in different ways. Especially when you add a little flower for her “hair”. 🙂

    She even made the inside fun too…. doesn’t it really finish the card?

    I know I loved the inspiration from this card and always look forward to what she and the other gals come up with each month to share!  Rose does an amazing job organizing our team swap each month and that is always fun inspiration.

    Plus, I’ll be running my next Stamp & Share for Stampin’ Up demos in July.  So if you are a Seattle-area demo or are interested in learning more about being a demo, let me know and I’ll make sure you get all the details!

    Sign and Save: From May 28-June 30 you can join Stampin’ Up! at one of two great prices. We will continue to offer the traditional starter kit priced at $99 ($125 product value), but for four weeks only we will also be offering a reduced priced starter kit at the low price of $50 ($55 product value).Learn more here.

    spaced shop now sig bar

    May Online Stamp Club Hostess CodeZUBHUEK6
    Use this code to get free exclusive tutorials & project kit!Learn more

  • Save on the Stampin’ Up Starter Kit through June!

    Save on the Stampin’ Up Starter Kit through June!

    2013-07-18 08.33.16-3I have been so blessed to have found so many friends with Stampni’ Up; both through my customers and my downline.  Through 4 state moves and 2 pregnancies, I’ve not been able to imagine giving up being a demo.  You see, I’m a sucker for the community and of course, the DISCOUNTS and SNEAK PEEKS!

    So, that is why I had to make sure everyone knew about this special offer on the starter kit through the end of June!

    Join the Fun for only $50!

    It’s true.  Stampin’ Up has decided to offer a special starter kit for only $50.  You get to pick out $55 of whatever you want for your kit – and it gets shipped to you for free!

    Why would I want the starter kit?

    • If you are excited for Blendabilities and want to be able to start playing with them now!  (Before they are widely released at the end of the summer)
    • You want to be able to get 30% off your first big order from the new Annual Catalog that goes live in June.
    • Get a discount on everything you order while you are a demonstrator too
    • Be a part of the demonstrator only forums & communities including my Fun n’ Crafty group!  We have members from across the US and so have an active Facebook page, team swaps, events, and monthly group calls.
    • You want to get your products for free or even earn money by sharing and stamping with your friends or online communities!

    Some common questions:

    I often get asked some questions about what it means to get the starter kit and become a Stampin’ Up demonstrator including

    1. Do I have to run classes or workshops?
      Nope!  Running events or having friends host parties can help you stay active and even earn you extra money, but you don’t have to do a single one if you don’t want. In fact I know a number of people are demonstrators for just themselves and love it. 🙂
    2. What are the benefits?  
      With your starter kit you’ll get to pick $55 in supplies to be shipped to you for free. Plus you’ll get a free paper pumpkin kit and access to preorder products from the annual catalog and then the holiday catalog in August.  Then get 20% or more off everything you order to boot!  Talk about your favorite and get inspired in demonstrator only forums and communities.
    3. How much do I have to sell to keep the benefits of being a demosntrator?  
      You get the first quarter free and then after that you just need to sell or buy $300 in product (that is the total before they give you your commission and discounts). 
    4. What happens if I get the starter kit but decide it isn’t for me?  
      You have until October to give it a try and check it out. If you decide it isn’t for you, keep everything you’ve gotten so far and enjoy it. If you haven’t sold/ordered $300 by the end of October, you just go back to being a valued customer and stamping friend!

    Have more questions?  Shoot me an email at jennifer@nwstamper.com and I’d love to chat with you.

    Or, ready to go – Get the details and Join now


    spaced shop now sig bar

    May Online Stamp Club Hostess CodeZUBHUEK6
    Use this code to get free exclusive tutorials & project kit!Learn more

  • Watercolor Wonder Notecards Ideas–Day 2 with Wood Chips and Vellum

    Watercolor Wonder Notecards Ideas–Day 2 with Wood Chips and Vellum

    So, I was planning on finishing posting these cards this weekend… but then the family decided to do an impromptu holiday trip to Portland, OR, so we took off and I completely forgot to schedule these before I went.  But now I’m back and have a lot to share with you in the next few couple weeks!

    Today, I was going to share with you the rest of the designs I put together for the Watercolor Wonder notecards.  With these cards, I started pulling in some different elements from around my craft room.  So, here is one of my favorites:

    I started out with the Gold foil vellum and then added the stamped circle with the poppy and sentiment from Happy Watercolor.  But it was just too plain…. so then I added some of the gold Watercolor Wonder washi tape.  And that was better, but it still needed something.

    And that is when I decided to grab my Wood Elements embellishment pack….. They were just the right addition of texture and dimension for me.  LOVE them!

    But these cards don’t have to have lots of layers to be cute.  Like I also really like this card too…. the chevrons come preprinted on the card, so all I had to do was stamp my flower and thank you.  I watercolored the flower with my aqua pen and just to add something to the card, I wrapped some linen thread around and add a subtles designer button, and DONE!

    Can you tell yet that I’m a fan of things that are cute but very quick and easy?  Smile  Seriously, with my two hyper heads running around, I have to squeeze in what crafting I can so while I love lots of layers and intricate projects, I can’t do them that often.  Thankfully I don’t think my friends and customers mind the quick and cute ideas!  (or if they do, they have a great poker face, ha ha!)

    Ok, so here are the last two cards.  They are the same card base (the polka dot background and the flowers come preprinted on the cards).  This was actually the most challenging for me to design with because the flowers are so pretty I didn’t want to completely cover them up, but I also needed to figure out how to have something balanced in the non-flower part of the card.  So, I started with just a simple thank you.

    But since just thank you isn’t enough… gotta have some pizzazz, I added some gold sequins and a daffodil bitty butterfly so I had my beloved dimension to everything.

    They are both pretty much the same except for the sequins…. So what do you think?  Random sequins or straight sequins are better?

    And just to end on a fun note, I thought I would share one of the photos from my trip to Portland.  Near downtown is a mall called Lloyd Center where there is a big ice rink enclosed in the mall.  A couple years ago we were in Portland and we took Nicholas on the rink, so this time Caitlin got her first chance to go ice skating… see, this is a novel thing in the Northwest. Smile  She did awesome and have fun on her one trip around the rink (both kids were ready to be done after one trip around).  I, of course, was the only one from our family to fall over on the ice and I did it in style! Flat on my back, landing head first.  But it was still a great trip!  I hope you had a wonderful holiday weekend as well!

    image

    Quick Dates Reminders:

    So I realized that the dates for when some of these items are no longer available are a little confusing so I wanted to give everyone a quick reminder of how it works this year:

    • The Occasions Catalog items (like the Happy Watercolor stamp and the Watercolor Wonder Notecards used above) are available until June 1st
    • The NEW Annual Catalog items are available starting June 2nd
      (need a catalog?  Fill out my request form here)
    • The Retiring items (everything on the discountinued Stamp list or discontinued Accessory list) is available WHILE SUPPLIES LAST through June 4th

    Make sense?  If you have any questions just shoot me a note to jennifer@nwstamper.comSmile 

    spaced shop now sig bar

    May Online Stamp Club Hostess CodeZUBHUEK6
    Use this code to get free exclusive tutorials & project kit!Learn more

    Stampin’ Up! Supplies Used (for all cards in this post)
    Stamps – Happy Watercolor
    Ink – Stazon, Gumball Green, Calypso Coral, Daffodil Delight, Tangerine Tango
    Paper –Watercolor Wonder Notecards, Whisper White, Gold Vellum, Daffodil Delight
    Accessories – Watercolor Wonder washi tape, 2-1/2” circle punch, Wood Elements accessories, Gold Sequins, Aqua Pen, Bitty Butterfly punch, linen thread

  • Watercolor Notecard Weekend–Day 1 Fun with Happy Watercolor

    Watercolor Notecard Weekend–Day 1 Fun with Happy Watercolor

    Ok, I know I’ve been sharing a lot with Happy Watercolor and even the Watercolor Wonder Notecards, but I’ve been having a lot of fun playing with them and I want to share them since I know a lot of folks have ordered the stamp set and the notecards.  I figure more idea for how to use your stuff is always better, right?  : )

    So in case you didn’t realize it with my past pictures, the cards come preprinted with different colors or patterns to get you started.  And they are all on watercolor paper… which means you can have fun watercoloring and adding your own personal touch as well.  So, here are two cards I made from the same base card, just with different stamping and embellishing.

    I would like to add, that I was not excited AT ALL when I was given these sequins a while back.  But turns out, they are a fun touch to add sometimes.  Since they come on a strand, I’ve been using them by pulling off sequins or tucking the strand partially behind a stamped layer.  But in this case, I think they actually are just right as a strand out in the open, all on their own!

    And then I wanted to figure out some different ideas to try on the other card styles… so this is my modified version of the spotlight technique.  Though, I think it almost looks like a bar across the colored background stamps… so maybe it is a “censored technique” because it looks like a censor bar. Smile

    And the last one for today I call my “Artsy Poppy”.  I started mixing and matching the stamps in the set as an experiment.  I actually kind of like it. 

    (PS – did you notice, this card base is the same as the card above?)

    If you look close up, you can see that the center of the poppy needed something, so I took an extra sequin and glued it down with a glue dot.  It still was missing something, so I added a little pearl and it suddenly was just right!

    So see, lots of different ideas and ways to spruce up these cards.  You have one more week to grab them – and 20 cards for $12.95 isn’t a bad deal at all!  See all the watercolor wonder coordinating supplies here.

    I have one more set of cards using these notecards that I’ll post tomorrow.  So you will have LOTS of ideas to play with with your supplies.

    spaced shop now sig bar

    May Online Stamp Club Hostess CodeZUBHUEK6
    Use this code to get free exclusive tutorials & project kit!Learn more

    Stampin’ Up! Supplies Used
    Stamps – Happy Watercolor
    Ink – Stazon, Gumball Green, Calypso Coral, Daffodil Delight, Tangerine Tango, Crushed Curry
    Paper –Watercolor Wonder Notecards, Whisper White
    Accessories – Scallop Tag Topper punch, Pearls, Gold Sequins, Aqua Pen

  • Father’s Day Card using Look Up to Father

    Father’s Day Card using Look Up to Father

    Look up to Father is one of those stamps that when I saw it in the Occasions Catalog, I knew I just HAD-TO-HAVE it!  I loved the sentiment (“A Father is someone to look up to no matter how tall you’ve grown”) and knew I wanted to make a card for my Dad with it.  So, I got it in one of my very first orders, and promptly mounted it and put it on my shelf…

    where it sat for a long time.  So, now is my first time inking it up and I LOVE it!

    I created this card for my Stamp Club to (1) give them a masculine card and (2) remind us all to use our designer papers!  Because I KNOW I’m not the only one who loves their paper and then tries to only use the teensiest tiniest piece on your projects to conserve.  Smile

    I colored the Look Up To Father stamp using my markers before stamping… I used Gumball Green for the leaves and grass, Soft Suede for the trunk, and Early Espresso for the sentiment.

    It was also another chance to use the Hardwood stamp set… so glad it will be sticking around for a while.   Sadly that is about the only part of this card (aside from the cardstock) that will be sticking around after the 1st of June!

    Retiring Items used in this card:

    And if you missed it, Stampin’ Up has dropped the price of many of the retiring items by up to 50%  So, check out the deals and what is left here.

    So, check out your stamp stash and see what images you loved and had to have; but haven’t seemed to get inky yet!  Now is the perfect time to pull them out and have a fun weekend playing!

    spaced shop now sig bar

    May Online Stamp Club Hostess CodeZUBHUEK6
    Use this code to get free exclusive tutorials & project kit!Learn more

  • New Retirement List Blowout Sale Starts Today!

    New Retirement List Blowout Sale Starts Today!

    retirement list 2014 discounted

    If you visit my Facebook page, you’ll have seen that yesterday I learned that Stampin’ Up was planning on dropping the price on selected items from the Retirement Lists!  Yay! 

    As before, everything that is retiring is available while supplies last – so don’t delay if you see something you like and it is on sale!

    Use Hostess Code ZUBHUEK6 to receive a gift from me with your order!

    Shop the Retirement List here


    Have fun shopping and enjoy the new deals!

    spaced shop now sig bar

  • Lots of Ideas for Rainbow Cards with Happy Watercolor

    Lots of Ideas for Rainbow Cards with Happy Watercolor

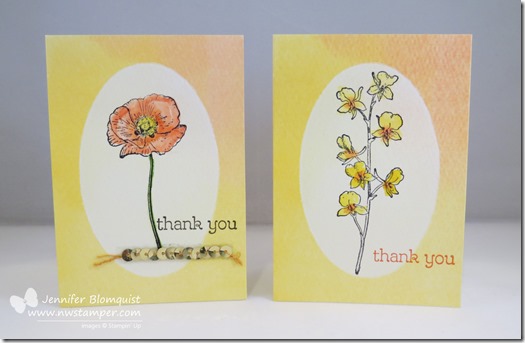
    Ok, as promised, I’m FINALLY posting those pictures from Stamp Club with all the variations of my Rainbow Happy Watercolor card (over on the right of this post).  Smile

    I have to admit, one of the things I love about stamping with other people in my classes is that I get to see some awesome ideas that I would NEVER have thought of on my own.  I have some folks who love making exactly the card I created, and that makes me happy because I know they liked the card and enjoy it.  But then, there are some folks (Elise and Tanya – I’m looking at you!) who make it their mission to make it somehow different than the sample.  And I think it is fun to see what they come up with as well.  I know they like the inspiration and sometimes I end up loving their card so much more than mine!

    Anyway, lets start the show with the card that I originally created for class but just wasn’t happy enough with it to have it be the official card.

    I liked the idea of letting everyone play with the Gumball Green stitched satin ribbon (another item retiring at the end of the month) and the new Scallop Tag Topper punch (which IS carrying over into the new catalog, yay!)  But when I put it all together, it just didn’t feel right to me.  So, I mixed it up.

    The funny thing, I showed them this card first and most of the gals in club LOVED it!  Guess that goes to show just because something isn’t your style, doesn’t mean it isn’t theirs. : ) 

    But see, this card used one of the flowers and I wanted to prove I could make a card with this set without the flowers!

    Now, lets see what everyone else made, shall we?

    This was a fun lemon-lime card made by Janine S.  Isn’t that fun how she did the hearts in the corner?!

    And this was another glittery version by Saundra W!  She totally went outside the box, which I thought was great.  But I really liked how she mixed and matched the hearts with the splotches.

    And, finally this version by Shannon L.  Mostly the same as the original with a fun variation on the hearts. 

    There was one more that didn’t use the hearts or that sentiment (it used the “psst…” sentiment on the outside and the happy on the inside), and she had the rainbow splotches not quite in a line along the bottom.  It looked AWESOME but I totally forgot to grab a photo of it before she left for the night.  Oh well.  But hopefully you had fun with the cards I DID get posted.

    And if you are local to the Seattle area and would like to join me for my monthly Stamp Club, shoot me an email at jennifer@nwstamper.com!  It’s a great group and one of my favorite classes each month.

    spaced shop now sig bar

    May Online Stamp Club Hostess CodeZUBHUEK6
    Use this code to get free exclusive tutorials & project kit!Learn more

    Retiring Items featured in this project that you don’t want to miss out on!
    (available while supplies last or through June 1)