
So, I dream of the day that I’m going to be so organized and pulled together that I have a long list of my upcoming Walkthrough Wednesday topics when I sit down to do my video… I’m going to know all my class projects for the following few months… and my blog posts – oh they will be written prior to 11pm the night before. ![]() But that is not my life these days! Good thing I love what I do, right?!
But that is not my life these days! Good thing I love what I do, right?!

Well, the card I have for you is one of those “moments of inspiration” cards where I knew I wanted to have something to share for today, but I had no idea what to do. I sat and stared at my desk…my stamps… my punches until finally an inkling of inspiration struck and suddenly this card came flowing from my brain.

I love how it turned out and I hope you enjoy it too! In fact, I’ve decided I’m going to use this as one of my group swap cards for convention next week! I’ll have some extras as well for general swapping so if you are going to be in SLC, say hello and maybe we can swap!
Tips for making this card:
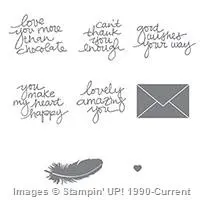
- Do you LOVE this Lovely Amazing You stamp set yet? It is only guaranteed to be available through August 10th (it is one of the stamp sets that was released monthly when they were testing out photopolymer stamp sets.) The font is fabulous, the sayings are great, and isn’t that feather awesome!?

- When stamping the feather, I stamped some full strength and some “stamped off”. When “stamping off” with the photopolymer stamp sets, I find that you need to fully in the stamp and then stamp first on scrap paper and THEN onto your card layer. If you try stamping an image that is partially off the page, not enough ink comes off the stamp in the areas that were past the edge of your card layer, so that when you go to stamp the second generation image, you will get it lighter in spots and full strength in other spots… no good!
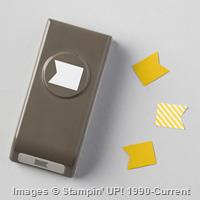
- Have fun with your punches! Punch out some of the Bitty Banner shapes in fun colors (this is Mint Macaron, Smoky Slate, and Wisteria Wonder). Then mix in a longer banner cut to just narrower than 5/8” that you can trim the ends by sliding the paper strip into the punch from the BOTTOM of the punch (instead of using the usual slit in the side – have most of the paper out of the punch and just tuck the end inside the punch through the hole in the bottom.) If this makes no sense, check it out on the video!


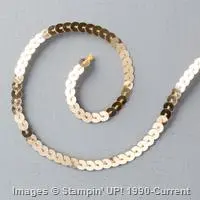
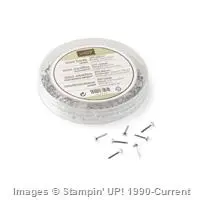
- Make your own custom accent by running a mini brad through the middle of sequin like this gold sequin from the Sequin Trim.

- The sentiments from this stamp set punch out great with the 1-3/4” circle punch (seen here) and the 2” circle punch (used for the Wisteria Wonder layer).


See all these tips in action and more with the video:
Note – if you are reading this blog post from email, click here to view the video.

As I mentioned, I’m getting ready to head to Salt Lake City next week for the Stampin’ Up convention. It is always an amazing time and I’m grateful to be going with a group of my Fun n’ Crafty Stampers group and will have the chance to say hi to many of my fabulous friends from across the US and Canada!
If you aren’t going to be joining me at this event, they just opened registration for the next NEW demonstrator event called On Stage. They have a 3 day event (in Brussels this time) with local 1 day events the last day so we can all hear all the announcements and product and catalog reveals! It is coming up in November, and I’d love to have you join me!
Not a demonstrator yet? ![]() There is still plenty of time and I’d love to have you be a part of the Fun n’ Crafty stampers and join us at one of the events! Email me for more details at jennifer@nwstamper.com.
There is still plenty of time and I’d love to have you be a part of the Fun n’ Crafty stampers and join us at one of the events! Email me for more details at jennifer@nwstamper.com.
And in the meantime, watch for more fun Convention updates next week!
![NWstamper signature_thumb[9]](http://www.nwstamper.com/wp-content/uploads/ad87b4046c1e_C9F6/NWstamper-signature_thumb9.png "NWstamper signature_thumb[9]")
![]()
Project Supplies Used:


Built for Free Using: My Stampin Blog