Walkthrough Wednesday–A Clean and Simple Card of Thanks with Lovely Amazing You

So, I dream of the day that I’m going to be so organized and pulled together that I have a long list of my upcoming Walkthrough Wednesday topics when I sit down to do my video… I’m going to know all my class projects for the following few months… and my blog posts – oh…
Project Life Cards Make Great Altered Picture Frames!
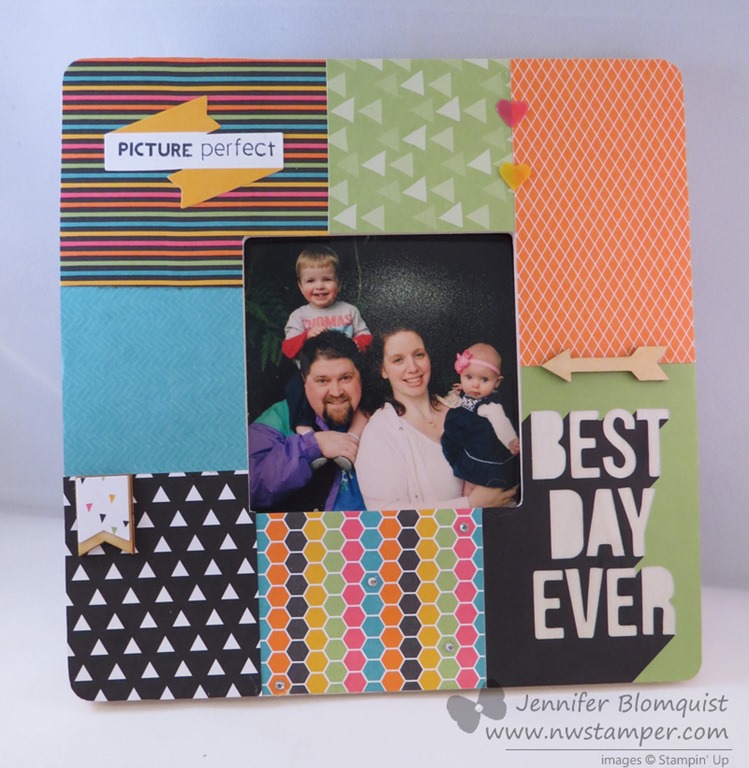
By now, You’ve probably heard of Project Life and know the cards in each kit are great for quick and easy scrapbooking (if you want to learn more about project life, I have a video about it here). But when they gave a set to us to use for the 2014 Stampin’ Up Convention display…
Weekly Deals for the last week of Sale-a-Bration

Happy Tuesday! We are down to our LAST WEEK of Sale-a-bration, and so if you have been thinking of stocking up on supplies, picking up some wish list items, or just getting started on that project you’ve been thinking about for a while; you have one week left to get the stuff you need and…
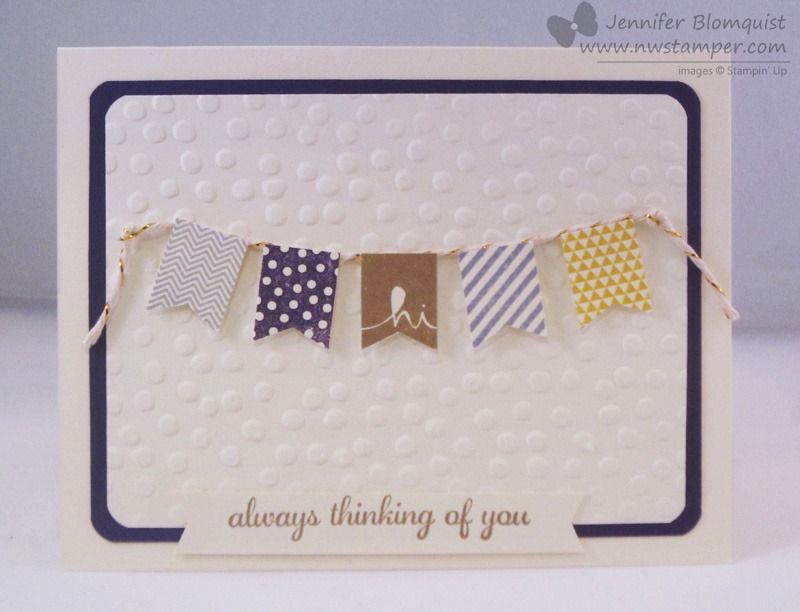
My Favorite Banner Card Yet!

I just realized this morning that I hadn’t shared this card yet and I love it so much that I figured I needed to fix that! This is my favorite card yet that I’ve made with the Sale-a-Bration set Banner Blast and I know a lot of it is the color… and the bling… and…
Guest Designers–Fun Cards with Fresh Prints, Banners, and more
This week I’m sharing some of the great cards I got from my team’s Occasion Catalog card swap. They came up with such fabulous cards that I wanted to share the inspiration with everyone! Today’s cards show some cute ways to use the patterns in the Fresh Prints designer paper stack to add a touch…
Eggplant and Gold Banner with Banner Blast
Right now, everyone is LOVING the Banner Blast stamp set and punch from the Sale-a-Bration catalog and so I wanted to sit down and play around with my supplies to see what I could come up with. Turns out, it is really quick to come up with something cute and fun – this is what…