Northwest Stamper

Tag: thank you card

  • Daisy Delight Sneak Peek Thank You Card

    Daisy Delight Sneak Peek Thank You Card

    I’m excited to finally be getting off my duff and participating in this fun Thailand Incentive Trip Achievers Blog Hop. Each month, a collection of the folks who have earned the trip and will be joining me in Thailand this July, choose a theme and share some amazing projects!  This month our theme is the “2017/2018 Annual Catalog Sneak Peek”. We want to show you some of the AMAZING products that are available for demonstrators to order right now! So check out all the cute projects and amazing inspiration!

    I have been having a blast using the new Daisy Delight Bundle.  It includes the new Daisy Delight stamp set and the Daisy punch.  And while I love my dies, I’m always a sucker for great punches.  They make projects quick and easy, and you don’t need a lot of space to get your work done.
    Layered Daisy Punch makes an easy card embellishment

    Tips for making this Daisy Delight Thank You card:

    • Double Up! I kept it sweet and simple.  I stamped my daisy in Crushed Curry twice and punched both flowers out.  The punch creates a sparse daisy, but once you start layering the punches, they really build up into beautiful flowers!
    • Perfect Complementary Punch! You can stamp the center of the flower and it punches out perfectly with the 1/2″ circle punch!
    • Add some shimmer! I’m hoping you can tell in the picture above, the middle of my flower was stamped in Early Espresso, but to get that coordinating golden glow and shimmer, I used my retiring Gold Wink of Stella brush.  It adds just the right hint of yellow to match the flower and adds lots of gold shimmer!

    Great thank you sentiment from the Daisy Delight stamp setI love the fonts and sentiments that go with this stamp set as well.  You can mix and match to fit exactly what you need your card to say.  And when I get the chance to mix and match my sentiment stamps, especially when there are different fonts, I love to mix and match my colors too!  I just picked two colors I used elsewhere in the card (Dapper Denim and Early Espresso) to tie everything together.

    Daisy Delight swap card by Jennifer Blomquist
    Such a fun stamp set and punch, to help make such pretty spring and summery cards!  And YES!  It will be released as a discounted bundle, so you can get them both and save too!

    Check out more great ideas on the Thailand Achievers Blog Hop

    Thanks for checking out my project and taking part in our blog hop! There are so many amazing ideas and inspiration you don’t want to miss. Remember that currently you are at my blog – Jennifer Blomquist – Northwest Stamper, so check the blog hop line up list to see who is next in the list.

    Make this project at home! Here is what you’ll need:

    NWstamper signature_thumb[9]

    order online button for sig 3_thumb[4]


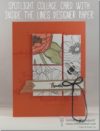
  • Spotlight Collage Technique with Inside the Lines Paper

    Spotlight Collage Technique with Inside the Lines Paper

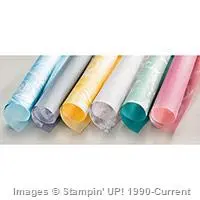
    Hello!  I’m back to share with you a fun and easy card that shows a neat Spotlight technique.  So, if you’ve seen the spotlight technique before, it is the idea of having a larger black and white area – usually filled in with line art images – and then coloring in just a little bit of the area to make that spotlighted area POP!  Well, in this case, the Inside the Lines designer paper (**free through the end of March with a $50 order) makes it super simple for you!  This paper pack is all about the current coloring book trend and gives you 12×12 sheets of paper just begging for you to color them in.

    Which brings us back to this technique, I just started with one big piece of the patterned paper and then I cut it into 3 parts.  You can size these however you want, I just recommend: (more…)

  • ICS Blog Hop–Season of Gratitude

    Welcome to November and fun new blog hop with the Inspire, Create, Share gals!  We’ve decide to do something a little bit different this month and we are pulling out our Paper Pumpkin boxes for this month (technically they are from October, but hey, November’s kits don’t ship until after November 10th, so you have time to sign up for yours!)

    As I often do, I create the design the way the instructions tell us to for the first project, and then I start exploring what other options I can do to change things up!  I usually stick with trying to figure out ideas that you can make using ONLY WHAT IS IN THE BOX.  So I don’t grab extra ink, paper, or punches when I’m starting out.  I want to give folks ideas of what they can do even if they don’t have a bunch of other supplies in their craft room.  So, check out what my favorite alternative turned out to be:

    October 2016 Paper Pumpkin Alternative Card Design

    Now, I’ll share what the cards in the kit are “supposed” to look like.  This is my first card created using the instructions as they were written for the kit.  You end up making a fall shaker card when you are done.  And it is kind of hard to tell, but that Vanilla paper is actually dry embossed, so those grooves are part of the paper.  Which made me want to bust out my sponges and try coloring it, which led to the second card version:

    It wasn’t my favorite, but I thought I would share it anyway.  Also, it leads me to a tip or reminder… depending on who you are.

    Paper Pumpkin Project Tip

    • When you are adhering the Window Sheet to the back of the leaf cut-outs don’t worry about putting adhesive on all sides of the window sheet!  I did that with my first one and totally ruined the window sheet because there wasn’t enough room without the adhesive being exposed through the die-cut holes.  And let me just say, an Adhesive Eraser is magic, except not so much on acetate sheets. Smile  They still smear all over the place!  So just put adhesive on the Vanilla Die Cut Sheet around the holes and press the window sheet onto that.  You just need to make sure the holes are covered, it doesn’t have to be perfect.
    • The instructions say to use the foam strips (to contain the sequins) on all 4 sides of the embossed Vanilla piece; and while that works, you often won’t see your sequins!  So, in the card above, I made my foam strips make a small rectangle just around where the die cut holes are.  That way, the sequins are almost always viewable.  Then I just added some extra foam along the far left edge to keep the paper balanced and steady.
    • Don’t forget to put your sequins on the bottom paper (in this case the card base) and NOT onto the window sheet.  By making little piles on the bottom sheet, you can place the top layer (with the holes) exactly where you want and still see what you are doing.

    But now, back to my final alternative that I really like!

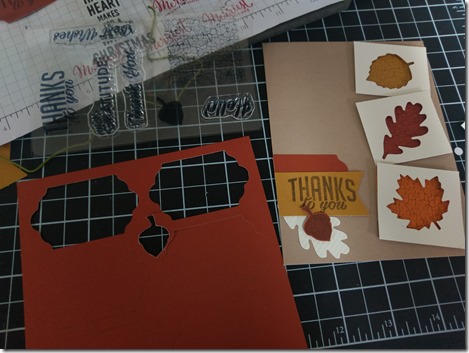
    I switched away from the Shaker card idea and instead started cutting out my favorite elements.  I cut out the die cut leave holes and then trimmed down some of the background colored paper to fit behind them.  I loved the crackle stamp for the cool effect that you get for the leaves, so I had to keep that in there – and now you can see it even better because you don’t have to look through sequins!

    I used Stampin’ Dimensionals to raise the die cut holes over the stamped paper, and then glued those down directly to the card base.  Then it was time to figure out the sentiment.  I used the same die cut shapes and just layered them a little bit differently:
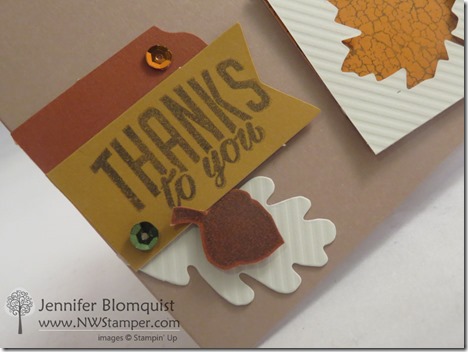
    But I didn’t want it to be too plain, so I layered back in one of the die cut pieces that popped out to make my shaker card and added a stamped acorn from the stamp set that comes with this month’s Paper Pumpkin kit.  And you may remember me telling you that when I do these alternative cards, I don’t grab extra papers and inks from my stash, so want to know where I got the paper for that acorn?  Check it out – it’s the left over paper in between the Cajun Craze tags!
    2016-11-02 15.24.35

    Then just add a few extra sequins and you are done!

    I hope you have enjoyed this Paper Pumpkin kit alternative idea!  Keep on hopping and check out what Andrea has in store for you, for even more great ideas.

    And don’t forget, if you like these ideas – you can always get MORE of the kits by purchasing refills in the Online Store!

    • If you are a current Paper Pumpkin subscriber, you get exclusive access to refill kits for past months as a great price.  see them here
    • And if you weren’t a subscriber before, you can always join now and get immediate access to be able to purchase refill kits, plus you’ll be all good to go to get this cute Holiday Exclusive box in your mailbox for November!

    14917149_1784322711825603_4425822216026875299_o

    Thanks for hopping!

    NWstamper signature_thumb[9]

    order online button for sig 3_thumb[4]

    14947527_10153874106165776_4026858921570814699_n

    November Premium Tutorial Pack Hostess Code – YG62GG6C

    NEW! I’ve joined with a group of amazing talented demonstrators – many of whom have been designers for the Stampin’ Up display boards at the Conventions with me, plus Artisan Design team members, and other talented folks, to create a set of great project tutorials just for you featuring the stamp sets that are on sale this month!  You can get your free copy of this SET of great project ideas by either:

    Place a $50 Stampin’ Up order with me (either directly or in my online store using the hostess code above) in the month of November

    Join my Fun n’ Crafty Stampers!  My team gets a copy of this Tutorial Pack for FREE!

  • Beautiful Backgrounds from Moroccan Nights

    Way back at Stampin’ Up OnStage in April, I was given the Moroccan Nights stamp set (love the perks of getting free stamps when you go to demonstrator events! Smile ).  But the problem was, it wasn’t a stamp set I had really looked at before or thought was my style.  Which meant it sat on my shelf for a loooong time.  But sometimes we all need a challenge to grab that stamp set that is collecting dust and see what we can create with it.  You may be surprised, like I was, at what cool things can result.

    Moroccan Nights Thank You card w title_thumb[2]

    Turns out, this stamp set makes AWESOME backgrounds for your cards.  I kept it really simple for this card and used the large image from the set for my central image in Crushed Curry and then turned it and stamped the corners using the SAME IMAGE only this time with Cajun Craze.  Turns out pretty cool, huh?  I just eyeballed it because I have the sticker on the back of my cling mount stamps, but if you wanted to get really precise, I would grab the Stamp-a-ma-jig and use that for exact placement.

    Moroccan Nights Thank You card close up_thumb[1]

    Tips and Tricks for this project:

    • Banner sentiments made easy!  I grabbed my Thoughtful Branches stamp set and matching banner punch (yes! you can get them as a discounted bundle as well!) to quickly stamp the outline shape, the sentiment, and 1-2-punch you are done!
    • Grab those markers to create perfectly matched accents – I used my Cajun Craze and Dapper Denim markers to color in one of the lanterns from the same Moroccan Lights stamp set to match the colors of the card. Then just some quick snips to fussy cut it out and I can layer it with a Stampin’ Dimensional over the sentiment.
    • Pearls are perfect for stepping it up!  It doesn’t stand out and grab your attention, but those little pearls I added to the Curry image, really makes a BIG difference when you are holding this card in person.  Make placement even easier when you pick up the pearls off the accent sheet with the tip of a paper piercer, no pearls flying willy-nilly!

    Moroccan Nights Thank You card side view_thumb[1]

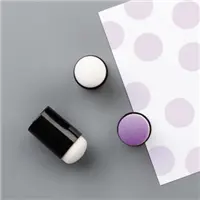
    Finally, I just sponged the edges of the stamped cardstock with Soft Suede to help distress it just enough to all come together.  Well, and the fact that you know me and you know I can’t do a card without reaching for my Stampin’ Dimensionals OR my sponge daubers! Smile

    Moroccan Nights Thank You card 2_thumb[1]


    NWstamper signature_thumb[9]

    order online button for sig 3_thumb[4]

    October Online Stamp Club Hostess Code – YG62GG6C
    Get free exclusive tutorials each month and even get the supplies in a Make & Take kit with your order over $40 when you use the monthly hostess code!

    Stock up on those pretty papers!  Click the image to get yours!
    B3G1DSP_DemoHeader_NA

    Project Measurements:
    • Very Vanilla cardstock – 4”x4”, scraps
    • Dapper Denim cardstock – 4 1/4” x 4 1/4”

    Product List

  • ICS Fall Fun Blog Hop

    It is fully October, if you couldn’t tell from all the Pumpkin Spice EVERYTHING that is in the stores and restaurants!  And that means that we are ready to head out of summer and jump into fall.  To help get you in the spirit and thinking of changing leaves, pumpkins, and all things warm and cozy… the gals at the Inspire, Create, Share blog hop group have put together another fun hop to share with you lots of Fall themed projects!

    I wanted to break out some of the great designer paper I had ordered from the Holiday catalog and break out those fall color combinations.  And while I was thinking about what to create, I suddenly remembered this oldie but goodie stamp set – Wonderous Wreath!  Check it out:

    Usually you see the wreath with Christmas or winter colors, but there is no reason why it can’t be fall instead!  I just grabbed my Petals & Paisleys designer paper and flipped it over to the back to look at the label where the professionals at Stampin’ Up have already come up with a great color combination.  I just use it as my crib sheet! Smile  Try this combo on for size:

    TAMS Color Builder (1)

    So, I just used those colors to create my wreath!  The coordinating wreath and bow dies made it a cinch to cut out and then I just needed to start layering it onto my card. 

    Since I had used the colors from the Petals and Paisley designer paper, it was a no brainer to pick my favorite patterns to layer on the left of the card.  Then I wanted to add just a touch of texture so I cut a piece of Crumb Cake cardstock and embossed it with the Woodgrain embossing folder for the perfect backdrop for the wreath itself (don’t forget to sponge the edge of the embossed paper with Soft Suede ink to really distress it!)

    Then I just needed a sentiment and I’m so super in love with this one from the Suite Seasons stamp set in the Holiday Catalog.  You’ve seen me use this sentiment on Very Vanilla cardstock and color in the decorative piece.  But since I didn’t want that accent to take away from the wreath, I left it simple and subtle with Soft Suede ink.

    This card showcases a fun way to use some of your favorite patterns from the designer series paper.  Right now many of the papers are buy 3 get 1 free!  Woo hoo!  I totally spaced and forgot this was a specialty paper, so it isn’t in this sale, but change this up for the Presents and Pinecones designer paper that IS on sale, and make the wreath holiday and you are good to go!

    I hope you have enjoyed this Fall inspiration idea!  Keep on hopping and check out what Candy has in store for you, for even more fun fall ideas.

    Thanks for hopping!

    NWstamper signature_thumb[9]

    order online button for sig 3_thumb[4]

    October Online Stamp Club Hostess Code – YG62GG6C
    Get free exclusive tutorials each month and even get the supplies in a Make & Take kit with your order over $40 when you use the monthly hostess code!

    Project Measurements:

    • Crumb Cake cardstock – 5 1/2″ x 8 1/2″, 2 3/4″ x 2 3/4″
    • Very Vanilla cardstock –3 1/4″ x 3 1/4″, 2″ x 2″
    • Petals & Paisleys designer paper  – 1″ x 5 1/2″, 1 1/4″ x 5 1/2″

    Product List

  • July Bonus Days & New Touches of Texture Card and Tag Ideas

    I’ve been busy busy getting ready for my big Craft Garage sale this weekend – if you are in the Bellevue/Seattle area, you should totally come check it out Friday and Saturday from 9-3.   But in the meantime, I had to take a break and share a fabulous new special just started TODAY!  Plus keep scrolling to check out some fun projects made with the new Touches of Texture stamp set. Smile

    Social1_BonusDays_demo_July0716_US

    Bonus Days Start Today!

    We all love getting fun new goodies and we all love getting cool stuff for free… so who wouldn’t love combining those and getting a $5 gift certificate for every $50 you order?!  Here is the scoop:

    • From July 7th-31st, you’ll earn a $5 gift certificate for every $50 you spend with me.  So $50= $5 coupon, $100= $10 coupon, $150= $15 in free stampin rewards credit now and $15 in Bonus days coupons for later!
    • There are NO LIMITS to how many coupons your can earn!
    • You can earn these coupons shopping
      – in my online store – www.nwstamper.com/shop
      – by emailing me your order to jennifer@nwstamper.com
      – or hosting an event or calling me
    • Thought about joining my team?  You can even earn Bonus coupons on all your orders you place as a demonstrator in July as well!  So you get your 20% discount PLUS coupons to use in August!  Total score!
    • Coupons can be redeemed from August 2nd –31st the using any of the same shopping methods above

    Have more questions?  Just let me know.  But otherwise, have fun shopping!

    A Card and a Tag with Touches of Texture

    Alright, need some inspiration to get your morning going after that exciting Bonus days news?  I thought I’d share a couple projects I got to make while on the Stampin’ Up Incentive Trip in May.  We had the fun and novel experience doing make and take projects on a cruise ship.  These were some of my fun tablemates while I stamped.

    2016-05-27 09.40.05

    We got to use the Touches of Texture stamp set and make a couple cards and a tag.  Here is the first card we made…

    It is a great quick and easy card since it doesn’t take a lot of supplies but still is fun and interesting.  Now, I’ll admit, this stamp set is one that I totally passed over in the catalog.  You see, I don’t always know what to do with “collage-style” stamp sets.  When you look at the stamp images, they just look like a bunch of random images.  But these projects showed me that the great thing about these sets is that they are designed for you to mis-mash together and it pretty much always looks good!  Now that is an idea I can get behind!  Stamping like a crazy woman and not having my messes not only look intentional, but artsy?  Sign me up! Smile

    We stamped a few images from the set for the flower and background splatter.  And if you look at the cardbase, there is another subtle background image too!  Add a strip of the Moroccan designer paper to the top, some Thick baker’s twine, and a sentiment and you are done!  Easy peasy!

    And now for a project that looks super fancy, but is even easier!  A Touches of Texture gift tag!

    All you have to do is cut a 2” strip (any length will do) from the Moroccan designer paper and punch the end with the Scalloped Tag Topper punch.  Stamp a few flowers from the Touches of Texture stamp set and set aside.

    Grab another 2” strip of a different pattern from the Moroccan designer paper and punch BOTH ENDS using the Scalloped Tag Topper punch for a cool background shape.  Stamp you sentiment and punch out with the 2” circle punch and adhere some banners made from yet another Moroccan designer paper pattern and some gold sequins.  Glue them all together and you are done!  But wouldn’t it be a pretty addition to any gift or even the front of a card?  Give it a shot and let me know what you think!

    NWstamper signature_thumb[9]

    order online button for sig 3_thumb[4]

    Product List

  • Woven Washi Thank You Card in Black & Pink

    Woven Washi Thank You Card in Black & Pink

    First, can I just say, Stamping friends are some of the best kind of friends!  I am always amazed at how kind, generous, and helpful so many of the people I meet through my stamping and crafting are.  Honestly, it is one of the big things that kept me active as a demonstrator as I went through pregnancies, state-to-state moves, pregnancies WHILE doing state-to-state moves. Smile  There were many times I thought about just letting things go but then I would think about the friends I’ve made and the communities I was a part of and I couldn’t bear to let them go.  Sure, I could slow down at times, but never drop out completely! 

    Well, I’m so glad I stuck around, not just for the amazing changes my business has brought to me and my family, but because of the friendships that have continued to grow. 

    Now, you may be wondering, why is Jennifer getting all sappy and rambling on and on about friendships and stamping?  Well, let me tell you!  It’s all because the card I have to share with you, only happened because of my amazing friend Sarah Naber and her sharing her creative genius with me for one of my technique classes.  Check it out:

    How cool is this card?  You see, she and I were talking about my technique class last month and I was talking about focusing on Washi Tape techniques.  She asked if I had ever done Woven Washi – the answer was no.  But then she told me about the technique and created this card for me to try and to share in my class.  See, told you she was cool!  I made a couple little tweaks to fit what I thought would work best in my class, but I loved her weaving and fun little accents.

    Now, I’ll admit the washi weaving takes a bit of time and a delicate hand, but don’t let that disuade you from giving it a try!  I started out by cutting my base cardstock that everything would be woven onto and then tearing off small pieces of washi tape that would cover the short side of the cardstock (so a bunch of 3”ish pieces in this example).  Only press them down on one side of your base cardstock – that is your anchored side – and then tear off a long strip of washi tape and start weaving it over one of the short strips, then under the next strip, over the following strip, under the one after that, etc.  Until you have the long strip woven into the little pieces.  Then grab another long piece and do it again.  Only this time start with under the first short strip, over the next short strip, under the following, and so on.

    When you are done, just tuck the edges around to the back of the base cardstock piece.  Pretty nifty, huh?

    And yes, I hate to say it, but this is another of those Fond Farewell cards!  Lots of the supplies are being discontinued… so doing wait too long to grab your favorite!

    Retiring Products on this Card

    • Watercolor Thank You stamp
    • Everyday Chic washi tape
    • It’s My Party Enamel Dots
    • Melon Mambo stitched satin ribbon

    I know, so sad right?  At least we know some amazing new stuff is coming on June 1st!

    While I'm Cruisin' Special ad

    Start shopping here

    NWstamper signature_thumb[9]

    order online button for sig 3_thumb[4]

    Product List

  • Botanical Blooms Thank You Card

    Botanical Blooms Thank You Card

    One of the really fun things about going to OnStage (the new name for Stampin’ Up convention and regional demonstrator events) is that we get to try out the newest products that are coming up and make some samples to use when we get home.  One of the products we got to try in November was the Botanical Blooms stamp set and matching dies.  We learned that the stamp set is designed to perfectly match the patterned paper (see the details on the leaves and flowers in the patterned paper?  yep, I STAMPED THEM!  How cool is that??!?)  And this is what we made at the event:

    image

    Now that was a fun and all sample to see how the products all worked, but I just wasn’t inspired to turn it into a card as is.  See, it was this odd 4 1/4” height (same as a normal card) but only 5” wide (narrower than a normal card).  So I decided I had to cut things up and experiment a bit.  And ended up really liking the end result… what do you think?

    So, what I ended up doing was cutting down the designer patterned paper and then layering it onto some Mossy Meadow cardstock (I’m sooooo going to miss this color when it retires later this month!!) and then put it all onto a Hello Honey card base.

    The design was so busy, I wanted to keep my sentiment simple so I reached for the wooden Expressions Elements for a simple thanks and to make it easier to read, I just adhered a thin strip of Mossy Meadow cardstock behind the letters to make it super clear.

    You can see from my imperfect stamping, show the detailing on the leaves is stamped on.  And the centers to many of the flowers.  It was kind of fun finishing out the paper design!  Then I just added a few rhinestones here and there for a little sparkle and we were good to go!

    A Quick Note about the Botanical Blooms Bundle – You Get Extra in It!

    I’ve had a couple people confused about the Botanical Blooms bundle… because they know that when you get a bundle you get 15% off the dies and stamp set.  But what they didn’t notice, is that in THIS SPECIFIC BUNDLE, you ALSO get the pack of designer paper too!

    botanical blooms bundle

    See the bundle details in the online store

    Fun bonus, right?  If you have questions, don’t hesitate to say hello and drop me a line at jennifer@nwstamper.com!

    NWstamper signature_thumb[9]

    order online button for sig 3_thumb[4]

    Botanical Blooms thank you card

    Product List

  • Using up scraps with Perfectly Artistic Paper

    For the next few days, I’ll be featuring the Perfectly Artistic designer paper – one of the free with a $50 purchase options from the Sale-a-Bration catalog.  See, I’ve been holding on to this paper since it came out, but something about knowing it was retiring in a few days (it is only available until Feb 15th), got me to actually start cutting into it and turns out it is super fun to use! 

    Perfectly Artistic scrap paper thank you card

    This card was my way of using up scraps around my craft table.  I had cut a bunch of the marble strips for a different card for class last week but I couldn’t bring myself to recycle these little bits.  That said, if I saved them, I knew they would just hang around forever and never get used!  (Know that feeling?) So, I challenged myself to use them up in a card now!  This was a whole lot of a little of this and a little of that, but I really like how it turned out…

    what do you think?  Funky fun or funky weird?

    Little scraps layer for big impact

    When you have these scraps that are too small to stand on their own, but too big to just throw away, try creating off-kilter layers to help work with the differing sizes!  I used a strip of Basic Black cardstock to ground everything and then just started stacking on my Perfectly Artistic paper.

    stamped vellum over perfectly artistic designer paper

    Once you have your basics down… keep up with the layering! Vellum is a perfect way to break up a pattern on a paper without adding one more design into the mix.  I decided to try adding a stamped image (from the Perfect Pennants stamp set) to give it something to pull it all together.  But then, of course, I decided I needed some sparkle, so a scrap of Gold Glimmer paper was just what the doctor ordered!

    Have trouble making all your layers even?  Don’t even try!

    Since everything else in this card was not straight, I didn’t have to bother trying to make my matting around my sentiment even either!  I actually use this trick a lot when I think I will have a hard time stamping letters (or images) straight… if you intentionally stamp or glue your papers at not quite straight lines, then when you stamp or glue something down that isn’t even… it looks perfect!  It will match the rest of the card and look artistic, not like you messed anything up. Smile 

    endless thanks for the perfectly artistic card

    Finally, I had to add one last touch, and that was to just hand draw a border line around the left, top, and right side of the card above my black cardstock.  I love sketch lines and like the fact that it isn’t perfectly straight.  Though it is easy enough to make them all nice and even with the help of a ruler. Perfectly Artistic Thank You card from Stampin Up

    What is changing with Sale-a-Bration

    • RETIRING ITEMS – Don’t forget that if you love one of these items, including the Perfectly Artistic paper, you only have a few days left to get yours.

    Retiring 2016 Sale-a-Bration items

    • COMING SOON – these items will replace the above options starting Feb 16th.  Still free with a $50 purchase, and I expect that glitter tape will run out before the end of Sale-a-bration.  Just my prediction!

    NEW 2016 Sale-a-Bration items

    Visit the Online Store to start shopping and earning your Sale-a-Bration gifts!

    NWstamper signature_thumb[9]

    order online button for sig 3_thumb[4]

    Use Hostess Code TNCXV4MP at check out to get a special thank you from me!

    Pick a FREE item with every $50 you spend!  See the Sale-a-Bration catalog.

    See all the tutorials & classes by mail here

    Save 25% on the Latest Weekly Deals

  • January Customer Thank You Card with Sky’s The Limit

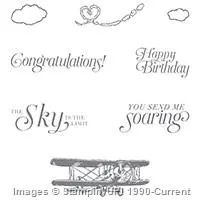
    I’ll admit, I’m a sucker for airplane stamps.  Doesn’t matter if they are vintage or jet liners… I LOVE travel stamps and especially flying stamps.  So, when I saw the Sky is the Limit stamp set in the Sale-a-Bration catalog, I knew I HAD to have it!  It was one of the first I picked.

    Fun fact about me – I actually have my pilot’s license.  As does my husband, my father, my grandparents, and my dad’s siblings!  So, you could say we are a flying family. Smile

    Well, today, I thought I would share another idea using this neat stamp set – my January thank you cards!

    Sky is the Limit Thank You Card

    Jennifer’s Project Tips:

    • Don’t forget your die-cuts! I mention this as my first tip, because I had designed the base of this card (the yellow/black/white with clouds) and I knew I wanted to add the airplane in the middle, but I was stuck because I knew stamping in the middle would get lost and I wanted to do something different than cutting out the plane like I did on this card.  Then it hit me!  Why not use a die cut shape to layer on top?  So Deco Label Thinlit it is!
      Don’t have this die set?  Any of the larger shapes will do, this just happened to be perfect for both the airplane and the sentiment.
    • It’s the little touches that count – In this case, I wanted to add a couple more touches to keep the card from getting boring.  So I added some of my favorite touches:
      – sponge the edges of die cuts and layers to soften them up and help them blend in with the rest of the card
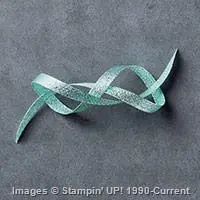
      – Use some fun ribbon to peek out for a great touch of texture, like this awesome Pool Party Glitter Ribbon!
      – Oh, and don’t forget a little pearl or rhinestone for the center of the propeller!
      Glitter Ribbon close up of Sky is the Limit stamp
    • Choose the right black ink for the job – I don’t know if you can really tell in the picture at the top of the post, but that airplane is BLACK
      not grey-black, not purple-black, black-black.
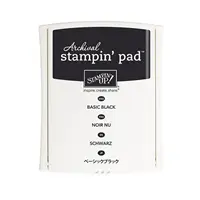
      And if you are like me, it is so nice to find a black ink that ISN’T Stazon that is a great rich black!  I’m using the new Archival Basic Black ink from Stampin’ Up (as I always do when I am using my red rubber stamps) and it is perfect for this card, but check out the little guide to which black ink I choose for which of my projects
      (tip – click on the image to see it bigger and for printing Smile )

    Black Ink Comparison Chart

    Have fun mixing and matching shapes and colors and great things will happen!

    Sky is the Limit stampin up card

    Fun new things are coming!  Are you on my list?

    If you aren’t on my newsletter mailing list, you are missing out on some great tutorials, first access to some of my promotions and specials, and lots of inspiration.  I’m working on some new offerings and can’t wait to share them as I finish them up and would love to be able to share them with you.

    Hop on over to my mailing list sign up and in a few quick clicks you will be on my VIP list. Smile

    >>> Get signed up here <<<

    NWstamper signature_thumb[9]

    order online button for sig 3_thumb[4]

    Use Hostess Code PGHMVNJM at check out to get a special thank you from me!

    Pick a FREE item with every $50 you spend!  See the Sale-a-Bration catalog.

    See all the tutorials & classes by mail here

    Save 25% on the Latest Weekly Deals

  • Beautiful Tie-Dyed Tree with Sheltering Tree and the Leaflet Thinlits

    Don’t you just love when you find two things in your craft room that don’t officially go together, but they just work together perfectly??  I was so blown away when I was given a card by fellow demonstrator Jen Martin that overlaid the Leaflet framelits with the Sheltering Tree trunk.  So I made my own version and used it as customer thank you cards.  Isn’t it such a cool combination?

    I never would have guessed that the two shapes were such a close match, and with a little coloring, they are super pretty together!

    Jennifer’s Project Tips:

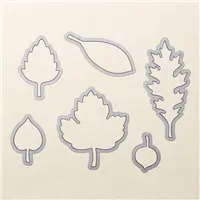
    • Start by creating a stencil with your favorite framelit!  In this case, I used the maple leaf thinlit from the Leaflet framelits and cut out a hole in a piece of computer/copy paper.  You want your paper to be thin… so not a piece of cardstock so that you can get right up to the edge of the shape cleanly on all sides.  You can throw away the cut out shape, you really just want the hole!
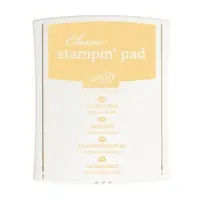
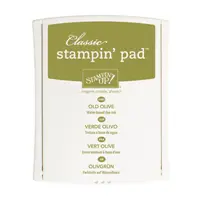
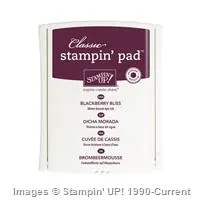
    • Pick your favorite color combination – You are going to place the stencil over your cardstock and then use sponge daubers to color in the leaf.  So grab your favorite 3-4 colors and matching sponge daubers to do this.  I used So Saffron, Pumpkin Pie, Old Olive, and Blackberry Bliss.
    • When sponging, start with your lightest color!  Mainly this is to prevent your sponge dauber from picking up the darker colors, plus it gives you a bit more control about how dark things get.   Here I sponged the ENTIRE leaf with the So Saffron, then I started adding bits of the other colors hear and there to get the tie-dye look.
    • Layer your stamped image on top of your sponged image – by doing the sponged image first, you can see where your stamped image needs to go, or if you want to adjust your stamped image to cover up a less than perfect spot on your sponging.  Thankfully, Sheltering Tree is a photopolymer stamp (meaning it is totally clear) so I can see exactly where to line up my stamp.  But if you are using a rubber stamp, you may want to use the Stamp-a-ma-jig to get things perfectly lined up.
    • Add a little color to your sentiment – I wanted to ground my image, so I took a strip of cardstock for my sentiment and stamped it in the same brown so that it would be easy to read… but then I sponged a little of the Old Olive along the bottom to make it feel like grass and just “ground” my tree/leaf.  A little color can go a long way for really pulling a card together!

    So, give this technique a try with any of your favorite framelits and stamps.  You may be surprised at how cool the combinations turn out!

    In the Seattle Area?  Join me for my In with the New! Spring Catalog Kick off Party!

    I have a bunch of super fun events coming up over the next few months, with more to be added soon.  First up is a fun and free kick-off party for all the newest and coolest products from the Occasions Catalog.  With free make & takes, over 60 new ideas on display, treats, and prizes – you should totally join me! 

    January 23rd at 1:30 pm, Bellevue, WA

    Email me for more details at jennifer@nwstamper.com or check out it out on my Bellevue/Redmond Card Makers Meetup group!

    NWstamper signature_thumb[9]

    order online button for sig 3_thumb[4]

    Use Hostess Code PGHMVNJM at check out to get a special thank you from me!

    Pick a FREE item with every $50 you spend!  See the Sale-a-Bration catalog.

    See all the tutorials & classes by mail here

    Save 25% on the Latest Weekly Deals

  • 3 Ways to Play with the Season of Cheer Designer Paper–Plus a Note about the Woodland Embossing Folder

    I know, I normally try to share one project in a post at a time, but today I had 3 projects that all used the retiring (and discounted!) Season of Cheer designer paper and since it was going away in a couple days, I figured why not share them all so you could see some different ways to use the paper in that pack!  You see, I tend to get into the trap of thinking a paper is just for the holiday it is sold for; so when I discover all-year ideas, I get really excited.  I think this paper pack especially lends itself to the all-year idea and so that is extra awesome.

    So, for example, this card…change out the sentiment and it could be thinking of you, thank you, miss you… absolutely anything you want!

    Missed the Woodland Embossing folder?  It’s coming back!

    And while we are here talking about retiring items.  I wanted to do a quick PSA about the Woodland Embossing folder… Stampin’ Up heard us, they realized this embossing folder was so stinkin popular and not everyone had a chance to get it before it sold out.  So they are working with their manufacturer and the embossing folder WILL BE BACK with the Annual Catalog in June.  So, don’t pay obscene amounts on Ebay for it.  Just hang tight and you will be able to get it again soon!

    Ok, now back to the card… Smile

    I love this technique with the Woodland embossing folder – brayer ink on the side of the folder where the trees are indented, then BEFORE you run through your Big Shot, stamp your background image on that same side.  THEN run your paper through the embossing folder.  It gives you color behind the trees along with pretty background images peeking through.

    Retiring (and discounted) products in this card:

    Colors used:

    • Very Vanilla
    • Soft Sky
    • Pear Pizzazz
    • Early Espresso

    Now, the next question is… what to do with the definitely holiday/seasonal themed papers in the pack now that December is pretty much gone.  Well, I shared this card in class a couple days ago to share the idea that you can still use them – turn them into holiday thank you cards!

    I really wanted to play with my love – the wooden snowflake elements – and I realized it fit really well in the Flower Medallion punch!  So we punched out the flower from a 3 1/4” x 3 1/4” piece of Very Vanilla cardstock.  And THEN punched out the flower shape using the 2 1/2” Circle punch.

    You can layer this over a piece of Whisper White cardstock that has the Winter Wonderland washi tape stretched across for a cool peek-a-boo technique.  Then just add your snowflake to the center using the Fine-Tip glue pen or a couple of glue dots.  I especially love the added touch by my friend Tanya Cabral who added the White Perfect Accent to the center of the snowflake!  Really centers it, don’t you think?

    Retiring (and discounted) products in this card:

    Colors used:

    • Very Vanilla
    • Whisper White
    • Crumb Cake
    • Night of Navy

    Finally, what if you really don’t want to look at another holiday card for a long while?  Like you’ve made and sent your tons of holiday cards and you are ready to move on?  How about a birthday card?!

    Yup, totally same paper pack!  Just flip over some of those patterns to see great anytime designs.  I used these to make a cheery birthday card that is great for any guy or gal in your life.  We mixed the Tin of Cards stamp set for the sentiment with the Be the Star stamp set for the star accents.  Then used the star punch to punch out the shapes, especially from the Gold Foil that is oh so snazzy.

    Sponge your edges with Soft Suede and a sponge dauber; tie on some linen thread, and you have a fun pulled together card.

    Colors used:

    • Whisper White
    • Crumb Cake
    • Hello Honey
    • Lost Lagoon
    • Soft Suede (sponging)
    • Early Espresso (cardstock)

    So hopefully this gave you some ideas for this fun paper – whether you already have some in your stash or if you are doing one last run through the Year-End Clearance sale and are looking for a great deal!

    NWstamper signature_thumb[9]

    order online button for sig 3_thumb[4]

    Use Hostess Code BEFX37ZS at check out to get a special thank you from me!

    NEW ITEMS ADDED – BIG Year-End Clearance Sale!  See what is on sale here.

    See all the tutorials & classes by mail here

    Check out the Holiday Catalog Retiring List & Sold Out Updates

    Save 25% on the Latest Weekly Deals