Northwest Stamper

Tag: gold sequins

  • Gold & Burlap Rustic Christmas Card from the NEW Holly Jolly Greetings CLASS BY MAIL!

    I have been having so much fun creating for my Holiday Card Series this fall and when I put the finishing touches on the Holly Jolly Greetings class, I couldn’t wait to share it with everyone.  This was one of my personal favorites from the class, but you’ll have to tell me which is your favorite! Smile

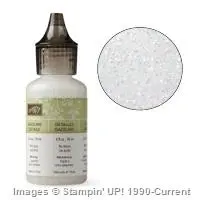
    I had a heck of a time photographing it because one of my favorite touches was the subtle sparkle on the trees from where we lightly painted on Dazzling Details glitter glue!  You can kind of see it in this picture… it is only on the raised parts of the trees.  We ran a thin line of Dazzling Details down the center of each tree and then smeared it around with our finger to make a lightly sparkling tree and something that would dry quickly too!

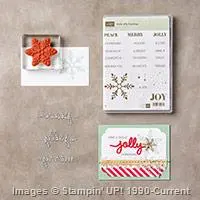
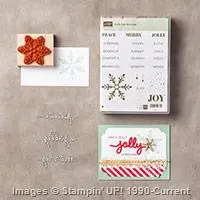
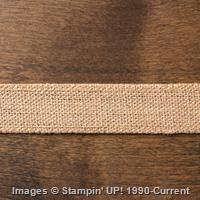
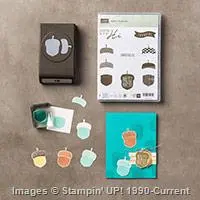
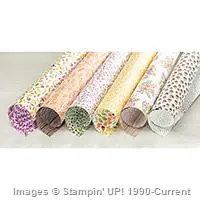
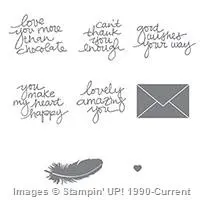
    We used a few stamps from the Holly Jolly Greetings stamp set (which was the focus of the class) but added lots of neutral touches like the different browns in the cardstock (Crumb Cake & Early Espresso with Very Vanilla) along with the strip of Burlap Ribbon which I’m just loving this year.

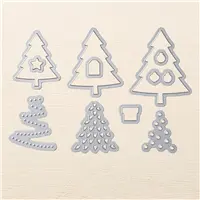
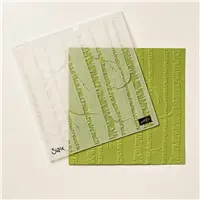
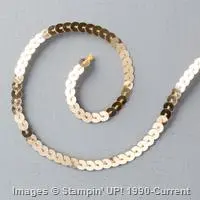
    But we also needed some glitz and cheer for the holidays too!  You can’t have Christmas without a little sparkle, right? Smile  So I added some of the Gold Sequin trim along with that Dazzling Details schmear. A full strand of sequins below the embossed paper and then individual sequins for ornaments.  And I had to continue the tree theme between the Woodland embossing folder and the Perfect Pines framelits!

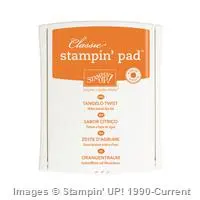
    A little bit of sponging with Garden Green ink, some stamping and layering and you have yourself a fun card!

    I ran this first as an in-person class, and everyone made 2 of this card and the other 4 cards, and if you sign up for this class by mail, you’ll get supplies to make 2 each as well – for a total of 10 cards!  Like I said, this probably was my favorite, which of these cards is yours?

    Sign up for the class by mail and you’ll get:

    • Precut supplies & accessories for 10 cards – 2 of each of the 5 designs
    • Pre-punched & embossed elements for the cards
    • Holly Jolly Greetings Stamp Set (clear mount)
    • PDF instructions walking you step-by-step through how to complete each of the cards
    • Priority shipping of your kit to you
    • (optional) Add on the Christmas Greetings thinlits (what we used to create the “peace”, “jolly”, and “merry” for only $16.  That is LESS than the catalog price!  <— BEST VALUE ADD-ON  — 

    Live outside the US or don’t need the kit – PDF instructions ONLY option is also available


    Kit choices


    >>> See all the classes in the Holiday Card Series here <<<


    Don’t forget about the Big Stamp Sale too! —TODAY IS THE LAST DAY!  —

    So visit the online store or grab your catalog and wishlist and let me know by 10:30pm PST/11:30pm MST what you want and we’ll get you that 15% off savings!

    15 off stamps promo_NWStamper[5]

    NWstamper signature_thumb[9]


    order online button for sig 3_thumb[4]

    But use Hostess Code FHRCKER7 to get a special thank you from me!

    Product Supplies Used:

  • Acorny Thanks with a Bit of Glitz! Plus new Weekly Deals too

    *******************************************
    Don’t Forget!  Only 3 More Days of the 15% off ALL Stamps Sale!
    Shop in my online store and you’ll automatically see the discount
    Use hostess code FHRCKER7 to get a special thank you from me!
    (excludes hostess stamps, bundles – because they already are discounted, and rotary stamps)
    *******************************************

    A lot of times when I’m working on creating a card for classes or just for my own fun, I start out by getting the mojo going by searching on Google Images or hoping around Pinterest or some of my friends blogs.  Usually, I see a few cards that inspire me in different ways and I combine my favorite elements into a card that is something new.  Like, maybe I love how the first card uses an embossing folder in the background, and I love the color scheme from a second card, and in a third card, I love how a set of punches are layered together.  I’ll mix and match all of those elements into one card that makes me happy.

    But then sometimes, I find a card that I love so much that I have to recreate it exactly how I see it.  And today’s card share is one of those cases… or should I say CASEs. Smile  (see what I did there?  some crafting humor Smile)  I was inspired by the very talented Ilina Crouse and her original card here, to create this card to give out as thank you cards… now if only I can figure out what I did with my completed cards I would be very happy!

    I think my favorite part of the card is the hint of glitter along the edge of the white sentiment layer!  Here is what I did:

    • Adhere a strip of the Into the Woods designer paper along the left edge of the card base
    • Adhere a 1/4” strip of Gold Glimmer paper to the back of a 3 3/4”x5 1/2” piece of Whisper White cardstock so that only about 1/8” of the gold is showing.
    • Mount the white and gold paper to the front of the card using Stampin’ Dimensionals
    • Decorate the front of the white cardstock. 

    This gives just a touch of gold and adds some fun dimension that is subtle.  One tip though, I did this on a card that had the crease at the top (so a 4 1/4” x 11” piece of base paper folded in half) but when I gave people this card, because of the dimension on the front, they wanted to open the card from the side.  So I recommend using a standard card base with the crease on the left (so a 5 1/2” x 8 1/2” piece of paper folded in half)

    For the front, I grabbed the super fun Acorny Thank You stamp set.  Here are a few tips for the front of my card:

    • Tangelo Twist and Early Espresso make a great fall color combination!  That is what I used on my acorn.
    • You can cut out your Thankful banner really easily using the Bitty Banners framelits!
    • Cover the back of your acorn with SNAIL or other tape runner, and then create loops from the Gold Metallic Thread and press them into the back of your acorn so that the tape covering the back holds them in place.
    • Add a few gold sequins from the Gold Sequin Trim for some extra glitz using glue dots

    I just totally love this card and may have to make it in other colors and designs.  Don’t you love it?

    Yesterday was also the start of some new Weekly Deals too!  A few fun and festive items are on sale…

    12112162_10205496976172890_1971421608440231933_n

    Shop the weekly deals here

    And while you are there, don’t forget about the Big Stamp Sale too!

    15 off stamps promo_NWStamper

    NWstamper signature_thumb[9]

    order online button for sig 3_thumb[4]

    But use Hostess Code FHRCKER7 to get a special thank you from me!

    Product Supplies Used:

  • Walkthrough Wednesday–A Clean and Simple Card of Thanks with Lovely Amazing You

    Walkthrough Wednesday–A Clean and Simple Card of Thanks with Lovely Amazing You

    So, I dream of the day that I’m going to be so organized and pulled together that I have a long list of my upcoming Walkthrough Wednesday topics when I sit down to do my video… I’m going to know all my class projects for the following few months… and my blog posts – oh they will be written prior to 11pm the night before. Smile  But that is not my life these days!  Good thing I love what I do, right?!

    Well, the card I have for you is one of those “moments of inspiration” cards where I knew I wanted to have something to share for today, but I had no idea what to do.  I sat and stared at my desk…my stamps… my punches until finally an inkling of inspiration struck and suddenly this card came flowing from my brain.

    I love how it turned out and I hope you enjoy it too!  In fact, I’ve decided I’m going to use this as one of my group swap cards for convention next week!  I’ll have some extras as well for general swapping so if you are going to be in SLC, say hello and maybe we can swap!

    Tips for making this card:

    • Do you LOVE this Lovely Amazing You stamp set yet?  It is only guaranteed to be available through August 10th (it is one of the stamp sets that was released monthly when they were testing out photopolymer stamp sets.)  The font is fabulous, the sayings are great, and isn’t that feather awesome!?
      lovely amazing you
    • When stamping the feather, I stamped some full strength and some “stamped off”.  When “stamping off” with the photopolymer stamp sets, I find that you need to fully in the stamp and then stamp first on scrap paper and THEN onto your card layer.  If you try stamping an image that is partially off the page, not enough ink comes off the stamp in the areas that were past the edge of your card layer, so that when you go to stamp the second generation image, you will get it lighter in spots and full strength in other spots… no good!
    • Have fun with your punches! Punch out some of the Bitty Banner shapes in fun colors (this is Mint Macaron, Smoky Slate, and Wisteria Wonder).  Then mix in a longer banner cut to just narrower than 5/8” that you can trim the ends by sliding the paper strip into the punch from the BOTTOM of the punch (instead of using the usual slit in the side – have most of the paper out of the punch and just tuck the end inside the punch through the hole in the bottom.)  If this makes no sense, check it out on the video! Smile
    • Make your own custom accent by running a mini brad through the middle of sequin like this gold sequin from the Sequin Trim.
    • The sentiments from this stamp set punch out great with the 1-3/4” circle punch (seen here) and the 2” circle punch (used for the Wisteria Wonder layer).

    See all these tips in action and more with the video:

     Note – if you are reading this blog post from email, click here to view the video.

    As I mentioned, I’m getting ready to head to Salt Lake City next week for the Stampin’ Up convention.  It is always an amazing time and I’m grateful to be going with a group of my Fun n’ Crafty Stampers group and will have the chance to say hi to many of my fabulous friends from across the US and Canada!

    If you aren’t going to be joining me at this event, they just opened registration for the next NEW demonstrator event called On Stage.  They have a 3 day event (in Brussels this time) with local 1 day events the last day so we can all hear all the announcements and product and catalog reveals!  It is coming up in November, and I’d love to have you join me!

    Not a demonstrator yet? Winking smile  There is still plenty of time and I’d love to have you be a part of the Fun n’ Crafty stampers and join us at one of the events!  Email me for more details at jennifer@nwstamper.com.

    And in the meantime, watch for more fun Convention updates next week!

    NWstamper signature_thumb[9]

    order online button for sig 3_thumb[4]


    Project Supplies Used:

  • Loving the Layered Letters Stamp Set!

    I’ve always thought Alphabet stamp sets were nice enough, but everytime I got one, I found I didn’t use it that much.  Which is why I didn’t order the Layered Letters stamp set right away… but once again my Mom was wiser than me and ordered it.  So I got to play with hers…and I think I’m in LOVE!

    Yes, I’ve finally found the alphabet stamp set that I can totally imagine using on a regular basis!  I think part of it is that it comes with an oval stamp and a rectangle stamp that makes it so you can stamp a background color and then stamp the letter inside the shape, giving you a TON of different options.  Like this one (see the yellow behind the letters in “Smile”?  It is a stamp!!):

    Annual15_p133_d

    But for my card share today, I kept it simple and just made a simple “HI”.  Add some banners and bling and you are good to go!

    Tips for making this card:

    • Keep it quick and simple by starting with just 2 patterns of paper cut to 1”x4-1/4” and 1-1/2” x 4-1/4”.   Trim the ends with the Banner Triple Punch in 2 seconds and layer together for the cute splash of color!
    • Go bold for your sentiment!  Start with a bright color (like this Calypso Coral cardstock) and then heat emboss your letters using White embossing powder.
      If you haven’t done much heat embossing before, here are the steps:
      –  rub the surface of your cardstock lightly with an Embossing Buddy to eliminate static and stray embossing powder
      –  stamp your image using Versamark ink
      –  cover generously with white embossing powder
      –  tap off the excess powder… thanks to the embossing powder, it should all tap off except where you stamped
      –  heat with your heat gun until all the powder melts and becomes nice and shiny
    • The new 1-1/2” Circle punch is PERFECT for punching out the word “Hi”
    • Add a few sequins dangling down for that perfect added shine.  I just took a 4 1/2” strand and used glue dots to hold it to the back of my punched circle.

    I have a bunch more Layered Letter cards to share so check back over the next week or so as I get them all posted up for you!  But you won’t be sad if you decide to get this stamp set in the meantime! Smile

     Final day to get your name in the drawing for the first June Bonus!  50% off any item in the catalog!

    As I posted last week, I’ve kicked off my Summer Spectacular with the big prize being the $100 Shopping Spree at the end of the Summer.  But in the meantime, I’ll have little drawings along the way including the one tonight for 50% off any one item in the catalog!  You have until tonight to get your name in the drawing!

    sizzlin summer spectacular stampin up

    Enter by either

    Thanks for stopping by and all your support!  I’ll be back tomorrow with some more fun ideas for you!

    NWstamper signature_thumb[9]

    order online button for sig 3_thumb[4]

    Project Supplies Used:

  • Memorial Day Weekend Sale & a Feels Good Clean and Simple Rainbow Card

    So we decided today to go pick out a big kid bike for Nicholas, which seems like a great way to kick off a holiday weekend.  So, I grabbed my newspaper and was checking the ads when I realized that another tradition here in the US is lots of sales and specials on a holiday weekend.  I thought I’d join in the fun and have this little special for you this weekend.  So, if you were still eyeballing some retiring items or Occasions Catalog goodies before they are gone in a little over a week, you can pick some up this weekend and I’ll send you a little gifty of your choice with your thank you card.

    memorial day 2015

    Pick from pearls, rhinestones, candy dots, or epoxy stickers!

    Just shop online using hostess code ZGKDJEB3
    (please don’t use the hostess code if you purchase $150 or more, since I want you to get the hostess benefits!)
    or email me with your order by Monday night.

    Alright, and now lets get on to some fun craftiness shall we!  This is a card I shared in classes recently and I love how clean and simple it is!

    Can you tell how bright and cheery it is?

    Tips for making this card:

    • Layer a piece of Whisper White cardstock over your Whisper White cardbase.  It gives you dimension and depth while keeping the card simple and uncomplicated.
    • Use your pattern papers to make a pretty rainbow on one side.  In this case, I used the retiring Brights Designer Paper Stack and used some of each of the primary colors.
    • I love to cover the seam between papers with ribbon or twine.  In this case, the Bermuda Bay Baker’s Twine was a great way to stick with the bright colors without overpowering the card.
    • Mix in a few gold sequins to add a touch of shine… especially with such a great sentiment about Sunshine!
    • PS – I use glue dots to adhere my sequins, easy and no mess!

    I hope you have a wonderful weekend!
    NWstamper signature_thumb[9]

    order online button for sig 3_thumb[4]

    Project Supplies Used:

  • Some Love and a Blog Hop

    I’m so excited!  The Fun n’ Crafty monthly blog hop is back and with new chic graphics too!  I am very lucky to have the talented Stacey Lane in our group who graciously offered to take over running this hop.  She has super ideas for the next 5 months of hop themes and we have more folks getting excited to participate, so you won’t want to miss it each month!  And if you ever want to join us and be a stop on our hop, all you have to do is hook yourself up with a Starter Kit from myself or one of the awesome folks from across the US in our group and get a great deal on your supplies and then tell us you want to be a stop on the hop and you are in!

    This month, our theme is LOVE and I have a couple ideas to share with you then make sure to check the list at the bottom of the blog to see even more great ideas!

    I had extra scraps and a half idea after putting together my Stacked with Love class and so I started playing around and just having fun and this sparkly card came out!

    Project Tips:

    • The Stacked with Love designer paper stack gives you a ton of patterns all in the same black/white/red color scheme, so it is fool proof to pick and choose a couple patterns to use on your card and know they will complement each other.
    • Add a softer touch of burlap by cutting off the seamed edges of the ribbon and then pulling threads to get a soft fringe look.

    • Use the Red Glimmer Paper to cut out a sparkly butterfly (the Butterfly Thinlit die set)!  Not only does it look pretty, but the paper is really stiff and sturdy, so it is really easy to work with in this intricate die.  No wax paper required! Smile
    • And speaking of the pieces from the intricate die, you don’t have to throw them all away!  Grab a couple and layer them together to create a cute little heart that is a perfect tiny accent for your sentiment.

    Fun right?

    Then the next card, I had to share.  I know, I know… you’ve seen my other versions of this card, but I got the idea to do it for a class and so for my technique class on using designer paper, I pulled this together and I think it is my favorite version yet!

    Project Tips:

    • You’ve heard most of the tips before with my prior cards, but like usual, pick out your 5-6 patterns of designer paper and lay them out BEFORE you start gluing down.  This makes sure you like the effect you get with the smaller pieces of the patterns.
    • Glue your strips onto a scrap piece of cardstock, so you can then use it however you like as one big piece instead of having to continue to futz with the little pieces.
    • Adhere your complementary cardstock piece first and then add your strip of custom designer paper near the TOP edge of the cardstock.  If you have it to close to the bottom of the cardstock strip, when you add your sentiment it will overlap too much of the patterned paper and you stop being able to see them.

    • And when you are doing white/black/red as your color combination, GOLD is always a great choice!  Add some gold baker’s twine and then use our mini stapler to staple some gold sequin trim to the top of the card.  Bam, you got bling!

    Love it! 

    I hope you enjoyed my ideas.  These lovely ladies have also put together projects to inspire you.  So make sure to check them out and if you wouldn’t mind, leave them a comment along the way.  I love these ladies and hopefully you will enjoy all the ideas they have put together for you. Smile 

    Fun & Crafty Blog Hop

    Happy Hopping!

    NWstamper signature_thumb[9]

    order online button for sig 3_thumb[4]

    Project Supplies Used:
    click any image below for more details or to get it now in the online store!

  • Holiday Gift Bag for Christmas using Seasonally Scattered

    How about something a little different today – a fun gift bag that is WAY QUICKER to make than you might expect using the Seasonally Scattered stamp set and those great chevron printed bags from Stampin’ Up.

    I created this for the Convention Display boards this last summer (yes, I’m still working on finishing up sharing all the projects for that! Smile) and I was asked to make some 3D projects for each the stamp sets I was given.  I started adding a little bit here and there and finally it all came together in a fun festive bag.

    Tips for making this project:

    • Start by gluing down a tea lace doily to the front of the preprinted chevron bags from Stampin’ Up.  The preprinted bags are great for small treats or gifts and since they already have the pattern it makes it easy to just add a little bit here and there and have it look great.
    • I stamped the Merry sentiment from the Seasonally Scattered stamp set on a piece of scrap paper and cut it out.  Layer over some scrap Old Olive cardstock and tear the edges of the Old Olive paper so it is just longer and taller than the stamped image.
      That is right… just tear… no tricks or special tools.  I usually just rip my paper pulling at a slight angle so I expose some of the core of my cardstock for a more textured look.
    • Loop some seam binding ribbon and adhere to the back and you can add everything to your doily with Stampin’ Dimensionals!

    • Then just punch out some extra banners using the Banner punch ( 1- Cherry Cobbler, 1- Old Olive, 1- Whisper White stamped with the snowflakes from the merry sentiment stamp)
    • Stuff your bag and then staple some Gold Sequins and the banners to the top corner to keep it closed!

    The only part that takes any time with these bags is the cutting out of the Merry sentiment, but you could use a framelit and die cut it to make it even faster!

    NWstamper signature_thumb[9]

    order online button for sig 3_thumb[4]

    Gratitude Month Week 1 Free Tutorial – Kinda Eclectic Thank You Card

    Shop online & use hostess code UCJDBQH4
    See the Catalogs online – Annual Catalog  |  Holiday Catalog  |  Holiday Supplement
    Save more when shopping – Weekly Deals  |  Clearance Rack

    Project Supplies Used:
    (if you are reading this in email, click here to see the list of supplies)

  • Gratitude Month–Thank You Card using Kinda Eclectic and In Colors

    Gratitude Month–Thank You Card using Kinda Eclectic and In Colors

    Happy November!  As I mentioned yesterday, I’m kicking off my Month of Gratitude with a free gift for you and a project tutorial.  Today I’m sharing a card I created as a different way to use your Kinda Eclectic stamp set and have a neat thank you card that you can use for guys, girls, and any time of the year.

    November Gratitude PDF Tutorial – Kinda Eclectic Thank You Card

    Project Tips:

    • Stick with a color family or In Color set (in this case the Stampin’ Up 2014-2016 In Colors) to make your background and for complimentary cardstock colors.  This gives you a variety of colors but you know the tones will work together no matter how wild you get with you stamping.
    • Use the starburst stamp from Kinda Eclectic to make a great background layer to your cards or projects.
    • Use the starburst framelits to cut out on of the stamped starbursts and do it off center.  This makes it more visually interesting, especially when you add an accent like the wooded elements.
    • When stamping on wooden pieces, use STAZON ink to prevent yucky bleeding and fuzzing of the ink.

    So, click the link above if you would like the full tutorial for this project.  And if you would like to order anything, don’t forget I have a special gift for you each week with orders.  This week, you get a cool ribbon sampler from the Holiday Catalog as my thank you to you!

    image

    Just shop in my online store or email me your order at jennifer@nwstamper.com and use hostess code UCJDBQH4 and when I start mailing out Thank You gifts you’ll receive this special bundle free in your mailbox! Smile

    Gratitude Month Gift

    And check back on Wednesday when my Fun n’ Crafty stampers are putting together a small blog hope focused on gratitude projects!  It should be great!

    NWstamper signature_thumb[9]

    order online button for sig 3_thumb[4]

    Card Supplies Used:
    (if you are reading this in email, click here to see the list of supplies)

  • November Gifts of Gratitude for You

    November Gifts of Gratitude for You

    November is Thanksgiving time here in the US and so it is often a time to remind ourselves of all the things that we should be grateful for.  Whether that is a roof over our head, wonderful family, or the ability to do the hobbies or jobs that we love.

    I’m so grateful for the opportunity to have a job that allows me to constantly explore and learn the creative crafts that I love and, more importantly, to be able to share that joy and what I learn with others.  I have met such wonderful and amazing people since starting out and so I wanted to give back this month with some extra gifts for everyone who makes this possible and who takes their time to share this wonderful hobby with me.

    10542719_904481236234705_1075587373933223300_o2014-10-28 20.35.45

    November Gifts of Gratitude

    4 weeks of giveaways and gifts for you

    Each week, I’ll be sharing a new Thank You card or gift that you can create at home to share your gratitude with others.  I’ll also have an extra special thank you gift that I’ll be sending out to everyone who orders that week from me!

    —————————-

    Week 1 – Nov 1st -8th

    Get Ribbon Sampler Pack of ALL the new ribbons from the Holiday Catalog
    as a thank you for your order.

    Make sure you use the hostess code UCJDBQH4 with your order so I can easily track who to send the gifts to. 🙂  (If your order is over $150, don’t use the hostess code – we want you to get your free hostess benefits – and I’ll still send you your gift!)  Shop online here

    Kinda Eclectic Thank You Card

    Stop by tomorrow and I’ll have all the details on this fun Thank You card featuring the Kinda Eclectic stamp set!  Then check back on the blog at the beginning of each week for your next Gratitude project and thank you gift!

    NWstamper signature_thumb[9]

    order online button for sig 3_thumb[4]

  • Elegant Gold Stamping with the Curvy Keepsake Box

    Wanna a peek at one of the boxes we’ll be making in my Too Cute Curvy Keepsake box class?  I had said that we would be making 4 boxes including one that was stamped… but when I went to go actually make the stamped box I stalled out.  I had wanted to use my Endless Wishes stamp set, but had forgotten I had loaned it to a downline member.  So I needed an alternate option and this is what I came up with:

    Turns out Mixed Bunch is a great substitute!  Especially when you use gold and Early Espresso.  Didn’t it turn out nice?

    I used the KRAFT cardstock – it is sturdier and a bit heavier than the Crumb Cake cardstock.  We’ll use Early Espresso ink and Encore Gold ink and then sponge with some Soft Suede ink.  But I really loved the extra touches to add to the bling – like the stamped sentiment which I stamped directly onto the Gold Foil sheets and then die cut out with the Starburst framelits.  Then add some gold sequins and 1/4” cotton ribbon to the top and you are set.

    I think these could be cute favors for events or just nice little gifts.  Can’t you imagine a pretty pile of these?  Smile

    If you would like to try out the fun boxes that you can make with this die, check out this fun class & class by mail I’m running tomorrow!  (Yes! You can still RSVP if you hurry)

    Tuesday 9/30 at 7pm, Panera in Redmond – RSVP here
    $15, save $5 with purchase of the Curvy Keepsake box die
    (Bonus kit – bring a friend and you both get to make the Turkey box for free!)
    Kit by mail option available!

    KIT BY MAIL – Get all the pieces precut and mailed to you in a kit to make all 4 boxes we make in class plus instructions for all of the boxes and the Turkey box!
    Cost is only $15+$3 shipping  (only $10 if you have purchased the die from me!)
    BONUS – have a friend sign up for the class too and I’ll include the Turkey kit for each of you!


    INSTRUCTIONS ONLY – Get access to the instructions for all 5 boxes so you can use your dies and punches at home to make these cute projects.
    Instructions will include all the dimensions, supplies used, and tips for making them as easy as possible!
    Cost is only $4.95  (that is only $1/box!)


    spaced shop now sig bar

    Hostess Code:  C2HYWWQM Use this Hostess Code and receive a free gift!
    (Please do not use the Hostess Code if your order is $150 or more)

    Project Supplies Used

  • From Scraps to Shiny Sweet

    Yesterday, I was trying to finally unbury my craft table…again!  I had everything piled up from the last two weeks, including all the odds & ends from my spare table that I used for prep work for my events that I took down over the weekend.  I was sooooo excited to be down to just all my scrap cardstock that was sorted and just needed to be put away in my file folders, so I thought I’d get it all wrapped up. 

    What is it about a clean craft table that makes you want to get crafting again?!

    As I was putting away scraps, I had this stamped strip of paper and the scrap strip of Gold Foil paper.  I thought,” why not make a banner out of the gold paper and glue them together?”  Then I grabbed the Vintage button I had colored for my Blendabilties class and stuck it on the end… grabbed some sequin trim scrap, some lace scrap, and cherry cobbler scrap… and things just started coming together!  Gotta love it when that happens. Smile

    Tips for making this card:

    • Take a regular ol’ white or vanilla button – like this Very Vintage Button – and color it with your Cherry Cobbler blendabilities!  Use the PEN TIP to color so you don’t risk messing up your brush tip.
    • Add a single sequin to the center with a glue dot for a complimentary bit of shine.

    • Did you know, this sentiment is from the Happy Hour stamp set and is 25% off with the weekly deals this week!  Love it!
    • Want to add a bit of shine to a corner of a card?  Staple a string of sequins for some not-too-overdone shine!  I used my Stampin’ Up mini stapler to staple the strand into a twist first and then stapled that onto my card.  (yes, I’m sure that made no sense, but if you just staple it to your card front, that works great too!)

    So, don’t forget to use those scraps!  You never know when they will come together just right. Smile

    spaced shop now sig bar

    Hostess Code:  C2HYWWQM Use this Hostess Code and receive a free gift!
    (Please do not use the Hostess Code if your order is $150 or more)

    Card Supplies Used:

  • Watercolor Wonder Notecards Ideas–Day 2 with Wood Chips and Vellum

    Watercolor Wonder Notecards Ideas–Day 2 with Wood Chips and Vellum

    So, I was planning on finishing posting these cards this weekend… but then the family decided to do an impromptu holiday trip to Portland, OR, so we took off and I completely forgot to schedule these before I went.  But now I’m back and have a lot to share with you in the next few couple weeks!

    Today, I was going to share with you the rest of the designs I put together for the Watercolor Wonder notecards.  With these cards, I started pulling in some different elements from around my craft room.  So, here is one of my favorites:

    I started out with the Gold foil vellum and then added the stamped circle with the poppy and sentiment from Happy Watercolor.  But it was just too plain…. so then I added some of the gold Watercolor Wonder washi tape.  And that was better, but it still needed something.

    And that is when I decided to grab my Wood Elements embellishment pack….. They were just the right addition of texture and dimension for me.  LOVE them!

    But these cards don’t have to have lots of layers to be cute.  Like I also really like this card too…. the chevrons come preprinted on the card, so all I had to do was stamp my flower and thank you.  I watercolored the flower with my aqua pen and just to add something to the card, I wrapped some linen thread around and add a subtles designer button, and DONE!

    Can you tell yet that I’m a fan of things that are cute but very quick and easy?  Smile  Seriously, with my two hyper heads running around, I have to squeeze in what crafting I can so while I love lots of layers and intricate projects, I can’t do them that often.  Thankfully I don’t think my friends and customers mind the quick and cute ideas!  (or if they do, they have a great poker face, ha ha!)

    Ok, so here are the last two cards.  They are the same card base (the polka dot background and the flowers come preprinted on the cards).  This was actually the most challenging for me to design with because the flowers are so pretty I didn’t want to completely cover them up, but I also needed to figure out how to have something balanced in the non-flower part of the card.  So, I started with just a simple thank you.

    But since just thank you isn’t enough… gotta have some pizzazz, I added some gold sequins and a daffodil bitty butterfly so I had my beloved dimension to everything.

    They are both pretty much the same except for the sequins…. So what do you think?  Random sequins or straight sequins are better?

    And just to end on a fun note, I thought I would share one of the photos from my trip to Portland.  Near downtown is a mall called Lloyd Center where there is a big ice rink enclosed in the mall.  A couple years ago we were in Portland and we took Nicholas on the rink, so this time Caitlin got her first chance to go ice skating… see, this is a novel thing in the Northwest. Smile  She did awesome and have fun on her one trip around the rink (both kids were ready to be done after one trip around).  I, of course, was the only one from our family to fall over on the ice and I did it in style! Flat on my back, landing head first.  But it was still a great trip!  I hope you had a wonderful holiday weekend as well!

    image

    Quick Dates Reminders:

    So I realized that the dates for when some of these items are no longer available are a little confusing so I wanted to give everyone a quick reminder of how it works this year:

    • The Occasions Catalog items (like the Happy Watercolor stamp and the Watercolor Wonder Notecards used above) are available until June 1st
    • The NEW Annual Catalog items are available starting June 2nd
      (need a catalog?  Fill out my request form here)
    • The Retiring items (everything on the discountinued Stamp list or discontinued Accessory list) is available WHILE SUPPLIES LAST through June 4th

    Make sense?  If you have any questions just shoot me a note to jennifer@nwstamper.comSmile 

    spaced shop now sig bar

    May Online Stamp Club Hostess CodeZUBHUEK6
    Use this code to get free exclusive tutorials & project kit!Learn more

    Stampin’ Up! Supplies Used (for all cards in this post)
    Stamps – Happy Watercolor
    Ink – Stazon, Gumball Green, Calypso Coral, Daffodil Delight, Tangerine Tango
    Paper –Watercolor Wonder Notecards, Whisper White, Gold Vellum, Daffodil Delight
    Accessories – Watercolor Wonder washi tape, 2-1/2” circle punch, Wood Elements accessories, Gold Sequins, Aqua Pen, Bitty Butterfly punch, linen thread