Northwest Stamper

Tag: birthday card

  • Bright & Cheery Birthday Card with the New Party Wishes Stamps & Confetti Embossing Folder

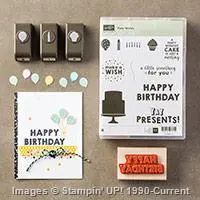
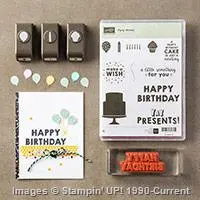
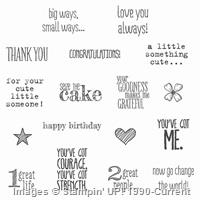
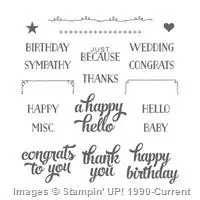
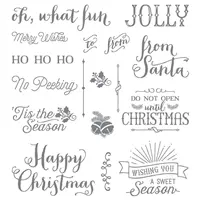
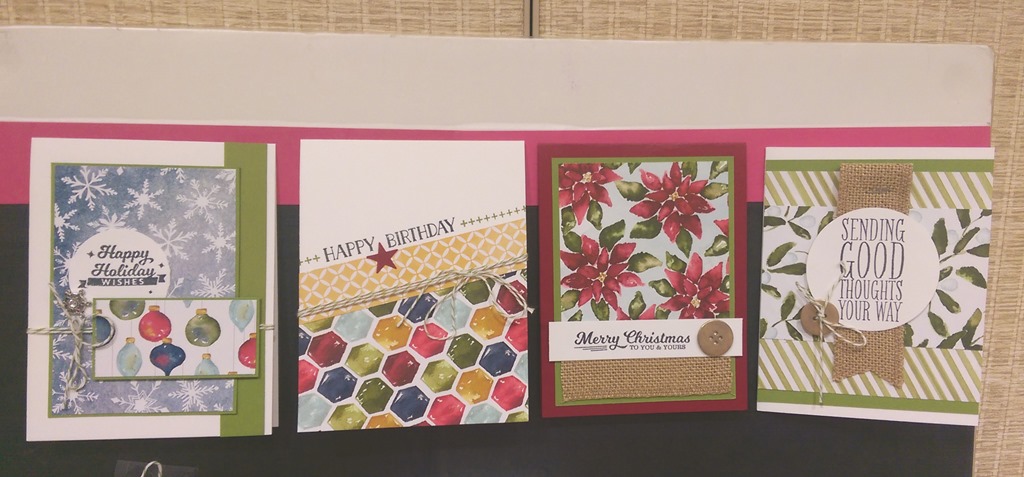
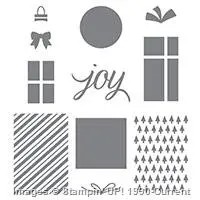
    Let’s think spring and bright and cheery as we head into January.  I know a lot of people are thinking about resolutions and thinking about making sure you are on top of birthday cards for the year – I know I am!  I want to do a lot better sending out birthday cards to my friends and family.  So, let’s kick things off with a fun birthday card using the new Party Wishes stamp set and the Confetti Embossing Folder!

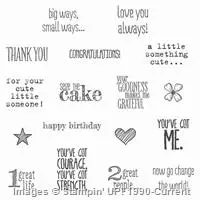
    Ok, really… I just love this sentiment!  Coming from a tech background and working in an office, I have had my share of meetings.  Plus I am a firm believer that every birthday needs cake… even if it is just a little cupcake.  This year, my kids both had mid-week birthdays, so we had their parties with friends and family on the weekend.  But I HAD to make sure they had some cake on their actual birthday even though their main-event cake was at the weekend party. Smile

    Jennifer’s Project Tips:

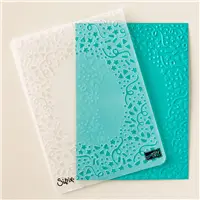
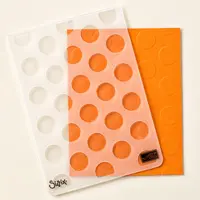
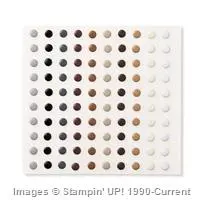
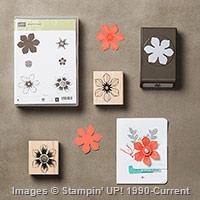
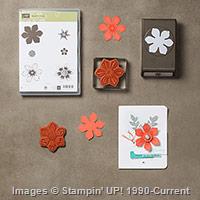
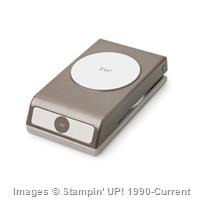
    • The Confetti embossing folder already has that oval smoothed out in the middle, making it a perfect frame for your birthday cards!  Place the indented side UP and lightly sponge over it with a sponge dauber and your favorite colors and it will keep the embossed areas mostly white and the color all around them, so they really pop!
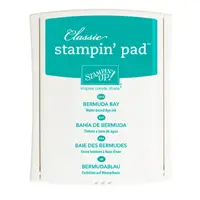
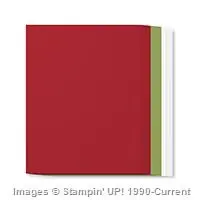
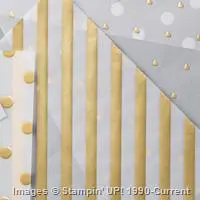
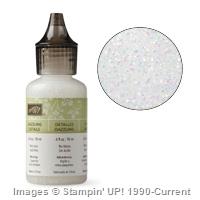
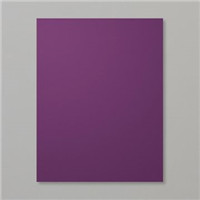
      Just be sure not to press too hard!  And mix and match your colors too.  I used:  Melon Mambo, Daffodil Delight, Bermuda Bay, and Perfect Plum.
    • Add a little extra sparkle by adding a strip of Dazzling Diamonds glimmer paper to the top and the bottom of the card.  It is really hard to see in the picture, but it really ups the pizzazz in real life.
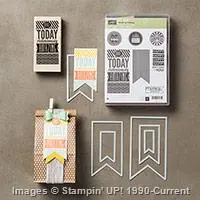
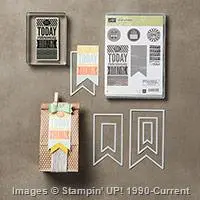
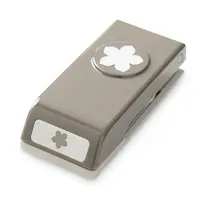
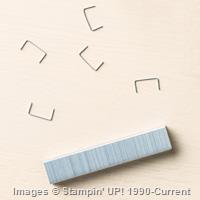
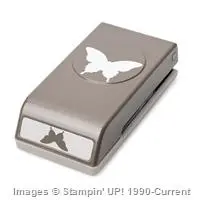
    • See those little birthday candles?  I totally did NOT cut those out by hand!  If you get the Party Wishes bundle, you will also get the Party Punch Pack which includes little punches to punch out the candles along with a little balloon and cupcake.  Easy peasy!
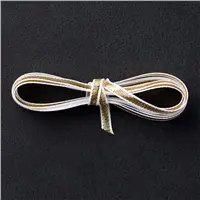
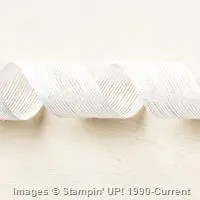
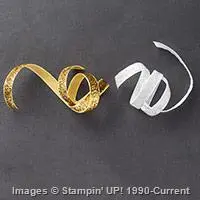
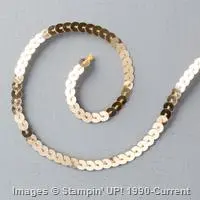
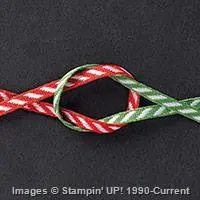
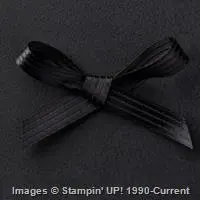
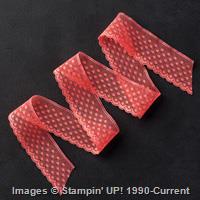
    • I did tie some Gold 1/8” ribbon around my cake.  It just needed a little punch up as well.  Look for any of your little ribbons and use them in unexpected ways like around stamped images.

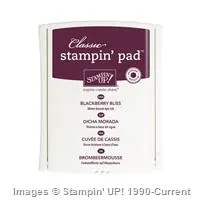
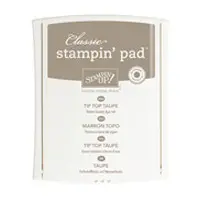
    Oh, and don’t forget that Archival Basic Black ink!  It makes for AMAZINGLY RICH and dark stamped sentiments and outlines.  Though I do only recommend it with your red rubber stamps (unless you don’t mind staining the heck out of your photopolymer stamps).  It really is my favorite black ink!

    It’s Sale-a-Bration time!

    Don’t forget, if you spend $50 or more…. like if you got the Party Wishes bundle, the embossing folder, some ribbon, and sponge daubers for example,  You’ll get to pick something for free out of the Sale-a-Bration catalog!

    Use hostess code PGHMVNJM at check out when you are shopping in my online store for an extra thank you from me!

    NWstamper signature_thumb[9]

    order online button for sig 3_thumb[4]

    Use Hostess Code PGHMVNJM at check out to get a special thank you from me!

    Pick a FREE item with every $50 you spend!  See the Sale-a-Bration catalog.

    See all the tutorials & classes by mail here

    Save 25% on the Latest Weekly Deals

  • 3 Ways to Play with the Season of Cheer Designer Paper–Plus a Note about the Woodland Embossing Folder

    I know, I normally try to share one project in a post at a time, but today I had 3 projects that all used the retiring (and discounted!) Season of Cheer designer paper and since it was going away in a couple days, I figured why not share them all so you could see some different ways to use the paper in that pack!  You see, I tend to get into the trap of thinking a paper is just for the holiday it is sold for; so when I discover all-year ideas, I get really excited.  I think this paper pack especially lends itself to the all-year idea and so that is extra awesome.

    So, for example, this card…change out the sentiment and it could be thinking of you, thank you, miss you… absolutely anything you want!

    Missed the Woodland Embossing folder?  It’s coming back!

    And while we are here talking about retiring items.  I wanted to do a quick PSA about the Woodland Embossing folder… Stampin’ Up heard us, they realized this embossing folder was so stinkin popular and not everyone had a chance to get it before it sold out.  So they are working with their manufacturer and the embossing folder WILL BE BACK with the Annual Catalog in June.  So, don’t pay obscene amounts on Ebay for it.  Just hang tight and you will be able to get it again soon!

    Ok, now back to the card… Smile

    I love this technique with the Woodland embossing folder – brayer ink on the side of the folder where the trees are indented, then BEFORE you run through your Big Shot, stamp your background image on that same side.  THEN run your paper through the embossing folder.  It gives you color behind the trees along with pretty background images peeking through.

    Retiring (and discounted) products in this card:

    Colors used:

    • Very Vanilla
    • Soft Sky
    • Pear Pizzazz
    • Early Espresso

    Now, the next question is… what to do with the definitely holiday/seasonal themed papers in the pack now that December is pretty much gone.  Well, I shared this card in class a couple days ago to share the idea that you can still use them – turn them into holiday thank you cards!

    I really wanted to play with my love – the wooden snowflake elements – and I realized it fit really well in the Flower Medallion punch!  So we punched out the flower from a 3 1/4” x 3 1/4” piece of Very Vanilla cardstock.  And THEN punched out the flower shape using the 2 1/2” Circle punch.

    You can layer this over a piece of Whisper White cardstock that has the Winter Wonderland washi tape stretched across for a cool peek-a-boo technique.  Then just add your snowflake to the center using the Fine-Tip glue pen or a couple of glue dots.  I especially love the added touch by my friend Tanya Cabral who added the White Perfect Accent to the center of the snowflake!  Really centers it, don’t you think?

    Retiring (and discounted) products in this card:

    Colors used:

    • Very Vanilla
    • Whisper White
    • Crumb Cake
    • Night of Navy

    Finally, what if you really don’t want to look at another holiday card for a long while?  Like you’ve made and sent your tons of holiday cards and you are ready to move on?  How about a birthday card?!

    Yup, totally same paper pack!  Just flip over some of those patterns to see great anytime designs.  I used these to make a cheery birthday card that is great for any guy or gal in your life.  We mixed the Tin of Cards stamp set for the sentiment with the Be the Star stamp set for the star accents.  Then used the star punch to punch out the shapes, especially from the Gold Foil that is oh so snazzy.

    Sponge your edges with Soft Suede and a sponge dauber; tie on some linen thread, and you have a fun pulled together card.

    Colors used:

    • Whisper White
    • Crumb Cake
    • Hello Honey
    • Lost Lagoon
    • Soft Suede (sponging)
    • Early Espresso (cardstock)

    So hopefully this gave you some ideas for this fun paper – whether you already have some in your stash or if you are doing one last run through the Year-End Clearance sale and are looking for a great deal!

    NWstamper signature_thumb[9]

    order online button for sig 3_thumb[4]

    Use Hostess Code BEFX37ZS at check out to get a special thank you from me!

    NEW ITEMS ADDED – BIG Year-End Clearance Sale!  See what is on sale here.

    See all the tutorials & classes by mail here

    Check out the Holiday Catalog Retiring List & Sold Out Updates

    Save 25% on the Latest Weekly Deals

  • Sneak Peek! Rose Garden Thinlits & Glimmer Paper = Gorgeously Elegant Cards!

    Woo hoo!  Don’t you just love sneak peeks?  I wanted to share a couple cards with you that I made playing with some new goodies coming on January 5th from the Occasions Catalog – the Rose Garden Thinlits, Rose Wonder stamp set, and beautiful Blushing Bride glimmer paper.  But more importantly, to remind you to pick up some Black Glimmer paper before it is gone on January 4th!!

    Seriously, I love this paper and don’t know why they aren’t carrying it over.  If you missed it, that was probably because it was hidden with the Halloween products, but it is perfect for any time of year, including birthdays & weddings! Smile

    My friend Heather, told me about this idea of using the Black Glimmer paper as an outline for an image… basically using any of the thin intricate dies.  And then cutting out the shape in a different color glimmer paper and filling in the holes with the different colors.  Like with this rose from the Rose Garden Thinlits die!  How stinkin’ pretty is that? 

    Jennifer’s project tips:

    • Cut out two different colored flowers to mix & match – I cut out the medium flower from the Rose Garden thinlits set from both a piece of Black Glimmer paper and the new Blushing Bride glimmer paper.  Then I set aside the Blushing Bride glitter outline and the Black glitter pieces for other projects and used the Black glimmer outline and the pink insides.
    • Use the right glue for the job!  It is projects like these that I’m glad we have so many options for adhesive because it lets you use just the right glue for the job.  In this case, I use the Fine-Tip glue pen to adhere the outline – I wanted to make sure it was all stuck down firmly without extra glue seeping out.  And then I used my two-way glue pen to completely coat the back of the petal pieces so that they would firmly stick down but wouldn’t have liquid glue getting onto the black outline as I was putting the pieces in place.  And well, tape runner is just too big for those little bitty pieces. Smileimage
    • Put a bow on it – I wanted to keep the rest of the card simple so that the glimmer flower could shine without it all being too much.  So I stuck with a simple sentiment from the coordinating Rose Wonder stamp set (they will be available to get in a bundle!) and then used some Blushing Bride cotton ribbon from the annual catalog to add some color and to balance the image.  And yes, I ran the base ribbon first and then tied a bow and attached it with a glue dot over the base ribbon!
    • Don’t forget those extra pieces you left behind!  Remember how we set aside the Black glimmer petal pieces?  Don’t throw them away!  Put them to good use in another project!

    For this card, I used the Two-way glue pen on the back of the Blushing Bride glimmer outline and let it sit, adhesive side up for a minute.  This makes the glue repositionable, so I could place the outline on my paper and know that it wouldn’t move until I was ready to pick it up… and then it WOULD move!  Then adhere the black glimmer pieces like in the first card, and then gently peel up the unwanted outline piece.  Doesn’t it look pretty?!

    I added some stamped elements from the Rose Wonder stamp set – the leaf outlines in Tip Top Taupe and the sentiment in Memento Black.  Add a few of the White Perfect Accents for an elegant accent and you have a pretty wedding card all ready to go.

    So, you can see now why I’m so sad that the Black Glimmer paper is retiring.  It is perfect for any occasion.  But hey, at least they have discounted it – so we can pick up some spare on sale before it’s gone. Smile 

    image

    NWstamper signature_thumb[9]

    order online button for sig 3_thumb[4]

    Use Hostess Code BEFX37ZS at check out to get a special thank you from me!

    NEW ITEMS ADDED – BIG Year-End Clearance Sale!  See what is on sale here.

    See all the tutorials & classes by mail here

    Check out the Holiday Catalog Retiring List & Sold Out Updates

    Save 25% on the Latest Weekly Deals

  • Bling Up your Card with Glitter Ribbon–A Birthday & Thank You card (BLOG HOP)

    I’m so excited to be able to join a fun blog hop today for the first time!  Welcome to the Grand Vacation Achievers Blog Hop for December. This is a monthly blog hop with many fabulous and talented Stampin’ Up demonstrators who work and play hard with their business. Smile  This month our theme is Bring on the Bling. You know I love me some sparkle and shine but I thought I’d be a bit different from my regular rhinestones (or even glimmer paper) and share some ideas using the fabulous – but retiring – Gold Glitter Ribbon!

    Holiday Catalog Ribbon – Perfect for Any Occasion!

    I wanted to share a couple ideas that used some of the Holiday Catalog items that are retiring in a few days that can give some bling and shine any time of year.  Like this Birthday Card featuring the Winter Wonderland Specialty designer paper & the Gold Glitter Ribbon.

    Tips for making this card:

    • Look for “anytime” patterns in your “Holiday” designer paper packs!  I had the Winter Wonderland designer paper in my stash and because it was in the Holiday Catalog in a Christmas section, all I could see in it at first were the snowflakes, acorns, and trees.  But when I started really trying to figure out how I could use the paper, I realized there were lots of neutral patterns that were good anytime.  Like this crackled glass pattern.  Plus, an extra bonus was that it had little shiny gold dots speckled throughout the paper so you got some subtle bling going on.  Who said gold is only for the holidays?
      PS – this paper pack is retiring on Jan 4th but yay! it is on sale as part of the Year-end Sale!
    • Layer your ribbon for cool new looks – The next thing was that I liked the idea of the Jute ribbon… but it was too wide and plain as it was.  So why not spiff it up and layer your favorite ribbon over it.  Adds a whole new dimension don’t you think?  I thought it helped balance the bright and sparkly gold in the Gold Glitter ribbon.  You can use SNAIL tape runner to adhere the ribbon together, but I might suggest a stronger adhesive like the Tear Tape to make sure that your gold ribbon really gets a good grip on the slightly fuzzy Jute Ribbon below.
    • Perfectly cut out banners from the Amazing Birthday stamp set with the bundled Banner Framelits – Did you know that the Banner framelits are a perfect match for the Amazing Birthday stamp set I used?  The stamp images fit great inside the different banner shapes for easy cutting.  Plus, you can get them together in a bundle and even save 15% off both.  How sweet is that?

    image

    So now moving on from Birthdays, another type of card that I need all the time is a Thank You card.  I was trying to use up some scraps on my desk and stumbled onto this design.  I loved the touch of gold at the bottom of the card.

    Tips for making this card:

    • Get fun effects by mixing your embossing folders and ink!  These cool polka dots are easy to do!  Just grab the Large Polka Dot embossing folder and the use a sponge dauber to sponge ink directly INSIDE the indented side of the embossing folder.  THEN put your paper in the folder and run it through your Big Shot.  As the paper is smashed into the impressions in the folder, they will also be pressed uniformly into the ink creating cool distressed looking dots of color on your paper!
    • Layered punches really help them stand out – I had fun with my cutting and punches here.  Start by stamping the leaves from the Kinda Eclectic stamp set and then cut those out (yes, it has to be by hand… sorry Smile) and then grab your punches!  I used my Petite Petals punch to punch out the Blackberry Bliss flower.  Then stamped onto white cardstock, the little flower from the Something to Say stamp set and punched it out using the Itty Bitty Accent punch pack.  They all layer together for a fun, unexpected flower!
    • Mix your metallics – Finally, just because I had used gold by adding the touch of the Gold Glitter ribobn at the bottom of the card… don’t you think it just grounds the card nicely?  I decided to add a hint of gold into the rest of the card by adding two gold sequins from the Gold Sequin trim next to my flower.  Just enough to balance the gold ribbon, but not too much that we are worried about getting gaudy or feeling like King Midas was having a field day with the card!  I stuck with gold but you can also get some fun looks by mixing gold and other metallic colors too.  So have fun and play around.

    So I hope you’ve enjoyed these two ideas for adding some bling to your projects that you can not only use anytime of year… but you can also use the Gold Glitter Ribbon to add some bling to GUY cards too!  I’d love to hear what you think!

    But keep the great ideas going by checking out the other ideas and inspiration you don’t want to miss. Remember that currently you are at my blog – JENNIFER BLOMQUIST, so check the blog hop line up list to see who is next in the list. Smile


    NWstamper signature_thumb[9]

    order online button for sig 3_thumb[4]

    Use Hostess Code BEFX37ZS at check out to get a special thank you from me!

    NEW ITEMS ADDED – BIG Year-End Clearance Sale!  See what is on sale here.

    See all the tutorials & classes by mail here

    Check out the Holiday Catalog Retiring List & Sold Out Updates

    Save 25% on the Latest Weekly Deals

    Price: $110.00

    Price: $40.00

    Price: $5.00

    Price: $5.00

    Price: $5.25

  • It’s Preorder Day! Check out this Sneak Peek!

    Ok, I’m totally half awake right now because I – not exactly intentionally – stayed up super late last night and was able to get in my next preorder from the upcoming 2016 Occasions catalog.  Yay!  I was super excited to be able to finally get some of the items I’ve been itching to get my hands on from the upcoming catalog to play with.  I was lucky to be able to try out a number of items at the recent OnStage event run by Stampin’ Up in November – which is why I couldn’t wait to get my preorder in!  So, hopefully that box of happiness will ship out today and I’ll have it Monday night to start playing with.

    But in the meantime, I had been able to do a mini pre-preorder a couple weeks ago and finally started digging into my stuff and thought I would share a little with you!  I even recorded a video of my unboxing to share what I got in that first order. 


    If you are reading this post in email, you can check out my Preorder Unboxing Video here.

    But, at the time of the video, I didn’t have any samples to share with you.  Well, I’m starting to fix that!  Thankfully, my Mom ordered some different items than I did.  So I had a chance to play a bit and make a sample from some of the It’s My Party Suite to share with you.

    And I will say, I was super excited to share and so I haven’t taken the “nice” picture yet… so watch for a full blog post on this card with better lighting and more details… but until then… TA DA!

    occasions catalog sneak peek party wishes with confetti embossing folder

    Are you ready to party now or what?!  I used a new stamp set (Party Wishes) with the matching small punch pack (I totally did NOT cut out those candles by hand!  Yay for coordinating punches!  The punch set comes with a balloon, cupcake, and the candle.)  I also used the new Confetti Embossing Folder… and YES! The oval in the middle is already there for you.  So, no messing with shims and chipboard when you are embossing. Smile  I just used the debossed side and sponged lightly over the top to get this cool party effect.

    Over the next month, I’ll be sharing a mix of my favorite projects using the current Holiday and annual catalog, along with sprinklings of sneak peek project ideas using the newest goodies coming in January.   Yep, this stuff all goes live January 5th!  If you have ordered with me in the last 6 months, you will be getting a copy of the catalog mailed to you later in December.  If you haven’t ordered from me and don’t get catalogs from other demonstrators, feel free to email me at jennifer@nwstamper.com and I’ll get you on the list to be sent one as well!

    Can’t Wait until January to See & Order from the Occasions Catalog?

    Did you know, if you take the plunge and join as a demonstrator now – whether to give yourself a discount on all your orders, or you’d like to have a way to get your favorite products for free or even earn extra spending money by sharing your love of crafting – you can fill your starter kit with ALL NEW PRODUCTS!  Yep!  You’ll be able to pick out $125 in new products for only $99 and get it shipped to you for free!  Then, when you are ready to get more from your wishlist, you’ll get 20% off everything you order.  Pretty sweet deal huh?  Want to know more, shoot me a message or check it out here – Join the Fun.


    NWstamper signature_thumb[9]

    order online button for sig 3_thumb[4]

    Use Hostess Code BEFX37ZS at check out to get a special thank you from me!

    See all the tutorials & classes by mail here

    Check out the Holiday Catalog Retiring List & Sold Out Updates

    Save 25% on the Latest Weekly Deals

    Don’t miss up to 60% off in the online Clearance Rack!

  • Christmas or All Year Cards with Season of Cheer Designer Paper

    At the Northwest Crafty Escape Weekend last month, I gave everyone who was attending on Friday a goodie bag that included a number of items including the Season of Cheer designer paper pack and some of the Old Olive Baker’s Twine (which is one of the weekly deal this week – booyah!)  I used this paper for their make & take projects and had fun designing 4 cards – 2 of which were Christmas Cards and 2 which were anytime of year cards!  Because I loved how even though this paper is in the Holiday Catalog and shown doing lots and lots of Christmas projects, it has patterns that are great for after the holiday season is over as well!

    image

    I tried to make that graphic so you could more easily see the patterns in the pack.  As you can tell, there are definitely “Holiday” patterns – from the hand painted ornaments or colored lights, to the holly berries and pointsettias.  So, you can make fun cards like this one:

    I just mixed two of the patterns and a little bit of coordinating cardstock to create a quick holiday card.  I just love the hand painted look of these ornaments.  Just makes it feel cozy and homey to me. Smile  Want to make your own?  Here are the dimensions for the paper for this card:

    • Whisper White cardbase – 4 ¼” x 11”, score at 5 ½”
    • Old Olive cardstock – 3 ¼” x 4 5/8”, 1 ½” x 2 7/8”, ¾” x 5 ½”
    • Snowflake paper – 3 1/8” x 4 ½”
    • Ornament paper – 1 3/8” x 2 ¾”

    But like I said, this paper pack doesn’t have to be just for Christmas.  Check out this Birthday card that we made using the same papers!

    I just used some of the more generic patterns and mixed in some stamps from the Tin of Cards stamp set (see it is awesome even outside of that cute project kit!)

    We cut bigger pieces of paper and adhered them onto our card front at an angle to get the look that we wanted.  Then just trim off the parts of the paper that hang over the edge to clean it up!  I also wrapped more of the Old Olive baker’s twine and added a little cardstock star using the Itty Bitty Accents Punch Pack.  See, fun Birthday card you can use for anyone at anytime of the year!

    Want the dimensions for this card too?  You got it!

    • Whisper White cardbase – 4 ¼” x 11”, score at 5 ½”
    • Multi-colored Hexagon paper – 3 ½” x 5 ½”
    • Yellow diamond paper – 1” x 5”

    In the Seattle area and want to come stamp with me?

    I regularly host events and classes in the Bellevue/Redmond/Seattle area and would love to have you join me!  Stay up to date on the latest events and classes by joining my Meetup Group – the Bellevue/Redmond Card Makers!  We always have a great time and would love to have you join us!

    NWstamper signature_thumb[9]

    order online button for sig 3_thumb[4]

    But use Hostess Code PU2EYZJY to get a special thank you from me!

    Product Supplies Used:

  • Season of Cheer Cards from the Northwest Crafty Escape Weekend

    Season of Cheer Cards from the Northwest Crafty Escape Weekend

    Its finally here!  We kicked off the Fall Northwest Crafty Escape Weekend yesterday with a fun low key Friday evening of crafting till late in the evening.  One of the things all-weekend attendees get is a goodie bag full of fun stuff.  This time I decided to design some cards using only what they got in the goodie bag… plus stamps, ink, adhesive.

    Here is what I came up with:

    Crafty Escape Weekend goodie bag cards

    Using only the cardstock paper, paper and accessories from these goodie bags:

    crafty escape weekend goodie bag

    Then I issued a challenge that they had to create any project using 2-3 of the supplies from the goodie bag for a project or three Friday night for a contest.  Everyone including all the Saturday only attendees will vote today and we’ll pick a winner tonight!

    Didn’t they do awesome?

    crafty escape weekend challenge cards

    Now today we have a couple classes and an evening pajama party!  Should be a fun day.

    And while we are here, it is a good time to start brainstorming ideas for the new Stamp Sale starting on Monday!!

    12143327_10206840842691290_3843111973478393220_n

    Monday 10/19 – Friday 10/23
    ALL Stamps are 15% off!

    Yep, all the stamps in the catalog – not including hostess sets or bundles – are 15% off!

    Even better?  You can take advantage of this in the Starter kit too!  Pick out $125 of product, pay only $99… and if the stamp set is 15% off, then you get even more for your $125. Smile Learn more about the starter kit here

    Get your wishlist’s ready – then shop in my online store
    Use hostess code FHRCKER7 for a special thank you from me

    NWstamper signature_thumb[9]

    order online button for sig 3_thumb[4]

    use Hostess Code FHRCKER7 to get a special thank you from me!

  • Beautiful Buttons and Fun Christmas Card w/ Masking Ideas

    So, when Stampin’ Up posted the weekly deals yesterday, I was initially surprised that there were fewer than in previous weeks.  But after looking at the items, I realized that just because there were fewer, didn’t mean they weren’t great items!  I LOVE some of these buttons and the masks and heck 25% off is still 25% I don’t have to pay – right?  And who doesn’t love a sale?  Smile 

    So today, I thought I’d share a few project ideas using the fun goodies on sale this week:

    image

    Metal Rimmed Pearls – Easiest cute accessory around!

    I love these little embellishments because they are super cute and did you know – they come with adhesive already on the back?!  Talk about making it so easy even my kiddos can do it!  In fact they did – here is the card I made for a recent class.  Check out  the matching blog post to see my kiddos recreate this card all by themselves and turning out pretty darn well, I would say too. Smile

    Beautiful Bunch birthday card – check out the details on this blog post

    Hearts & Stars Mask – Cute in any season

    The hearts and stars mask is a great way to easily make your own custom background in any color you like!  I have use it a few times but this was one of my favorite and most popular designs.  Perfect for easy Christmas cards!

    Festival of Trees Christmas card – get all the details in this blog post

    Classy Designer Buttons – Perfect accents for any card!

    I also really like the Classy Designer Buttons.  I know I used them on a few cards lately but it appears I haven’t posted them to the blog yet.  So instead, I thought I’d share this cute card from my Stampin’ Up website (that page of mine with my class calendar, promotions, and all about the perks of joining my fun group as a demonstrator!)  Anyway, I love how this card is great for any paper you may have lying around.  It is just so easy to cut or punch a few squares, stamp a sentiment and embellish with some linen thread and the classy buttons!

    image

    Baby Girl card – get all the details here

    Ok, off to do a little more prep work for my Northwest Crafty Escape Weekend coming up on Friday!  I have the goodie bag supplies being delivered today and their wrappings and baggies all made and ready to go!  Now to finish up some samples for some of the on site classes and we will be rockin’ and rollin’.  I can’t wait! 

    ** Make sure you are a fan of my Northwest Stamper Facebook page so you can see all the fun and inspiration as it happens! **

    NWstamper signature_thumb[9]

    order online button for sig 3_thumb[4]

    use Hostess Code FHRCKER7 to get a special thank you from me!

  • A Not Necessarily Holiday All Your Presents Joy Card

    Once again, I find that when I see products in a Holiday Catalog or promotion, I find my brain immediately going to that holiday and everything I see made with that item is pretty much based around that holiday.  So, when I see the Your Presents stamp set, I think of it as a Christmas stamps set.  But here is the great thing…. people give presents all.year.long.  Smile  Crazy, right?  So when I pulled out this card that I had the chance to make at Convention this summer, I immediately thought “Christmas Card”.  But who wouldn’t be happy about getting a present and getting a little joy at their birthday any time in the year?

    This card is an awesome way to use up scraps too!  All you need is your card base and then some:

    • Scrap strip of vellum cardstock
    • Scrap strip of Dazzling Diamonds glimmer paper
    • Scrap of baker’s twine
    • Scrap of your favorite ribbon, like this Garden Green striped ribbon
    • Scrap of whisper white cardstock to stamp on and punch out your image

    Mix in some different pattern papers you love or ribbons that you have bits and pieces of and you can totally change up this card to be perfect for your recipient!

    I also LOVE the touch of using the Stampin’ Up handheld stapler to tack down your little ribbons.  No messy adhesive to deal with and a subtle horizontal accent to break up the long vertical strips of paper.  Plus, seriously, how stinkin’ easy can you make it when it is just staple – staple – done. Smile

    This was also the card that made me fall in love with the new Archival Basic Black ink pad.  Can you see how rich and deep black it is?  Especially over other colors… totally a must have!  Make sure it is on your Christmas wish lists, because what better stocking stuffer?  Well other than a gift certificate for even more crafting goodies!

    (ps – if you want to tell your family now, I do offer Stampin’ Up gift certificates, they can get the details here)


    NWstamper signature_thumb[9]

    order online button for sig 3_thumb[4]

    use Hostess Code FHRCKER7 to get a special thank you from me!

    Project Supplies Used:

  • Amazing Birthday Gold & Vellum Wow Card

    So, you see… I love cards with Vellum on them.  The slightly translucent cardstock adds a touch of elegance to pretty much anything you make with it.  Well, when they came out with Foiled Vellum, I thought it was super pretty, but sometimes I struggle with what to do with it.  So when I saw this card I just had to put my own version together.  And I have been trying to find the original card that inspired this card, turns out I forgot to save it.  So if it is your card, let me know – and thank you for the lovely inspiration!  Here is my version where I changed up the colors and added a couple touches…

    image

    Tips for making this card:

    • The gold foiled vellum makes such a great touch – both for backgrounds as well as trim on the matching envelope!  Layer it over different colored cardstock for different looks.
    • Vellum can be tricky when it comes to adhering since you can usually see the adhesive through the paper.  The Foiled Vellum is great because it has big pieces of the foil to hide your adhesive behind.  Just DON”T USE LIQUID adhesives behind the foil!  It can cause the foil to soften and wrinkle depending on how much glue you use.  Much less pretty look! Smile
    • I used 2 images from the Amazing Birthday stamp set… the banner and the large sentiment.   These layer together fabulously and you can even use the Banner Framelits to cut out the banner so no fussy cutting!image
    • Use markers to get different colors on your sentiment, or – in this case – stamp multiple times and trim out for dimensional layers!  Stamp the whole image in the new Archival Black ink for a rich background.  Then stamp the top of the sentiment on scrap paper in Black and the bottom of the sentiment in Calypso Coral.
    • To compliment the vellum in the background, I punched out a vellum butterfly using the Elegant Butterfly punch.  Notice how I added a candy dot to the center?  That isn’t just a cute accent for the butterfly, it also hides a glue dot that holds the butterfly to the card front!
    • Finally, I wanted to add a little bit more gold to the top of the card by putting a small strip of the 1/8th Gold Taffeta ribbon behind the popped up “make” oval.
    • I always love these cards where a few items come together for a WOW of a card!  And don’t forget to add a bit of the same accents to the envelope to really pull it all together! Smile


    LAST CALL Weekend for the Northwest Crafty Escape Crop!

    Next weekend is my Northwest Crafty Escape Weekend and we will be having lots of fun spending the whole weekend crafting, laughing, and having a great time!  I have a seat or two left, so if you were thinking of coming, RSVPs have to be in by the end of the weekend so I can get lunch orders finalized and in to the hotel for the weekend.  See details and RSVP here!


    NWstamper signature_thumb[9]

    order online button for sig 3_thumb[4]

    use Hostess Code FHRCKER7 to get a special thank you from me!

  • Classy and Not-to-Flowery Birthday Card using Beautiful Bunch

    Ahhhh…. finally getting back in to creating!  Last Friday I had my monthly Creative Cards Class and so while I was on my family trip to Orcas Island at the beginning of the week, I had packed a few supplies and I started playing around and I was so excited when this idea started coming together!  (I mean, really excited!  I had been having a total creative road block before!)

    It is a card that is great to pull together for those last minute needs, or spend extra time and gussy it up to make it even more fancy than my clean and simple version here.

    Tips for making this card:

    • Keep it simple with an always elegant Whisper White card base.  I just changed it up a little by cutting my cardstock to 4-1/4” x 11” and then scoring at 5-1/2” so that it made it extra easy for me to wrap my ribbon around the front flap of the card.
    • Speaking of ribbon, it always looks just a little bit nicer when you can actually wrap it around the paper instead of just cutting the ends off at the edge of your cardstock.  Do even more to hide the seams by starting one end of your ribbon just under the left side of the black cardstock and then wrapping around the front flap of the card and ENDING just underneath the right side of the black cardstock!  It keeps it smooth and lovely on the inside of your card.
    • Add a pop of color with a single accent piece for your card – in this case the flower.  It is built up using the Beautiful Bunch stamp set and matching Fun Flower punch (Get them as a bundle together and you save 15% on both!)

      Beautiful Bunch Bundle
    • Stamp the flower image onto a piece of scrap Blackberry Bliss cardstock using Blackberry Bliss ink (or pick your own tone on tone coloring), punch out and then layer together using Stampin’ Dimensionals for flowers that wow!

    • Did you know? You can punch out the center of the flower using the 7/8” scallop circle punch!  That is what we did to give us that contrasting Daffodil Delight flower center.
    • Oh!  And aren’t those Metal Rimmed Pearls the perfect touch for the center of the flower??  They come with adhesive already on the back so they are SUPER EASY to use too!
    • Finishing touches are key!  We used another stamp from the set to create the spotted accent line and then blinged it up by using some Dazzling Details.  Seriously, for $2.50/bottle, I {heart} this stuff so much!

    • Find so many elegant sentiments that are the perfect size for almost every project with the Tin of Cards stamp set – see, it’s not just for the Tin of Cards project kit!

    Easy and fun, right?  My son, Nicholas is 5 and since he was a year and a half, he has been wanting to play along with creating with my stamps.  It was adorable… he actually asked me earlier this week if an ink pad was the “twist twist tap tap” kind or just “tap” kind (linen pad vs foam ink pad)!

    Well, he often sees me getting ready for card classes or swaps and wants to the do the cards with me.  I usually don’t have the time to walk him through it then and so tell him to grab HIS craft supplies and create a card.  But lately he’s been insisting he wants to do one of my cards from my classes.  So I had a couple extra kits from this class, so I let him and his sister (Caitlin who is 3) have at it.  I think they did pretty well!

    2015-08-18 18.08.59

    And their finished cards:

    2015-08-18 18.35.21-1

    2015-08-18 18.36.42-1


    They did all the work themselves! I didn’t do any stamping or punching for them! Smile  I see many fun years of crafting together coming….

    NWstamper signature_thumb[9]

    order online button for sig 3_thumb[4]


    Project Supplies Used:

  • Sprinkles of Life Cupcake Birthday for the Fun n’ Crafty Blog Hop – (Wednesday Walkthrough Video Tutorial)

    If you missed it yesterday, the new 2015 Stampin’ Up annual catalog launched yesterday and so today we are in full swing of everything ramped up and ready to go with all the changes that come with the new catalog.  If you haven’t seen yours yet, here is the link to the new catalog and to my new catalog walkthrough video that went up on my YouTube channel yesterday.

    See the new catalog PDF  |  Check out my new catalog walkthrough on YouTube!

    But not only is the new catalog here but it is once again time for another Fun n’ Crafty Stampers Blog Hop!  We were supposed to be mixing products from the new catalog with items from the prior catalog… you know, the good ol’ mixing of old and new.  And I can tell you, the new products do that great, especially the new In Colors!   So, while I got a little excited playing with my new stuff, I did at least mix in some old colors and my 2-1/2” circle punch to do a bit of old and new.  So it counts, right? Smile

    Triple Banner Punch + Cherry on Top paper + Sprinkles of Life stamp set = a Bright Birthday Card!

    As I was working on this card, I got inspired to put together a whole Card Class by Mail around this super duper awesome stamp set – so this is card 1 from my new Sprinkles of Life card class by mail!

    Tips for making this card:

    • The new “Banner Triple Punch” or as I call it, the Triple Banner punch, makes these banners come together super easy.  Sure, it doesn’t take that long to trim paper ends by hand with your scissors, but after using this, I can tell how great it is to not have to worry about being a little off… or wanting to go quick because I want to have 2 or 3 banner ends per card!
    • Use the color palatte of your designer paper to get you started!  In this case, I pulled the Crushed Curry ink, Watermelon Wonder, and Bermuda Bay from the Cherry on Top designer paper pack.  It really pulls everything together!
    • The Sprinkles of Life stamp set gives you a TON of options for your projects

      image

      – especially when you add in the Tree Builder punch.  Because then suddenly you get so much dimension for your clouds, trees, and cupcakes!image
    • Sponge the edges of your banners to help them POP and keep from blending into one another.  It use Crushed Curry as a bright alternative to my typical browns.
    • Get more control and a better sponged edge when you use a Sponge Dauber for your inking as opposed to direct to inkpad or the yellow sponges.
    • Don’t be afraid to stamp onto non-traditional colors!  I don’t think of Watermelon Wonder and Bermuda Bay as real-life cupcake colors, but they still totally work on a card!
    • Use the flower punch from the Tree Builder punch to get the little accent flower and then bling it up with the smallest sized rhinestone.
    • Add the perfect finishing touch with the new Dotted Lace Trim in all the new In Colors (though I have to say the Watermelon color in the lace is my FAV!)

    Watch my Wednesday Walkthrough video for even more tips and to see just how easy it is to pull this card together! And then make sure to hop along to all the other great project ideas on our Hop!


    (viewing this in email?  You can find the Wednesday Walkthrough video here)


    Don’t miss out on all the other great project ideas waiting for you on the hop!

    Fun & Crafty Blog Hop

    Jennifer B. of Northwest Stamper <–YOU ARE HERE

    Tobe B. of The Craft Sea

    Susan S. of Stampin’ By The SF Bay

    Pam W. of Stinky Tofu

    Sara G. of 1200 Some Miles


    And if you are interested in more ideas with this stamp set and/or are interested in being able to make all of these cards at home, make sure to register soon for this class by mail!

    Sign up for this class here

    Did you know?  Members of my Fun n’ Crafty downline get all my class by mail tutorials for free?  Its my way of helping you learn more ideas for sharing classes or projects with your friends and customers!

    Plus, with the get 2 free additional stamp sets when you sign up this month, you can pick up this Sprinkles of Life stamp set as a free bonus item! Get started here

    NWstamper signature_thumb[9]

    order online button for sig 3_thumb[4]

    Project Supplies Used: