Northwest Stamper

Tag: stampin’ up

  • Black & White Negative Heat Embossing with Pleasant Poppies

    Black & White Negative Heat Embossing with Pleasant Poppies

    I have had a card pinned on Pinterest for ages that used this cool split image with one half one color and the other half a different color.  So, when I was working on cards for my embossing class, I just had to give it a try and my Pleasant Poppies stamp set was the perfect choice to give it a go, since I knew it was a big stamp and the line art would make it easy to do.

    So this is what I came up with and love how it turned out!

    How do you do it?  It is easier than you think!  I started with two pieces of 2” x 4” cardstock – one in Basic Black and one in Whisper White.  Set them side by side to make a square and then ink up your image with Versamark ink. 

    Stamp your image across both pieces of paper at the same time and then separate the papers.  Use white embossing powder on the black cardstock and black embossing powder on the white cardstock.  Heat it up and then glue the pieces back down onto your card front so that the images are lined up.

    Easy Peasy!

    You will notice that my card has some embossed speckles.  That is because I didn’t use my embossing buddy.  So, as a reminder always use your embossing buddy!

    Give it a try with any color and have fun!

    spaced shop now sig bar

    April Online Stamp Club Hostess CodeG4VQJ7VB
    Use this code to get free exclusive tutorials & project kit! Learn more

  • Scalloped Peek-a-Boo Flower Catalog CASE

    Scalloped Peek-a-Boo Flower Catalog CASE

    Today the girls over at Stylin’ Stampin’ Inkspiration have put together a fun collection of cards to share.  We all picked a card from the Annual Catalog to CASE (Copy-And-Share-Everything) and then share for the blog post.  So I thought I would share a card we did recently for my monthly stamp club!

    This card was actually made because one of the ladies saw it in the catalog and really wanted to see how to make it.  And, of course, I was happy to oblige!

    This is my card:

    This is the card in the catalog on page 176:

    image

    Wow… maybe I need to photo graph my cards on top of bright colored paper because comparing their photo to mine, it makes quite the difference! Smile 

    In any event, the fun thing about this card was trimming out a rectangle from the front of the card so that your flower can pop through.  I cut it out 1/2” from each of the top, right, and bottom edge of the card and make it 1-1/4” wide.

    Then I could use the 1-1/4” scallop punch and the 7/8 scallop circle punch to create a cute flower to show through.  Add some decoration with Gorgeous Grunge stamps and some Gold Baker’s Twine and you have a fun alternative!

    If you have any specific questions about this card, leave me a comment and I’ll be sure to get back to you! 

    My club ladies had a lot of fun creating this card and I hope you take the time to try it out too.  With the Stampin’ Trimmer, it is really quick and easy to create these cut outs on your card fronts.

    spaced shop now sig bar

    April Online Stamp Club Hostess CodeG4VQJ7VB
    Use this code to get free exclusive tutorials & project kit!Learn more

  • Saying Goodbye to Oh Hello & the 2012-2014 In Colors

    Saying Goodbye to Oh Hello & the 2012-2014 In Colors

    I knew it was coming…. the 2012-2014 In Colors were destined to be retired at the end of May this year, but it always takes seeing the retirement list come out for me to suddenly have this burst of new found love for the colors!  So, as I was trying to decide what card to share with you today, I saw this swap from last year and knew it was a perfect way to send off the In Colors and the stamp I’m going to miss – Oh Hello!

    I was one of those people who didn’t love Summer Starfruit as a color at first.  But doesn’t it look nice when you pair it with other colors?  From the designer series paper (which I need to use more of in general!) to the ribbon…. they are nice touches without it being too overwhelming.

    So that is a tip for you!  If you have a color that you don’t love as a big piece of cardstock or ink… mix it up with some other strong colors and add it to your project in pieces, especially pieces that are patterned!  It helps break it up and make it a great accent piece!

    Yes, pretty much everything about this card is retiring – from the In Color Dahlias (that cute resin flower in the corner!), to the cardstock, markers to color the stamps, designer paper, ribbon, and the stamp!  While the In Color cardstock is sold out, everything else is still available for now!

    View the Retiring Stamps HERE

    View the Retiring Accessories HERE

    Make sure you use the hostess code G4VQJ7VB to received this month’s free online stamp club tutorials


    Retiring Items at a discount with Weekly Deals!

    We’ve been guessing that the weekly deals were a way for Stampin’ Up manage extra inventory or get ready to clear out items that they were going to be retiring.  Turns out that was the case as many of the items that were on the weekly deals showed up on the retirement lists.  This week is no exception!

    weekly deals 4-22-14

    Just a reminder that these items are all retiring and so they are only available while supplies last.  But hey!  You get free shipping and they are 25% off, so SCORE!  Check out any of the items in the online store to grab them before they are gone:

    And just a reminder that the free shipping counts towards anything in your order…. so non-retiring items, clearance rack, online only stamps, as well as the retiring items!  So, enjoy the deal!

    spaced shop now sig bar

    April Online Stamp Club Hostess CodeG4VQJ7VB
    Use this code to get free exclusive tutorials & project kit!Learn more

  • The Stampin’ Up! Retirement List for 2014 is Here!

    The Stampin’ Up! Retirement List for 2014 is Here!

    We’ve been eagerly waiting and Stampin’ Up has finally released the list of stamps and accessories from the 2013-2014 Annual Catalog that will be retiring.

    Some things to remember:

    • Everything on the list, INCLUDING STAMPS, are while supplies last!
    • items WILL start selling out.  Especially the 2012-2014 In Color ink refills and cardstock!

    But the good news is that there is FREE SHIPPING from now until Friday!  Yay!  So you can grab your favorites now, and if you decide you need more later, you can pick them up and save the shipping costs. Yay!


    View the Retiring Stamps HERE

    View the Retiring Accessories HERE

    Make sure you use the hostess code G4VQJ7VB to received this month’s free online stamp club tutorials

    If your order is over $40, you will receive the make & take project in the mail too!
    (note – if your order is going to be over $150, don’t use the hostess code so you can receive the hostess benefits!)


    Here are just a few of my favorites that are going away!

    I’m just crushed that these items are going away!  They are staples in my craft room!

    1. Sponge Daubers (SOB!!  How will I sponge the edges of my paper?  The yellow sponges just aren’t the same!)
      image

    How about you?  Which of your favorites are on the list?

    Retirement List Prediction Contest Winner!

    Thank you for all the entries in the retirement list prediction game!  I’m going through the entries and will have the winner announced later today!  So, stop on back by for that announcement soon!

    spaced shop now sig bar

    April Online Stamp Club Hostess CodeG4VQJ7VB
    Use this code to get free exclusive tutorials & project kit!Learn more

  • Easter Punch Art & Why You Should Buy the Clearance Easter Egg Dye Kits

    Easter Punch Art & Why You Should Buy the Clearance Easter Egg Dye Kits

    Happy Easter!  I hope you have a wonderfully bright and peaceful day!  Today we’ll be hoping for sunny skies, family easter egg hunts, and spending time with our extended family in the area.

    But while we are doing that, I wanted to share an idea with you to consider as you see the Easter supplies go on sale in the stores starting tomorrow (or maybe even today).  Consider grabbing those Easter Egg dying kits while they are on clearance, and here is why…

    So, last night we pulled out our eggs and coloring kit to start dying some eggs.  I needed something to cover our counter…. turns out my used Stampin’ Up grid paper made a nice lining. Smile  (See there is a reason I don’t throw them away after classes!)

    2014-04-19 20.01.03

    We made our eggs like normal… add 3 Tablespoons of Vinegar to a cup and drop the dye tablets in.  After they are done fizzing, add your 1/2 cup water to each cup.  Then dunk your eggs and let them soak and dye the shells.  I also couldn’t find the box the dye tablets came in, so I had to create my own egg holder!  I took a cereal box and kitchen scissors and cut 12 holes in the top of the box.  Then I could set each egg on top of a (poorly) cut hole to dry!

    2014-04-19 20.17.32

    Now, this is the fun part!  Once you are done with your eggs, you still have lots of dye left over.  So I grabbed some of my ribbon from my craft room and started throwing them in the cups and letting them soak up the color!

    2014-04-19 20.25.26

    In these cups, I have 4 pieces of the 7/8” Cotton Ribbon and 2 pieces of the White Organza Ribbon.

    And this is how they turned out:

    2014-04-20 10.46.35

    Pretty huh?  Now to create some fun projects with my custom colored ribbons! Smile

    I hope you have a wonderful rest of your weekend.  And a few quick reminders:

    Last Call for the Retirement List Prediction Contest!

    Don’t forget to get your guesses in by tonight for what 10 stamp sets you think will be retiring!  You have a chance to win your favorites from the retiring list for free.  Email me your guesses to jennifer@nwstamper.com and find out tomorrow who the winner is!

    FREE SHIPPING starts tomorrow!

    If you didn’t see on my Facebook page, Stampin’ Up will be offering Free Shipping tomorrow through Friday for all orders – which is perfect timing as the retirement list comes out on Monday!  So, get your orders ready and don’t forget to use hostess code G4VQJ7VB to received this month’s free online stamp club tutorials and if your order is over $40, you will receive the make & take project in the mail too!
    (note – if your order is going to be over $150, don’t use the hostess code so you can receive the hostess benefits!)

    spaced shop now sig bar

    April Online Stamp Club Hostess CodeG4VQJ7VB
    Use this code to get free exclusive tutorials & project kit!Learn more

  • Quick Spring Easter Treat Bag Tutorial with Punch Art Daffodil!

    Quick Spring Easter Treat Bag Tutorial with Punch Art Daffodil!

    Happy Easter weekend! I don’t know about you, but we still need to do a lot of our prep for Easter.  Today we’ll be spending time coloring Easter eggs – and I’ll be making sure I have everything I need for Easter baskets and Easter dinner! 

    (PS – don’t forget to enter the Retirement List Prediction Contest!  It is free to play along and you could win up to $30 in free Stampin’ Up products!)

    So, back to Easter treats!  I thought I would share a quick spring or Easter treat idea that you can pull together at the last minute!  This was created by my Mom, Kathy Thisted, for our Fun n’ Crafty team Stamp & Share a few weeks ago and I just love it.

    Scallop Tag Topper & Punch Art Treat Bag

    There are lots of fun elements to this treat bag, but the nice thing is that with a few punches, it is super quick to make!

    Start with a 2”x8” piece of cardstock (this is Chocolate Chip) and score at 3-1/2” x 4-1/2” to help it stand up on it’s own.  Then, grab the Designer Frames Embossing Folders and use the oval to one to emboss your frame. 

    Use the Extra Wide Oval Punch to punch out the center of your oval.  LOVE that it is an almost perfect match!

    Punch both ends of the strip of cardstock with the Scallop Tag Topper Punch to give you that pretty finished look!

    Then grab your Petite Petals punch  and the four petal flower punch from the Bitty Punch Pack to make your Daffodil.  I punched one of each shape out of Daffodil Delight cardstock.

    In the sample, the flower is stamped first using the Petite Petals stamp set – and I think it definitely adds something to it.  But for the sake of this tutorial, I didn’t end up stamping.  I hope you don’t mind. Smile 

    Fold up the small punched flower and adhere it to the center of your larger flower with liquid glue or a glue dot!  I love how my mom colored in the center of the little flower with the White Gel pen for a little extra definition!

    Add a scrap of cardstock for the stem and grass at the bottom.  Want to hear a fun trick?  Stamp out one of the flower heads from the Too Kind stamp set and then cut it out and use the backside for your grass!  Neat huh?

    image

    Add some candy, tie it with a ribbon and you are done!  Easy Peasy!


      Reminder! Get your guesses emailed in!

      If you haven’t gotten in your guesses for my Retirement List prediction contest, don’t forget to get those in!  You have until tomorrow afternoon but since I know many folks will be busy with Easter activities, you may want to send them in today. Smile 

    Pick 10 stamp sets from the annual catalog that you think will be retiring and email me your list to jennifer@nwstamper.com.  If you have the most guesses correct when the list is posted Monday morning, you will win a shopping spree from me!  See all the details here.

    spaced shop now sig bar

    April Online Stamp Club Hostess CodeG4VQJ7VB
    Use this code to get free exclusive tutorials & project kit! Learn more

  • It’s Time for the 2014 Retirement List Contest!

    It’s Time for the 2014 Retirement List Contest!

    Are You Up for a Guessing Game?

    I can’t believe it is that time already, but Monday (April 21st) the Retirement List for the 2013-2014 Annual Catalog will be released!  I’ll be posting the list monday morning of all the stamps and accessories that will be discontinuing – and in a first, BOTH stamps & accessories will be while supplies last.  (In the past, stamps were always guaranteed until the end of the catalog period)

    So, to keep us entertained while we wait for the list to come out –
    I’m running a Stampin’ Up! Retirement List prediction game!

    2014 retirement list promotion

    All you have to do is pick 10 stamps or stamp sets that are in the 2013-2014 Stampin’ Up! Annual Catalog and send your predictions to me in an email.  Whoever gets the most right, wins a prize from me!

    What are you playing for?
    Win $25 to spend on your favorites from the Retirement List!
    Guess all 10 correctly and win $30 off your order instead!

    How to Play
    1. Grab your copy of the 2013-2014 Annual Catalog and start flipping, or check out the catalog online here.
    2. Write down the 10 stamp sets or single stamps that are in the catalog that you think will be retired this year (not including hostess sets)
    3. Email me your list of predictions to jennifer@nwstamper.com by April 20th at 3pm PST
    4. Watch on April 21st for the Retirement List to be released!

    If you are on my mailing list – I will email out the full list of everything that is retiring on the 21st and announce a winner for this game (I’ll also be posting this information here on the blog too, but watch for a special bonus in my newsletter Winking smile).

    In the event of a tie, I will name the winner based on the earliest timestamp on the emails I receive.

    A few rules:

    • Anyone may send me their predictions but only non-demonstrators can win my prize.  If you are currently a Stampin’ Up! demonstrator, enjoy the demo community chatter and sneak peeks from Stampin’ Success and other demo events. :)
    • If the retirement list leaks out early, I reserve the right to shut down the contest part of the game early.

    So, get flippin and enjoy the guessing game of what will stay and what will go!  I can’t wait to see what everyone predicts!

    spaced shop now sig bar

    April Online Stamp Club Hostess CodeG4VQJ7VB
    Use this code to get free exclusive tutorials & project kit! Learn more


  • Lovely Lattices with the Chevron Border Punch

    Lovely Lattices with the Chevron Border Punch

    Today is my day to share some ideas over on the Stampin’ Stylin’ Inkspiration blog and I thought I would share with them and you a technique that has been around for a while but I only recently gave it a try myself – making lattices with the Chevron punch!  If you haven’t tried it yet, this is an easy technique that has lots of possibilities.

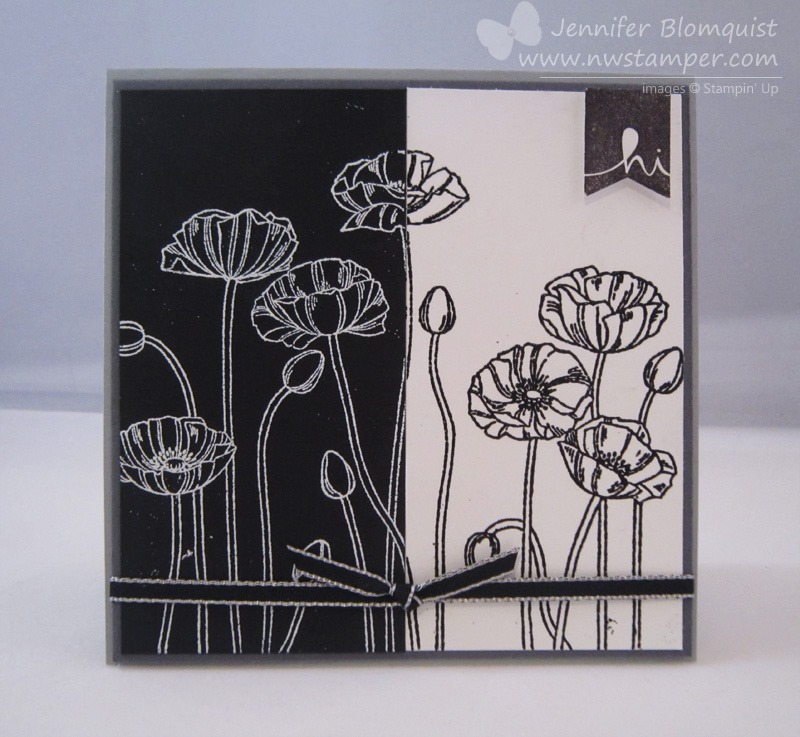
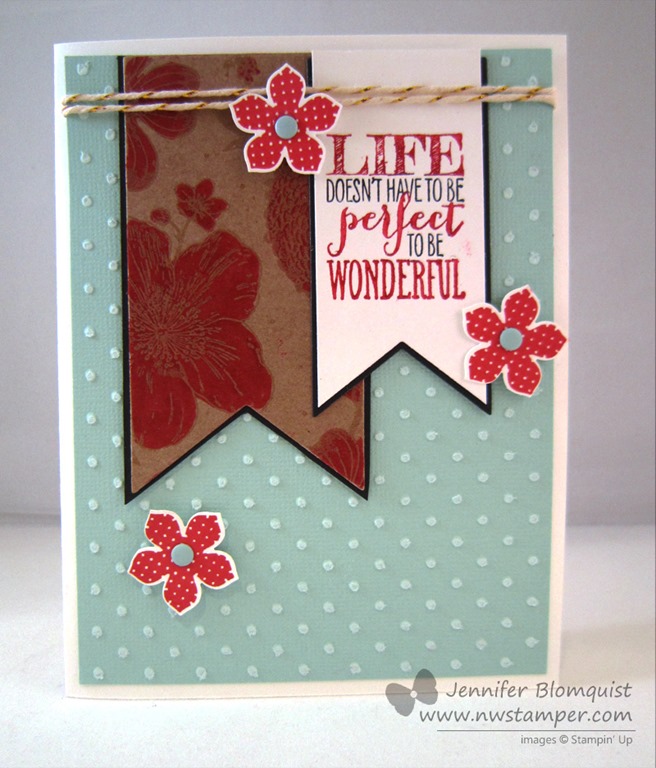
    To get started, here is the card that was my first attempt with this idea:

    It was my chance to play with a few of the fun new tools from the Occasion catalog including:

    So, when I would see that lattice or similar looks on other cards, I always thought it was really hard and complicated.  I wasn’t sure that I could make it myself, but I finally figured that since I had the Chevron Punch I ought to at least give it a try. 

    Turns out it is easier than I thought!  Wanna see how to do it yourself?

    Start out with two 1.25″ x 5.5″ strips of cardstock.  Punch the chevron pattern on each one.  Here is where I lined up the first edge of my cardstock to get started punching so that I had the right amount of spacing.

    Now, after you punch the first set of chevrons, slide the paper over and continue punching along the paper strip.  Make sure you only see silver through the punched chevrons as you go!  Otherwise your chevrons will be uneven and won’t braid together very well.

    Once you are done, you should have two strips of cardstock that look about the same.  Lay them next to each other on the table so the chevrons are pointed in the opposite directions.

    Now, start “braiding” the paper.  That is lay the two strips on top of each other in this orientation and start tucking the chevron tips so that the top layer chevron tips are *behind* the chevron tips of the back piece of paper.  I know that is a little confusing to read in text, but if you look up close, this next picture might help!

    Wha-bam!  You have a handy dandy snazzy lattice to use in your projects. 🙂  Now, because you braided them together, your final piece is actually a little bit longer than 5-1/2″.  So you can position it how you’d like on the front of your card and trim off the extra – so, no worries if your ends look a little strange.

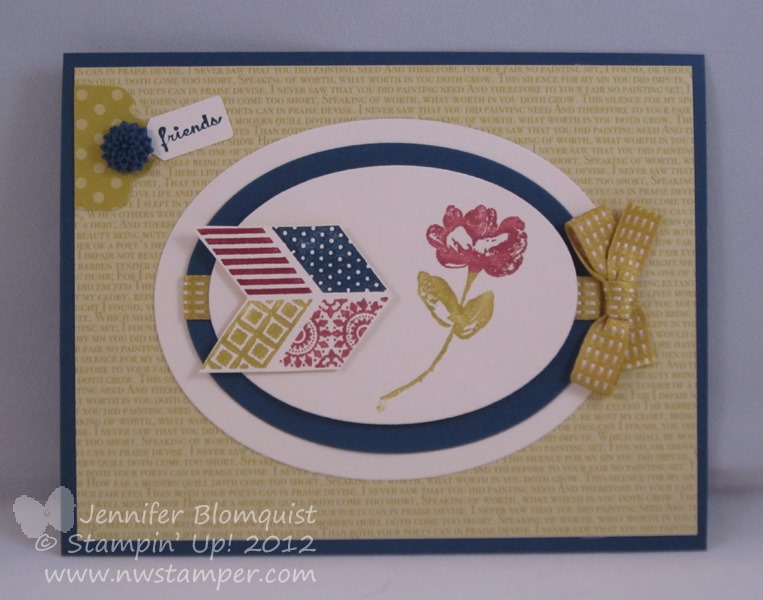
    Tuck in some flowers… add some butterflies… stamp your background with the Hardwood stamp set and you have a really fun card!

    I hope you enjoyed this little tutorial!  I highly recommend giving it a shot.  There are so many fun things you can do with this technique.  For example, check out another idea for something you can do if you make this lattice with two different colored strips of cardstock!

    In this case, I used Melon Mambo and Whisper White, then I glued it over a piece of Pear Pizzazz cardstock for bright look on white.  What do you think?  Pretty right?  Smile  So give it a shot and get creative and you may just love what comes out!

    spaced shop now sig bar

    April Online Stamp Club Hostess CodeG4VQJ7VB
    Use this code to get free exclusive tutorials & project kit! Learn more

  • Big News! Exclusive Project Life Products by Becky Higgins are Coming Soon!

    Big News! Exclusive Project Life Products by Becky Higgins are Coming Soon!

    I’m bouncing in my seat here at my computer as I just have learned that Stampin’ Up and Becky Higgins have been working on a partnership to create a new line specifically for Stampin’ Up!  Yay!

    Project Life promo pic

    Why am I so stinkin’ excited?

    1. New scrapbooking products that make my scrapbooking quick, easy, and cute!
    2. Project Life items that coordinate with the supplies I have at home – all my inks, cardstock, papers, tools, and accessories!
    3. Get free stuff in the form of hostess benefits when you get your supplies for your scrapbooks!  Have a scrapbooking get together with friends and everyone can get their pocket pages and cards and work on everything together!
    4. Demonstrators get a discount too!  I had just started exploring Project Life and now I can save money too.  Got to love that!


    blogimage2_projectlife_april1514_all

    stampin up project life list

    **UPDATE!  They are here!  Get your favorite items in the Online Store here**

    Some additional details about Project Life by Stampin’ Up!

    If you aren’t familiar with Project Life, it is a simple idea of having an easy way to take all those photos you’ve taken and print them at out the standard 4×6 size and have a cute way to preserve and journal them without needing to figure out a full page layout for them.  Becky Higgins actually started the idea and it has grown to be an incredibly popular style of scrapbooking .  You can learn lots more by visiting Becky’s site and her thoughts on Project Life.

    This Project Life line looks like it will be a little different than some of the other lines she has released, for example:

    • All of the journaling cards are going to have square corners.  There will be a corner rounder punch to match with other Project Life cards you may have if you want the rounded corners.
    • The core kits will still contain 100 cards, but you will NOT have duplicates in the pack.  I know I’m actually happy about that because I’ve found I don’t know what to do with the many duplicates of the same card since I like to use the front in one place, the back in another place, and then don’t want duplicates of the same sentiments.
    • We will offer Pocket Pages in a variety pack so you can easily have somewhere to put your photos and cards.  Smile  And it sounds like Albums will be coming too!  I can’t wait until I can get a sneak peek of the new catalog in 2 weeks.  I’ll be able to give you more of a scoop then!
    • Did you see?  There will be an accessory pack with specialty cards, wood accents, stickers, arrow paper clips, and WASHI TAPE!

    Here is the scoop on when you can get your hands on it!

    You can get everything in the picture above starting May 1st – find them in the online store here.

    You can email me in advance if you know what you want and want me to have everything ready to order on your behalf (I’ll do a group order for anyone who is local to me to help save on shipping)

    or stop by my online storeon May 1st to shop online.

    If you are a demonstrator by April 21st, you will be able to start ordering them early!  Yup, we can start ordering on April 21st.  And you know I’ll be getting mine and can’t wait to start putting together some pages and sharing them with you!

    Have questions?  Leave a comment or email me at jennifer@nwstamper.com and I’d be happy to chat more with you about this exciting new line of products!

    spaced shop now sig bar

    April Online Stamp Club Hostess CodeG4VQJ7VB
    Use this code to get free exclusive tutorials & project kit!Learn more

  • The Wow Factor of Coloring on Natural Composition Specialty Paper!

    The Wow Factor of Coloring on Natural Composition Specialty Paper!

    Have you experienced the coolness of the Natural Composition Speciality Paper?  Once again, I have another project that I can’t believe I haven’t shared yet and my favorite part of it is how the Natural Composition paper makes it look!

    I created this card for a class last month and was playing with a few of my favorite things:

    • Core’dinations cardstock – I used the Pool Party core’dintations cardstock and ran it through my BigShot with the Perfect Polka Dots embossing folder.  Then I sanded off the top of the dots to help them pop a little bit more.
    • Petite Petals stamps & punch – I have to admit I’m totally falling in love with these little flowers!  And the fact that they are so easy to punch out is just awesome!
    • Gold Baker’s Twine – Turns out it just always is the perfect touch of subtle sparkle on your projects.  It took me months to start using it but now I LOVE using it!
    • Perfect Pennants stamp set – the sentiment is my favorite sentiment from the Occasions catalog!
    • and finally – Natural Composition Paper!

    The Natural Composition Specialty designer paper does not look very special in the main catalog and in fact, just about everyone I have in class that uses it tells me that they didn’t think it looked interesting in the catalog but they love it once they try it.  Because you can do things like this:

    So, the thing it it is a stiffer cardstock that looks a bit like cardboard or a stiff kraft cardstock.  But then on one side of the paper there is a clear embossed pattern.  So you can do cool stuff like sponging or coloring!

    In this case, we colored over the flower images with a Real Red marker and after it starts soaking in a little bit to the paper, it will wipe off the embossed image and you get a really cool defined image.  Don’t you think?’

    You can do this with any color or ink (if you want to sponge it) and it is pretty fool proof.  You can’t really mess it up.  Got to love that!

    spaced shop now sig bar

    April Online Stamp Club Hostess CodeG4VQJ7VB
    Use this code to get free exclusive tutorials & project kit! Learn more

    Stampin’ Up! Supplies Used
    Stamps – Perfect Pennants, Petite Petals
    Ink – Markers (Real Red, Basic Black), Real Red
    Paper –Pool Party cord’inations cardstock, Whisper White, Basic Black, Naturals Composition specialty designer paper
    Accessories – Big Shot, Pennants Framelits, Petite Petals punch, Gold Baker’s twine, Candy Dots (Subtles), Perfect Polka dots embossing folder, sanding block

  • A Sweet Card with an Envelope Full of Butterflies

    A Sweet Card with an Envelope Full of Butterflies

    Happy Sunday to you!  Today I have one of those cards to share that is a little bit of this and a little bit of that from around your craft room.  But in the end doesn’t it turn out to be such a sweet card?

    I had seen a photo of a card that had the idea of an envelope with lots of butterflies flying out from that and so I tried to capture that with the supplies I had at home.  So I started out with my Strawberry Slush cardbase and had to add a bit of texture and so I pulled out my much under-used embossing folder – the Fancy Fan embossing folder.  Then I layered on a strip of Smoky Slate cardstock edged with the Scallop Edge border punch and a piece of the Gingham Garden washi tape.  Again… why don’t I use washi tape more often??  It is so stinkin’ easy and so cute on your projects.

    Finally, the center piece of the card!  I created my own envelope using one of the smallest dimensions on the Envelope Punch BoardSee?  It isn’t just for envelopes for your card!  Put your envelope together, punch out a variety of butterflies and glue them on to look like they are exploding out of the envelope.  Not hard to put together but think of how much of a smile this will bring to someone’s face when they get it from you!  Smile  See, I’m smiling just thinking of mailing it out. 

    Have a wonderful Sunday! 

    spaced shop now sig bar

    April Online Stamp Club Hostess CodeG4VQJ7VB
    Use this code to get free exclusive tutorials & project kit! Learn more

    Stampin’ Up! Supplies Used
    Stamps – Hip Notes
    Ink – Markers (Strawberry Slush, Basic Grey)
    Paper –Strawberry Slush, Smoky Slate, Very Vanilla, Whisper White, Pink Pirouette Designer Paper
    Accessories – Word Window punch, Gingham Garden washi tape, Elegant Butterfly punch, Bitty Butterfly punch, Big Shot, Fancy Fan embossing folder, Scalloped Edge Border punch, Envelope Punch board

    Favorite products:

    134820s
    127821s
    132140s
    117273s
    132622s
    132622s
    132622s
  • Fun with Window Sheets and Rainbows for a Card

    Fun with Window Sheets and Rainbows for a Card

    Today I wanted to share another card I created for the Scrapyard Chicks Weekend Workshop (save 10% off your registration by using the coupon code NWstamper).  I’ll be teaching 6 different cards and I was trying to come up with designs that were fresh and a bit different than I’ve done before.  And I just love how this one turned out.

    So, you can make this card with any paper you have at home but I went for some fun rainbow colors that I punched out with a 1” circle punch and adhered to a Baked Brown Sugar cardbase.  But here is where it gets a bit different –

    We add a window sheet over the top and stamp it with White Craft ink!

    I cut my window sheet to 4” x 5-1/4” so it was a little smaller than the front of my card (and more efficient for cutting up your 12×12 sheet that they come in from Stampin’ Up).  I laid it over my card front and then stamped each flower using the Mosaic Madness stamp set on top of each circle and the White ink.  Then I stamped the “and I’m so very grateful” on the card base itself in brown ink.  I found it useful to stamp the “inside” sentiment first because then I could stamp the window sheet just above that brown stamped image.

    Finally, I glued down my window sheet and hid my adhesive by wrapping white baker’s twine around the top of the window sheet.  Add some tiny pearls in the middle of each flower and you are done!

    Tip:  I found that using the White Craft ink on the window sheets take a really long time to dry.  So the sample above is using White craft ink, but for my class I’ll be switching out for White Stazon ink instead!

    spaced shop now sig bar

    April Online Stamp Club Hostess CodeG4VQJ7VB
    Use this code to get free exclusive tutorials & project kit! Learn more

    Stampin’ Up! Supplies Used
    Stamps – So Very Grateful, Mosaic Madness
    Ink – White Stazon, Early Espresso
    Paper –Baked Brown Sugar, Calyspo Coral, Real Red, Pumpkin Pie, Daffodil Delight, Pistachio Pudding, Gumball Green, Midnight Muse, Tempting Turquoise, Raspberry Ripple, Window Sheets
    Accessories – White baker’s twine, pearls, heat gun


    Favorite Products: