Northwest Stamper

Tag: stampin’ up

  • Make Your Own Background Paper Using the Endless Thanks Stamp Set

    After an amazing week last week at convention, then coming home and being a single mommy for the week while my hubby is off on a business trip, it’s been busy to say the least.  I have had grand plans to get lots and lots done in the evenings after the kids went to bed but turns out I’m still recovering from the lack of sleep at convention (turns out your mid-30s body doesn’t bounce back as fast as your mid-20’s body… who knew?! Smile) and so I’m still catching up.  But one thing that I learned at convention and really took home with me is balance – figuring out how to make sure you make time for the important people and things in your life (like family and sleep) and then doing the rest (like photographing my cards from swap).  They make the good point, if I’m rested and my family isn’t crabby they haven’t seen me in a while, everyone is going to be happier!

    That said, I finally started photographing my pile of swaps from Convention… you see, I have a lot:

    2015-07-30 14.27.06

    After over an hour of photographing cards, I almost have them all done!  I’ll be sharing some of my favorites here on the blog over the next week.  If you come to my classes and events, I’ll have many of them with me.  And if you are a member of my Fun n’ Crafty Stampers demonstrator group, I’ll upload all of the pictures this weekend!

    But while I finish working on that, I thought I’d share a card I made with the cute Endless Thanks stamp set:

    I was playing with this stamp set and trying to come up with something that only uses the new In Colors when I ended up with this design.  It shows a fun way you can use your stamps to make your own background paper.

    Tips for making this card:

    • Use the larger flower from the Endless Thanks stamp set to stamp randomly around the front of your card – I used Watermelon Wonder because I was using the new 2015-2017 In Colors, but use whichever color you love.
    • Make sure you go off the edge of your card front with some flowers, if you try to keep them all inside the edges it ends with a strange border around your card.
    • Use the little leaf stamp from the set and stamp 2 overlapping leaves on the side of each flower.  They don’t have to be on the same side, just keep them together.
    • Fill in the white spaces with the smaller flower from the set in a complementary color – like the Delightful Dijon I used here.
    • Break up the busy-ness of the card by creating a layer over the center.  I matted in Watermelon Wonder to tie in to the flowers, and then kept it simple with a few flowers and the sentiment in the center.
    • I still only used Watermelon Wonder for my ink for the flowers in the middle of the card, just stamp one in the middle and then WITHOUT reinking your stamp, stamp to the left and to the right of the first flower to get the lighter shades.
    • Wrap a piece of the new dotted lace trim around your matted cardstock and then use one more piece of the lace trim to tie a bow in the middle of your piece of lace.  Isn’t it so fun and fluffy??

    You can try this idea of creating you own background with any stamps you own, so grab a stamp and give it a whirl! 

    And if you love any of the products I used in my card, you can find them in my online store by clicking any of the pictures below!  And look, you don’t need many supplies to make this fun card!


    NWstamper signature_thumb[9]

    order online button for sig 3_thumb[4]

  • New Weekly Deals–Ribbons and More Galore!

    It is a Tuesday Quickie here!  Just wanted to make sure you had heard about the latest deals… especially since they are so cute!

    New Weekly Deals

    11800495_10205059731236314_4954220019427063650_n

    I’ll be putting in an order today and possibly another later in the week.  So you can either email me with what you want or start shopping online here – See the Weekly Deals in the Store

    New Paper Pumpkin Promotion

    While I was at convention, Stampin’ Up also announced a new Paper Pumpkin promotion.  So if you haven’t subscribed before, or stopped a while back, this may be a great time to give it a go. 

    image

    This is an awesome deal given that it typically runs $19.95, which is also a great deal because each month we get:

    • Exclusive subscriber only stamp sets
    • Precut cardstock & accessories
    • All the ribbons & embellishments
    • INK!  (guaranteed different colors each month for at least 12 months!)
    • A clear block with your first kit that you can use with ALL the stamps in future kits
    • Extra supplies – just in case you need them
    • Exclusive access to purchase refill kits (everything but the stamps and ink for only $8!) or complete extra kits while supplies last! (see them online here)

    Start your new subscription here

    PS – if you have been a subscriber before, make sure to sign up using a DIFFERENT email address to make sure you get the 50% off.

    I’ve seen the next 2 months of kits, so if you have questions, let me know and I’ll give you the scoop!


    NWstamper signature_thumb[9]

    order online button for sig 3_thumb[4]

  • Wrapping up the Stampin’ Up Convention! Highlights, Display Boards, and More!

    It happens every year… the first night of a Stampin’ Up Convention or other event, I stay up late the first night socializing and then blogging/facebooking.  Then the second night, we are up late again… but more tired from the late night/early morning from the day before.  So I get a little less done.  Then by the last day… I’m just toast!  Smile  This year was worse than normal for me as my team had a blast staying up and having in-room “happy hour” as we chatted and some people had some wine.  But after coming home at midnight on Saturday and then spending time with the family before the hubby turned around for his turn to go on a business trip) I rested and am finally catching up on the last bit of sharing! 

    I wanted to give you the full experience, so WARNING! Lots of pictures ahead! Smile

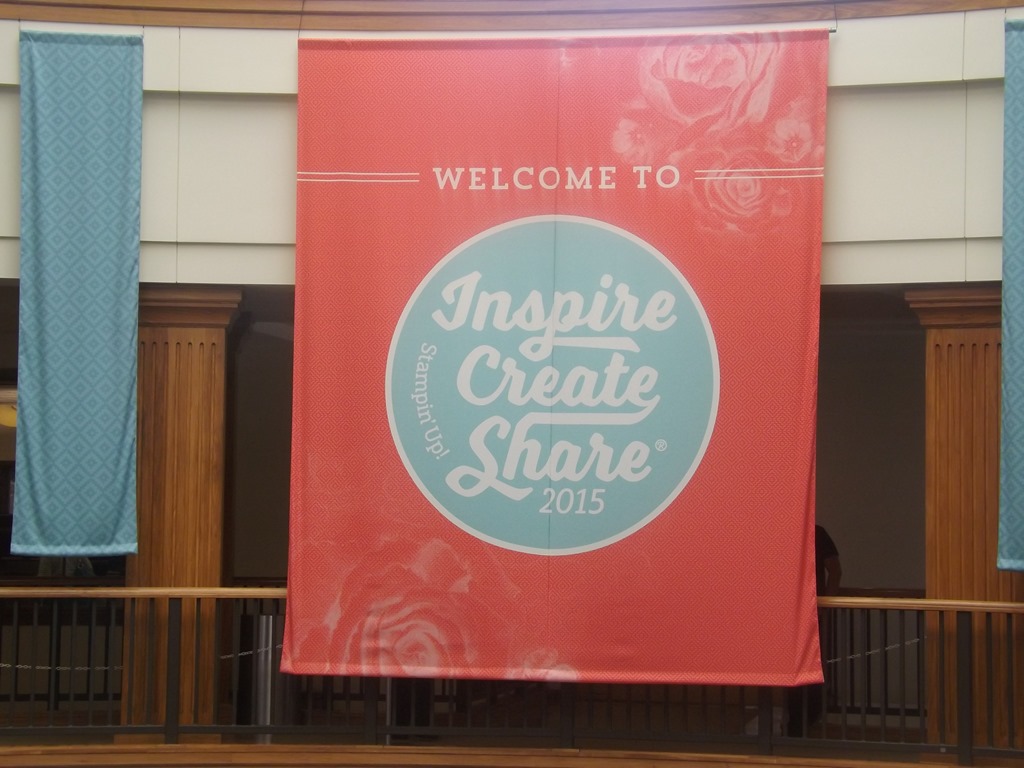
    Stampin’ Up Convention 2015 – Day 2

    As always there are a ton of demonstrators gathered for Convention, but I love getting a chance to meet and mingle with everyone!  By day 2, my crew had a plan in place for snagging seats for our group.  I just had to sneak away for a minute to snap a quick pick of some of the crowd eagerly awaiting the chance to get in for day 2!

    IMG_0481

    I also love the chance to see and say hello to some of the amazing Stampin’ Up Home office staff who make these events and all the support for demonstrators so great throughout the year.  Like the lovely Miss Andrea Withers and the fabulous Bonnie Farley!

    2015-07-24 09.27.07

    2015-07-24 11.09.43

    Plus they always play fun music while we are waiting for the session to start so you have to stand up and dance a little!  See, even Tanya, Nicole, and Carla were getting into it. Smile

    2015-07-24 11.11.34

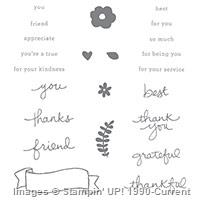
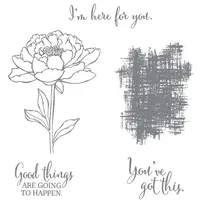
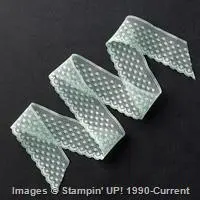
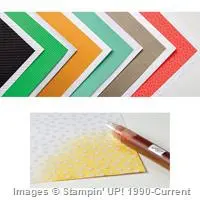
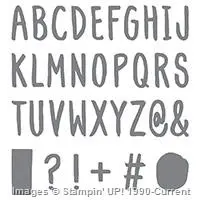
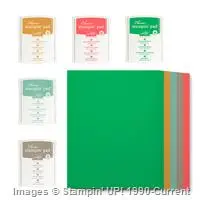
    There were awesome stamping demonstrations featuring new products like new Black Glimmer Paper, new stamps, and a new Pillow Box die!!

    2015-07-24 10.03.33

    And new spiderweb doilies, framelits, papers, and even new fall wood accents!

    2015-07-24 10.07.49

    2015-07-24 12.21.43

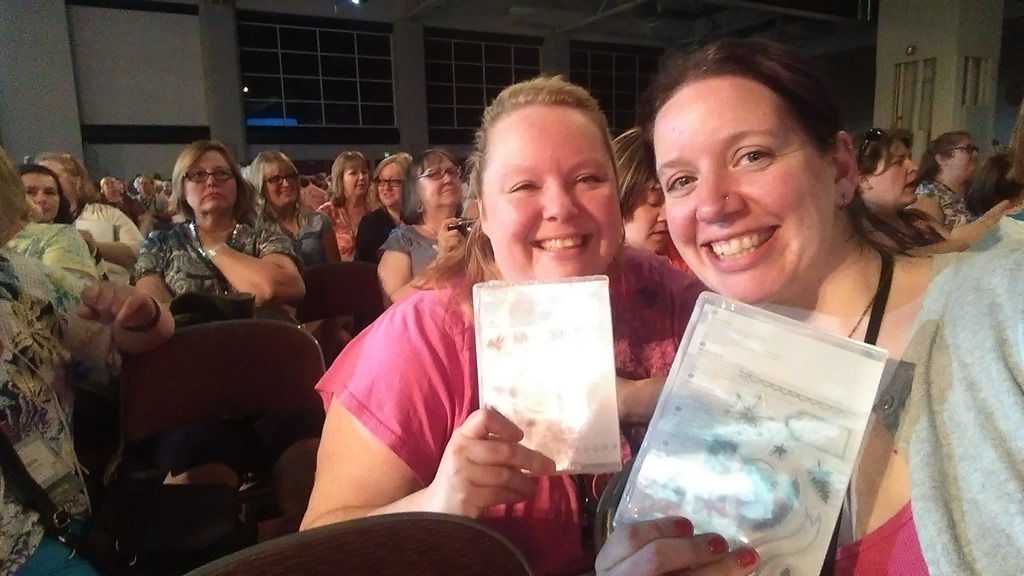
    Of course there was Prize Patrol!  Monica and I won the new Project Life stamp set coming in the Holiday Catalog.

    2015-07-24 18.28.11

    Then on to a workshop demonstration and Make & Takes!2015-07-24 14.32.05

    I totally meant to finish my projects… but I was chatting and getting way to excited about some of the new product I got to play with!

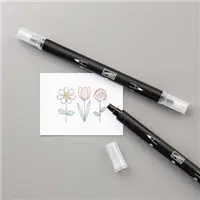
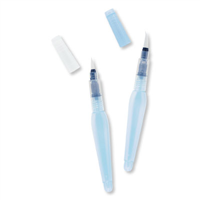
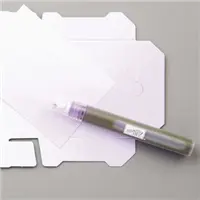
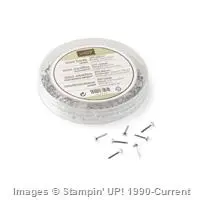
    FINE TIP GLUE!!!!!  With a pin in the cap so that the tip doesn’t get sealed up!

    2015-07-24 14.48.41

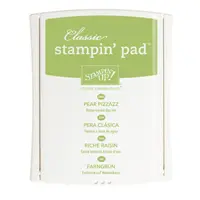
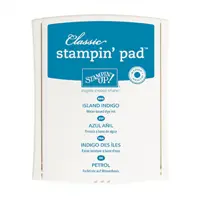
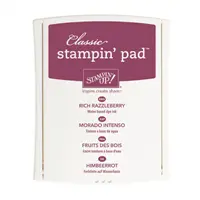
    And new Archival Ink in Basic Black and Basic Grey.

    2015-07-24 14.33.02

    The new ink pad stamps like a dream!  They use the old linen pads and are a new formula but they are AWESOME!  I fell totally in love when I was using it on the make & take… so imagine my excitement when they ended up giving the out to everyone at convention!  Yay!!

    2015-07-24 19.35.36

    As usual, there was lots of swapping

    2015-07-24 10.43.56

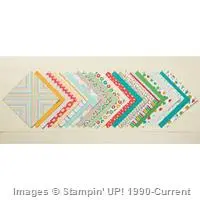
    And as you wandered around the Gathering Place, you could see lots of the new products as samples or to just play with… such as these edgelits (there are 3 in the pack! Trees, sleigh, and cottages)

    2015-07-24 15.01.39

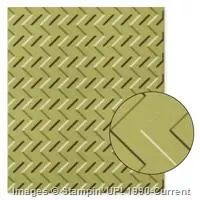
    New embossing folder of birch trees

    2015-07-24 15.03.59

    And window/fireplace scene stamp set and framelit bundles!  There are two bundles… one all about the fireplace

    IMG_0515

    and one all about the window frame and scenery

    IMG_0517

    Then it was time for more classes and stamping presentations

    2015-07-24 14.47.33

    Let me just say this bird set is going to be HUGE this year!

    2015-07-24 19.17.37

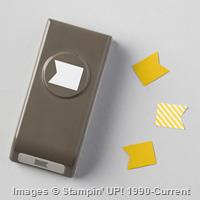
    psst – new punch alert!!

    IMG_0500

    IMG_0555

    psst – another new punch alert!

    IMG_0557

    I even got to walk across the stage for earning the Grand Vacation – the Mediterranean Cruise – which was fun!

    IMG_0508

    And in addition to spoiling us at the event with great places to relax and chat and share with other demonstrators, prizes, and inspiration… for everyone who earned an annual award or had reached a milestone anniversary with the company, we had a little relaxation space that not only had some treats and drinks, but they also gave us this reuseable trash bin filled with lots of goodies!  I didn’t have that stamp set yet either – so super bonus score!

    annual award goodie bag

    Then we had the evening to ourselves so the crew headed to Olive Garden before heading back to the hotel for a dip in the Hot Tub and day 2 of “happy hour”.  I also got a chance to catch up with some other great friends, especially my great friend Sarah Naber

    2015-07-24 23.44.29

    I went to bed “early” as it was only 1am… not too bad for me on an event night! Smile

    Stampin Up Convention Day 3

    With the sun rising on Day 3, it was my last day in Salt Lake City.  The main convention event only went until lunch time, so there was a lot to get through in a little bit of time!

    2015-07-25 07.23.07

    … I always love having this view from my room!  Its my happy place!…

    I spent some time in the morning checking out the display boards… they were entirely filled with cards brought by other demonstrators this year and they were fantastic!  Like how stinkin’ adorable is this bird?

    IMG_0723

    *** See all the display board cards in pictures on my Facebook Page here ***

    IMG_0725

    Rich Judkins, the President of Stampin’ Up, came out and shared a great story on perspective and talked about how the company was doing both from a numbers perspective and from a morale perspective.  It was honest, and real… and great example of him sharing that the executive team really does hear how demonstrators are feeling, what we are concerned about, and CARES about us!  There is a lot of change this year and we all know it is tough, but they are trying to make things better for demonstrators and keep improving as they hear our feedback.  It was seriously great and reassuring to hear!

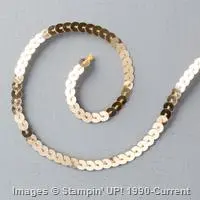
    We had more stamping demonstrations… so more cute ideas!

    2015-07-25 13.36.31

    and new product!  Must have this snowflake stamp set/punch bundle and those wood snowflakes!!

    2015-07-25 14.07.13

    and more cute stuff!

    2015-07-25 14.17.42

    Double wide pillow box using the new pillow box thinlit!

    IMG_0743

    And of course, more prize patrol!

    2015-07-25 13.39.32-1

    Plus something for everyone!  Hand painted holiday paper for all of us… thanks, Stampin’ Up!

    2015-07-25 14.28.50

    And with that, convention was over!  I had the opportunity to attend some additional leaders training in the afternoon.  I got to chat with Sara (seriously the most down to earth CEO there is!)

    2015-07-25 15.06.52

    And for those of you who have seen Brian Pilling bring Diet Coke to the presenters on stage at events before… he does it in real life too!  Isn’t he sweet for taking care of everyone!

    IMG_0787

    The training was a great way to review what I learned and think about how to make improvements to my business but also how to use it to help my team as well!  So much to get implementing for all my crew as the year goes on!

    2015-07-25 16.20.00

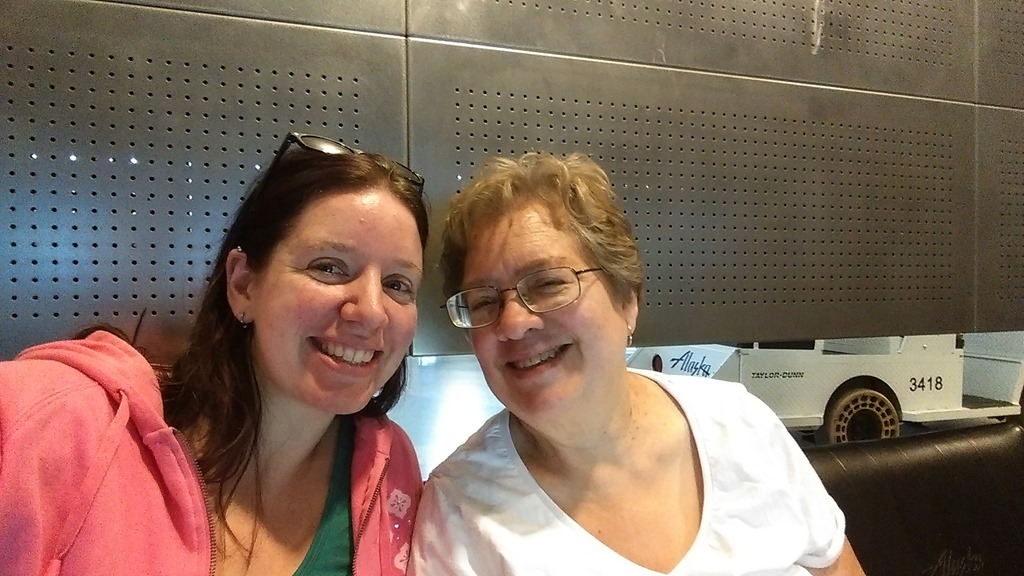
    Fun Fact!  My Mom and I have attended every Convention together since I joined and 2 leaderships.  So this was our 7th Convention together… .how cool is that?!?

    2015-07-25 14.47.19-2

    We celebrated the end of a great weekend with some Strawberry Shortcake before heading to the airport to say good-bye once again to Salt Lake City and back to our amazing, supportive families!

    2015-07-25 18.18.34

    So, I hope you enjoyed my recap.  Wish you were there (unless you were there – in which case, glad to celebrate with you!)  I’m already looking forward to the new On Stage events coming up starting in November.  I’d love to have you go with me.  All you have to do is let me know you want to go, snag the great deal that is the starter kit so you can become a member of my Fun n’ Crafty Stampers and then register!  We have an awesome group and you will have a blast!

    Give it a try!  Join the Fun and pick out your Starter Kit here

    2015-07-23 09.28.28

    Until next time… keep it fun and happy stamping!

    IMG_0783


    NWstamper signature_thumb[9]

    order online button for sig 3_thumb[4]

  • Stampin’ Up Convention 2015–Day 1

    Stampin’ Up Convention 2015–Day 1

    ——————————-

    double punchesWhile I’m away you can play and earn free stamps twice as fast!
    Get double punches on your Northwest Stamper Rewards card all week
    when you shop with me online or email me.

    ——————————

    What a busy but great first day here at Convention!  It was all about NEW and the NEW Holiday Catalog!  From the very first session as they revealed the upcoming catalog to fun throughout the day as we learned, stamped, and got new ideas based on some the great stuff coming out in September.

    So here is your daily recap!

    We started out by checking out the Convention Center and getting the CUTE convention bag this year.  I think it is my favorite yet!

    2015-07-23 08.45.48

    As we were waiting in line, we spotted one of the staff in the blinky sparkly outfits which meant if we said hello and played his game (name the cardstock color) we won prizes!

    2015-07-23 09.24.36

    Of course we rocked it… most of the gals got logo travel purses/badge holders – which they were really excited about, and a few of us got ribbon spools. WINNING!

    2015-07-23 09.28.28

    And btw – doesn’t everyone look great in our team shirts?  This is our Fun n’ Crafty  crew representing at Convention! The bright blue clumps of people made it SOOO much easier to find each other Smile

    2015-07-23 17.19.18-2

    Finally we were let in and we got to see main stage.  Seriously people, the décor is so fab this year!

    2015-07-23 11.46.35

    They started out with the “Daily Share” which essentially was a 2 hour long new holiday catalog reveal party led by Bonnie Farley, Brian Piling, and Carrie Cudney

    IMG_0371

    I will say though, one of my favorite little clips was of Brian aka “Quick and Easy” trying to go out on the streets with a Quick and Easy Card Project on a cart randomly asking people if they wanted to make a quick project with him.  I’ll say, that man has way more guts than me! Smile

    2015-07-23 10.29.35

    2015-07-23 10.31.34

    Different this year was that most of the catalog reveal was showing a completed project or two as someone talked about their favorite new item in the catalog or how they would share the catalog with others.  So, mostly, lots of photo ops of cute new stuff.

    Like new stamps, red pom pom trim, new festive buttons…. 

    2015-07-23 10.42.40-2

    New specialty designer papers, new word thinlit dies!!!

    IMG_0376

    And even more dies!  Many of the new stamp sets in the catalog now have coordinating dies so you can easily cut out and create neat layered projects.

    There is also a new Precision Plate for the Big Shot that they say will help you eliminate the need for wax paper with your intricate dies.  GREAT concept!  I get to play with it today so I’ll keep you posted on what I discover after playing with it.

    2015-07-23 10.55.16

    Who loves this die?!

    2015-07-23 10.55.32

    And finally we got our copy of the holiday catalog too!

    2015-07-23 13.56.52

    Here is a better picture, with the more important part in focus Winking smile

    2015-07-23 14.07.58-2

    Then it was time to head to lunch, classes, and the Gathering Place where there were lots of samples and all the products in the Holiday Catalog on display for us to check out.

    Kicked off the party with the Interim CEO Sara Douglas

    2015-07-23 12.07.33

    Even the décor for some of the Make & Takes put you in the festive spirit

    2015-07-23 16.10.49

    PSST – Those deer are from some of our upcoming designer paper!  Love the vintage!

    2015-07-23 15.36.43

    More vintage sneak peeks with this cute tag we made – check out the striped satin ribbon, the santa cut out from patterned paper, and the Pointsettia button!

    2015-07-23 16.06.52

    Then it was back to the Gathering Place for more relaxing and checking out boards.

    IMG_0394

    This is the stamp set and matching framelit that I HAVE TO HAVE!  This WILL be coming to my house in August when I can preorder it. Smile 

    2015-07-23 16.21.32

    New kits were out…totally doing these shaker cards as a class!

    IMG_0397

    And lots more:

    IMG_0402

    foo

    IMG_0413

    foo

    IMG_0430

    foo

    IMG_0436

    Finally it was time to grab some dinner and then get gussied up for Awards Night and the Roaring 20’s after party.  Monica Van Tassel from our Fun n’ Crafty group was extra crafty and MADE us all feather headbands to wear.  How fun is that??

    2015-07-23 18.50.47

    They kicked off the party with a neat dance show by some local dancers

    IMG_0446

    Then Sara got things started recognizing so many demonstrators for their outstanding achievement this last year.  Let me just say, a lot of people had AMAZING years!

    IMG_0459

    Then it was time to party!

    2015-07-23 23.31.07

    2015-07-23 23.00.35

    They had food, a live band, and event dance lessons.  Of course, Mom, Beatie, and I had to arrive in style Smile

    IMG_0465

    IMG_0467

    IMG_0472

    IMG_0474

    Then we headed back to our hotel where Liz had brought some wine so we had late night happy hour in her room.  So, more fun socializing and discussing our have-to-haves from the upcoming catalog and preorder!

    2015-07-23 22.44.36

    2015-07-23 22.08.52

    2015-07-23 22.09.04

    All in all, a great day!  Make all the better by the wonderful people I was with!  Now off to get going for Day 2! 

    I’ll see you over on Facebook for more real time updates throughout the day!

    NWstamper signature_thumb[9]

    order online button for sig 3_thumb[4]

  • It’s the Stampin’ Up Convention Arrival Day!  (RECAP)

    It’s the Stampin’ Up Convention Arrival Day! (RECAP)

    ——————————-

    While I’m away you can play and earn free stamps twice as fast! 
    Get double punches on your Northwest Stamper Rewards card all week! 

    ——————————

    Oh my everyone!  Yesterday was the big arrival day for myself, almost all of the Fun n’ Crafty stampers group, and a few friends who would be hanging out with us. 

    DSCF5174

    Mom and I got up way too early for my liking to head to the airport Smile  But we were happy to be on our way!

    IMAG9236

    As expected, I didn’t have my swaps anywhere near ready to go, so I through amazing luck, I had the only open middle seat on the plane next to me!  Which meant it was time to set up a swap making factory!

    IMAG9237

    IMAG9238

    Most of our group arrived in the morning, so we hung out in our hotel room (or at least the one hotel room we could check into early) and worked on finishing swaps. 

    And can I say, I LOVE my stamping team and friends and they TOTALLY saved my bacon!  Everyone was so nice and offered to help assemble my swaps that I was silly in thinking I could pull together in a reasonable amount of time. Smile  <3 Them!

    IMAG9239

    After a yummy lunch, we boarded the bus for the pilgramige to the Stampin’ Up home office for a tour and to say thank you to the awesome staff hanging out there, working hard to keep everything running smoothly!

    DSCF5318

    Of course Mom and I had to get our picture taken in the atrium….

    IMAG9243

    We explored the Idea room and their fun conference room that is wall of whiteboard.  I had to leave my graffiti while I was there

    IMAG9245

    Then checking out the distribution center where they were packaging and shipping orders while we watched!

    DSCF5207

    And of course we had to say hello and an extra big thank you to the demonstrator support team… who were answering calls while we walked.

    IMAG9259

    And they had cute card samples on display too!  (PS – I have more samples posted over on my Facebook page here)

    IMAG9254

    These two were designed by my fab friend Michelle Suit!  Isn’t she talented?

    IMAG9255

    There were even new projects in the Legacy Museum too!

    IMAG9261

    Finally, in between bouts of crazy rain, we ran out to the rock for our obligatory rock picture!

    DSCF5314

    (L-R:  Monica Van Tassell, Kathy Thisted, Carla Branton, me – Jennifer Blomquist, Nicole Flournoy, and Beatie Bucy)

    Afterwards, I scrambled to finish getting goodie bags ready for the crew before we headed out to dinner.

    IMAG9266

    Inside each bag we had

    • A team t-shirt (saying on the front and our team name on the back!) made by my friend Tamra Davis for us.
    • A name bag tag
    • Treats that were supposed to have a cute poem with them but I wasn’t that on top of things… but it went something like this:
      ”When convention feels like a circus (animal crackers)
      and you just need to chill (wintergreen life savers)
      get smart (smarties)
      Stay smooth and have fun (fun size milky way candy bar)” Smile
      IMAG9285

    We walked to dinner at Red Rock Brewery and though we didn’t have all one table, we still had fun and swapped for some cute cards!

    IMAG9273

    IMAG9280

    So, now it is time to get ready for Day 1 – lots more swapping, bags, prize patrol, and lots and lots of fun!  Make sure you are watching my Facebook page for updates throughout the day!

    IMAG9287

    NWstamper signature_thumb[9]

    order online button for sig 3_thumb[4]

  • Lace & Flowers Card with You’ve Got This

    Lace & Flowers Card with You’ve Got This

    Today is the big day!  I fly to Salt Lake City with my Mom for our 7th Stampin’ Up convention! 

    2015-07-22 06.02.53

    It is always a blast (which is why we’ve gone every year!) and I’m glad to be able to make this year – the last Convention of it’s kind – and learn more about what the new OnStage events will be like in the future.  Plus the fact that I CAN’T WAIT to see the new upcoming Holiday Catalog while I’m there! Smile  (If you are a demo, don’t forget, you can watch the general sessions live streaming and see the catalog online tomorrow!)

    But in the meantime, while I’m taking pictures and reconnecting with Fun n’ Crafty team members from across the US today, I wanted to leave you with a card idea to keep you going.

    This card is one that I saw by Sandi MacIver and just loved the clean bold lines with the Mint Macaron and Basic Black cardstock… offset by the delicate touch of the new In Color Dotted Lace trim. 

    No joke – when I saw the trim was the new In Color ribbon, I was totally bummed.  But now, not even 2 months into the catalog, I have run through 3 full spools of ribbon! 

    This is just stamping with Memento Black ink onto Whisper White cardstock for your flower and then color it in with a blender pen and So Saffron ink.

    Layer your Basic Black cardstock onto Mint Macaron and then tie around the front with the matching Mint Macaron lace ribbon.  It’s not adhered at all, just tied tightly.

    Alright, now off to frolic around Salt Lake City!  I’ll be back with more fun and inspiration soon!

    PS – You’ve “liked” my Facebook Page, right?  Northwest Stamper on Facebook  Watch there for the action as it happens. Smile 

    NWstamper signature_thumb[9]

    order online button for sig 3_thumb[4]


    Project Supplies Used:

  • Final Stampin’ Up Convention Prep with a DOUBLE Rewards Points week and New Weekly Deals

    Its an exciting week around here!  Tomorrow I head to Salt Lake City for the big Stampin’ Up convention and I can’t wait!  This is the last year that they are holding this style of Convention event (they are changing to a new global event starting in November) so I’m glad I get to go be a part of the summer convention send off.

    Of course, like usual, I’m still scrambling to pack and work on my swaps…

    swap making 2

    I was working last night while watching tv… and I’ve had a station set up to work while my kids were playing!swap making 1

    Each year I think I’ve designed an “easy” swap to mass produce and then I start working and realize each swap requires a ton of punching and glueing Smile  They aren’t hard to make just time consuming when you are trying to make 60+.  I expect I’ll be still assembling on the plane tomorrow, but that is half the fun, right? ha ha ha

    In the meantime, for those of you not joining me in Salt Lake City, I’ll be posting realtime updates as long as my phone holds up over on my Facebook page… and Facebook had gotten a little crabby with how they show posts, so you may have to start actually visiting my page to make sure you catch them all because FB tends to stop showing posts from pages you like if they post too often or the “wrong” type of posts (like if I post too many pictures, they stop showing all of them on your walls).  It is silly but I’ll keep posting anyway!

    I’ll also post up summaries late each night here on the blog.


    CONVENTION SPECIAL! 

    Double Reward Punches = Free Stamps in half the time!
    July 21 – 26, 2015

    While I’m away, I’m offering double punches all week long!  For every $40 in product you purchase get not 1 but 2 punches on your Northwest Stamper Rewards punch card.  So $40 = 2 punches, $80=4 punches and so on. 

    Once you have 10 punches on your card, you can pick out any stamp set in the catalog or online to receive free from me!  Sweet, right?


    Get your punch card here to track your points

    Rewards Program details:

    • Each time you make a purchase, you will want to track it on the punch card and note the date of your order
    • Once you have filled all 10 spots, email me to let me know which stamp set you want along with the dates of your orders to confirm punch card completion.
    • NOTE – you are responsible for tracking your own orders
    • Punches are good for 2 years from purchase date.


    New Weekly Deals are here too!

    11707780_10204985608909028_477075471889294725_n


    View the weekly deals online here

    So, grab some great deals and sit back and get ready for a few days of awesome inspiration and fun with all the excitement from Convention!

    NWstamper signature_thumb[9]

    order online button for sig 3_thumb[4]

  • A Watercoloring CASE of You’ve Got This

    I’ll be the first to admit that sometimes you want to make a cute card but have NO IDEA what to create.  So what’s person to do?  Why hit up Pinterest and blogs… and if you are a Stampin’ Up demonstrator, check out the sample projects Stampin’ Up has created and shared for us to use! Smile  Today’s card was one that I saw during the new catalog preorder and I LOVED the use of the new lace trim that I had to make it myself.  Isn’t it cute?

    Tips for making this card:

    • Don’t be afraid to grab that watercolor paper!  If you haven’t ever ordered some, you would not be disappointed if you picked some up for cards like this (and so many others!).  The awesome thing about watercolor paper is that you can keep adding color or going back over an area to get it right and your paper will stay flat, not pill up, and take the color awesomely!
    • When watercoloring you will want to make sure you have:  Stazon black ink (for stamping the outline image), an Aqua Painter (for coloring in your image using everyday water – got to love that they are refillable!), watercolor paper, and your favorite dye-based ink pad (like any of the Stampin’ Up classic pads).
    • I colored with Mint Macaron for the flower head, Delightful Dijon, and Old Olive for the stem.
    • And btw – isn’t this You’ve Got This stamp set perfect for watercoloring??
    • The lace trim is wide… like 1” wide, but that doesn’t mean you have to use it full width!  Try tucking it under a layer and just peeking out for a cute effect.
    • Add some subtle sparkle with gold or silver baker’s twine and then finish with a pop of color with the new In Color Blossoms.

    Well, today is the day that some of my Fun n’ Crafty team members are coming over as we stamp, chat, and get our swaps all finished up for convention next week!  I’m so excited and can’t wait to hit Salt Lake City next week to say hello to so many friends I haven’t seen in a while and get to share the awesome experience of convention for the first time with many in my group.  It will be a blast!

    Don’t forget to follow me over on Facebook for real time posts and then stop by the blog each morning as I share a recap of the prior day. Smile 

    Visit me on Facebook

    And if you want to take advantage of the fabulous starter kit deal (get $125 in anything you want for only $99 plus free shipping!) you automatically be a part of my Fun n’ Crafty group – be in on the sharing I’ll be doing on our team Facebook group, PLUS have access to LIVE STREAMING from convention at all the main stage presentations!  So if you can’t be there in person, you can be there virtually for part of it for free. Smile  

    our convention 2014 crew!  Our group is over 50 people strong though and all over the US!  Come join our community – we’d love to have you!  Join us today

    NWstamper signature_thumb[9]

    order online button for sig 3_thumb[4]
    Project Supplies Used:

  • 2 Fun Techniques+1 Great Stamp Set = A Happy Hodgepodge Card

    2 Fun Techniques+1 Great Stamp Set = A Happy Hodgepodge Card

    I know I shared a card yesterday using the Lovely Amazing You stamp set for Walkthrough Wednesday (you can see the card and video instructions here)… so I hope you don’t mind me sharing another idea for you using that same stamp set!  You get the added bonus of a few fun techniques with this one too, so it is just all kinds of happy!

    This card is extra fun because it is actually a really simple card to make (minus the fussy cutting of the feathers… but that isn’t too bad) and you get to do a lot of playing with it!

    Tips for making this card:

    • First lets talk about the green striped paper.  Notice that it is darker on the bottom than the top? Well you do now! Smile  That is because it is embossed paper that is inked!  You can either stamp an image with versamark ink and then heat emboss with clear embossing powder…. or do it the easy way and get pre-embossed paper! This was the Irresistably Yours paper from Sale-a-Bration 2015, but you can do the same thing using the new Color me Irresistable paper in the current catalog!
      BONUS!  The Color Me Irresistable paper is on sale as part of the weekly deals this week!  So get it at 30% off… I ordered mine yesterday so don’t forget to get yours!
      color me irresistible
    • Once you have a clear embossed image, just sponge over with your favorite color of ink.  In this case, we used those big yellow sponges (these ones) and started sponging at the bottom for the darkest color and kept sponging upward so that as the ink started to run out on the sponge, it got lighter on our paper.
    • See that cool cheveron in the background?  Nope – not a stamp!  It’s an embossing folder!  Use sponge daubers to ink spots on an embossing folder (the raised side) and then spritz with water before using that as a stamp onto watercolor paper.  You get awesomely cool colors and designs and they are different everytime.
    • And the 2-1.2” Circle punch makes a great frame to show off your cool embossing folder stamped paper and to highlight those great sentiments from the Lovely Amazing You stamp set.
    • Finally, these feathers are the same ones we used yesterday and come from the Lovely Amazing You stamp set.  I stamped first in Island Indigo on a piece of scrap paper and then stamped AGAIN on more scrap paper to create the two colors of feathers.
    • Yes, you have to cut them out by hand… but take a deep breath and enjoy the zen relaxation that comes over you as you focus on the paper and the art of snipping. Smile
    • Add a little bow of silver baker’s twine (adhered with a glue dot) and you are good to go!

    So if you missed the card yesterday, this is another idea using the same stamp set:

    Check out the blog post and video tutorial here

    And like I mentioned yesterday, this super awesome stamp set is only guaranteed to be available for a little less than a month (through August 10th) so consider getting your copy – plus maybe the fun emboss resist paper, Color Me Irresistible from the weekly deals.

    So, I hope you enjoyed today’s card.  I promise to do a video soon showing how I did that stamping with an embossing folder technique because it is just too awesome not to share!

    Now I’m off to work on more swaps for Convention!  Make sure you are following me over on my Facebook page to get the realtime, as they happen, photos and news postings of all the happenings in Salt Lake!

    NWstamper signature_thumb[9]

    order online button for sig 3_thumb[4]


    Project Supplies Used:

  • Walkthrough Wednesday–A Clean and Simple Card of Thanks with Lovely Amazing You

    Walkthrough Wednesday–A Clean and Simple Card of Thanks with Lovely Amazing You

    So, I dream of the day that I’m going to be so organized and pulled together that I have a long list of my upcoming Walkthrough Wednesday topics when I sit down to do my video… I’m going to know all my class projects for the following few months… and my blog posts – oh they will be written prior to 11pm the night before. Smile  But that is not my life these days!  Good thing I love what I do, right?!

    Well, the card I have for you is one of those “moments of inspiration” cards where I knew I wanted to have something to share for today, but I had no idea what to do.  I sat and stared at my desk…my stamps… my punches until finally an inkling of inspiration struck and suddenly this card came flowing from my brain.

    I love how it turned out and I hope you enjoy it too!  In fact, I’ve decided I’m going to use this as one of my group swap cards for convention next week!  I’ll have some extras as well for general swapping so if you are going to be in SLC, say hello and maybe we can swap!

    Tips for making this card:

    • Do you LOVE this Lovely Amazing You stamp set yet?  It is only guaranteed to be available through August 10th (it is one of the stamp sets that was released monthly when they were testing out photopolymer stamp sets.)  The font is fabulous, the sayings are great, and isn’t that feather awesome!?
      lovely amazing you
    • When stamping the feather, I stamped some full strength and some “stamped off”.  When “stamping off” with the photopolymer stamp sets, I find that you need to fully in the stamp and then stamp first on scrap paper and THEN onto your card layer.  If you try stamping an image that is partially off the page, not enough ink comes off the stamp in the areas that were past the edge of your card layer, so that when you go to stamp the second generation image, you will get it lighter in spots and full strength in other spots… no good!
    • Have fun with your punches! Punch out some of the Bitty Banner shapes in fun colors (this is Mint Macaron, Smoky Slate, and Wisteria Wonder).  Then mix in a longer banner cut to just narrower than 5/8” that you can trim the ends by sliding the paper strip into the punch from the BOTTOM of the punch (instead of using the usual slit in the side – have most of the paper out of the punch and just tuck the end inside the punch through the hole in the bottom.)  If this makes no sense, check it out on the video! Smile
    • Make your own custom accent by running a mini brad through the middle of sequin like this gold sequin from the Sequin Trim.
    • The sentiments from this stamp set punch out great with the 1-3/4” circle punch (seen here) and the 2” circle punch (used for the Wisteria Wonder layer).

    See all these tips in action and more with the video:

     Note – if you are reading this blog post from email, click here to view the video.

    As I mentioned, I’m getting ready to head to Salt Lake City next week for the Stampin’ Up convention.  It is always an amazing time and I’m grateful to be going with a group of my Fun n’ Crafty Stampers group and will have the chance to say hi to many of my fabulous friends from across the US and Canada!

    If you aren’t going to be joining me at this event, they just opened registration for the next NEW demonstrator event called On Stage.  They have a 3 day event (in Brussels this time) with local 1 day events the last day so we can all hear all the announcements and product and catalog reveals!  It is coming up in November, and I’d love to have you join me!

    Not a demonstrator yet? Winking smile  There is still plenty of time and I’d love to have you be a part of the Fun n’ Crafty stampers and join us at one of the events!  Email me for more details at jennifer@nwstamper.com.

    And in the meantime, watch for more fun Convention updates next week!

    NWstamper signature_thumb[9]

    order online button for sig 3_thumb[4]


    Project Supplies Used:

  • New Weekly Deals & Heads up about the Watercolor Wishes Card Kit!

    New Weekly Deals & Heads up about the Watercolor Wishes Card Kit!

    As I head into the studio to work on tomorrow’s Walkthrough Wednesday video (cutting it a little close this week Smile) I wanted to make sure you had the latest on the newest Weekly Deals as well as I just heard word about the Watercolor Wishes card kit too!

    Watercolor Wishes Card kit – They are running low!

    If you are like me and super excited to get your hands on the new Watercolor Wishes card kit, don’t delay on placing your order!  They just told us this morning that this kit has been SOOOO popular that they expect to sell through their original 13 week forecast of kits in just 2 weeks.  So they before the week is out, they will likely go on backorder.  I’m ordering some today, let me know if you need any!

    The kits include:

    • a cute stamp set
    • pre-printed card bases for 20 cards
    • all the die cut accents and embellishments for the cards
    • extra embellishments and washi tape
    • ink spots
    • clear block
    • Stampin’ Dimensionals
    • and envelopes!

    Get your Watercolor Wishes All-Inclusive Kit here

    And while you are shopping for those, don’t forget to check out the new weekly deals too!

    11745408_10204940386418494_633147514955738370_n

    I love the paper on the weekly deals this week and the twine and washi are favorites too!

    See the weekly deals online here 

    Ok, off to start recording!  If you have any requests or feedback on what YOU would like to see on the WALKTHROUGH WEDNESDAYs, I’d love to hear from you!


    NWstamper signature_thumb[9]

    order online button for sig 3_thumb[4]

  • A Color Blocking LOVE Card with Layered Letters Alphabet Stamps

    A Color Blocking LOVE Card with Layered Letters Alphabet Stamps

    I don’t know about you, but I’ve always seemed to have at least one alphabet stamp set lying around my craft room…like for years, the stamp set may alternate but I’ve always had at LEAST one set.  I always told myself they would be great for scrapbooking or for custom words on cards…and I’ve used them once or twice, but most of the time I glossed right past them in favor of a sentiment from other stamp sets.  So, when Layered Letters came out and I loved the font, I knew to be skeptical if I would actually use it.

    But turns out, I have been having a blast with it and get this – have ACTUALLY MADE CARDS with it! Smile  I know, crazy, right?  Here is one of the cards I created:

    Tips for making this card:

    • One of the cool things about the Layered Letters stamp set is that it comes with an oval stamp and a rectangle stamp that perfectly fit behind all the letters.
      image
    • Letters don’t have to be in a line, stack them together to make a block!
    • Use different colors from the same color family (these are the 2015-2017 Stampin’ Up In Colors) for the stamped backgrounds.
    • Compliment it even more by creating a background for your card using the same colors in blocks;, just switch up the positions.
    • Dimensions for the card background:
      – Card base – 4 1/4” x 8 1/2” folded in half
      – Color blocks – 2”x2” squares in 4 colors
    • Add a touch of flair by adding a couple banners, punched perfectly by using the Banner Triple Punch!  Make a 1” banner and a 1 1/2” banner and layer the little one centered over the larger banner.

    What do you think?  Fun alphabet or what? Hopefully this gives you some ideas for using your alphabets or just seeing how this one is full of possibilities!

    NWstamper signature_thumb[9]

    order online button for sig 3_thumb[4]


    Project Supplies Used: