Just stopping in to share, I just heard this morning that Stampin’ Up has added MORE items to the Year-End Clearance Sale, including some great deals on some retired favorites!
The Christmas countdown has begun! Use this Curvy Keepsake Christmas light treat bag for a fun little giftable or table setting for all those last minute gifts for co-workers, family, and friends. I love how fast it comes together so it is perfect for whipping up when you need something quick.
Tips for making this project:
The Curvy Keepsake die makes the perfect bulb shape! Use the Curvy Keepsake die, not for a little round box but for the perfect shape of the Christmas light bulbs. Cut two of the box dies shapes only cut off the shorter/fatter side of the die and keep the long pointed die.
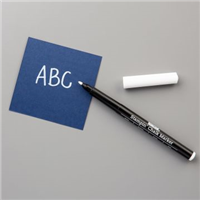
Make it look curved with sponging and a White Chalk Marker – Sponging the edges of the green bulb (I used Cucumber Crush cardstock and ink) helps give it some dimension. Then add a bit of “shine” or reflection by coloring with the White Chalk Marker to one side of the bulb.
Create a whole strand with different colors – I made this in green, but pick your own favorite colors or create a complete strand by alternating Real Red, Cucumber Crush, Pacific Point, and Daffodil Delight. Hang them on a piece of ribbon for a holiday banner to use every year!
Complete the look by scoring the “screw” end – Grab your favorite scalloped edge punch (I used the Scallop Square punch) and tuck in your cardstock to create the screw end. (See the video below for how to do this) Then use your score board or Stampin’ Trimmer to create scored lines to make it look even closer to the real thing!
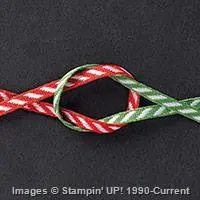
Finish it off with festive ribbon – Keep it together by tying a bow using some festive ribbon. Plus, this Garden Green striped ribbon (in a bundle with the Real Red striped ribbon) is also on sale in the Year-End sale! So you can save money at the same time.
Check out this video so you can try it yourself!
(reading this in email? click here to view the video)
Last minute gifts available! Grab a gift certificate today!
Can you believe we are now less than a week out from Christmas?! Yesterday was my birthday and that always means we are getting into the home stretch! We’ve had my daughter’s birthday, school has just finished up for 2015, and I got to have lots of fun relaxing for my birthday. Now things actually get quiet around here until the evening of Christmas Eve arrives and we begin the excitement for Christmas.
And by the way, thank you for all the amazing notes of birthday wishes yesterday! I spent the day relaxing and picking and printing photos for my December Daily Project Life album. (Which I plan to start working on today! I can never seem to do the plan my pages ahead thing) But I was surrounded by family as we went out to dinner at California Pizza Kitchen.
And seriously, the surprise sundae they brought me was sooooooo good! Vanilla Ice Cream, just a little bit of Chocolate Sauce, whipped cream, candied nuts, and a cherry. Yum!
And then after the kiddos were in bed, my parents, the hubby, and I went off to see the new Star Wars! (Don’t worry, the other grandma was at home with the kiddos )
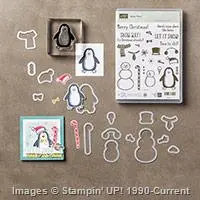
Now, I thought I’d share a card with you that we made in Stamp Club this month that just makes me smile. It was inspired by an idea by Patty Bennett with the two penguins peeking out but I put my own twist on the card! What do you think?
Tips for making this card:
The Snow Friends Bundle is like paper dolls! Have fun dressing them up! I love the Snow Friends stamp set because it is filled with Snowmen and Penguins and all the accessories you could want. You pick out your animals and their accessories and then just have fun dressing them up. It is like being a kid again and playing with paper dolls. In this case, I made a Mr and Mrs Penguin to spread the holiday cheer.
Yes! There is a framelit for that! The Snow Play framelits are awesome because they have a framelit for EVERY shape in the set. So no need to hand cut a thing! Just stamp the different elements you want and then you can run them through your Big Shot at the same time.
Use circle punches to create windows for your images – We used the 2” circle punch to create windows for the Penguins. Put together your penguins FIRST, then punch two holes into your designer paper for windows. Glue them to the designer paper and trim off any parts that are hanging out.
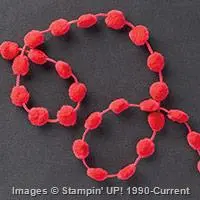
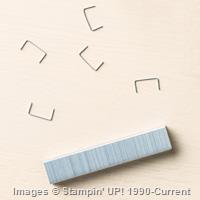
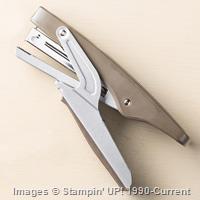
Add festive cheer with holiday ribbons – I used two fun ribbons, the gold 1/8” ribbon and the Real Red pom pom trim (ON SALE with the Year-End clearance sale!) I wrapped and adhered the gold ribbon to the front panel of the card. Then I stapled the red pom pom trim to the card front using the mini stapler from Stampin’ Up. It is just the perfect size for reaching wherever I need on my cards.
Give it layers and dimensions for the final touch – I layered my penguin/designer paper with Stampin’ Dimensionals onto a piece of Real Red cardstock to make the penguins pop, then glued it all flat onto a Smoky Slate card base.
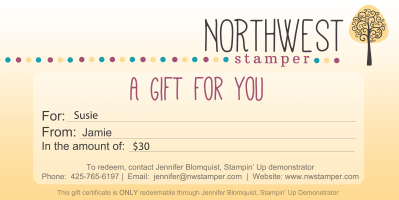
There is still time for a last minute gift! Everyone loves a Gift Certificate
Don’t forget to tell your friends and family to email me a jennifer@nwstamper.com or shop on my Gift Certificates page to get you the perfect gift or stocking stuffer! Or pick one up yourself as the perfect gift for that crafty friend… or just for Santa to put under the tree for you.
Use Hostess Code BEFX37ZS at check out to get a special thank you from me!
I really did have grand plans this year to get all of my Christmas cards out early. After years of being terrible about NOT sending out cards at all, last year I sent out around 70 holiday cards and it felt great to be putting a little cheer out through the mail. So, I was all gung ho that I was going to be all organized this year and get them in the mail at the beginning of December.
But then suddenly, I turned around and here it is December 16th and they have yet to hit the post office! Anyone with me? How many times do we have grand plans but one reason or another keeps us from making it happen? Well, I’m here to say, it is never too late! In this case, there is still time to make and send Christmas cards (or send the cards you have!) Today’s share is a simple card idea that you can pull together quickly for those people who need some holiday cheer from you.
I actually made this card as a swap for the November OnStage Local regional event. I decided the day that we were leaving that I wanted to make swaps after all and so I pulled these together. They are clean and simple, and easy to pull together!
Tips for making this card:
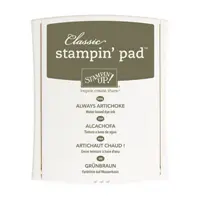
Keep it simple and cost effective by choosing ONE color plus white – I picked Always Artichoke because I had an almost full pack on my desk and thought the muted color would be good for this design. Use that color for your card base and for your smallest layer. Then just use Whisper White cardstock as your matting layer to create a nice border around your stamped images.
Use heat embossing for an easy-to-create WOW – I kept in the deep green theme by stamping a tree and my sentiment in Mossy Meadow ink, but added layers and dimension by stamping one tree in Versamark ink and then covering it in White embossing powder. Heat set for a snowy tree that really catches your eye.
Make your embossed images more interesting with sponging – I sponged over my white embossed tree with Always Artichoke ink to give the tree some depth. This is a great technique to use on any project you are heat embossing though. Just match the ink color with the color of the underlying cardstock for a rich addition to your image. You can also make your central cardstock have more dimension with the same trick only by sponging the edges of the cardstock with the same color ink.
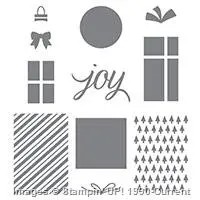
Try out different size banners! – I had left over Always Artichoke cardstock strips after cutting for the smaller piece on this card. So I decided to use them by cutting them in half and stamping my sentiment (the Joy from the Your Presents stamp set). I normally do longer and skinnier banners, but this smaller size was just right for this card.
Make banners more easily with the Banner Triple Punch – The best part about adding banners is that I don’t have to try hard to make the ends look even and nice thanks to the Banner Triple Punch (I still want to call it the triple banner punch!) Even if your piece is small, you can slide it in to this punch and with a press, you have perfect banner ends! Easy Peasy!
So, if you still have Christmas cards to make, you still have time!
And if you need to order some extra supplies, you still have time for that too! If you are on the west coast, orders typically come in about 2-3 days. If you are on the east coast… well, orders will arrive before Christmas if you order by tomorrow, so you can still make “thinking of you at Christmas” cards. Have questions or need help? I’m here for you! Email me at jennifer@nwstamper.com
Use Hostess Code BEFX37ZS at check out to get a special thank you from me!
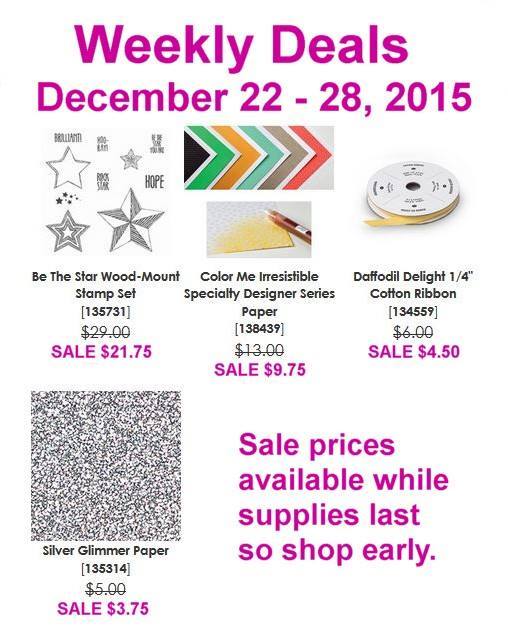
Happy Tuesday! Today new weekly deals are out and so I wanted to not only share the new deals with you, but also share some ideas for you as well! I hope you find some fun inspiration!
Also, before we get into the weekly deals, just a reminder that Christmas is coming up quick! TIP: If you are ordering Christmas gifts, you’ll want to have your orders in by THURSDAY Dec 17th! You can get your shopping done here. Or, get the perfect gift of a shopping spree with a gift certificate! I make it easy for you to get your gift certificate in as little as 24 hrs and they can have fun shopping the sales or even the new catalog in January and earn free Sale-a-Bration item to boot!
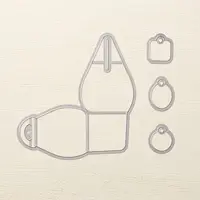
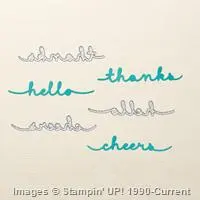
Don’t you love the idea of folding over the long stem part of the die to make a cute loop for making tags and banners? I thought that was just such a clever idea!
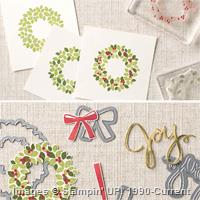
While I have some friends who have finished up all their holiday crafting and are so ready to move on from Christmas stamping and head into spring; the holiday bug has gotten to me and I am so in the mood to create for Christmas! So, in case you are too… I’m going to be sharing more holiday ideas including this Christmas card we made recently in a class using the lovely Wonderous Wreath stamp set!
I had to play with a few of my favorite sparkle and shine papers and loved pulling out this this classic stamp set that looks so great cut out with the coordinating die.
Oh, but before I get to far into talking about this card… I wanted to make sure you saw that the BIG Year-End sale started yesterday!
There are a ton of awesome deals… including Holiday Catalog items NOW DISCOUNTED! Everything is while supplies last, so check it out and score some great deals for you and a friend!
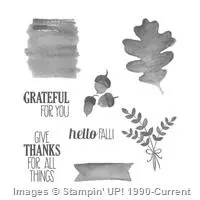
Festive Wreaths made easy! Pull out that Wondrous Wreath stamp set and the matching wreath framelits (still available in a discounted bundle when you buy both together!) and have fun making cute and easy wreaths! Once you’ve stamped your wreath, you can cut it out by using the inside & the outside of the wreath dies at the same time!
Stamping the Wreath is as easy as 1-2-3 1. Start with your lightest color (in this case, Old Olive) and stamp the full wreath image. 2. Then add in your darker leaves by stamping the sparse leaves stamp with Mossy Meadow. You should be able to line up your leaves by lining up the “handles” of photopolymer that are on stamps 1 & 2. The leaves should overlap exactly. 3. Finally add in your berries, stamped with Real Red. The leaves should line up but the berries have no right or wrong placement, just wherever you like! Mix and match your colors to make fall, spring, Valentine’s, or Christmas wreaths. Good anytime of the year!
Black Glimmer Paper = Anytime Sparkle! I think a lot of people missed the Black Glimmer paper because it was placed in the Halloween section of the Holiday Catalog. But it is amazing stuff and perfect for any time you need an elegant card. Like here we used it for our Noel greeting! Just the right touch! PS – It is on sale for only $3.50 a pack in the Year-End Sale while supplies last
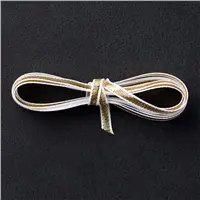
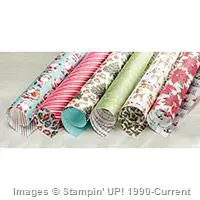
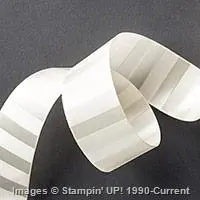
Wide Ribbons make great backgrounds – I love this Very Vanilla Subtle Striped Ribbon (also on sale in the year-end sale) and it’s wider size makes it perfect to be soft, shiny background elements for my cards. Like here where it goes behind the Home for Christmas holiday designer paper…. which btw – don’t you just love those musical notes pattern?!
Red Foil makes it shine! Just because you used glitter paper doesn’t mean you can’t add a little shine too. 🙂 I love my Real Red foil and it makes just the perfect bow… the bow and the hanging ribbon are dies that come with the wreath die.
Don’t forget the finishing touches Once you’ve made a card and have all the big elements figured out, don’t forget the little touches that really put the finishing polish on your card. From sponging the edges of the card base (I used a sponge dauber and Old Olive ink) to using the Banner Triple punch to make two sizes of banner ends for my papers in the middle of the page, to popping some elements up on foam Stampin’ Dimensionals. Each little touch is what helps bring your project to life!
Need a last minute gift? What about a Stampin’ Up Gift Card?
Have a friend or loved one that loves crafting as much as you do? Let them have the fun of a shopping spree for the holidays! I can get you a gift certificate by email in as little as 24hrs from when you first contact me!
This week has really been a real life lesson for me on gratitude. I have been blessed by some amazing people who came out of the woodwork and helped me survive this week as I was starting to get super stressed out midway through! I am one of those people who have a hard time asking for help and I was shown how amazing friends and community can be. So today’s card share is my virtual way of sharing my gratitude for them!
See, Thursday morning, I was helping decorate a table for a Ladies Christmas Dinner with my MOPS group and I was starting to freakout just a little. Hubby was out of town, so I was single parenting and still needed to get ready for card class the next night, plus clean and finish planning my daughter’s birthday party on Sunday. And lets just say my house was a disaster and I didn’t really know what I was doing for the party. Oh, and I knew I would be out late that night because I would be at the Christmas dinner. So I was just seeing a lot to do and not enough plan to know how I was going to do it!
But by the end of the night, I had one friend, Trisha, who was helping with the Christmas dinner offer to come over the next day to help me finish cutting for card class… then that afternoon, my friend Chrissy had me over to help me get my mind straight about the party and put together a plan – but even more, she sat there with her Cricuit and cut out a BUNCH of decorations for the party while we were talking! So I went home not only with a plan but with many of the decorations done! Then in the evening I was overwhelmed when another friend, Lisa, sent me a picture of a fondant Hello Kitty she had made me for on top of the birthday cake (Caitlin had asked for a “Hello Kitty” cake and while I can make anything with paper… designing with frosting is not quite my forte ) And my evening timed out that I could clean my kitchen and by the time I went to bed, I was starting to feel like I could do this after all! So to all of you – THANK YOU!
Tips for making this card:
Frame it up with simple layers – I always love how clean everything looks when you use simple layering to mat your card elements. I find that a 1/8” mat is the perfect size most of the time, and really easy to cut on your trimmer. Just cut your matting cardstock 1/4” larger in both directions than your smaller piece. So for example, in this card: – Card base as a mat: 4 1/4” x 5 1/2” – Crumb cake piece: 4” x 5 1/4” – Soft Suede square mat: 3 1/2” x 3 1/2”
– Very Vanilla piece for stamping: 3 1/4” x 3 1/4”
Use those busy patterned papers for accents – I used one of the patterns from the Into the Woods designer paper for a pop of color and an accent. The pattern is one I like but busier than I would normally use for a big piece, so use it for a smaller layer and tuck it under one of the elements for just the right accent piece.
Get creative with your Burlap Ribbon – I love my burlap ribbon… like use it all the time! But I wanted to soften it up a bit when I was making this card, so we changed it up a bit. First, trim off the stitching from one side of the ribbon. Then pull out 3 threads from the top of the burlap ribbon before gluing it down to your card front. (I recommend tape runner applied to the cardstock on the card for taping down the ribbon). Then use the threads for other accents on your card! I used two like twine across my Very Vanilla piece and then threaded the third through a Gold Button and tied a bow.
Make a Shadow for your images – No lining up required! One fun way to play with your stamp images is to use two different colors to create a “shadow” image. The nice thing is, since you want them to be slightly offset, you don’t have to worry about lining things up. So, you can get a little messy and it looks great everytime! In this case, I stamped the background rectangle from the For All Things stamp set in Crumb Cake in, and then stamped the leaves in Soft Suede ink over the top as my main image. Then stamp the shadow in Cajun Craze ink by stamping close to my original spot but not exactly the same position.
I’m happy to say, thanks to the help earlier this week and then my mother-in-law coming over to help clean as I was baking for the party yesterday, I think we are all ready for our Princess Party! Princess Caitlin is all ready to go!
So hugs to all of you and thank you to everyone who takes the time to share their talents and time to help make every day just a little bit more survivable and a little more magical!
Use Hostess Code BEFX37ZS at check out to get a special thank you from me!
Project Supplies Used on this Card: Click any image for more details or to shop! Use hostess code BEFX37ZS when shopping to get a special thank you from me!
Ok, I’m totally half awake right now because I – not exactly intentionally – stayed up super late last night and was able to get in my next preorder from the upcoming 2016 Occasions catalog. Yay! I was super excited to be able to finally get some of the items I’ve been itching to get my hands on from the upcoming catalog to play with. I was lucky to be able to try out a number of items at the recent OnStage event run by Stampin’ Up in November – which is why I couldn’t wait to get my preorder in! So, hopefully that box of happiness will ship out today and I’ll have it Monday night to start playing with.
But in the meantime, I had been able to do a mini pre-preorder a couple weeks ago and finally started digging into my stuff and thought I would share a little with you! I even recorded a video of my unboxing to share what I got in that first order.
But, at the time of the video, I didn’t have any samples to share with you. Well, I’m starting to fix that! Thankfully, my Mom ordered some different items than I did. So I had a chance to play a bit and make a sample from some of the It’s My Party Suite to share with you.
And I will say, I was super excited to share and so I haven’t taken the “nice” picture yet… so watch for a full blog post on this card with better lighting and more details… but until then… TA DA!
Are you ready to party now or what?! I used a new stamp set (Party Wishes) with the matching small punch pack (I totally did NOT cut out those candles by hand! Yay for coordinating punches! The punch set comes with a balloon, cupcake, and the candle.) I also used the new Confetti Embossing Folder… and YES! The oval in the middle is already there for you. So, no messing with shims and chipboard when you are embossing. I just used the debossed side and sponged lightly over the top to get this cool party effect.
Over the next month, I’ll be sharing a mix of my favorite projects using the current Holiday and annual catalog, along with sprinklings of sneak peek project ideas using the newest goodies coming in January. Yep, this stuff all goes live January 5th! If you have ordered with me in the last 6 months, you will be getting a copy of the catalog mailed to you later in December. If you haven’t ordered from me and don’t get catalogs from other demonstrators, feel free to email me at jennifer@nwstamper.com and I’ll get you on the list to be sent one as well!
Can’t Wait until January to See & Order from the Occasions Catalog?
Did you know, if you take the plunge and join as a demonstrator now – whether to give yourself a discount on all your orders, or you’d like to have a way to get your favorite products for free or even earn extra spending money by sharing your love of crafting – you can fill your starter kit with ALL NEW PRODUCTS! Yep! You’ll be able to pick out $125 in new products for only $99 and get it shipped to you for free! Then, when you are ready to get more from your wishlist, you’ll get 20% off everything you order. Pretty sweet deal huh? Want to know more, shoot me a message or check it out here – Join the Fun.
Use Hostess Code BEFX37ZS at check out to get a special thank you from me!
I know we are getting into Christmas time and lots of wintery projects, but I still have a few fall themed projects that I loved and so I wanted to share with you – including this thank you card I made for recent customer thank you cards.
I had seen the idea for using a cut out hole with the Leaflet framelits and thought it would be cute trying stamping on the leaves themselves! So I tried that and it ended up being a fun project.
Tips for making this card:
Stamp your scene first! With photopolymer stamps, you can often see what you are doing when it comes to stamping in a very specific spot on your paper (which is why I love them so, so much!) but in this case, I found it easier to stamp my scene first from the Happy Scenes stamp set and then position my framelit so that everything lined up the way I wanted it to and cut out.
Layer your die cuts – Make a cool shadow or accent effect by cutting out the same shape as your stamped focal point only in solid color cardstock and slightly offset behind the stamped image. In this case, I stamped on Whisper White and then cut out a second leaf in Cajun Craze cardstock.
Have fun with your Aqua Painter – After you cut out your shape, have fun letting your inner artist (or kindergartener as the case may be!) and play with coloring things in! Use your aqua painter (a special brush-tip pen that the barrel is filled with water that you can use to paint on your ink) by picking up ink from the LID of your ink pad (squeeze the closed ink pad if you need to get more ink on the lid) and paint it onto your scene. It doesn’t have to be perfect, so just have fun layering your colors and making your own personal sunset image. Everyone will be different!
Wide ribbons don’t always have to be wide! – I wanted some ribbon and loved the texture of burlap, but didn’t need the weight it added of having the full width of the burlap ribbon. So, don’t be afraid to pull out your scissors and cut the ribbon in half!
Mix and Match your stamped image for all seasons – I made this card with the fall theme, but use the snow scene or spring scene from the Happy Scenes stamp set and make it a whole new card!
Check the Holiday Retiring List before your favorite sells out – The Happy Scenes stamp set and Happy Haunting paper are both on the Holiday Catalog Retiring list and so are only available while supplies last. There are more awesome items that are saying goodbye this month, and two items that have already sold out! So make sure to check your list before December is over.
Use Hostess Code BEFX37ZS at check out to get a special thank you from me!
As we are winding down our Thanksgiving holiday weekend, I’m trying to get back to my computer and back in the groove of getting all of these project photos off my camera and up on the blog to share. Because, making projects is fun… sharing them is even MORE fun!
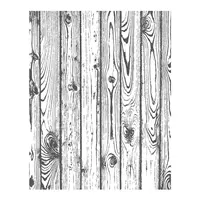
Today, I have a card I put together using the Woodland embossing folder and some simple sponging! We were told the night before Thanksgiving that this embossing folder is close to selling out permanently, so if this was on your wishlist, I wouldn’t wait too long to get it! I’m waiting to see when Stampin’ Up opens tomorrow if we have an update on it, but for now you can still orders yours in the online store.
Tips for making this card:
Keep the colors simple – You know me, I love clean and simple cards. The trick is to pick a couple neutral colors and one to two brighter colors to add the POP of color! In this case, I stuck with Very Vanilla, Soft Suede, Gold, and Rich Razzleberry for my pop!
Try sponging your embossing folders – The woodland embossing folder is perfect for this technique! Run your paper through the embossing folder and then when it comes out, use a sponge dauber to lightly rub ink over the raised areas!
Help the word die cuts pop out quick & easy – I waited to share the Precision Plate for the BigShot with folks in my class until I could really see why it made a difference. And using these thin word dies, I DO see a difference! I find the words are much easier to pop out when I use the precision plate, as well as especially when you are using easily dentable paper like the foil papers, you don’t get the “polka dot effect” of the paper pushing up into the holes in the die. So, now I ALWAYS use my precision plate when cutting out thin word dies.
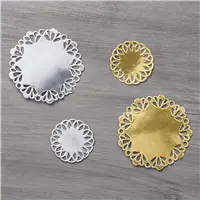
Extend your Metallic Doilies to the perfect size – I have been loving the Metallic Doilies (and love that they are 30% off through tomorrow in the Online Extravaganza sale!) and they often give me the right touch of shine on my card. But sometimes you need them to be just a little bit bigger than they are. So, grab those scissors and snip away! I cut one of the smaller doilies in half and stretched it out so some peeked out above and below my sentiment!
Use the fine tip glue pen for glueing details diecuts a breeze – the thin lines of the words and the metallic doilies can sometimes be a challenge to glue. Thankfully, the Fine Tip glue pen makes it easy to get it all glued without the glue showing! Here is the trick: Use the glue from the fine tip glue pen sparingly! Don’t draw the lines of the paper with the glue, instead place dots of glue in areas with larger spots of paper and use the tip of the glue pen to spread the glue out along the finer lines! This keeps the glue from smooshing out the sides.
Don’t forget! The online extravaganza ends tomorrow with one more set of 24hr deals!
Just a reminder that the deals end tomorrow of when they sell out! Tomorrow they will be adding 3 sale items:
Project Life Starter Bundle! You get a 12×12 album, This is the Life card kit, This is the Life accessory kit, and page protectors in a bundle for 30% off! Everything you need to get your pictures from your last vacation or just the last year, in an album and off your computer or phone. It makes it easy and cute without too much thinking!
Christmas Tagables Bundle! Get a set of a TON of christmas gift tag stamps plus the Scalloped Tag Topper together in a bundle for 20% off. Just add some of that paper you may or may not have been hoarding at home and you are ready to go!
Tiny Triangles embossing folder. And just to be different, they added an embossing folder for 20% off on Monday only! Add fun geometric designs to your projects.
I’ll be updating my list once I get an update from Stampin’ Up! But you can see all the sale items here:
So, what do you think of the Online Extravaganza this year? Lots of great deals on both fun & flashy items along with what I consider staples for my craft room. So to help you filter through all the fun and cute stuff, I put together my top 5 fun items and top 5 craft room staples for you. I even put together a video so you could hear more about why I put them on my list along with a few samples. I’ll share some of it here, but feel free to check out the video too!
Top 5 Fun Items from the Online Extravaganza
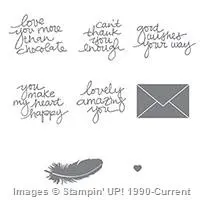
Lovely Amazing You stamp set – this stamp set is so versatile and has some great sentiments. I fell in love with it when I first saw it and have never regretted the purchase!
Mini Treat Bag Thinlit & Accessories – the perfect size for gift card holders, candy/sweets treat bags, or just little love notes. Plus all the accessories make it a great value.
Metal Rimmed Pearls – easy to use and oh so classy!
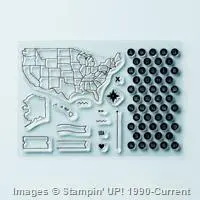
Map it Out stamp set – great for “we’ve moved”, “I miss you” or just we were here cards and scrapbook pages.
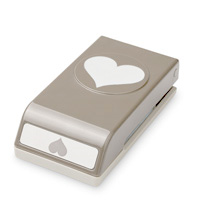
Sweetheart Punch – just a great heart shape and 50% off!
If you are on my newsletter, hopefully you printed out your wishlist and browsed the sneak peek list I sent you because NOW IS THE TIME! No need to brave the crazy parking lots (and let me tell you, I didn’t realize how brave you have to be until attempting Costco on the Sunday afternoon before Thanksgiving yesterday! Eek! That was a mad house!)
If you still need a wishlist, you can print out your own and feel super organized as you are going through all the deals! And figure out what you are getting now and what you are going to email your family and let them know to get for you this week for early Christmas shopping.
There are BONUS sale items in two 24hr sale times – Bonus time #1: November 23rd (buy 3 get 1 free select designer paper & select punch boards) – Bonus time #2: November 30th (select product bundles & tiny triangles embossing folder)
Online Extravaganza sale prices are while supplies last… so don’t wait too long
Have a list that is over $100 in product? Consider making your purchase through the Stampin’ Up starter kit! You can not only increase your savings by being able to select $125 in product for only $100, but then you will also be set to join my Fun n’ Crafty Stampers group, get in on the December spring catalog preorder, get 20% off future purchases,and more! email me for more details.
TODAY ONLY! 24hr Special bonus deals – MONDAY 11/23 ONLY!
There is so much good stuff, but I wanted to make sure you didn’t miss out on some of the specials that are only good through today:
Use Hostess Code PU2EYZJY at check out to get a special thank you from me!
I’ll be back tomorrow with a few ideas for my top 5 items that are part of the online sale! So check back for more great ways to use your favorite supplies!


![NWstamper signature_thumb[9]](https://i0.wp.com/www.nwstamper.com/wp-content/uploads/ad87b4046c1e_C9F6/NWstamper-signature_thumb9_thumb.png?resize=322%2C118 "NWstamper signature_thumb[9]")


