Northwest Stamper

Tag: perfect pennants

  • Using up scraps with Perfectly Artistic Paper

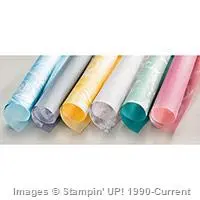
    For the next few days, I’ll be featuring the Perfectly Artistic designer paper – one of the free with a $50 purchase options from the Sale-a-Bration catalog.  See, I’ve been holding on to this paper since it came out, but something about knowing it was retiring in a few days (it is only available until Feb 15th), got me to actually start cutting into it and turns out it is super fun to use! 

    Perfectly Artistic scrap paper thank you card

    This card was my way of using up scraps around my craft table.  I had cut a bunch of the marble strips for a different card for class last week but I couldn’t bring myself to recycle these little bits.  That said, if I saved them, I knew they would just hang around forever and never get used!  (Know that feeling?) So, I challenged myself to use them up in a card now!  This was a whole lot of a little of this and a little of that, but I really like how it turned out…

    what do you think?  Funky fun or funky weird?

    Little scraps layer for big impact

    When you have these scraps that are too small to stand on their own, but too big to just throw away, try creating off-kilter layers to help work with the differing sizes!  I used a strip of Basic Black cardstock to ground everything and then just started stacking on my Perfectly Artistic paper.

    stamped vellum over perfectly artistic designer paper

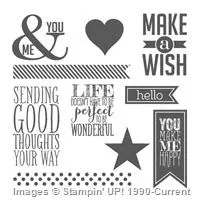
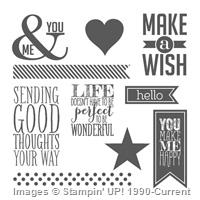
    Once you have your basics down… keep up with the layering! Vellum is a perfect way to break up a pattern on a paper without adding one more design into the mix.  I decided to try adding a stamped image (from the Perfect Pennants stamp set) to give it something to pull it all together.  But then, of course, I decided I needed some sparkle, so a scrap of Gold Glimmer paper was just what the doctor ordered!

    Have trouble making all your layers even?  Don’t even try!

    Since everything else in this card was not straight, I didn’t have to bother trying to make my matting around my sentiment even either!  I actually use this trick a lot when I think I will have a hard time stamping letters (or images) straight… if you intentionally stamp or glue your papers at not quite straight lines, then when you stamp or glue something down that isn’t even… it looks perfect!  It will match the rest of the card and look artistic, not like you messed anything up. Smile 

    endless thanks for the perfectly artistic card

    Finally, I had to add one last touch, and that was to just hand draw a border line around the left, top, and right side of the card above my black cardstock.  I love sketch lines and like the fact that it isn’t perfectly straight.  Though it is easy enough to make them all nice and even with the help of a ruler. Perfectly Artistic Thank You card from Stampin Up

    What is changing with Sale-a-Bration

    • RETIRING ITEMS – Don’t forget that if you love one of these items, including the Perfectly Artistic paper, you only have a few days left to get yours.

    Retiring 2016 Sale-a-Bration items

    • COMING SOON – these items will replace the above options starting Feb 16th.  Still free with a $50 purchase, and I expect that glitter tape will run out before the end of Sale-a-bration.  Just my prediction!

    NEW 2016 Sale-a-Bration items

    Visit the Online Store to start shopping and earning your Sale-a-Bration gifts!

    NWstamper signature_thumb[9]

    order online button for sig 3_thumb[4]

    Use Hostess Code TNCXV4MP at check out to get a special thank you from me!

    Pick a FREE item with every $50 you spend!  See the Sale-a-Bration catalog.

    See all the tutorials & classes by mail here

    Save 25% on the Latest Weekly Deals

  • Gorgeous Grunge Polaroid Birthday Card

    Gorgeous Grunge Polaroid Birthday Card

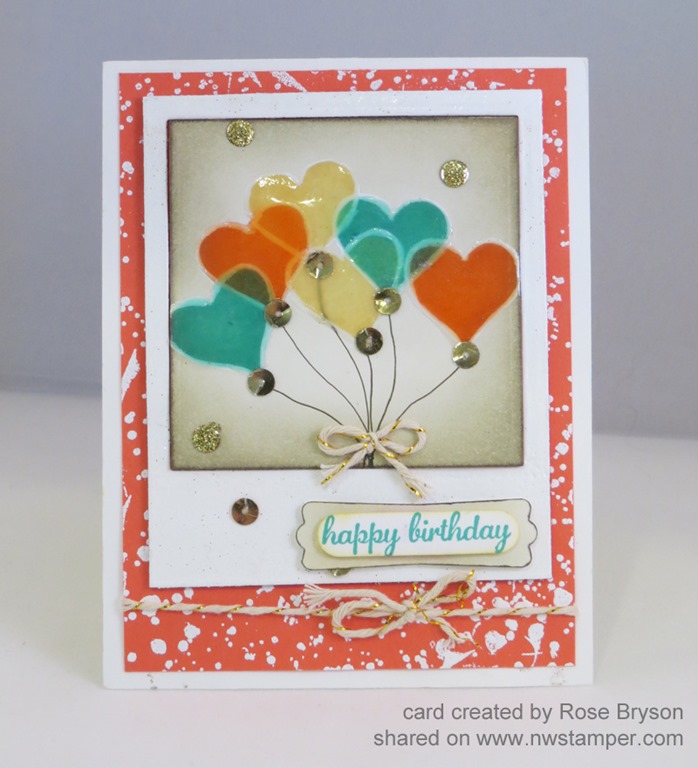
    One of the things I especially love about crafting is that two people can take the same supplies and turn out completely different cards with totally different styles.  As you may have noticed from my blog, my style tends to be more clean and simple cards that can be created pretty quickly.  That said, Rosemary Bryson is one of the gals in my downline and she can take the same products I have and seem to effortlessly turn them into stunning works of art!  For example, this card:

    I love how she combined the stamp sets and punches to create such a unique look!

    The hearts were stamped using the Perfect Pennants stamp set and then traced with a white gel pen and then covered in crystal effects.  she also added sequins and glimmer paper dots to add some extra sparkle and shine.  Such a fun idea!

    And it is really hard to tell, but she actually inked the entire paper (the polaroid frame) with versamark and embossed it with white embossing paper to give it that thick, shiny feel!  See, that is something I never would have thought to do.  And add some more embossing on the background paper with Gorgeous Grunge and you have a fun paint splatter effect to keep any part of the card from being boring. Smile 

    Stampin’ Up Supplies Used

    If you happen to be in the Pierce County (Tacoma/Bonney Lake/Puyallup), Washington area, you should definitely check out her classes she is starting up with a new meetup group called the Pierce County Paper Crafters.  I know I want to go myself and get to make some of her amazing creations!

    spaced shop now sig bar

    June Online Stamp Club Hostess CodeACANDKB4
    Use this code to get free exclusive tutorials & project kit!  Learn more

  • Pop Up Card in a Box featuring Create a Cupcake

    Pop Up Card in a Box featuring Create a Cupcake

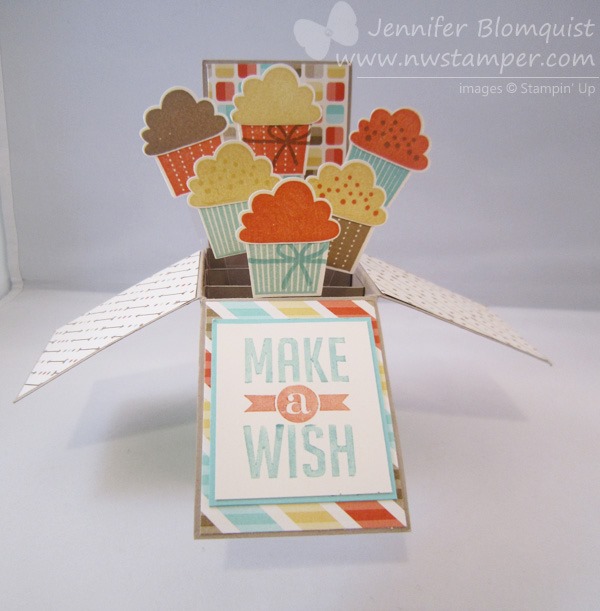
    The new Stampin’ up catalog is here and while I excitedly placed my first order from it yesterday, I thought I would show a few projects today and tomorrow that feature some fun ideas and products that are going away after tomorrow.  The first project (well both today and tomorrow) will be card in a box – just in two different sizes!

    This one features the Create a Cupcake stamp set that is retiring after tomorrow.  I’m a bit sad because I really like the sentiments that go with this set…. here is the sentiments I used from the set for the backside of the card.

    Now you may be thinking… how is this considered a CARD when it looks like a BOX?  Check it out, here is what it looks like in an envelope:

    Crazy, right?!  It totally fits!  That is the brilliance of this card design.  It folds down flat to be a mailable card but when the recipient pulls it out of the envelope it pops open to be a box with fun jiggly bits that can sit on their table or shelf.

    This is what it looks like when it is collapsed flat after they pull it out of their envelope.

    I thought my outside needed something which is why I added the Coastal Cabana cardstock with some stamping from the Perfect Pennants stamp set.  I also used that same set for the front “Make a Wish” sentiment too.  So happy this set at least is continuing on into the new catalog. Smile

    And if you like the cupcakes, (they really do make fun birthday cards)… or as one person said, muffins for her holiday baking.  You have two options right now:


    Create a Cupcake Stamp Set (retiring 6/4)~OR~  Cupcake Partyboth of which coordinate with the Cupcake Punch
    imageimageimage


    These cards aren’t hard to make, just time consuming to decorate if you get fancy.  Smile  I have to find my instructions for putting them together but I’ll post them TOMORROW if you want to stop back by to see the other horizontal design for this style of card.


    I’m getting ready to close my first Product Sampler / Product Share for the new catalog! If you are interested in samplers for the new designer papers or ribbon, make sure you let me know ASAP!  Details can be found here.

    spaced shop now sig bar

    June Online Stamp Club Hostess CodeACANDKB4
    Use this code to get free exclusive tutorials & project kit!  Learn more

  • Grungy Chic Winner for our Team Meeting Card Contest!

    Grungy Chic Winner for our Team Meeting Card Contest!

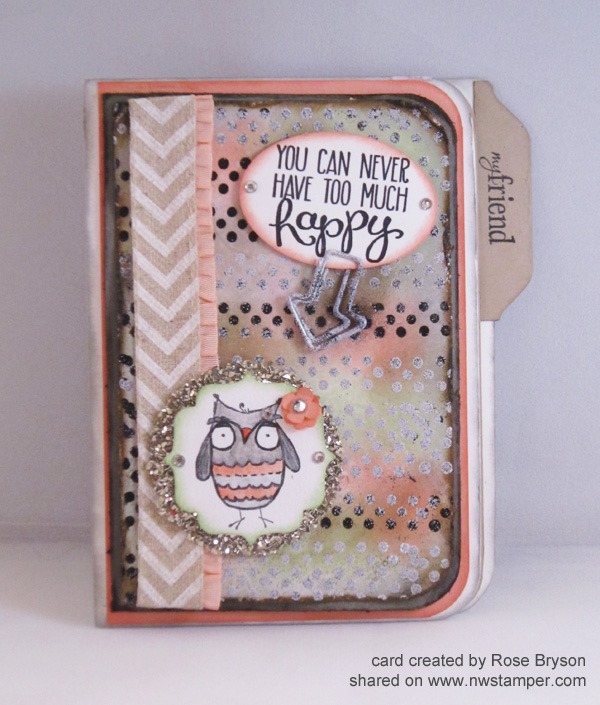
    I discovered that I had a bunch of pictures from my Team Stamp & Share event this spring that I never posted.  And as you can see from today’s card – they NEED to be shared!  So, today I thought I would share the winner from the card contest by Rosemary Bryson!

    Stunning, right?!

    Her card was so amazing in person with all the layers and detailing, I just had to show some of the cute elements, so that even if you don’t make this exact card, you can use some of these fun ideas.

    First up, I loved punching out this sentiment from the Yippee Skippee stamp set with the Wide Oval Punch (who knew it was a perfect fit?!)  But I especially love her embossing of the polka dots from the Perfect Pennants stamp set!  It looks like she mixed black and white embossing powder to create this cool frosty effect.

    And the owl from the Baby, We’ve Grown stamp set… I always saw that as a baby only set but she proved me wrong!  This is reminding me to look at my stamp sets in different ways. Especially when you add a little flower for her “hair”. 🙂

    She even made the inside fun too…. doesn’t it really finish the card?

    I know I loved the inspiration from this card and always look forward to what she and the other gals come up with each month to share!  Rose does an amazing job organizing our team swap each month and that is always fun inspiration.

    Plus, I’ll be running my next Stamp & Share for Stampin’ Up demos in July.  So if you are a Seattle-area demo or are interested in learning more about being a demo, let me know and I’ll make sure you get all the details!

    Sign and Save: From May 28-June 30 you can join Stampin’ Up! at one of two great prices. We will continue to offer the traditional starter kit priced at $99 ($125 product value), but for four weeks only we will also be offering a reduced priced starter kit at the low price of $50 ($55 product value).Learn more here.

    spaced shop now sig bar

    May Online Stamp Club Hostess CodeZUBHUEK6
    Use this code to get free exclusive tutorials & project kit!Learn more

  • Stampin’ Up Display Stamper 2014 Submission

    Stampin’ Up Display Stamper 2014 Submission

    So, every year I go to the Stampin’ Up convention… and every year I’m blown away by the amazing ideas and inspiration on all the different display boards.  (To see what I’m talking about, here are a few past posts I’ve done showing the display boards.)  Well, this year they are doing a call for display board stampers and to throw your hat in the ring, you need to pull together some of your best/favorite projects and put them together in one post to show your style and ability.  So, I thought it would be a fun way to flip through my past projects and put them together to share with you here.  And maybe they will love them too and I’ll get to share even more ideas on a display board at the Stampin’ Up Convention 2014!

    oh, and PS – if you love the idea of checking out all the display boards, don’t forget that anyone who joins Stampin’ Up as a demonstrator right now will get free registration to convention this summer!  So, you just get yourself to Salt Lake City, and you can be blown away by inspiration for FREE!  Yay!  Email me at jennifer@nwstamper.com for more details if you are interested or check out this page to learn more about the perks of being a demonstrator!

    So Here You Go!
    3 Cards

    so very grateful colored

    So Very Grateful Thank You

    Burlap and Gold Masculine Card (blog post here)

    Negative Heat Embossing with Pleasant Poppies (blog post here)

    1 Scrapbook Page

    This was so hard for me to narrow down and decide which scrapbook page to show.  I think my favorite layout may actually be this older one, but I figured the one I’d show here is this –

    Perfect Pennants with Watercolor Wonder Waves (blog post here)

    Or maybe it is just that these photos always make me smile!

    2 3D items

    Ok, this is where I don’t make and post nearly enough.  So here is what I decided was the nicest from things I actually designed myself – instead of flat out copies of what other people had created. Smile

    Card organizer for holding cards and envelopes (blog post here)

    Easter Treat Bag (blog post here)

    Awww.  So much fun to walk down memory lane.  I hope you enjoyed the ideas and inspiration. Smile

    spaced shop now sig bar

    April Online Stamp Club Hostess CodeG4VQJ7VB
    Use this code to get free exclusive tutorials & project kit!Learn more

  • The Wow Factor of Coloring on Natural Composition Specialty Paper!

    The Wow Factor of Coloring on Natural Composition Specialty Paper!

    Have you experienced the coolness of the Natural Composition Speciality Paper?  Once again, I have another project that I can’t believe I haven’t shared yet and my favorite part of it is how the Natural Composition paper makes it look!

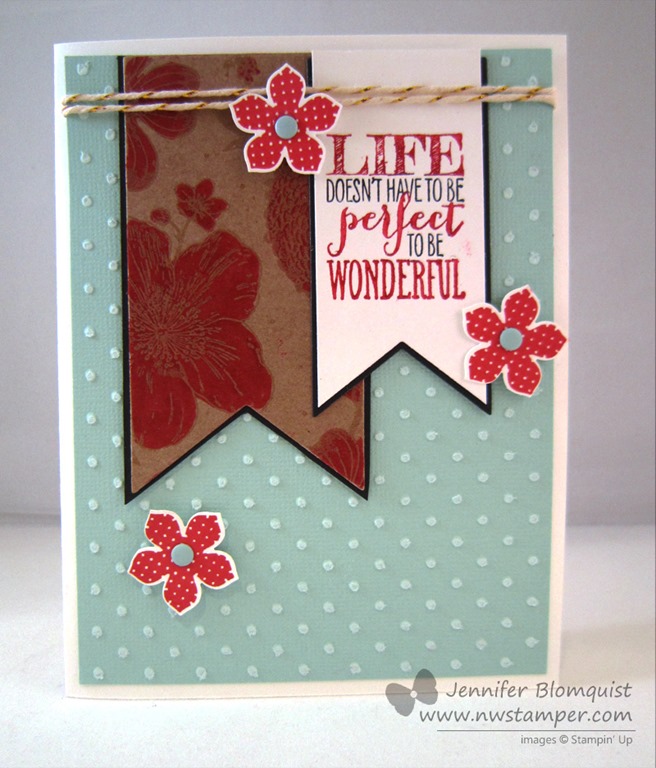
    I created this card for a class last month and was playing with a few of my favorite things:

    • Core’dinations cardstock – I used the Pool Party core’dintations cardstock and ran it through my BigShot with the Perfect Polka Dots embossing folder.  Then I sanded off the top of the dots to help them pop a little bit more.
    • Petite Petals stamps & punch – I have to admit I’m totally falling in love with these little flowers!  And the fact that they are so easy to punch out is just awesome!
    • Gold Baker’s Twine – Turns out it just always is the perfect touch of subtle sparkle on your projects.  It took me months to start using it but now I LOVE using it!
    • Perfect Pennants stamp set – the sentiment is my favorite sentiment from the Occasions catalog!
    • and finally – Natural Composition Paper!

    The Natural Composition Specialty designer paper does not look very special in the main catalog and in fact, just about everyone I have in class that uses it tells me that they didn’t think it looked interesting in the catalog but they love it once they try it.  Because you can do things like this:

    So, the thing it it is a stiffer cardstock that looks a bit like cardboard or a stiff kraft cardstock.  But then on one side of the paper there is a clear embossed pattern.  So you can do cool stuff like sponging or coloring!

    In this case, we colored over the flower images with a Real Red marker and after it starts soaking in a little bit to the paper, it will wipe off the embossed image and you get a really cool defined image.  Don’t you think?’

    You can do this with any color or ink (if you want to sponge it) and it is pretty fool proof.  You can’t really mess it up.  Got to love that!

    spaced shop now sig bar

    April Online Stamp Club Hostess CodeG4VQJ7VB
    Use this code to get free exclusive tutorials & project kit! Learn more

    Stampin’ Up! Supplies Used
    Stamps – Perfect Pennants, Petite Petals
    Ink – Markers (Real Red, Basic Black), Real Red
    Paper –Pool Party cord’inations cardstock, Whisper White, Basic Black, Naturals Composition specialty designer paper
    Accessories – Big Shot, Pennants Framelits, Petite Petals punch, Gold Baker’s twine, Candy Dots (Subtles), Perfect Polka dots embossing folder, sanding block

  • Sweet & Simple No-Layer Card

    Sweet & Simple No-Layer Card

    Well, I totally forgot that today was Oscars day…. but given that my son has given me another head cold, today seems like the perfect day for laying on the couch and watching some TV.  So, if you are following along with the Oscars with me, don’t miss out on my Winners Predictions Contest over on my Northwest Stamper facebook page for a chance to win some prizes!

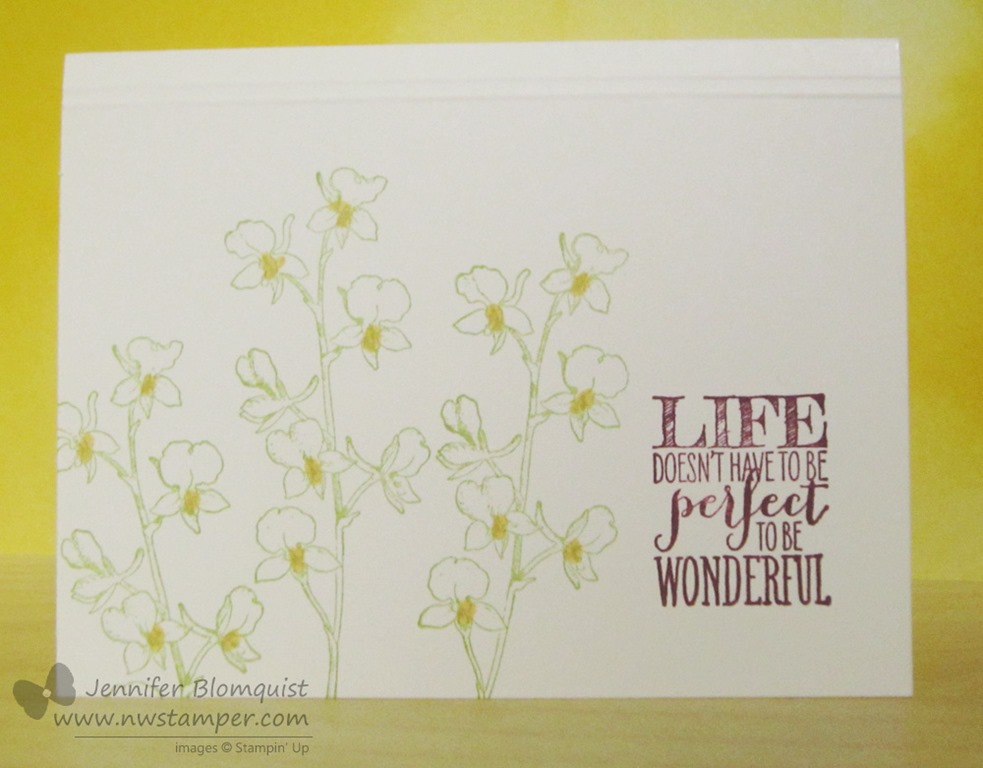
    In the meantime, I thought I’d share a very quick and easy card that is perfect when you don’t have a lot of time or are just feeling a bit icky like I am today.  Look…. no layers at all!

    All I needed was a couple stamp sets:  Happy Watercolor and Perfect Pennants, two ink pads, a marker, and my Simply Scored.

    After stamping each of the flower images, I went back over them and added some yellow to the centers of the flowers for an extra sweet touch.

    Also, I used my favorite trick for keeping no-layer cards interesting…. SCORING!

    Sometimes I make scored lines in a box shape to frame my image, but in this case I kept it even simpler than that and scored two lines along the top of my card.  The first link is about 3/8” from the crease of the card, then I scored a second line 1/8” further down from the first line to add emphasis.

    spaced shop now sig bar

    March Online Stamp Club Hostess CodeXEWP4DFD
    Use this code to get free exclusive tutorials & project kit!
    Learn more


  • Guest Designers–Fun Cards with Fresh Prints, Banners, and more

    Guest Designers–Fun Cards with Fresh Prints, Banners, and more

    This week I’m sharing some of the great cards I got from my team’s Occasion Catalog card swap.  They came up with such fabulous cards that I wanted to share the inspiration with everyone! 

    Today’s cards show some cute ways to use the patterns in the Fresh Prints designer paper stack to add a touch of pattern to your cards…plus I just realized they use the exact same color combination too! Winning combo I think.

    image

    Card 1 – Perfect Pennants w/ Colored Rhinestones

    This first card was created by the talented Angela McCormack and is a great clean and simple card that uses the pattern of the designer paper to compliment the shape of the sentiment. (I REALLY need to get out my pennant framelits and start using them… love how this looks layered like this).

    Plus, if you look, those red spots in the corners are actually rhinestones that she colored with a sharpie to fit in perfectly!

    Card 2 – Banners for a Birthday

    Next up was this fun Birthday card created by Sara Grafton that is another clean and simple card but has so many fun touches that it packs a lot of punch! Smile 

    The Happy Birthday to You image is from one stamp and she did an awesome job coloring it in before stamping.  Then the touches of the popped up cupcake and the set of banners using the new Banner punch from the Sale-a-Bration catalog is a great addition.

    Aren’t they so talented?  I love that both cards as so fun to look at, yet are something I could do at home easily enough.  Thanks, Ladies, for sharing your wonderful ideas and inspiration!

    spaced shop now sig bar

    Virtual Stamp Club Hostess CodeBNDDMDVU
    Use this code to get free exclusive tutorials & project kit! Learn more

  • Cheery Thinking of You with Petite Petals Flowers

    Cheery Thinking of You with Petite Petals Flowers

    Whew!  I’m back to the land of the living!

    I went to bed last Thursday night thinking of all my plans of what I was going to finish and get caught up on on Friday (aka Valentine’s Day).  Instead, I woke up in the early hours of the morning with a terrible stomach bug!  So, instead I spent the day in bed with a brief period laying on the couch.  Finally I am back to functional again (though now my husband has gotten taken out) and I’m trying to get caught back up. Smile 

    Today’s card was the perfect share today because of the number of people I heard of that were sick recently as well as a sweet friend who just had to suffer a devastating loss.  So, for all of them and for you, here is a card to send a little sunshine your way.

    This card was inspired by a card by Natasha Zandbergen that I had found on Pinterest and of course had to give it my own flair!  So, I loved the idea of cutting out the oval shape from the Oval Framelits and stamping my sentiment from the super fabulous Perfect Pennants stamp set for the focal piece…. and then I started getting a little creative.

    First – I embossed my front layer with the Decorative Dots embossing folder from the Sale-a-Bration brochure.  Then I decided to be a little odd and I sanded the the dots that were embossed.  It is a really subtle thing, but I wanted to soften the dots and give them a bit of texture.  See, when you sand your embossed elements, even if you don’t use core-dinations cardstock, it gives the raised part a bit of a velvety look.

    Then, I wanted to play with the new Petite Petals stamp set.  So I got to stamping.

    Psst – here is a little secret.  If you look at those flowers and wonder why they aren’t punched out very crisply, that is because I was borrowing this stamp set from my mom and she had forgotten to loan me the punch.  I wanted to have the flowers cut out, so I hand cut them.  They look much nicer when you use the punch!

    It still needed something though, and I played with all different options for breaking the So Saffron yellow color up along the bottom of the card and ended up settling on the Natural Chevron Trim as that extra piece. 

    Plus I thought that the chevron looked like arrows for a conveyor belt shuttling along those good thoughts to the card recipient. Winking smile  I know totally dorky… but hi! *waving* I’m a dork!  hee hee

    So, hope you are healthy and having a wonderful weekend at your home!  Until next time!

    spaced shop now sig bar

    Virtual Stamp Club Hostess CodeBNDDMDVU
    Use this code to get free exclusive tutorials & project kit! Learn more

    Stampin’ Up! Supplies Used
    Stamps – Perfect Pennants, Petite Petals
    Ink – Basic Black, Raspberry Ripple, So Saffron, Soft Sky
    Paper – Whisper White, So Saffron
    Accessories – Big Shot, Oval Framelits, Decorative Dots embossing folder (FREE with a $50 order) Petite Petals punch, Naturals Chevron ribbon, Sanding Block, Rhinestones

  • Last Minute Valentine Card Ideas from Leadership

    Last Minute Valentine Card Ideas from Leadership

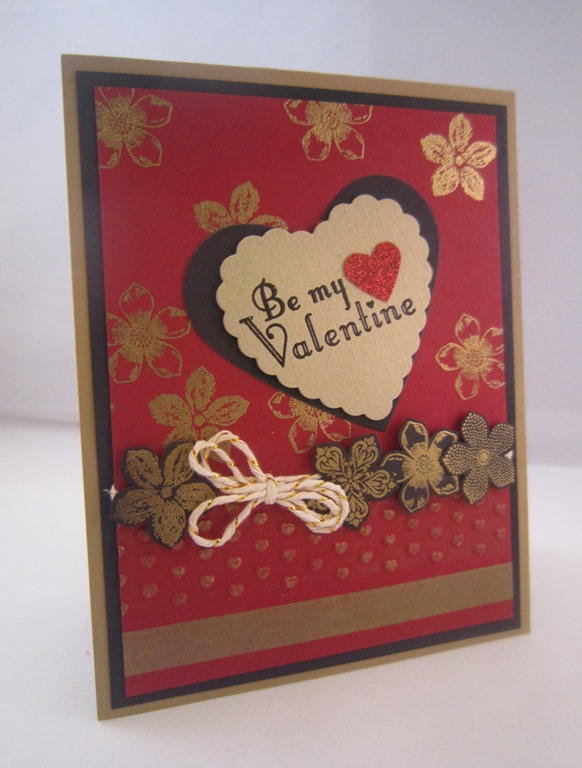
    I have had a TON of cards sitting on my camera begging to get edited and shared with the world, and finally I had time yesterday to spend most of the day editing them.  So, with Valentine’s day just around the corner, I thought I would share some of the great card swaps I received at Leadership that are perfect for giving to a loved one on Friday.

    created by Robbie Chandler

    Isn’t Red, Gold, and Black such an awesome color scheme?!  I love how she did a bunch of gold embossing over the red base and the black cardstock (that she then punched out with the Petite Petals punch).  Then add some gold washi tape and the gold baker’s twine and just a touch of red glimmer paper.  Very elegant!

    created by Kim Allen

    A less traditional card but really fun and whimsical.  I love the sentiment from the Love You to the Moon set and I think the punched out moon for the rocket to fly around is so cute (yes the moon is part of the stamp image but I like the layering with a different color of cardstock.  And the Razzleberry button with white bakers twine is a nice touch at the top of the banner.

    created by Dawn Walker-Randall

    And finally a more traditional Valentine’s Day card with the red and white, and hearts!  This uses the heart framelits and see that cool flower background on the bigger heart?  That is the Petals-a-Plenty embossing folder that embossed the Pool Party paper and then they inked it!

    Check out my video tutorial for coloring the embossed flowers with this folder here

    So some totally fun ideas to give you a few more ideas while you still have time to create!  I’ll have at least one or two more ideas for you this week, but hopefully this gets you started!

    spaced shop now sig bar

  • Stamped Scrapbook Pages on a Kiwi Lane Designs Blog Hop

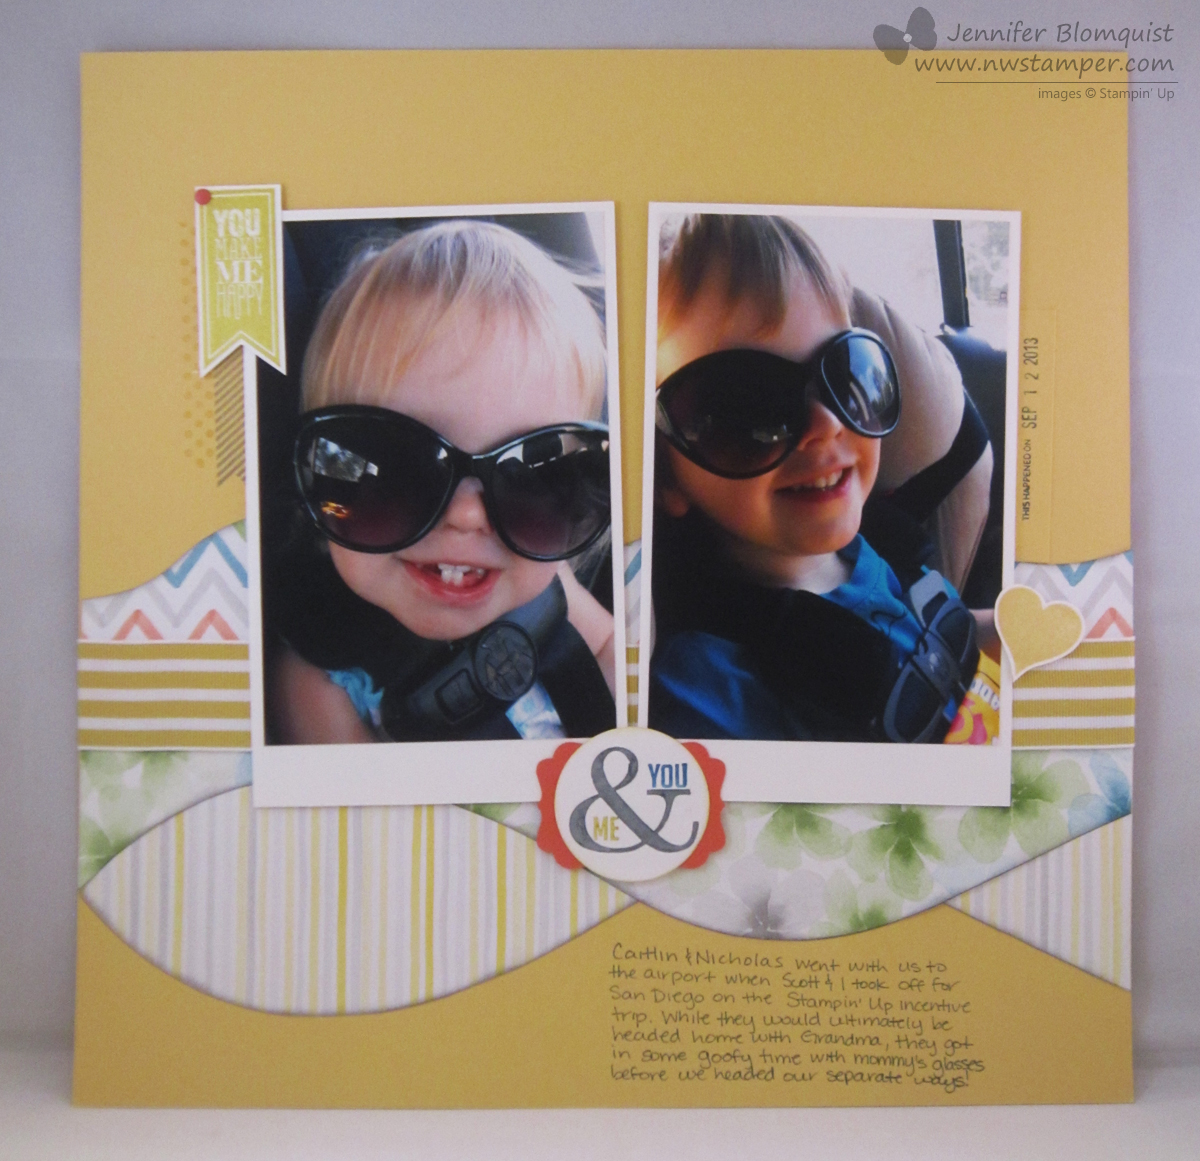
    76834_10152085028263232_1279811947_nI have a fun blog hop for you today and it is something a little bit different!  My friends have gone a little fan girl over Kiwi Lane and their designer templates.  Basically they are plastic templates that you can use to help design your projects by layering them on your base paper to decide what you want it to look like before you actually cut into your paper!  So, when I was offered the chance to play with a set and participate in this blog hop, I jumped at the chance.

    Wanna see what I made?

    Aren’t they cute?!  I swear these pictures make me smile every time I look at them. 🙂

    So, what am I showing off her in this layout besides my cuties?  Three things that are really fun to play with:

    1. The 12” Borders Clara Lane templates from Kiwi Lane.

      See all those waves – I totally traced them and, yes, cut them out.  But don’t they add some nice whimsy to the page? I actually started out this page by laying out a few of the templates on a piece of designer paper to get an idea for how I wanted to put it together:
      clara lane kiwi lane templates sample

      Then I just had to pick my papers, trace, and cut.

    2. Perfect Pennants Stamps from Stampin’ Up

      Have I mentioned how much I love the sentiments from this set?  Plus I had to use the border/pennant element stamps to add a little bit of something extra next to the photos.

      And even the heart next to my favorite little guy!

      (psst – I even used my rotary stamp to date the page!)

    3. Watercolor Wonder designer paper from Stampin’ Up!

      This is one of those sets of paper that I kept thinking was really pretty, but never actually got to cutting into it…. well, fixed that problem!  I loved the colors and decided to go for it on this page.

      And while you can’t see as much of them on the first page, I figured I decided I wanted to do something with the remaining “scraps” of paper that was left over after I cut out my waves for layout 1 and so I whipped together layout 2!

    I just took my leftover designer paper and thought it would make a great edge to a scrapbook page.  I layered them together – Don’t Gasp! – I’ll admit, I cut off the bottom two layers so I could save a ton of the paper for future projects, but I liked the pattern on top for a background for my page.  Then I layered all the waves over another piece of patterned paper (Soft Sky pattern from the paper stacks) to complete the look.

    Here are a few of my favorite touches I wanted to show you up close on this one:

    • Wood starburst accent from the Essentials Wooden Elements
    • Mix and match Washi Tape adding some pop behind my photo
    • Some Natural trim ribbon
    • And if you look REALLY CLOSE, you can see my faux stitching I did along the edge of the wave.  It is actually pretty subtle on the final page in person as well, but gives just a little extra something.

    So, what do you think? Fun, right?

    What I loved, I was able to pull these two layouts together in ONE naptime!  Yup, the first layout took me more of the time, but then the second one using the scraps just came together. I think I have the fun templates and the cute paper patterns to thank for that.

    Want to Win a $25 Gift Certificate to Kiwi Lane?

    You will see some amazing talent on this blog hop, so check everyone out and share the love by leaving a comment on each stop.  The hop runs through 11:59 PM MST on Sunday FEBRUARY 9TH.  A random winner from ONE of the participating blogs (including the Kiwi Lane blog), will be given a $25 gift certificate to the Kiwi Lane Shop, for leaving a comment and will be announced on the Kiwi Lane blog on Thursday, FEBRUARY 13TH.

    Blog Line Up:

    Kiwi Lane
    Charissa Miller
    Claire Spielman
    Lissa Mitchell
    Kristy MacKeen
    Gail Owens
    Arin Flynn
    Holly Gagnon
    Jennifer Blomquist  <—YOU ARE HERE
    Christine Meyer

    Thanks for stopping by and I hope you come back as I share card, scrapbook, and 3D projects regularly each week!  Or join the conversation with me over on Facebook. 🙂

    Happy Hopping!

    spaced shop now sig bar

    Stampin’ Supplies Used

    Stamps – Perfect Pennants, Remember This rotary stamp
    Ink – Summer Starfruit, So Saffron, Smoky Slate, Markers (Basic Grey, Summer Starfruit, Pacific Point)
    Paper – Watercolor Wonder designer paper, So Saffron cs, Whisper White cs
    Accessories – Summer Starfruit Striped Grosgrain ribbon, Decorative Label Punch, 1-3/4” Circle punch, Pennant framelits, Subtles Candy Dots, Sponge Daubers, Clara Lane (by Kiwi Lane)

    Stampin’ Supplies Used

    Stamps – a Round Array
    Ink – Marina Mist, Marker (Sahara Sand)
    Paper – Watercolor Wonder designer paper, Subtles designer paper stack (Soft Sky), Whisper White cs, Smoky Slate cs
    Accessories – Natural Trim ribbon, Essentials Wooden Accents, Watercolor Wonder Washi tape, Gingham Garden Washi tape, Epic Day washi tape, 7/8” Scallop circle punch, glue dots, Thickers stickers

  • Triple Time Stamping (almost) with Petite Petals

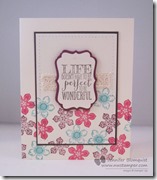
    So, I wanted to try a different idea for stamping where I did a background with random stamping and thought the new Petite Petals would be a fun stamp set to do it with. 

    I’ll admit, I completely did it WRONG but I think I covered up my oops well enough… what do you think?

    So, the way this card was a mistake was that the way you’re SUPPOSED to do this technique is:

    1. Cut a piece of white cardstock smaller than your card base
    2. Hold your smaller piece of cardstock down on your card base and random stamp your images all over the card base AND the smaller piece of cardstock so that some images are stamped across BOTH pieces of paper.
    3. Adhere your smaller piece of cardstock to a slightly larger piece of cardstock for a mat to break up the stamped images.

    Here is how I stamped it: 

    1. Random stamp your cardbase with lots of cute images
    2. Cut your smaller piece of cardstock
    3. Hold your smaller piece of cardstock over the stamped cardbase and realize that some of the images are supposed to overlap
    4. PANIC
    5. Grab a scrap piece of paper and eyeball stamping the flowers on the smaller piece of cardstock so they look like they were stamped overlapping both pieces of paper.
    6. Adhere your smaller piece of cardstock to a mat and call it good enough! Smile 

    See, it was pretty close for eyeballing, huh?

    Then I wanted to add a few more details and started adding bits and pieces.

    I started with the sentiment (I LOVE this phrase from the Perfect Pennants stamp set) and then matted it with some extra punches from the decorative label punch.

    Then I needed a little more, so I added some paper piercing around the inside of the matted cardstock and a bit of crochet ribbon to add a vintage touch.

    And next time… I’ll actually stamp it the right way and it will go sooooo much faster! Winking smile 

    spaced shop now sig bar

    Stampin’ Supplies Used

    Stamps – Perfect Pennants, Petite Petals
    Ink – Melon Mambo, Tempting Turquoise, Rich Razzleberry, Basic Grey
    Paper – Very Vanilla, Basic Black, Rich Razzleberry
    Accessories – Crochet Trim, Decorative Label punch, Essentials Piercing template, Paper Piercing tool, Piercing pad