Happy Monday! I’m back today to share with you a fun Foxy Friends card that I’ve been sitting on for a while. And by sitting on for a while, I mean, I made this at my LAST Northwest Crafty Retreat Weekend in the fall! We have our next retreat coming up at the end of the month, so its about time I get this posted. ![]() This was my interpretation of a Mojo Monday card sketch and the A Little Foxy Suite made it come together so super easily. Keep reading and I’ll show you the sketch and how I put it together!
This was my interpretation of a Mojo Monday card sketch and the A Little Foxy Suite made it come together so super easily. Keep reading and I’ll show you the sketch and how I put it together!
Tag: hello card
Saying Hello with Foxy Friends and the A Little Foxy Suite
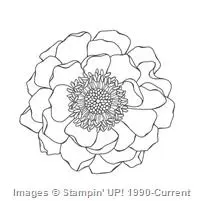
A Clean and Simple Embossed Happy Hello with Blended Bloom
Sometimes I get all caught up in the fun of playing with all my punches, ribbons, and accessories, that I forget to go back to the basics…. ink, stamps, and paper! But I shared this card with my Stamp Club recently and loved the elegance of it and the simplicity.

Tips for making this card:
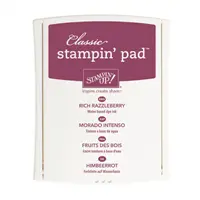
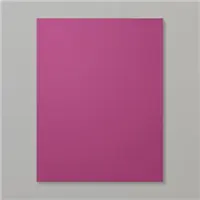
- Pick your favorite color and feature it on your card and then stick to simple neutrals to break it up. In this case, I just used Rich Razzleberry and Whisper White… and it turns out, that is all the color you need!
- Keep it from being too flat by spicing it up with two of my favorite tricks: Heat Embossing and Sponging!
- I started by heat embossing the Blended Bloom flower in the lower left corner of my Rich Razzleberry cardstock. To do this:
– Lightly wipe over the area with the Embossing Buddy (it is a little cloth pouch with powder inside), this de-statics the paper and makes sure the embossing powder only sticks to the stamped lines and doesn’t give you speckles in other places!
– Stamp your image using Versamark Ink (the clear watermarking ink)
– Generously dump embossing powder over the stamped image to make sure all the ink is covered in powder.
– Tap off any excess powder onto a piece of computer paper or the grid paper mats are perfect for this! And then dump the excess powder back into the container.
– Use the heat tool to blow hot air over the embossing powder to melt it into the shiny awesome raised image that you want! - Once you have your embossed flower, tap a sponge dauber into Rich Razzleberry ink and then swirl it over the center of your flower to get the darker middle. Easy as that!

- Sponge all the way around the edges of the stamped card for a darker edge.
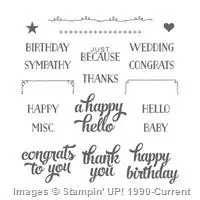
- Do the same thing with the sentiment by heat embossing, I used the “A Happy Hello” from the Tin of Cards stamp set (LOVE IT!) and added a bit of the trim from the same stamp set in Rich Razzleberry ink.

- Then just adhere your layers and you are done!
See, I told you easy… and fun too!
Hmm… speaking of easy, this is inspiring me. I think I may use this same general idea to create some swaps for OnStage Local – Stampin’ Up’s new live events that is the replacement for Convention and Regionals! I’ll be headed to Vancouver, WA tomorrow for this fun event starting with a leaders dinner Friday night and then the main event on Saturday! We’ll be getting a sneak peek at what is coming new in January 2016 with the spring Occasions catalog and Sale-a-Bration! Woo hoo! Can’t wait to see and then share.

And in other exciting news….
Class by Mail Page is Up! See available kits and tutorials from past classes now!
I have had folks asking for a place to see all of my classes by mail and project tutorials. Well, I finally have them all consolidated into one place. I’ll still be making some changes and improvements to the layout of the page and adding some more descriptions, but they are up and ready for you!
>>> Available Classes by Mail and Tutorials <<<
Just email me with your order
or
shop online at www.nwstamper.com/shop with hostess code PU2EYZJY
(if your order is over $150, skip the hostess code and you’ll get the benefits & the tutorial!)Then email me with which tutorial you would like sent to you for FREE!
Offer good through 11/18/2015![NWstamper signature_thumb[9]](https://i0.wp.com/www.nwstamper.com/wp-content/uploads/ad87b4046c1e_C9F6/NWstamper-signature_thumb9_thumb.png?resize=322%2C118 "NWstamper signature_thumb[9]")
![order online button for sig 3_thumb[4]](https://i0.wp.com/www.nwstamper.com/wp-content/uploads/ad87b4046c1e_C9F6/order-online-button-for-sig-3_thumb4_thumb.png?resize=307%2C45 "order online button for sig 3_thumb[4]")
But use Hostess Code PU2EYZJY to get a special thank you from me!
Project Supplies Used:
Built for Free Using: My Stampin Blog
Playing with the New Labels Thinlits Flip Card
When I ran a recent class about cards that flip and pop, I knew I had to share a card using the new Labels Thinlit die. I mean, the fact that one run through the Big Shot and you have the card almost done, got to love the ease of that.
Since the thinlit die comes with a bunch of extra shape dies, I wanted to see what I could come up with that mostly uses those extra shapes. Have you seen all the options?

So, this is what we made:

I decided to try to experiment – and this is a little hard to see in the picture – but with the main label shape, we actually cut out a label in Coastal Cabana and then cut out a second label shape in So Saffron, but this time, we placed the “hi” die inside the label die so that it would cut out the “hi” leaving a hole in the shape of the word (does that make sense?
 ) Then we glued the labels together so the Coastal Cabana peeked through!
To decorate the rest of the card, we added a bit of Washi tape to the front of the card and then stamped an image from the Gorgeous Grunge stamp set. We stamped the inside, just like the card from last month’s newsletter
(if you missed it, you can sign up here and I’ll get you a copy of the past newseltter)

So this is an idea to make a card using just a few supplies…. now I’m off to try out a few more ideas that incorporate more items from your craft room to step up the card even more.
Untill then, happy stamping!


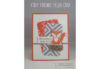
Cute and Quick Masking Card using Oh Hello
I love my monthly technique classes, not only because I love sharing new ideas with the folks who come craft with me, but it forces me to remember some techniques I haven’t tried in a while and come up with new takes on old methods.
Today’s card is one we created recently in my Misting and Masking technique class.

This was a simple card that is a lot of fun to do! And it uses 3 different styles of masking!
1. Using a mask so your stamp pattern only shows in the pattern of the mask
(in this case, I die cut a flower from the Floral Fusions framelits and laid the paper with the flower shaped hole over my card front. Then I stamped using the chevron oval from the Oh Hello stamp set. Ta da! A custom chevron flower!)2. Using a cut out piece of paper to prevent part of the stamp image from leaving ink on your card front
(in this case, I used the die cut flower from step one and laid it over the stamped chevron flower. Then I could stamp my arrow “leaves” and have them appear to be hidden behind the flower!)3. Use a post-it note to cover up part of a stamp’s image before inking
(in this case, I covered up the “oh” part of the “oh hello” stamp so that I only inked up the Hello part. This works a bit better than inking up the whole thing and trying to clean off just the “oh” part because often you don’t get it all or you still have some weird colored cleaner on the stamp that transfers to your image exactly where you don’t want it.)See, made entirely by tweaking up the Oh Hello stamp set:
 And the cute Sycamore Street ribbon and button bundle from the Sale-a-Bration flyer (yup! that is right! Get all the ribbon and buttons you see here FREE with your $50 order!)
So, give it a try and I hope you had as much fun as I did!

To Order Stampin’ Up! Products Anytime, click here!
Are you earning your Northwest Stamper Rewards?
Every order gets you closer to your FREE stamp set! Click here to learn more!
Hello Masking Card Recipe:
Stamps: Oh Hello
Ink: Crumb Cake, Raspberry Ripple, Gumball Green
Paper: Whisper White cs, Raspberry Ripple cs, Crumb Cake cs
Accessories: Sycamore Street ribbon & button pack*, Glue Dots, Big Shot, Floral Fusion framelits* item that is available for free with a $50 order through 3/22/2013