Northwest Stamper

Tag: gold foil

  • Cheery Thanks Peek-a-Book card with Pop of Pink Washi

    Are you like me and after you’ve taken a little bit of time off from getting into your craft room, you return to sit and stare at your supplies thinking, “I really want to make something cute, but have NO IDEA what to make or where to get started!”

    I swear, getting my groove back on can be the hardest thing for me in crafting.  Well, today, I wanted to share with you a project idea that is quick, easy, and is a great way to get over that missing mojo hump and get your crafting groove on.  The always fun, washi peek-a-boo card!

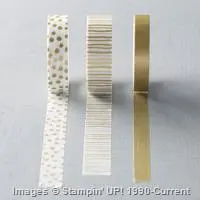
    When you do a card like this, start with your basic white card base and then grab your favorite set of washi tape.  In this case, I grabbed the Pop of Pink Washi Tape pack.  It has 5 coordinating patterns, but since they all go together, you can just pick your favorite 3 patterns and lay them out on a white layer of cardstock.  See… super easy so far!

    Then it is just a matter of creating a fun layer with a cutout for that pattern to peek out through!

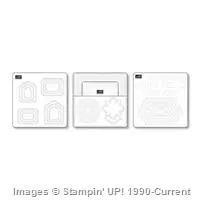
    In this case, I grabbed the Layering Square framelits and the Elegant Butterfly punch to create my accent piece.  I picked out a square from the Layering Squares dies that was just a little bit bigger than my punch and then using that selected a matching scalloped square that would give me a reasonable sized border.  Then it was as simple as cutting out a piece of Whisper White cardstock with the square and a Gold Foil piece with the scallop square and glue them together.  Then I could punch out the butterfly from the center.  Fun, huh?

    Once you have that, just place over your washi tape with the foam Stampin’ Dimensionals, and add a sentiment (from one of my favorite sentiment sets – Suite Sayings) in the corner.  Then you can just mount it all onto your white cardbase and you are done!

    And just like that, you’ve made something cute and you are ready to keep the momentum going onto your next project!

    Looking for more ideas and tutorials?  Don’t miss the details below about my 12 Weeks of Christmas.

    12 Weeks of Christmas FREE Exclusive Tutorials – are you on the list?

    12 weeks of christmas

    Last week was the first week of the 12 Weeks of Christmas program I do each year, and TODAY the second tutorial is being sent out!  I wanted to make sure to remind everyone that you’ll want to get signed up on my newsletter list to make sure you are getting all of these great project and card ideas that are perfect for setting you up for awesome holiday crafts.   These are projects I don’t post on my blog or on Facebook, plus you’ll get step by step instructions and a downloadable PDF so you can print it out and save it for later!

    ** Get on the Email List Here **

    NWstamper signature_thumb[9]

    order online button for sig 3_thumb[4]

    October Online Stamp Club Hostess Code – YG62GG6C
    Get free exclusive tutorials each month and even get the supplies in a Make & Take kit with your order over $40 when you use the monthly hostess code!

    Project Measurements:
    • Whisper White cardstock – 5 1/2″ x 8 1/2″, 4 3/4” x 3 1/2”, scrap (2 1/2”-3” square)
    • Gold Foil –scrap (3”x3” ish)


    Product List

  • 3 Ways to Play with the Season of Cheer Designer Paper–Plus a Note about the Woodland Embossing Folder

    I know, I normally try to share one project in a post at a time, but today I had 3 projects that all used the retiring (and discounted!) Season of Cheer designer paper and since it was going away in a couple days, I figured why not share them all so you could see some different ways to use the paper in that pack!  You see, I tend to get into the trap of thinking a paper is just for the holiday it is sold for; so when I discover all-year ideas, I get really excited.  I think this paper pack especially lends itself to the all-year idea and so that is extra awesome.

    So, for example, this card…change out the sentiment and it could be thinking of you, thank you, miss you… absolutely anything you want!

    Missed the Woodland Embossing folder?  It’s coming back!

    And while we are here talking about retiring items.  I wanted to do a quick PSA about the Woodland Embossing folder… Stampin’ Up heard us, they realized this embossing folder was so stinkin popular and not everyone had a chance to get it before it sold out.  So they are working with their manufacturer and the embossing folder WILL BE BACK with the Annual Catalog in June.  So, don’t pay obscene amounts on Ebay for it.  Just hang tight and you will be able to get it again soon!

    Ok, now back to the card… Smile

    I love this technique with the Woodland embossing folder – brayer ink on the side of the folder where the trees are indented, then BEFORE you run through your Big Shot, stamp your background image on that same side.  THEN run your paper through the embossing folder.  It gives you color behind the trees along with pretty background images peeking through.

    Retiring (and discounted) products in this card:

    Colors used:

    • Very Vanilla
    • Soft Sky
    • Pear Pizzazz
    • Early Espresso

    Now, the next question is… what to do with the definitely holiday/seasonal themed papers in the pack now that December is pretty much gone.  Well, I shared this card in class a couple days ago to share the idea that you can still use them – turn them into holiday thank you cards!

    I really wanted to play with my love – the wooden snowflake elements – and I realized it fit really well in the Flower Medallion punch!  So we punched out the flower from a 3 1/4” x 3 1/4” piece of Very Vanilla cardstock.  And THEN punched out the flower shape using the 2 1/2” Circle punch.

    You can layer this over a piece of Whisper White cardstock that has the Winter Wonderland washi tape stretched across for a cool peek-a-boo technique.  Then just add your snowflake to the center using the Fine-Tip glue pen or a couple of glue dots.  I especially love the added touch by my friend Tanya Cabral who added the White Perfect Accent to the center of the snowflake!  Really centers it, don’t you think?

    Retiring (and discounted) products in this card:

    Colors used:

    • Very Vanilla
    • Whisper White
    • Crumb Cake
    • Night of Navy

    Finally, what if you really don’t want to look at another holiday card for a long while?  Like you’ve made and sent your tons of holiday cards and you are ready to move on?  How about a birthday card?!

    Yup, totally same paper pack!  Just flip over some of those patterns to see great anytime designs.  I used these to make a cheery birthday card that is great for any guy or gal in your life.  We mixed the Tin of Cards stamp set for the sentiment with the Be the Star stamp set for the star accents.  Then used the star punch to punch out the shapes, especially from the Gold Foil that is oh so snazzy.

    Sponge your edges with Soft Suede and a sponge dauber; tie on some linen thread, and you have a fun pulled together card.

    Colors used:

    • Whisper White
    • Crumb Cake
    • Hello Honey
    • Lost Lagoon
    • Soft Suede (sponging)
    • Early Espresso (cardstock)

    So hopefully this gave you some ideas for this fun paper – whether you already have some in your stash or if you are doing one last run through the Year-End Clearance sale and are looking for a great deal!

    NWstamper signature_thumb[9]

    order online button for sig 3_thumb[4]

    Use Hostess Code BEFX37ZS at check out to get a special thank you from me!

    NEW ITEMS ADDED – BIG Year-End Clearance Sale!  See what is on sale here.

    See all the tutorials & classes by mail here

    Check out the Holiday Catalog Retiring List & Sold Out Updates
    Save 25% on the Latest Weekly Deals

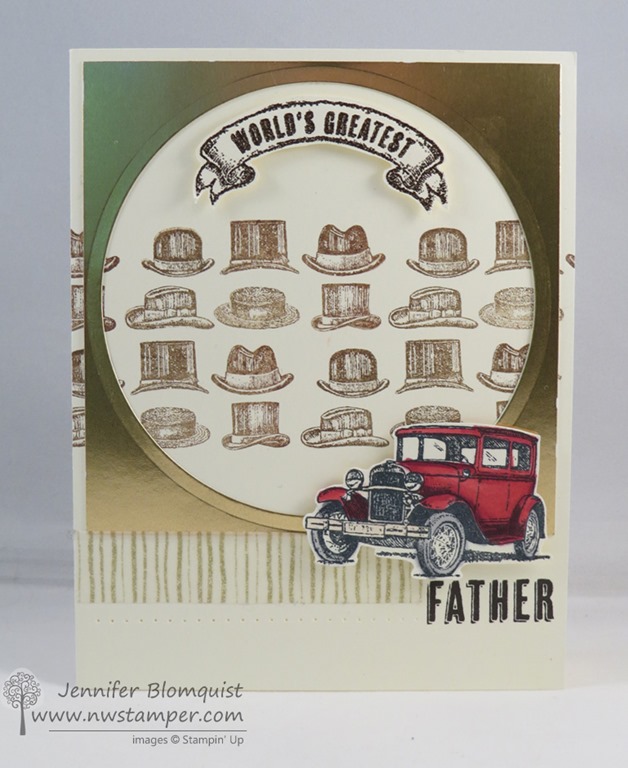
  • World’s Greatest Father Card with Guy Greetings

    World’s Greatest Father Card with Guy Greetings

    I can’t believe Father’s Day is coming up quick!  This year I’m bound and determined to make a gift early… I’m not sure what the gift will be yet, but at least I have a card ready!

    I aimed for the balance of fancy but not fussy, and I think it makes it there.

    Tips for making this card:

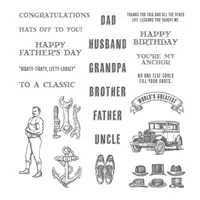
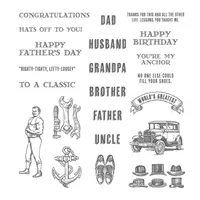
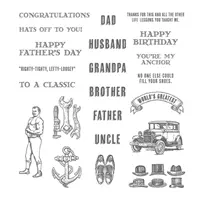
    • Mix and match the images from the Guy Greetings stamp set to make this for that special guy in your life. 
    • The stamp set not only says “Father” but you also get the choice of Grandpa, Dad, Uncle, Husband and Brother!
      image
    • Stamp the hats image multiple times to make a background for your card.  To help blend in the fact that you are using the same stamp a bunch, stamp the first time and then offset the second stamped image – ie stamp so the last row of the hats in the first image are lined up under the middle row of hats in the second image.
    • Spotlight them by using the Circles Framelits and cutting out a large circle from a 4”x4” piece of the Gold Foil paper – which is awesome stuff, btw!
    • Stamp and cut out the “Worlds Greatest” and the car image to give extra POP on the card.
    • Make it a little more polished by heat embossing the “World’s Greatest” and the “Father” sentiments.
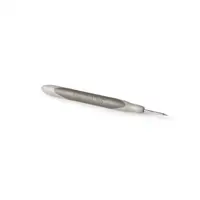
    • I also added a bit of the retired gold Watercolor Wonder washi tape and the used my Essentials piercing template to pierce a row of holes from the left edge to the “Father” sentiment.  Sometimes the little details are just what it needs!

    A few of the steps take a little bit of work, but for the awesome men in our lives, it is worth it, right?

    Want more ideas with this set?

    You can still get the instructions for the class by mail from last month and I have 1 kit left if you want an actual kit.  Get the details here.

    And here is a little something for you – new discounts with the Weekly Deals!

    Shop the weekly deals here

    Paper Pumpkin Special – Ends Tomorrow!

    And if you missed out on the Paper Pumpkin deal last month and wish you had tried it, there is a summer special available through TOMORROW

    paper pumpkin promotion

    Sign up here with code SAVE50


    NWstamper signature_thumb[9]

    order online button for sig 3_thumb[4]

    Project Supplies Used:

    Supply List
    Built for Free Using:  My Stampin Blog

  • Elegant Gold Stamping with the Curvy Keepsake Box

    Wanna a peek at one of the boxes we’ll be making in my Too Cute Curvy Keepsake box class?  I had said that we would be making 4 boxes including one that was stamped… but when I went to go actually make the stamped box I stalled out.  I had wanted to use my Endless Wishes stamp set, but had forgotten I had loaned it to a downline member.  So I needed an alternate option and this is what I came up with:

    Turns out Mixed Bunch is a great substitute!  Especially when you use gold and Early Espresso.  Didn’t it turn out nice?

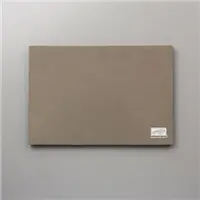
    I used the KRAFT cardstock – it is sturdier and a bit heavier than the Crumb Cake cardstock.  We’ll use Early Espresso ink and Encore Gold ink and then sponge with some Soft Suede ink.  But I really loved the extra touches to add to the bling – like the stamped sentiment which I stamped directly onto the Gold Foil sheets and then die cut out with the Starburst framelits.  Then add some gold sequins and 1/4” cotton ribbon to the top and you are set.

    I think these could be cute favors for events or just nice little gifts.  Can’t you imagine a pretty pile of these?  Smile

    If you would like to try out the fun boxes that you can make with this die, check out this fun class & class by mail I’m running tomorrow!  (Yes! You can still RSVP if you hurry)

    Tuesday 9/30 at 7pm, Panera in Redmond – RSVP here
    $15, save $5 with purchase of the Curvy Keepsake box die
    (Bonus kit – bring a friend and you both get to make the Turkey box for free!)
    Kit by mail option available!

    KIT BY MAIL – Get all the pieces precut and mailed to you in a kit to make all 4 boxes we make in class plus instructions for all of the boxes and the Turkey box!
    Cost is only $15+$3 shipping  (only $10 if you have purchased the die from me!)
    BONUS – have a friend sign up for the class too and I’ll include the Turkey kit for each of you!


    INSTRUCTIONS ONLY – Get access to the instructions for all 5 boxes so you can use your dies and punches at home to make these cute projects.
    Instructions will include all the dimensions, supplies used, and tips for making them as easy as possible!
    Cost is only $4.95  (that is only $1/box!)


    spaced shop now sig bar

    Hostess Code:  C2HYWWQM Use this Hostess Code and receive a free gift!
    (Please do not use the Hostess Code if your order is $150 or more)

    Project Supplies Used

  • From Scraps to Shiny Sweet

    Yesterday, I was trying to finally unbury my craft table…again!  I had everything piled up from the last two weeks, including all the odds & ends from my spare table that I used for prep work for my events that I took down over the weekend.  I was sooooo excited to be down to just all my scrap cardstock that was sorted and just needed to be put away in my file folders, so I thought I’d get it all wrapped up. 

    What is it about a clean craft table that makes you want to get crafting again?!

    As I was putting away scraps, I had this stamped strip of paper and the scrap strip of Gold Foil paper.  I thought,” why not make a banner out of the gold paper and glue them together?”  Then I grabbed the Vintage button I had colored for my Blendabilties class and stuck it on the end… grabbed some sequin trim scrap, some lace scrap, and cherry cobbler scrap… and things just started coming together!  Gotta love it when that happens. Smile

    Tips for making this card:

    • Take a regular ol’ white or vanilla button – like this Very Vintage Button – and color it with your Cherry Cobbler blendabilities!  Use the PEN TIP to color so you don’t risk messing up your brush tip.
    • Add a single sequin to the center with a glue dot for a complimentary bit of shine.

    • Did you know, this sentiment is from the Happy Hour stamp set and is 25% off with the weekly deals this week!  Love it!
    • Want to add a bit of shine to a corner of a card?  Staple a string of sequins for some not-too-overdone shine!  I used my Stampin’ Up mini stapler to staple the strand into a twist first and then stapled that onto my card.  (yes, I’m sure that made no sense, but if you just staple it to your card front, that works great too!)
    So, don’t forget to use those scraps!  You never know when they will come together just right. Smile

    spaced shop now sig bar

    Hostess Code:  C2HYWWQM Use this Hostess Code and receive a free gift!
    (Please do not use the Hostess Code if your order is $150 or more)

    Card Supplies Used:

  • Muslin Birthday Treat Bag with Amazing Birthday

    It’s Stamp Set Focus day over at Stylin’ Stampin’ Inkspiration and today everyone is playing with the Amazing Birthday stamp set!  I had so much fun using it for the convention display boards this summer and I love it’s versatility! 

    So today I’m going to shake things up a bit… I’m not sharing a card!  Gasp! I know, what is wrong with me? Winking smile  I don’t often do 3D projects but I do have to admit I love embellishing some of the premade treat bags and boxes.  Especially these Muslin Bags from Stampin’ Up because they are so soft and have such fun textures to work with.  What do you think?

    Tips for this project:

    • You can stamp on the Muslin Bags with any of your Stampin’ Up inks, but for longer and more solid staying power, grab your Stazon Ink for best results – like I did with the cake images.
    • If you are really crafty – aka have a sewing machine, which I do not – you can sew your ribbons together and even onto the bag.
      If you are like me and DON’T own a sewing machine, I attached the Melon Mambo 1/8” taffeta ribbon to the Chevron Natural ribbon using Sticky Strip.  Then I used hot glue to attach the Chevron ribbon to my bag.  I made sure to put a piece of cardboard inside my bag while glueing just in case any glue oozed through (none did, but I wanted to be extra sure).
    • I used the Banner Framelit to cut out the Thankful sentiment.  Then I took that same framelit and traced the outside of the framelit shape on a piece of Melon Mambo cardstock and cut it out with scissors to create the mat piece.

    • For the gold foil, layer a long strip of foil onto your banner shape and then just use your snips to cut out the banner end to match the cardstock piece underneath.
    • Add subtle sparkle by dotting Dazzling Details all over the front and back of the bag.  Just make sure to give it enough time to sit out to dry!

    These bags would be perfect for goodie bags or thank you gifts for a birthday party or other celebration!  Just mix and match your colors and you are good to go!

    One Week Only!

    Join my crafty crew, the Fun n’ Crafty Stampers and receive an EXTRA $25 in free product with your Starter Kit!  That is $150 in goodies for only $99! If you’ve been considering starting your own business, making some money to cover your craft supplies, or just want to get your supplies at a discount, this is a great deal and an awesome time to become a member of my stamping group from across the US!  Learn more here

    spaced shop now sig bar

    August Online Stamp Club Hostess Code – TT2NETD4
    Use this code to get free exclusive tutorials & project kit! Learn more

    Project Supplies Used:

  • Masculine Monday with Burlap, Woodgrain, and Word Bubbles!

    Masculine Monday with Burlap, Woodgrain, and Word Bubbles!

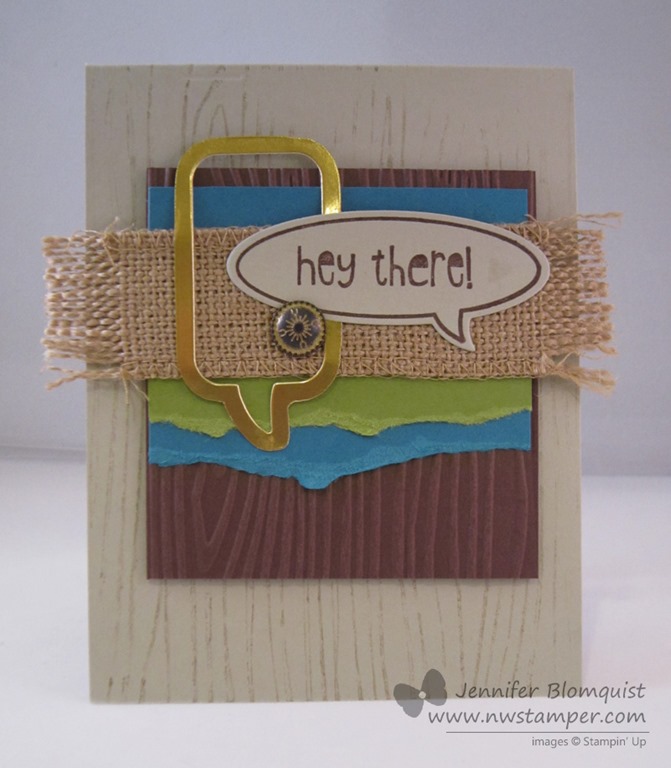
    I know many of us struggle with masculine cards.  I often find it so easy to reach for my flowers and rhinestones and pinks and whatnot; but when I need to make a card for a guy, those go-to items suddenly don’t seem to be quite the right fit.  Well, as luck would have it, today over on the Stylin’ Stampin’ Inkspiration blog, they are sharing some cards for Masculine Monday (and WOW are there some stunners!)  So, I wanted to participate with the design team and I wanted a guy card for my upcoming card class at the Scrapyard Chicks Spring Workshop, so I grabbed some burlap ribbon, some scraps of paper, and got to work!

    Can I just say… I LOVE how this turned out.  It has a lot of fun touches to it without being super over the top or fussy.

    The class I’m teaching in April focuses on 6 different techniques and for this card, I was showing off a neat different way to use your embossing folders…. as a stamp!  That is right, that grainy background on the card base – it is actually stamping using the Woodgrain embossing folder.

    So how does that work?

    1. You take your ink pad and slide it along the raised side of your embossing folder.
    2. Close the embossing folder over your card front so the ink is where you want it (basically, make it look like you are about to run it through the Big Shot)
    3. Do NOT actually run it through the Big Shot, instead use your bone folder to burnish the embossing folder and impress the ink onto your card base
    4. Open up the folder and admire your stamping work. Smile


    The other think I really liked about this card was the mixing and matching of the word bubbles.  I stamped the “Hey There” with the Just Sayin’ stamp set and then cut it out with the Word Bubbles framelits (and yes, get the bundle!  They are both cute Winking smile).

    But then I needed something more, so I grabbed some of the Gold Foil paper and cut out a different word bubble shape from the framelits.  Now, when you look at the paper that now has a word bubble sized hole in it, you will see that the framelit die embossed a faint line from the outer edge of the die (as opposed to the inner edge of the die where the cutting occurred).  So in this case, you can use that faint line as a cutting guideline and cut along that share to give you this cool metallic word bubble outline!

    Oh, and I actually did emboss the Chocolate Chip paper with my embossing folder… I like the contrast of the stamped woodgrain and the embossed woodgrain.

    So, what do you think?  I really liked how it turned out and can’t wait to share it at the workshop in a month!


    spaced shop now sig bar

    March Online Stamp Club Hostess CodeXEWP4DFD
    Use this code to get free exclusive tutorials & project kit! Learn more

    Stampin’ Up! Supplies Used
    Stamps – Just Sayin’
    Ink – Soft Suede, Chocolate Chip
    Paper – Sahara Sand, Old Olive, Island Indigo, Chocolate Chip, Whisper White, Gold Foil
    Accessories – Big Shot, Word Bubble framelits, Vintage Brads, Woodgrain embossing folder, Burlap ribbon

    Favorite products:

    134820s
    127821s
    132140s
    117273s
    132622s
  • A Golden Anniversary Card

    Have I mentioned that I’m finally falling in love with this Gold trend?  When I had a chance to sit down and play with my new stuff for an afternoon recently, I found that I kept reaching for my Gold Foil paper or the Gold Vellum.  Given that this is the girl who ALWAYS prefers silver to gold and practically never wears gold anything… this is HUGE!

    So, how about this card for someone who is celebrating an anniversary?  Especially a golden anniversary?  (hee hee… did you see what I did there? : ) )

    I was very lucky to have been given this stamp set as a gift over the holidays.  I had actually seen the rubber for this set in the production line when I was in Kanab in September for Founder’s Circle and just LOVED the mustache, the I do with the “o” being a ring, and the people (aka – bathroom people I’ve heard them called).  See… kinda fun, right? Perfect Couple

    Perfect Couple Stamp Set

    So, I just had to play with it and I got in the mood to try out my Oval Framelits as well.  Yes, I know they aren’t new-new, but they hadn’t come out of their packaging before in my house, so they were novel to me!

    I tried this idea of cutting out the ovals to make a frame and then mounting the gold heart vellum to the backside of the frame.  That way, I could have my vellum and not have to worry about edges or how to glue it down.  Plus, in this case, I actually like the embossing that sometimes gets left behind when you cut out with a framelit.  It adds FLAIR!

    Then just stamp and punch out your people and it looks like a fun cake topper from their wedding.  Anyone else see it? 

    And, yes, this leaves you with big ovals left over from the gold and the Crisp Cantaloupe cardstock, but I’ll show you tomorrow an idea for how to use them!  So, make sure to stop back by!

    Stampin’ Up! Supplies Used

    Stamps – Perfect Couple
    Ink – Basic Grey, Crisp Cantaloupe
    Paper – Very Vanilla cs, Crisp Cantaloupe cs, Gold Vellum, Gold Foil cs
    Accessories – Big Shot, Oval Framelits, Extra Large Oval punch, Decorative Label Punch

    Oh hey!  I just saw that one of the Weekly Deals is the oval punch I used in this card.  How snazzy is that?  So, if you don’t have it, know it goes great with the couple stamp and you can get it for 25% off this week.

    image


    spaced shop now sig bar

  • The Stampin’ Up! Occasions Catalog is Here!

    I don’t know about you but I’m ready to shake off winter and the holiday projects and start thinking lighter and spring!  Turns out the papers and stamps from the new Occasions Catalog help get me in that mood without me even thinking about it.  I personally love how fresh this latest catalog feels… it still has the same set up as the holiday with TONS of ideas and inspiration in the first half, followed by all the actual products in the back half. 
    2014 Occasions Catalog

    View the Occasions Catalog PDF
    Occasions Catalog Supplies List

    I’m going through phases with what I’m using and loving (I can’t get enough of the gold foil paper right now!) but here are a few of my favorites for today:

    But let me show you…here is one of my first cards I made with the So Very Grateful stamp set:

    I saw it and I knew I had to have it.  Apparently I’m craving stamps to watercolor!  But it is just so darn relaxing and fun to get creative with colors without having to worry to much about messing anything up. ha ha.

    As you can see, I’m also busting out tons of gold metallic but I think it is just enough to make it pretty and not overdone.

    Card Supplies Used

    • Stamps – So Very Grateful
    • Ink – Basic Black, Strawberry Slush, Crisp Cantaloupe, Pistachio Pudding
    • Paper – Fresh Prints designer paper stack, Whisper White cardstock, Watercolor paper, Gold Foil paper
    • Accessories – Aqua Pen, Gold Sequins

    See something you love?  You can find all of it in the online store. Smile

    So Very Grateful stamp set


    spaced shop now sig bar