Northwest Stamper

Tag: emboss resist

  • Simply Elegent Emboss Resist Christmas Card with Totally Trees

    Its been a busy holiday season around here!  My kids are in full swing of school and extra-curricular activities winter performances.  Between last week and this coming week, we have something happening every day.  But I still love the season and all the opportunities to see everyone and see the joy in my kids faces as they get to perform and show us what they have been working on! 

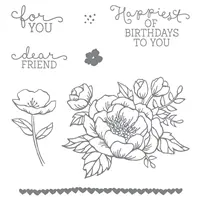
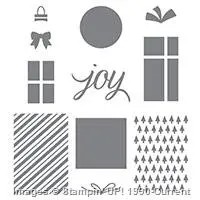
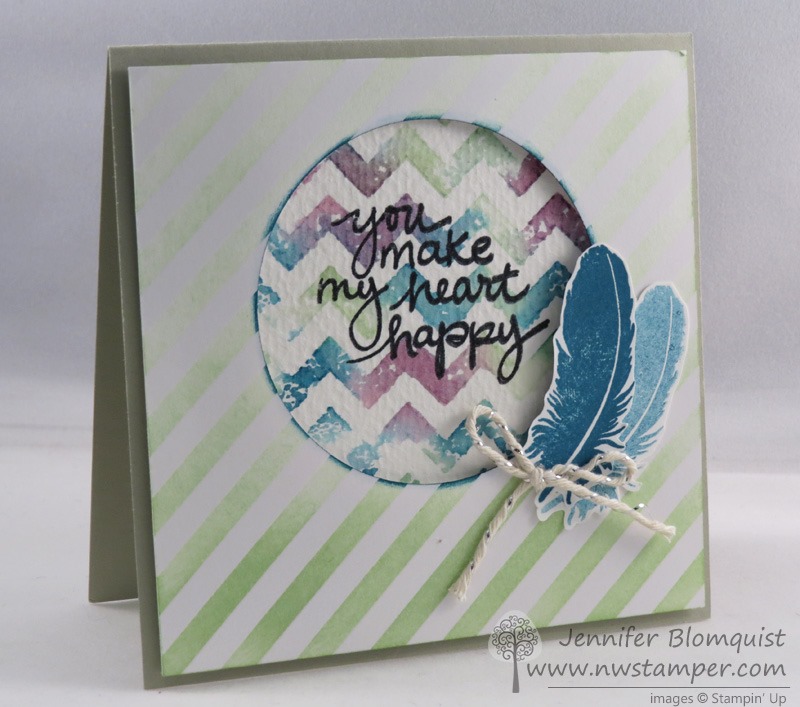
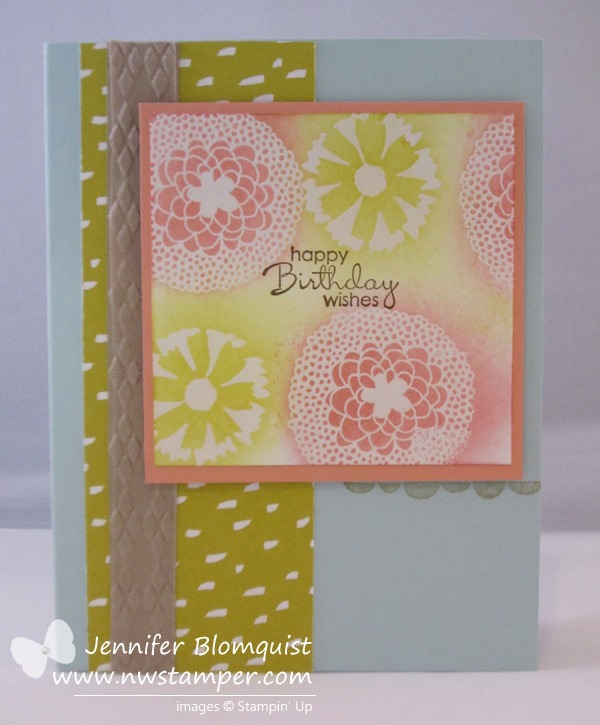
    Well, let me share a little of my joy… one of the holiday cards I’ll be sending out this year to send some cheer.  This was a card I created for one of my holiday card classes and it uses the awesome Totally Trees stamp set (it’s retiring this month, FYI!) and the great emboss resist stamping technique.

    Tips for making this card:

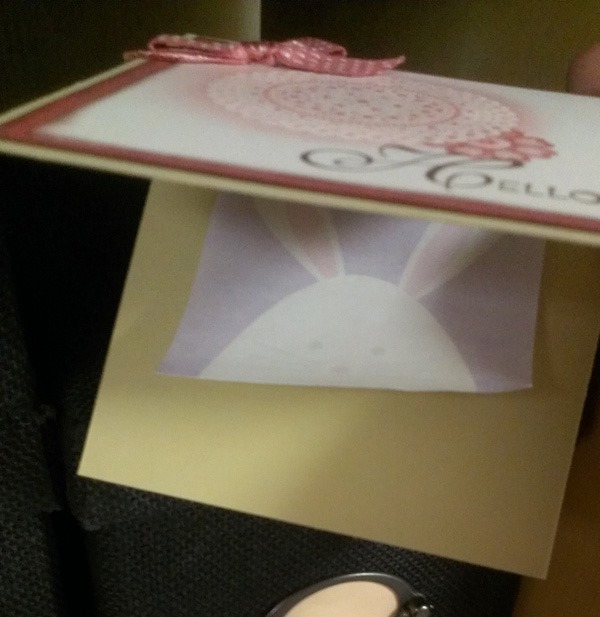
    • Heat emboss your tree image onto a piece of Whisper White cardstock using White embossing powder AFTER cutting out your oval!  Normally I advise folks to stamp first and then die cut, but in this case, because you want to make sure your trees are spaced so they will all fit in your oval, it works better to stamp after cutting out the shape.
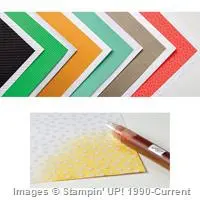
    • Use the yellow Stampin’ Sponges for smooth color coverage over your embossed images.  Once you have done your heat embossing, you can sponge color right over the top of them to create a colored background.  The ink won’t stick to the shiny embossed areas, so you get color in between the tiniest of details.  And the yellow sponges give you a much smoother color coverage than sponge daubers and makeup sponges!
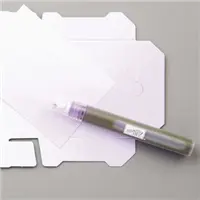
    • Add some sparkle and color shading with Wink of Stella.  If you look at my trees, you’ll notice that the blue looks a little darker around the tree branches.  That is because I colored with the clear Wink of Stella after I was done sponging the background.  The glitter paint darkened the background slightly and adds lots of shimmer to the card in person!

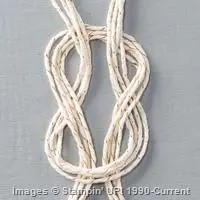
    I had been using my layering ovals for the blue scalloped background and then wanted to add a little more detail so I ran some SNAIL adhesive on the back of the blue oval and created loops out of the Silver Metallic Thread and just pressed the loops into the adhesive on the back of the oval to hold them in place.  I also layered everything over some of the Loose Burlap Ribbon to add a rustic or natural touch… and to keep the card from drowning in blue. Smile

    Change the colors and the sentiment and you could use this for a sympathy, masculine birthday, or thinking of you card any time of the year!

    Christmas is coming!  Make sure your holiday orders will arrive on time!

    1ftwf8

    Stampin’ Up has said that the deadline for orders to arrive before Christmas is December 15th.  If you are on the west coast, you may have a little more time, but don’t add stress this holiday season.  I know I’m trying to wrap up my holiday shopping lists…so get those last few gifts (for you or for a friend!) and then kick back and enjoy not having to worry or stalk the delivery man. Smile 

    NWstamper signature_thumb[9]

    order online button for sig 3_thumb[4]

    Project Measurements
    • Soft Sky cardstock – 5 1/2” x 8 1/2”
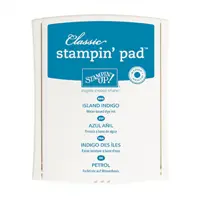
    • Island Indigo cardstock – 1 3/4” x 5 1/2”
    • Whisper White – 1/2” x 3 1/2”

    Product List

  • Fast and Fun Birthday Card with Birthday Blooms!

    Sometimes I need a card, but my brain is just struggling when I try to figure what exactly to make for that card.  Anyone else know that feeling?  Like, you have your supplies in front of you and you just stare at them, willing them to start arranging themselves into some awesome design… but sadly, they just lay there looking back at you. Smile  Well, the other day I was having that same problem when I suddenly remembered the amazing Emboss Resist technique and had a flash of inspiration!  Check out this cute card that is so easy to do with this technique:

    Jennifer’s Project Tips:

    • Emboss Resist is an easy WOW for your cards!  Here is how it works:
        1.  Find your favorite line art image… this works great with lace, doily, and outline flower images like this one from Birthday Blooms… the important thing is that there are skinny lines with lots of non-inked space in between.
        2.  Rub the surface of your cardstock with an Embossing Buddy (this prevents static or other dust from causing stray embossing powder to get stuck later)
        3.  Ink your stamp with Versamark ink and stamp your image
        4.  Cover with clear or white embossing powder and heat set
        5.  Use a wedge cut from one of the yellow Stampin’ Sponges and sponge ink over your embossed image
        6.  Use a kleenex or paper towel to rub over the top of your embossed image to remove any excess ink
    • For best results, use one of the yellow sponges – I find that the yellow sponges are more poreous and so tend to do a better job lightly applying ink and keeping it fairly smooth instead of having a stark circle of ink from a sponge dauber or makeup sponge.  Grab one and cut it up into 6-8 wedges and you can play with lots of colors.
    • Experiment with lots of colors!  I was making a bunch, and so I grabbed a bunch of left over cardbases (when I cut a paper in half for a card base, I keep the extra half in a plastic bag to use later) and then made the same stamped/embossed image and just changed up the ink color to match cardstock!

      Birthday Blooms emboss resist cards
    • Keep the rest of the card simple to let your embossed image really POP!  I used just a few rhinestones and stamped my sentiment in Tip Top Taupe ink so that I could have the focus be on my embossed image.

    So give it a try and let me know what you think!

    Short on time and design ideas?  Have fun & keep it easy with Paper Pumpkin!

    I totally forgot to share this before, but since we were talking about making things easy, I wanted to let you know about a special promo going on right now.  12494668_1099050553458618_2931584849723161323_nEach month we get:

    • Exclusive subscriber only stamp sets
    • Precut cardstock & accessories
    • All the ribbons & embellishments
    • INK!  (guaranteed different colors each month for at least 12 months!)
    • A clear block with your first kit that you can use with ALL the stamps in future kits
    • Extra supplies – just in case you need them
    • Exclusive access to purchase refill kits (everything but the stamps and ink for only $8!) or complete extra kits while supplies last! (see them online here)

    And through the end of March, if you purchase a 3-month, pre-paid subscription you’ll save about $5 off the subscription price, plus get to pick out a Sale-a-Bration stamp set or paper pack for FREE!  Sweet, huh? 

    You can even combine that with my Technique Series hostess code – TNCXV4MP – and get a free kit from my January Technique class too!

    Get or GIFT your Paper Pumpkin Subscription here


    NWstamper signature_thumb[9]

    order online button for sig 3_thumb[4]

    Use Hostess Code PGHMVNJM at check out to get a special thank you from me!

    Pick a FREE item with every $50 you spend!  See the Sale-a-Bration catalog.

    See all the tutorials & classes by mail here

    Save 25% on the Latest Weekly Deals

  • Christmas Card Joy with Peaceful Pines

    I really did have grand plans this year to get all of my Christmas cards out early.  After years of being terrible about NOT sending out cards at all, last year I sent out around 70 holiday cards and it felt great to be putting a little cheer out through the mail.  So, I was all gung ho that I was going to be all organized this year and get them in the mail at the beginning of December.

    But then suddenly, I turned around and here it is December 16th and they have yet to hit the post office!  Anyone with me?  How many times do we have grand plans but one reason or another keeps us from making it happen?  Well, I’m here to say, it is never too late!  In this case, there is still time to make and send Christmas cards (or send the cards you have!)  Today’s share is a simple card idea that you can pull together quickly for those people who need some holiday cheer from you.

    I actually made this card as a swap for the November OnStage Local regional event.  I decided the day that we were leaving that I wanted to make swaps after all and so I pulled these together.  They are clean and simple, and easy to pull together!

    Tips for making this card:

    • Keep it simple and cost effective by choosing ONE color plus white – I picked Always Artichoke because I had an almost full pack on my desk and thought the muted color would be good for this design.  Use that color for your card base and for your smallest layer.  Then just use Whisper White cardstock as your matting layer to create a nice border around your stamped images.
    • Use heat embossing for an easy-to-create WOW – I kept in the deep green theme by stamping a tree and my sentiment in Mossy Meadow ink, but added layers and dimension by stamping one tree in Versamark ink and then covering it in White embossing powder.  Heat set for a snowy tree that really catches your eye.
    • Make your embossed images more interesting with sponging – I sponged over my white embossed tree with Always Artichoke ink to give the tree some depth.  This is a great technique to use on any project you are heat embossing though.  Just match the ink color with the color of the underlying cardstock for a rich addition to your image.  You can also make your central cardstock have more dimension with the same trick only by sponging the edges of the cardstock with the same color ink.
    • Try out different size banners! – I had left over Always Artichoke cardstock strips after cutting for the smaller piece on this card.  So I decided to use them by cutting them in half and stamping my sentiment (the Joy from the Your Presents stamp set).  I normally do longer and skinnier banners, but this smaller size was just right for this card.
    • Make banners more easily with the Banner Triple Punch – The best part about adding banners is that I don’t have to try hard to make the ends look even and nice thanks to the Banner Triple Punch (I still want to call it the triple banner punch!)  Even if your piece is small, you can slide it in to this punch and with a press, you have perfect banner ends!  Easy Peasy!

    So, if you still have Christmas cards to make, you still have time!

    And if you need to order some extra supplies, you still have time for that too!  If you are on the west coast, orders typically come in about 2-3 days.  If you are on the east coast… well, orders will arrive before Christmas if you order by tomorrow, so you can still make “thinking of you at Christmas” cards. Smile  Have questions or need help?  I’m here for you!  Email me at jennifer@nwstamper.com

    NWstamper signature_thumb[9]

    order online button for sig 3_thumb[4]

    Use Hostess Code BEFX37ZS at check out to get a special thank you from me!

    BIG Year-End Clearance Sale is on NOW! See what is on sale here.

    See all the tutorials & classes by mail here

    Check out the Holiday Catalog Retiring List & Sold Out Updates

    Save 25% on the Latest Weekly Deals

  • 2 Fun Techniques+1 Great Stamp Set = A Happy Hodgepodge Card

    2 Fun Techniques+1 Great Stamp Set = A Happy Hodgepodge Card

    I know I shared a card yesterday using the Lovely Amazing You stamp set for Walkthrough Wednesday (you can see the card and video instructions here)… so I hope you don’t mind me sharing another idea for you using that same stamp set!  You get the added bonus of a few fun techniques with this one too, so it is just all kinds of happy!

    This card is extra fun because it is actually a really simple card to make (minus the fussy cutting of the feathers… but that isn’t too bad) and you get to do a lot of playing with it!

    Tips for making this card:

    • First lets talk about the green striped paper.  Notice that it is darker on the bottom than the top? Well you do now! Smile  That is because it is embossed paper that is inked!  You can either stamp an image with versamark ink and then heat emboss with clear embossing powder…. or do it the easy way and get pre-embossed paper! This was the Irresistably Yours paper from Sale-a-Bration 2015, but you can do the same thing using the new Color me Irresistable paper in the current catalog!
      BONUS!  The Color Me Irresistable paper is on sale as part of the weekly deals this week!  So get it at 30% off… I ordered mine yesterday so don’t forget to get yours!
      color me irresistible
    • Once you have a clear embossed image, just sponge over with your favorite color of ink.  In this case, we used those big yellow sponges (these ones) and started sponging at the bottom for the darkest color and kept sponging upward so that as the ink started to run out on the sponge, it got lighter on our paper.
    • See that cool cheveron in the background?  Nope – not a stamp!  It’s an embossing folder!  Use sponge daubers to ink spots on an embossing folder (the raised side) and then spritz with water before using that as a stamp onto watercolor paper.  You get awesomely cool colors and designs and they are different everytime.
    • And the 2-1.2” Circle punch makes a great frame to show off your cool embossing folder stamped paper and to highlight those great sentiments from the Lovely Amazing You stamp set.
    • Finally, these feathers are the same ones we used yesterday and come from the Lovely Amazing You stamp set.  I stamped first in Island Indigo on a piece of scrap paper and then stamped AGAIN on more scrap paper to create the two colors of feathers.
    • Yes, you have to cut them out by hand… but take a deep breath and enjoy the zen relaxation that comes over you as you focus on the paper and the art of snipping. Smile
    • Add a little bow of silver baker’s twine (adhered with a glue dot) and you are good to go!

    So if you missed the card yesterday, this is another idea using the same stamp set:

    Check out the blog post and video tutorial here

    And like I mentioned yesterday, this super awesome stamp set is only guaranteed to be available for a little less than a month (through August 10th) so consider getting your copy – plus maybe the fun emboss resist paper, Color Me Irresistible from the weekly deals.

    So, I hope you enjoyed today’s card.  I promise to do a video soon showing how I did that stamping with an embossing folder technique because it is just too awesome not to share!

    Now I’m off to work on more swaps for Convention!  Make sure you are following me over on my Facebook page to get the realtime, as they happen, photos and news postings of all the happenings in Salt Lake!

    NWstamper signature_thumb[9]

    order online button for sig 3_thumb[4]


    Project Supplies Used:

  • A Summery Emboss Resist Card plus LAST DAY for Free Shipping!

    A Summery Emboss Resist Card plus LAST DAY for Free Shipping!

    Before I get to the card for today, I wanted to remind everyone that today is the LAST DAY for Free Shipping on any Stampin’ Up order.  So, if you were thinking of grabbing your favorites from the retirement lists before they sell out, or you’ve been eyeing that big purchase – don’t miss out on the extra savings with free shipping! 
    Shop Online Now  |  View the Retiring Stamps list  |  View the Retiring Accessories list

    Ok, now on to the card!

    Have I mentioned how much I love doing emboss resist cards?  Today I thought I would quickly share another sample I made for my embossing class using the Petal Parade stamp set from the Sale-a-Bration catalog from this year.  See.. it is possible for me to do this technique with a stamp set other than Lovely & Lacy!  ha ha.

    I love how it looks like citrus and lemonade to me with the pinks and the yellows.  That is actually Crisp Canteloupe and Summer Starfruit as the inks for this card; they actually go together really well don’t you think?

    To make it, I recommend stamping your sentiment in the middle FIRST! 

    And then randomly stamp your images using versamark. 

    Heat emboss with clear embossing powder to give you your shapes. 

    Then take your yellow sponges and starting from the MIDDLE of each embossed shape, sponge in a spiral pattern to get the saturation of color that you want

    Once you have all your colors added, uses a little extra of one of the colors to sponge the in-between spaces to fill in all the white gaps.  That is it!

    Oh, the other thing I wanted to show you from this card… embossing ribbon!  That is right, you heard me…. embossing RIBBONSmile 

    image

    It’s a little hard to tell the texture from the photo, but this is piece of the Crumb Cake seam binding ribbon that I placed over a piece of Crumb Cake cardstock to give it a bit of stiffness.  Once it is glued down – and I recommend glue stick for adhering the ribbon – then you can run it through the Big Shot in an embossing folder.  It gives you the texture and fabric look of ribbon, customized to any embossing folder pattern you have!  It’s actually really cool.

    And don’t forget to get in on the FREE SHIPPING that is ending TODAY.  So if you have been looking at some items and want to save a little bit of money. Visit my online store and take advantage of the free shipping – especially combined with clearance rack and weekly deals!

    spaced shop now sig bar

    April Online Stamp Club Hostess CodeG4VQJ7VB
    Use this code to get free exclusive tutorials & project kit! Learn more

    Stampin’ Up! Supplies Used
    Stamps – Petal Parade, Petite Pairs
    Ink – Early Espresso, Summer Starfruit, Crisp Cantaloupe, Crumb Cake, Versamark
    Paper –Pool Party, Whisper White, Crisp Cantaloupe, Crumb Cake, Sweet Sorbet designer paper
    Accessories – Big Shot, Argyle embossing folder, Heat gun, embossing buddy, clear embossing powder, Stampin’ Dimensionals

  • Have You Seen This in my Thank You Cards?

    Have You Seen This in my Thank You Cards?

    I send out Thank You cards to everyone who places an order with me – sometimes I get a little behind (like in February when we had health issues at home) but I try to make sure I get caught up.  Well, yesterday, I was finishing up the last batch of Thank You cards and getting them ready to mail when I realized I do something that may seem strange to some folks.  So, I thought I’d share a little background today.

    So, what is it that I do that is odd?  Well, when I send out my thank you cards, instead of writing my note on the inside like I normally do for birthday cards, congrats, sympathy, etc, I write my note on a post-it note and put THAT inside the card!

    post it note in thank you card

    I always thought it was clear why I did that… I want to send you a Thank You for your order, but I also want to GIVE you a card that you can use for ideas or for giving away to someone else!  So, I write my note on a post-it so you can pull out and reuse the card.  If you want to keep it for ideas or for yourself, that is awesome.  If you want to share it with someone else, that is great too.

    I was talking with someone I gave a card to recently and when I mentioned I had written on the post-it note so she could re-use it if she wanted, she was surprised and shared that she hadn’t even thought of that.  Smile 

    So, thank you for ordering with me… please enjoy your card, however you choose!  Oh, and want to see the front of this card?  I can’t believe I haven’t shared it yet!

    lovely and lacy emboss resist

    Love, love, love this Lacy & Lovely stamp set!  Pair it with Primrose Petals and some emboss resist technique and it is a really pretty card.  I think I need to spend some more time with my Primrose Petals papers and ribbon before they go away next month! 

    spaced shop now sig bar

    April Online Stamp Club Hostess CodeG4VQJ7VB
    Use this code to get free exclusive tutorials & project kit! Learn more

    lovely and lacy emboss resistStampin’ Up! Supplies Used
    Stamps – Lacy & Lovely
    Ink – Versamark, Primrose Petals, Early Espresso
    Paper –River Rock (retired), Primrose Petals, Whisper White
    Accessories – Heat Gun, Clear embossing powder, embossing buddy, Primrose Petals stitched satin ribbon, glue dots, sponges


    Favorite Supplies:

    122887s
    102283s
    103083s
    109130s
    129053s
    126844s
    101610s
  • Lacy & Lovely Emboss Resist–Ombre Style!

    Lacy & Lovely Emboss Resist–Ombre Style!

    Heat embossing is one of those great techniques that always instantly makes a card just a little bit classier and more elegant.  That said, I totally forget about it a ton of the time!  Thankfully, I have my Lacy & Lovely stamp set which always gets me excited to do some embossing.  Especially because I LOVE doing the emboss resist technique with it.

    In the Seattle area?  Join me for my Embossing Technique class on Monday 3/31 at 7pm in Redmond, WA!  Get all the details here – I’d love to have you stamp with me!)

    Recently I was experimenting with some different card ideas and I ended up with this:

    It was supposed to be an ombre card – where the purples go from lightest to darkest – but I got too excited to start sponging and I forgot to make sure I knew which piece went where!

    So instead, you get something reminiscent of ombre… you get the idea. Smile

    How to make this card

    1. Start out with your Whisper White piece of cardstock and cut it into 3 pieces.  Lay them out on a piece of scrap paper so they form their origional rectangle.
    2. Stamp randomly with the large doily shape from your stamp set using Versamark
    3. Sprinkle clear embossing powder over the stamped images and heat with the heat tool
    4. Select 3 ink colors in different shades of the same color.  Grab one of the yellow sponges and start sponging each panel a different color.
      For best results – sponge in order from lightest to darkest!
    5. Randomly stamp different images from the stamp set in the colors you plan to sponge with.  (I stamped with Wisteria Wonder and Elegant Eggplant)
    6. Adhere your panels to a piece of cardstock for a matted frame.  Add embellishments, and you are done!

    The great thing is that the clear embossed areas will resist your sponged ink and so the white shows through no matter how dark of an ink you use to color with.

    Next time though, I’ll try to remember to sponge my colors in the right order!  Smile

    spaced shop now sig bar

    March Online Stamp Club Hostess CodeXEWP4DFD
    Use this code to get free exclusive tutorials & project kit! Learn more

    Stampin’ Up! Supplies Used
    Stamps – Lacy & Lovely
    Ink – Wisteria Wonder, Elegant Eggplant, Perfect Plum
    Paper –Crumb Cake, Chocolate Chip, Whisper White
    Accessories – Heat Gun, Clear embossing powder, embossing buddy, Crumb Cake seam binding ribbon, sponges

    Favorite Products

    122887s
    129053s
    103083s
    109130s
    122332s
    101610s
  • Thank You for an Awesome 2012 and now on to 2013!

    We did it… we made it through 2012 and now can cheerfully welcome in 2013!  Its amazing to me how something so relatively simple (flipping a page on a calendar) can lead to such a re-energizing feeling!

    But before I get to excited and enthusiastic to stride into the new year, I have to look back on 2012 and I realize how blessed I am to be surrounded by such amazing people.  So, I wanted to take a minute to say Thank You to all of you wonderful people who have made my life so much better for joining me on this adventure:

    1.  To the folks on my Stampin’ Up! team – you all are super awesome!  No seriously! Smile  I continue to be inspired, impressed, and amazed by the talent and enthusiasm they share with me regularly.  Even the folks who are totally new to stamping get me excited with their excitement and joy from trying this new adventure.

    2.  To my friends and customers – I know it is totally cheesy, but I love being able to help and support you.  I know that my life can get crazy and busy, but I appreciate that you have all continued to support me and allow me to serve you!

    3.  To everyone who visits my blog and my facebook page – seeing that people actually read my random posts is what keeps me going and motivated to continue to post here.  Not that I don’t like sharing and talking to myself, but it is way more fun to share and talk with someone else!  I hope I’ve been able to share some new and fun ideas and you’ll keep coming back for more in the new year!

    And so with that, I thought I’d share a Thank You card… just for you!


    So, I hope you have an amazing beginning to your 2013!

    PS – don’t forget!  The holiday catalog ends TOMORROW!  So, if you have any favorites that aren’t carrying over, grab them now.  Then get ready for the Spring Catalog and Sale-a-Bration starting soon!

    To Order Stampin’ Up! Products Anytime, click here!

    Need a Spring Catalog or Sale-a-Bration brochure?

    shoot me an email to jennifer@nwstamper.com with your contact info and I’ll make sure one will be making its way to your mailbox shortly!

    Are you earning your Northwest Stamper Rewards?
    Every order gets you closer to your FREE stamp set!Click here to learn more!

  • Fabulous Fall Card with Emboss Resist

    I don’t know about you, but when I was walking around with the kiddos yesterday, it hit me how the trees have seemed to go from green with some reds and yellows, to almost bare with some reds, oranges, and yellows barely hanging on!  I guess I can’t pretend that Fall isn’t totally here. 🙂

    So, when I was working on cards for my Fabulous Fall class, I had to go for those warm and cozy tones to fill up the card.  And this is what I came up with:


    I played with textures and golden colors in this card.  I swear, More Mustard cardstock gets so neglected at my house until fall time!  But here are some of the touches we did to put together this card:

    1.  We stamped the leaf image from Lovely as a Tree with Versamark and then used Clear embossing powder to emboss the image.  Then we sponged with Cherry Cobbler and More Mustard ink to make the glowing color.  You can also see where we took the Natural Composition specialty designer series paper and colored it in with ink and a water brush/pen.  It makes a really pretty subtle color effect.


    2.  We also spritzed the card base with Gold Smooch Spritz.  It is always so hard to capture that in a photo but you can kind of see it here.


    3. Finally, I had made a version of this card that didn’t have the extra Chocolate Chip cardstock matting the cardfront (and acting as the cardbase); but just having More Mustard as the cardbase didn’t quite work.  So, I went with the dark cardbase and just added an insert with a fun stamped touch.

    So in the end, we did lots of different little things that came together for a pretty and rich effect!  What do you think?  Is it “Fall” enough for you?  🙂


    Did you see November’s Ink-redible special?
    Get a FREE set of 10 ink pads with a qualifying order/party; or get them free when you join the Stampin’ Up! family!  See the details here


    To Order Stampin’ Up! Products Anytime, click here!

    Its Ink-redible November!
    Get a FREE set of 10 ink pads with a qualifying order or party; or get them free when you join the Stampin’ Up! family!  Learn more

    Are you earning your Northwest Stamper Rewards? Every order gets you closer to your FREE stamp set! Click here to learn more!

  • Peek-a-boo Emboss Resist with Raining Flowers

    Oops, I was so focused on getting the first week of my 12 weeks of Christmas newsletter ready that I totally got behind and forgot to get this post up! Well, I’m fixing that now.  (and if you want to get exclusive holiday ideas sent to your inbox, just make sure you are on my mailing list and you will be all set!  And can I just say I LOVE the first project…. soooo elegant. Smile)

    This is another fun idea for how to use your clear embossing powders.  I don’t know what the “official” name for this technique is called – so I’m going to call it Peek-a-boo Emboss Resist.


    imageTo get this effect, you want to find some fun pattern of designer paper and stamp your SOLID stamp image (like this flower from the Raining Flowers stamp set) onto the paper with Versamark ink.  Cover with clear embossing powder and heat with your heat gun.

    Now, use your brayer to run a dark color over your designer paper until you can’t see the paper’s pattern any more.  The embossed areas will resist the ink (you can take a tissue and wipe off any extra ink that is trying to stick around).  So, your pattern will show through the inked area and “peek-a-boo” through!

    I will say, the hardest part is picking what pattern to show under your stamped image… at least for me. Smile  I had to hold up paper patterns and stamp images to my mom to decide what to try out for this card and so, thanks to her for this card!

    This was one of the cards we made for my Awesome Embossing class.  I’m thinking of putting this class together as an online class.  So, let me know if you would like to see this as an online class and I’ll make sure to put it together to share!


    To Order Stampin’ Up! Products Anytime, click here!

    Check out the 2012 Holiday Catalog

    Are you earning your Northwest Stamper Rewards? Every order gets you closer to your FREE stamp set! Click here to learn more!

    Raining Flowers Emboss Resist Card Recipe
    Stamps:
    Raining Flowers, Teeny Tiny Wishes
    Ink: Island Indigo, Versamark
    Paper: Whisper White, Island Indigo, Daffodil Delight, River Rock cardstock, Summer Smooches designer series paper
    Accessories: heat gun, clear embossing powder, embossing buddy, modern label punch, word window punch, mini silver brads, paper piercer, brayer

  • Elegant Thank You Card using Emboss Resist

    Ever have one of those days where your mojo is kicking in and you are able to make some projects that just make you smile?

    I hope so!  Yesterday was one of those days for me and I was having such a blast finishing getting ready for my Awesome Embossing class this weekend.  I had such a hard time narrowing down what I wanted to showcase for the class since there are so many cool embossing techniques and so many variations on what you can do with many of them.  But I focused down to 4 different ideas that I loved.  However, my absolute favorite was the card I’m sharing today – the Emboss Resist card!

    Emboss resist


    I had just gotten my new Lacy and Lovely stamp set…so glad I got this set!…and I thought it would be perfect for this technique.  I tried to stick to a more monochromatic style card even though I added a few other hits of color; and so my focus was on the Calypso Coral elements around the white embossed doily image.

    Seriously, this is so quick to do and such a pretty result!  I’ve decided I’m going to do this card for my swaps at the Stampin’ Up! regionals in Tacoma in a couple weeks.  So if you are going to Tacoma, find me and I’ll swap with you. 🙂

    And this isn’t the best picture, but I thought I’d share a sneaky peek at my first Halloween card and another embossing card for the class:


    I promise I’ll share the full card soon!

    Well, I’m off to take my family to the Puyallup fair.  This will be Nicholas and Caitlin’s first time at a big fair and hopefully they love seeing the animals, displays, and other fair favorites while we are there!  Wish me luck that I don’t get sucked into too many “you’ve never seen a knife that cuts like this!” demos and displays.  🙂  I love all the too-good-to-be-true stuff that seems to always be offered at these events.

    Now just ask me how many of the items like that that I’ve bought at fairs have actually gotten use after I’ve gotten home… no wait, maybe you better not. 😉


    Shop for Stamps and More Online, click here!

    Don’t Miss It! Free Stitched Satin Ribbon with every $40 purchase!

    Are you earning your Northwest Stamper Rewards? Every order gets you closer to your FREE stamp set! Click here to learn more!

  • Simple holiday cards with a side of bling

    Well, December is finally here and like usual I suddenly realize that I need to get my Christmas cards put together and my mailing list organized.  Thankfully I was running a technique night this last Tuesday and so we created three fun holiday cards.  The actual card designs aren’t too complicated as the focus was more on some fun techniques to add some bling to your cards.  These cards were tons of fun to make and look much better in person than in the photos. 🙂

    Technique 1 – Stained Glass Window

    For this card, the bling came in the form of sparkle on a colored window sheet image.  To do this, start by stamping your preferred image onto a window sheet using Staz-on ink.  Squeeze some crystal effects onto a piece of plastic or some waxy paper (I like using the backing that is left behind when you peel off the sticker labels for your stamp sets).  Add a drop or two of reinker dye and some dazzling diamonds glitter.  Mix together and apply to your stamped image with a paintbrush.  Once that has dried, attach your window sheet (ink side down) to your card front using brads or your favorite adhesive (just note that if you use adhesive it will show through unless you cover it up with another card element.

    Stamps: Christmas Classics
    Inks:  Staz-on black, Soft Suede classic ink, Old Olive reinker
    Paper: Soft Suede CS, Whisper White CS, Merry Moments DSP
    Accessories:  Gold brads, Scallop edge punch, paper piercier and mat pack, Crystal Effects, Dazzling Diamonds glitter, Close to Cocoa marker (to color in the trunk)

    Technique 2 – Brayer Resist

    I had been seeing some fabulous samples using the new Bride specialty DSP.  If you haven’t seen the paper before, it is a white (or black or ivory) paper with either stripes or the swirly pattern in shiny foil of the same color.  While this is pretty and elegant on its own, it is also perfect for coloring because the shiny part resists ink.  So, for this card, we inked up our brayer and rolled it over the paper to create the design on the bottom half of the card.  It can take a few rolls to get the color coated evenly but gives you tons of options with only one package of paper and a few ink pads.

    Stamps: Sweet Season, Sincere Salutations
    Inks: Night of Navy classic ink
    Paper:  Bridesmaid DSP, Whisper White CS, Bashful Blue CS
    Accessories:  Organza ribbon, Scallop circle punch, brayer, Frost Crystal brads, paper piercer, Stampin dimentionals

    Technique 3 – Shimmer Paints

    So, this is the hardest effect to see in a photo but adds a subtle shine to your projects.  It is also the easist and fastest technique of all.  Ink up your image (don’t you just love the Dasher stamp from the under $10 section of the catty??) and set the stamp aside BEFORE you stamp.  Next, take your shimmer paint container and shake it up.  Open it up and set the lid in front of you.  Now, you should be able to take a sponge dauber and pick up the shimmer paint from the inside of the paint container lid.  Sponge the paint on top of your inked stamp (in my case I just sponged over the antlers).  NOW, stamp your image onto your paper.  You will see the color come through but with a shimmery effect where you applied the paint.  I then used the dauber which had some ink and some shimmer paint left on it from daubing the stamp rubber and used that to distress the edge of my square paper.  It gave it a really nice shimmery brown all around the edge.

    Stamps:  Dasher
    Inks: Chocolate Chip classic
    Paper:  Merry Moments DSP, Real Red CS, Chocolate Chip CS, Very Vanilla CS
    Accessories:  Sponge Dauber, Frost Shimmer Paint, Chocolate Chip 5/8″ ribbon