Yay! It’s time for another Blog Hop with the Fun n’ Crafty stampers, my lovely and talented downline that I’m blessed to have connected with and become friends with over the last few years! (I told you SU is pretty awesome, right?) Well, today we are doing our monthly blog hop a little bit early because we wanted to share with you some Easter ideas while you still had time to make them! And while I had plans to make another card to show you, I got knocked out with a stomach bug over the last few days, so it was all I could do to get this little video tutorial filmed. So I hope you like it!

So here is my little bunny box for you. I think I’m going to fill mine with jelly beans and put them in my kids Easter baskets this year – because that is what is so awesome about this, it is a treat box AND a cute decoration in one!
I’ve also been making this in my card classes this month as a bonus project (I have one left coming up this Saturday if you are in the Seattle area ![]() ) and everyone have been having lots of fun with them and so I can vouch that ANYONE can make them.
) and everyone have been having lots of fun with them and so I can vouch that ANYONE can make them.
Tips for making this project:
- When putting together your box and adhering your ears, make sure you are using VERY STRONG adhesive such as the Fast Fuse or Sticky Strip. I wouldn’t trust snail or liquid glue to hold up over time. In fact, my first couple boxes I made last year I used snail and they started popping apart a few weeks later.
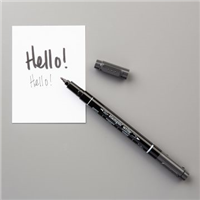
- I built my box first and then adhered all the punched elements – mostly with liquid glue. I saved my inking with pen for last so I could see how it all had come together.

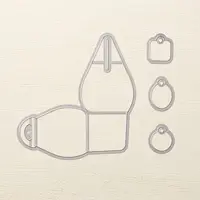
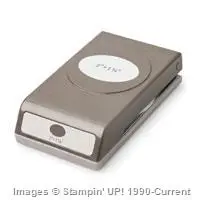
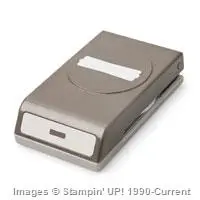
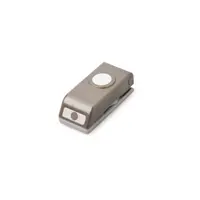
- Here is a list of the punches used (see the supply list at the bottom of the page for pictures of each of these punches if you are more visual like me!)
– Extra Large Oval
– Large Oval
– Modern Label
– Owl Builder
– 1/2” circle
– Mini treat back die - If you need any of these supplies, now is a great time to get them thanks to Sale-a-Bration! For every $50 you spend, you’ll get to pick out something free… in fact, you can even pick out a refill for your Fast Fuse as a free item if you want!Check it out: Original Sale-a-Braiton Items | March additions | Annual Catalog Choices

I also put together a Video Tutorial for How to Make the Bunny– now the first few minutes are tips and tricks for the curvy keepsake box and then I start step by step walking through going from punches to bunny!
(note – if you are reading this from email, you won’t see the video so click the link above)
I’ll be back later with more fun Easter ideas but in the meantime, don’t wait! Check out the great projects shared by these lovely ladies and don’t forget to give them some love along the way!
**Blog hop starts at 7am PST on 3/25**

Fun & Crafty Blog Hop
Tobe B. of The Craft Sea
Sarah G. of 1200 Some Miles
Jennifer B. of Northwest Stamper <—YOU ARE HERE
Pam W. of Stinky Tofu


![NWstamper signature_thumb[9]](https://i0.wp.com/www.nwstamper.com/wp-content/uploads/ad87b4046c1e_C9F6/NWstamper-signature_thumb9.png "NWstamper signature_thumb[9]")
![]()
Project Supplies Used:
Easy shopping anytime! Click the images below to see the item in the online store.


Built for Free Using: My Stampin Blog
Leave a Reply