Northwest Stamper

Category: Class by Mail

  • NEW! First Frost Class by Mail

    NEW! First Frost Class by Mail

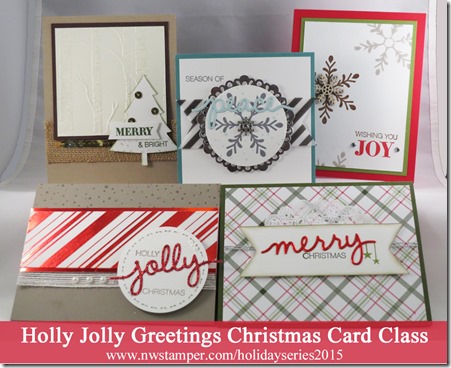
    I created this class for my Northwest Crafty Escape Weekend this fall and loved the cards so much that I’ve been wanting to share it as a class by mail.  Well, time raced by and I realized that if I wanted to share it with you it had to be NOW otherwise we would miss the beautiful Frosted Floral designer paper as it retires at the end of this month!  This set makes beautiful cards for the holidays, new year, and really any time of the year.  I’d love to share these ideas with you and help you make them at home.

    First Frost Class by Mail

    Ok, so how do my classes by mail work?  Well, I try to make it easy for you to have fun creating beautiful cards and try to give you a little extra so you can keep playing after you finish the kit cards.  I do any die cutting or embossing for you – with the exception of die cuts that need to be stamped first (so like in this case, there are a couple flowers you would need to stamp before die cutting.  In those cases, I give you the cardstock so you can stamp and cut yourself.

    You also get all the precut paper and accessories needed to complete your kit.  All you need is your adhesive, stamps, and ink.

    You can purchase the project kit, or I offer a discount if you add-on the coordinating stamps & dies.

    Class by Mail - Make cards using the First Frost bundle

    Class by mail options:

    1. First Frost Class by Mail kit – $37 shipped priority mail
      • All card bases and envelopes including one silver edged and one gold edged card base to make one each of the 6 cards
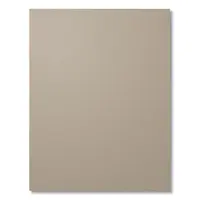
      • All precut cardstock
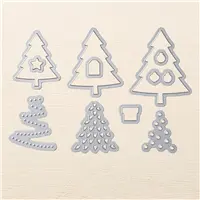
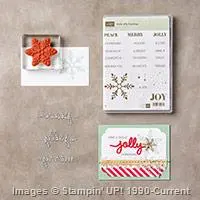
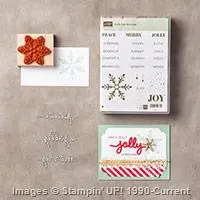
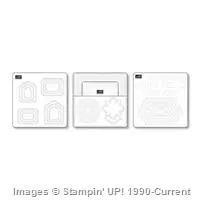
      • Die cuts out of the Black Foil paper
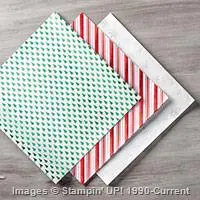
      • Precut Frosted Floral designer paper for the cards
      • 1 6×6 piece of each pattern in the Frosted Floral designer paper pack
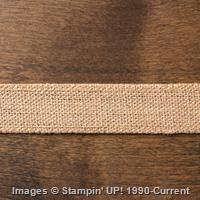
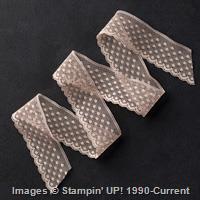
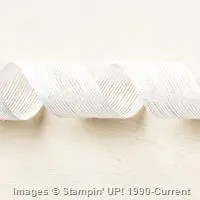
      • 1 yd Tranquil Tide velvet ribbon
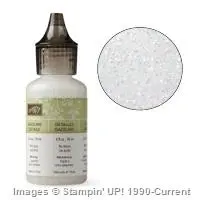
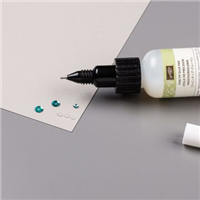
      • 1 pack of the Frosted & Clear Epoxy Shapes
      • PDF tutorial for all 6 cards
    2. First Frost Class PDF Tutorial only – $11.95
      • PDF tutorial for all 6 cards

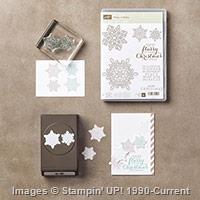
    If you would like to add on the First Frost stamps or bundles – email me and we can add it to your class at 10% off!

    Select your preferred option and click the buy now button to sign up for your preferred option.  PDF tutorials will email by Wednesday 12/19.  Class kits will start mailing at the end of the week.


    First Frost Class by Mail


     This class will be available until the end of December 2018 or while project supplies last. 🙂

    Happy Crafting!

    Thanks for reading! Shop Stampin' Up by clicking here

  • Limited Time – Build Your Stash Card Class By Mail

    Limited Time – Build Your Stash Card Class By Mail

    I’ve been promising this class by mail for a while and I finally have everything up and ready so you can make these cards at home!  So I’m offering this as a class by mail for a LIMITED TIME only as many of the supplies are retiring and are while supplies last.

    ***Class kit registration is available through May 19th***

    I ran this as a class at my recent Northwest Crafty Retreat Weekend and everyone loved the cards.  So I knew I had to make it available to my crafty friends who couldn’t make it to the retreat!  Its centered around the Cupcakes & Carousels designer paper stack.  A great paper pack that is so much more versatile than it seems at first glance.

    Check out what you get in this great card class by mail

    You’ll get supplies to make 12 cards!  2 each of the 6 designs including:

    • Precut cardstock to make the 12 cards
    • A FULL PACK of the Cupcakes & Carousels designer series paper, with the needed piece precut for you for these cards.  You’ll have the remaining pieces from the 48 sheet 6×6 pack included in your kit so you can make more cards and projects beyond these 12 cards.
    • A FULL SPOOL of the Very Vanilla 1/4″ Satin ribbon, with the pieces you need for the cards precut.  The rest of the 10 yd spool will be in your kit to use on future projects.
    • Punched and die cut pieces for the cards
    • Necessary accessories and embellishments
    • Step-by-Step color PDF tutorials for each of the cards emailed to you
      (PDF tutorial only option is also available)

    Build your stash -card class by mail to make at home

    You just need to supply your own stamps, ink, and adhesive and you’ll be ready to have your stash ready for anything.

    All this is only $34 plus shipping to you!


    Class kit options


    Class kit registration is available through May 19th
    Kits will ship the following times: 
    Early Bird orders placed by May 3rd will ship the week of May 8th
    orders placed May 4th-May 19th will ship the week of May 22nd

    If you have any questions or need extra supplies, email me at Jennifer@nwstamper.com

    NWstamper signature_thumb[9]

    order online button for sig 3_thumb[4]

  • Sneak Peek of the Thoughtful Branches Class by Mail!

    I’ve been playing a lot with my Thoughtful Branches bundle that I order last month… see, it always takes something sitting on my shelf for at least 2 or 3 weeks before I seem to percolate enough to start busting it out and getting it inky.  Know the feeling? 

    Well, I’m lucky that I got my groove on because this fabulous set is only available for about 4 weeks!  Yep, that is right!  The stamp set and dies just came out yesterday as a limited time offer and are only available while supplies last or August 31st, whichever comes first.  So, I’m getting my playing done while I can still show you how fun it is AND then you can still pick up your own copy…. ‘cause you know you are going to want to play with it too! Smile 

    To help get you some inspiration and to make it easier to get started playing once you get your own set, I created this fun class by mail just for you!  I wanted to show how versatile the stamp set is and give you the supplies to get going.  So for this month, I’m GIVING YOU the class kit for FREE when you purchase the bundle from me! 

    Say what?!?

    Yep, that is right!  Get the supplies to make 8 of these cards for FREE!  Or purchase the class kit or instructions if you already have your bundle.  Here is the scoop:

    Thoughtful Branches Class by Mail

    The class kit includes all the precut paper and embellishments to make 8 cards (2 each of 4 designs), plus envelopes and full color PDF tutorial set emailed to you.  You can get yours one of three ways:

    • GET IT FREE! – order the bundle from me and I’ll include the class kit for FREE!  You just pay the shipping to get it to you. Smile  Bundle price with class kit shipping – $69
    • Just need the kit supplies?  No problem!  Get just the class kit for only $25 and get the supplies and instructions for all 8 cards
    • Or pick up the PDF instructions for $6.95 

    Class Options


    Note – class kits will be mailed the week of 8/15.  PDF instructions will be emailed out mid-week of the first week of August.

    Get even more ideas!  Check back later (around 6pm PT on Wednesday), as I’ll be participating in a fun Blog Hop all about framelits and I have a bonus card using this Thoughtful Branches bundle to share with you!


    NWstamper signature_thumb[9]

    order online button for sig 3_thumb[4]

    Product List

  • Summer Time Fun Time–Keeping Busy with Fun Stamping Events

    During the school year, I spend a lot of time with my stamping business online.  But with the kids home and summer in full swing, I’ve been spending more time away from my computer and out and about.  But that doesn’t mean all stamping has stopped!  I just have fallen behind on some of my sharing… but whooo boy!  There are some exciting things to share coming up!  From fun events, product sneak peeks, and more!  I thought I’d hop back online and share what I’ve been up to and what exciting things are coming soon!

    Just for August! Thoughtful Branches Bundle, Class in Person & Class by Mail (Get it FREE)!

    thoughtful branches

    This is a super versatile and adorable stamp set and die that is ONLY available in the month of August.  And it is while supplies last.  Seriously though… it is AMAZING!  Check it out:

    image

    image

    Love it?  Get a FREE class with it when you purchase the bundle from me! 

    Yup!  That is right!  I’m back with a new class you can either do IN PERSON or BY MAIL!  We’ll be making 4 fun cards using this set (images coming soon!) – the online class will make 8 total (2 of each design). 

    Class options:

    • In Person – Join us on Monday August 1st, at 7pm at the Panera Bread in Redmond, WA.  We’ll be making 4 cute cards together and all supplies are provided.  Class fee is only $15
      GET IT FREE!  – purchase the bundle that night or place another order and get your class fee waived!
      RSVP HERE or by emailing me at jennifer@nwstamper.com
    • By Mail – Not local or can’t make it?  No problem! I’m offering the class by mail as well with extra!
      Class kit by mail:  Have fun making it at home!  Get the supplies to make 2 each of all 4 cards.  You’ll get all the paper precut, embellishments, envelopes, and a full color pdf tutorial so you can have the walk through instructions.  Class kit fee is $25
      GET IT FREE! – preorder the bundle from me and I’ll include the class kit for FREE!  You just pay the shipping to get it to you. Smile  Bundle price with class kit shipping – $69
    • Instructions only:  Already have the bundle?  Get the pdf instructions for $6.95
      PDFs will be emailed out mid-next week

    Class Options


    Northwest Stamp & Share Regional Demonstrator Event

    Are you a demonstrator or thinking of becoming one?  If you didn’t know, I LOVE being a Stampin’ Up demonstrator and in fact am celebrating just hitting my 8 year anniversary on the 26th!  One of my favorite things to do is get together with other demonstrators and share and learn from each other.  I’m so excited for this new event for Stampin’ Up demonstrators in the Pacific Northwest!  Join us as we share the excitement of the NEW Holiday Catalog.  Get project ideas, participate in swapping, learn from other demonstrators, and have lots of fun!  This is our very own unofficial regional event and you are sure to go away inspired.

    This has been the big event I’ve been focused on this summer and I can’t wait to see it all come together next month!

    Get the scoop and register to join us!


    Northwest Crafty Escape Weekend is Coming September 16-18!

    My other big event that is in the works is my fall Crafty retreat!  It is always a blast and this one will be no exception!  We’ll be playing with new goodies from the Holiday Catalog, creating till the middle of the night, getting inspired and laughing all along the way.

    2016-04-22 19.40.11

    NW Crafty Escape Weekend

    ANNOUNCING – the Northwest Crafty Escape Weekend Fall Fest!

    Sept 16th-18th, 2016
    Hyatt House in Bellevue
    3244 139th Ave SE, Bellevue, WA 98005

    RSVP deadline – Sept 5th, 2016

    Get details and reserve your spot here


    Finally, don’t forget, Bonus Days are happening now!  You have until Sunday, July 31st to place your $50 orders and get your $5 Bonus Coupons to use in August! 

    So, as you can see, it’s a busy summer and lots of great stuff happening!

    Don’t forget to take advantage of my FREE CARD CLASS to go with your purchase of the Thoughtful Branches bundle!  Alright, back to planning… stamp with you soon!

    NWstamper signature_thumb[9]

    order online button for sig 3_thumb[4]

  • Fun with the Sunburst Die & NEW Class by MAIL!

    While I was at my Northwest Crafty Escape Weekend a few weeks ago, I ran a fun class that was all about the Sunburst thinlit die and 5 different techniques you could use with that die!  It was super fun and everyone loved seeing some new ideas for how to create with this die!  So, I’ve been working on putting together this class as a Class by Mail and I’m happy to report that I’m putting the finishing touches and so I ready to start opening up registration for this by mail event!

    Sunburst Sayings Class by Mail!

    5 different technique ideas using the Sunburst die that you can make from the comfort of your home!
    Get the scoop here – www.nwstamper.com/sunburstclass
    but I will have the tutorial option as well as kits in the mail options for you!
    RSVP this week and I’ll ship out your class kit next week before I leave on my Stampin’ Up cruise!  Otherwise, final kits will be mailed out the first week of June when I’m back from my trip.

    In the meantime, check out another fun idea IN ADDITION to the 5 class cards using the Sunburst die

    I loved the idea of cutting out a Sunburst as your main focal point on your card, but then cutting out another sunburst using a complimentary color (in this case- I used Hello Honey for the darker yellow, and So Saffron for the lighter yellow).  Once you have your second color, you just cut down the rays to make a fun highlight to your sunburst!

    You can use a punch – like the retiring 2 1/2” circle punch – or just trim it down by hand for a more funky look.

    Then just add in some fun accents to brighten up your sentiment.  I love layering Gold Glimmer paper behind my sentiment… just make sure to use a strong adhesive to hold your paper down like glue dots or fast fuse are great options!  Then I just added a few rhinestones for a little more bling without adding too much color.  Turns out pretty, right? Smile

    Play with your colors and how much you trim down for fun accents and designs!

    And then consider signing up for my class by mail and get even more ideas of what you can create with this die and get step by step instructions and even some videos to make sure you have it down totally right!

    Sunburst Sayings class by mail ad light

    And don’t forget! The Sunburst Sayings bundle (get the stamp set and die together at a discount) gets unbundled – so no more discounted price – starting in June!  So, grab the bundle while you can at a discount. Smile

    NWstamper signature_thumb[9]

    order online button for sig 3_thumb[4]


    Product List

  • Inspiring Weekly Deals & save on the Flurry of Wishes Class by Mail!

    When I woke up this morning and checked out the weekly deals, I was expecting one or two cool things and a couple that I could take or leave… but man was I pleasantly surprised to see a lot of awesome up this week! 

    Check it out and if you aren’t inspired by something… well, you will have to tell me what DOES inspire you.Smile 

    11201941_10205590681675469_3676096873224387746_n

    So, lets break it down… shall we?

    Festive Flower Builder Punch… cute for Holiday Pointsettias or just make cute flowers for any time of the year!

    image

    Want to see how to make this Pointsettia?  Check out this video to show you how!

    I also love this White version created by Peggy Noe!  You can check out her beautiful card on her blog post here.

    Metallic Foil Doilies… Can I just say I’ve already gone through at least 2 packs of these Smile  LOVE them!

    image
    Though, embarrassingly, I just realized that apparently I haven’t photographed my recent pictures with the doilies so I’ll have to get on that! 🙂  I did use them though for a recent Project Life album I was working on!

    metallic doilies in Project Life scrapbook albumPerfect Pines Framelits… Good with or without the stamp set!  (if you want to see the coordinating stamp set, you can see it here in a bundle)
    Like this with card that was from my Holly Jolly Greetings Class by Mail!

    Or check out this cute card made by Jennifer Frank at our recent Northwest Crafty Escape Weekend as an entry into one of our challenges!

    Perfect Pines christmas card challenge card

    Snow Flurry Punch… this is one of my FAVORITES!  I love it alone but again, especially with the coordinating stamp set.  You can see the bundle here

    I also did a class by mail using this punch, and so I’ll pass the savings on to you!  Purchase the punch as part of the Flurry of Wishes Class by mail and I’ll give you $4.50 off the class fee!  Just sign up here and I’ll refund you the $4.50 after either seeing your purchase of the Snow Flurry punch or when you sign up for the best value class bundle!

    NWstamper signature_thumb[9]

    order online button for sig 3_thumb[4]

    But use Hostess Code PU2EYZJY to get a special thank you from me!

  • Have a Holly Jolly Christmas–Fun Card with Foiled Vellum, Glimmer Paper, and More!

    So, yesterday I was (correctly) chastised for getting behind on posting on the blog. Smile So, I had to hop-to and get another one of my recent favorites up to share with you.

    Today I have another card from my Holly Jolly Greetings Class by Mail, it has lots of little details but I love how they come together!

    A few tips for making this card:

    • The candy cane striping is from the Holiday Fancy Foil designer vellum.  You get 3 patterns in the pack – green foiled christmas trees, silver foiled snowflakes, and red foiled stripes.  I wanted the red color for this card, but also wanted it to be striking!  So, all you have to do is layer a piece of Whisper White cardstock behind your vellum and you get a bold POP of contrast between the foiled pattern and plain vellum!
    • Layer your foiled vellum onto an accent piece of the full sheet of Red Foil sheets for even more shine!
    • Help your sentiment stand out by popping it up on a plain white 2 1/2” Circle punch.  Want to take it a step up?  Grab the Updated Essentials Piercing Pack and use the circle template to pierce holes all the way around the circle.  Then grab your Tip Top Taupe marker and connect the dots to create a fun Faux Stitched look.
    • And since I’m so onto red right now.  Why not add in more sparkle with the GORGEOUS Red Glimmer paper?  Perfect for the “Jolly” from the Christmas Greetings thinlits that are bundled with the Holly Jolly Greetings stamp set.
    • Add some pearls in different sizes on your card to bring it all home.  See those 3 pearls by the Jolly?  Those are part of those strands of connected-together pearls that are always left over on your pearl or rhinestone sheets… Smile  Cut a few off and they are perfect here!

    See, totally fun and don’t you love the texture that White Jute ribbon gives to the card too?

    Want to make this at home?  The class kit is still available!  I’ll be mailing more out this weekend, so make sure your name is on the list.  You’ll get pdf instructions for this and 4 other cards along with supplies to make 2 each of all 5 cards.  Here are all the cards:

    Sign up for your Holly Jolly Greetings Card kit here

    Oh, and I almost forgot!  Today is Tuesday which means there are NEW Weekly Deals!

    12188928_10205528193593306_4220536223974106088_n

    Check out these deals in the online store here

    So, thank you Heather for the kick in the pants to get a fun new card up on the blog.  Now to get the rest written and posted to share!  Guess I know what I’m doing this week. Smile  I really do appreciate you taking the time to check out my posts and I love the feedback you share in comments, on my facebook page, and in email!  Keep it coming!
    NWstamper signature_thumb[9]

    order online button for sig 3_thumb[4]

    use Hostess Code FHRCKER7 to get a special thank you from me!

  • Gold & Burlap Rustic Christmas Card from the NEW Holly Jolly Greetings CLASS BY MAIL!

    I have been having so much fun creating for my Holiday Card Series this fall and when I put the finishing touches on the Holly Jolly Greetings class, I couldn’t wait to share it with everyone.  This was one of my personal favorites from the class, but you’ll have to tell me which is your favorite! Smile

    I had a heck of a time photographing it because one of my favorite touches was the subtle sparkle on the trees from where we lightly painted on Dazzling Details glitter glue!  You can kind of see it in this picture… it is only on the raised parts of the trees.  We ran a thin line of Dazzling Details down the center of each tree and then smeared it around with our finger to make a lightly sparkling tree and something that would dry quickly too!

    We used a few stamps from the Holly Jolly Greetings stamp set (which was the focus of the class) but added lots of neutral touches like the different browns in the cardstock (Crumb Cake & Early Espresso with Very Vanilla) along with the strip of Burlap Ribbon which I’m just loving this year.

    But we also needed some glitz and cheer for the holidays too!  You can’t have Christmas without a little sparkle, right? Smile  So I added some of the Gold Sequin trim along with that Dazzling Details schmear. A full strand of sequins below the embossed paper and then individual sequins for ornaments.  And I had to continue the tree theme between the Woodland embossing folder and the Perfect Pines framelits!

    A little bit of sponging with Garden Green ink, some stamping and layering and you have yourself a fun card!

    I ran this first as an in-person class, and everyone made 2 of this card and the other 4 cards, and if you sign up for this class by mail, you’ll get supplies to make 2 each as well – for a total of 10 cards!  Like I said, this probably was my favorite, which of these cards is yours?

    Sign up for the class by mail and you’ll get:

    • Precut supplies & accessories for 10 cards – 2 of each of the 5 designs
    • Pre-punched & embossed elements for the cards
    • Holly Jolly Greetings Stamp Set (clear mount)
    • PDF instructions walking you step-by-step through how to complete each of the cards
    • Priority shipping of your kit to you
    • (optional) Add on the Christmas Greetings thinlits (what we used to create the “peace”, “jolly”, and “merry” for only $16.  That is LESS than the catalog price!  <— BEST VALUE ADD-ON  — 

    Live outside the US or don’t need the kit – PDF instructions ONLY option is also available


    Kit choices


    >>> See all the classes in the Holiday Card Series here <<<


    Don’t forget about the Big Stamp Sale too! —TODAY IS THE LAST DAY!  —

    So visit the online store or grab your catalog and wishlist and let me know by 10:30pm PST/11:30pm MST what you want and we’ll get you that 15% off savings!

    15 off stamps promo_NWStamper[5]

    NWstamper signature_thumb[9]


    order online button for sig 3_thumb[4]

    But use Hostess Code FHRCKER7 to get a special thank you from me!

    Product Supplies Used:

  • Flurry of Wishes Vintage Elegance Christmas Card & NEW Class by Mail!

    This last weekend I held the first of my Holiday Card Series – this is something new I’m doing this year where I’m running 4 Holiday Card classes between now and the end of November and each one will give you a stack of cards that will get you well on your way to getting your holiday cards done this year.  PLUS – everyone who participates in 3 of the card series classes will receive a $15 shopping spree from me at the end of the series.  Participate in all 4 and you get a $20 shopping spree!  How stinkin sweet is that?  And yes!  This even goes for those of you participating in my class by mail program. Smile   You can get more details about this at the bottom of this post!

    But back to the card I wanted to share today – this oh so pretty vintage & elegant Christmas card using the Flurry of Wishes!

    LOVE!  If I do say so myself. ha ha ha!  Like I mentioned, it was part of the first Holiday Card class that was all about the Flurry of Wishes stamp set – here is everything we made:

    But we are talking about this card today… and I wanted to share with you a few of my favorite touches with it.

    Tips for making this card:

    • Stamp your main image in a slightly darker ink color than the cardstock – in this case, we stamped with Tip Top Taupe ink on to Sahara Sand cardstock.
    • Fill in a few of the outlined shapes using the white Chalk Pen.  It gives a soft look and highlights some of the detailing of the image.
    • Take it up a notch by adding a few small pearls as well!  They are subtle but really add to the elegance factor.
    • For the sentiment, layer your cardstock over some of the A-MA-ZING In Color lace trim – again we were using the Tip Top Taupe trim.  It is wide enough to be a great layering ribbon.
    • I am in love with the wooden Snowflake embellishments so one had to come out for this card and again, a few more little pearls!

    It all comes together for a great card that doesn’t actually take that many supplies and can be quick to mass produce as well.  Always a perk, right?

    Flurry of Wishes – Class By Mail is Here!

    Everyone loved this class this weekend and raved about the cards and the value; and I wanted to share it with those of you who aren’t able to attend my classes in person!  So, I am offering this (and the rest of the Holiday Card Series) as a class by mail.

    In this class you’ll get:

    • Precut supplies & accessories for 10 cards – 2 of each of the 5 designs
    • Pre-punched elements for the cards
    • PDF instructions walking you step-by-step through how to complete each of the cards
    • Priority shipping of your kit to you
    • (optional) the Flurry of Wishes photopolymer stamp set and Snowflake punch!  <— BEST VALUE ADD-ON  —  SAVE over $10 off the class kit when you include the stamp set & punch in your kit

    Live outside the US or don’t need the kit – PDF instructions ONLY option is also available

    NOTE – I am finishing up the pdf instructions now, so they will start being emailed out to everyone Friday, Oct 2nd.  Class kits will be mailed starting next week.


    Kit choices – includes priority shipping


    If you have any questions, don’t hesitate to let me know at jennifer@nwstamper.com .  So, give this idea a try and have fun playing as we head into the fall and holiday season!

    NWstamper signature_thumb[9]

    order online button for sig 3_thumb[4]

    Project Supplies Used: