Northwest Stamper

Category: Cards

  • Pictures from Mom and Me

    What a whirlwind spring!  There have been tons of family visits, stamping events, and work deadlines.  That has kept me away from my computer as much as normal but also means I have a backlog of great things to show you! 


    First up, I thought I would share some of the projects we did as part of the mom & me event.  I tried to keep the cards simple with plenty of opportunity for kids of all ages to get involved.  So, I’m thinking of going back and sprucing up some of my examples now (like coloring in some of the images that I left as outlines for kids to color or leave as is) but since I want to get a post up, I’ll show you there current state. 🙂

     And my SCS blogging group, sorry I’ve been away so long but I’m back and will be visiting your blogs very soon!


    Here are the cards we did:

    star_thanks_wmmm_monkey_wmmm_lym_wm


    This is a photo frame we did using a CD case as the holder. All you have to do is pop the cover off of the case and then rotate the cover so it would stand up if the cd case base was on the table.  Pop the cover back on and then slide in your decorated background.  In the second picture, I didn’t have a photo printed out to put in the frame, so I put a red piece of card stock in to show you how you don’t glue down the top left corner so it can sit over your photo.  🙂  Its easy, peasy!cd_photomat_wmcd_photomat2_wm

  • Another Petal Pizazz pastel card

    Four of the samplers with different pages shown
    Four of the samplers with different pages shown

    Late last week, my mom came up for a visit (a week after my MIL was here for a week visiting!)  She was in town to join me at the Creating Keepsakes big scrapbooking convention in Portland this last weekend.  The convention was an absolute blast and we stayed up waay to late Saturday night at the crop and then having our own after-hours crop back at my house. 🙂  We had a great time over the weekend and between our projects at home and the projects we made from the classes at the convention, I have lots of cool things to show you this week.  I’ll be trying to get to pictures taken of the projects and posted this week. 


    Late last week, the paper came in for my paper samplers and so I got to go through all of it when I was cutting it to 6×6 sheets.  I have to say, there is some really cute paper!  I have a few now on my wishlist that I didn’t have on there before (Flock Together anyone? Textured designer paper!)  I still have a couple left, so if you want one, email me and I can get one out to you!


    A badly fanned out view of one single paper sampler
    A badly fanned out view of one single paper sampler

    Finally, when my mom was here, she wanted to try out the pastel techniques we did at our technique night last week.  So, while showing her how to use pastels to color an embossed image and color ribbon, I made a quick thank you card for one of the ladies who purchased one of the paper samplers.  This time I played with layering multiple pastel colors on an image.  I only used a little but it makes such a nice blended effect that you could get more complicated and make some beautiful designs.


    pastel_thanks
    Card Recipe
    Stamps:
    Petal Pizazz, Thank You Kindly
    Inks:  Green Galore, versamark
    Paper:  Purely Pomegranite (love note), Very Vanilla CS, Whisper White CS (for the embossed images)
    Accessories: Pastel chalks, clear embossing powder, sponges, whisper white grosgrain ribbon, glue dots
  • Playing with Pastels

    ahhh… it feels good to back at the blog.  I just getting over a yucky cold and just in time because my technique night was last night.  We were playing with pastel chalks and between my cold and my half-cleaned craft room, I got a bit of a late start preparing for it.  However, I’m happy to report that I’ve made huge progress on my craft room (you can now fit chairs at the table and the table is cleaned off for the first time since moving here last fall :))!  Of course, in the process of prepping for the class last night, my craft table is a mess… so I get that straightened up and share it with you.


    But in the meantime, I thought I’d share what I whipped up as samples for some different techniques.  This was actually my first time in a long time that I had used my chalks and I discovered they are a lot more fun than I remembered.  And the girls did some awesome work with them – I just need to remember to take pictures of what they create!

    pastels_tt_wm2

    The techniques we focused on were popping pastels (the cupcake and the butterflies), coloring an embossed image (the blue scalloped flower), coloring ribbon (the blue ribbon), chalkboard technique (the red flower), and using chalks directly on the stamp to color a stamped image (some of the background flowers on the heartfelt card).


    pastel_ribbon_wmThe flower started out as clear embossing powder over versamark on whisper white paper. After you have embossed your flower, you can take a sponge to your chalk to pick up some color and then rub the sponge over the embossed image to color it. I recommend using brighter colors though because my first attempt with a light blue barely showed up. This card was made using the brilliant blue chalk. And with chalks it is very easy to layer colors. One person, used orange as a base color and then used rose red to color the edges.


    And yes, this is a white ribbon! Use the same sponge to apply color to your ribbon by rubbing along the white ribbon.  You can use sealent afterwards to keep it from rubbing off on your hands but it doesn’t rub off much if you don’t.


    chalkboard_heartfelt_wm This card used the chalkboard technique where you stamp with white craft ink on a dark paper and then pick up the chalk color using a q-tip or applicator.  Once you have the color, you want to tap your stamped image to apply the chalk.  Don’t rub or you will have a lovely smear of white and chalk in places you may not want. 🙂  Once you have applied your colors.  I tapped off excess power and then use a paper towel to lightly wipe off the excess color.  It turns out with a very lovely effect.


    Well, I’ll be back later with hopefully some new goodies to show you (my occasions mini preorder is supposed to arrive today!)  Have a happy wednesday!

  • Getting in a little stamping

    lilacflower_wm  Its been a crazy week for me but I’ve finally managed to sneak away to get a quick card put together and up on the blog.   This last week, I was away in Dallas on a business trip and returned home to my Mother-in-law visiting for a week.  And while all of that is fun, I haven’t had much time to get some stamping in.  But then yesterday, I had the perfect excuse to take time out of entertaining and get creative.  My MIL was going to a wedding and didn’t want to spend $4 for a “nothing special” card from the store.  So, we were going to make a card for her to take.  So, while she was getting ready for the wedding, I started playing with some of my scraps to see what I could come up with.  In this case, I had the flowers from my crystal effects technique night, the bow from the same night (we were discussing different ways to tie bows), and then scraps from the new SAB paper – delicate dots.  I only had about 15 min to come up with a layout and put it together so it is simpler than I might have done if I had more time, but it was nice to use some of my pieces into a simple, pretty card.  Inside the card, I stamped the Heard from the Heart sentiment “wishing you happiness today and always”. 


    My other project I’ve started is getting my office cleaned up and turned into a craft room.  My dining room has been great but my DH would rather I get set up in a slightly less public space. 🙂  So my MIL and I went to ikea and shopped for some fun organizational pieces and I hope to make good progress on this project over the next week.  Having the pieces sitting in my house is pretty motivating for me to get it done.  I’ll share pictures when i’m done.   Hope you all are having a great week!

  • BigShot butterflies and a fun candy purse

    Hope you all had a great Valentine’s Day weekend!  I enjoyed some time with the DH at home on Saturday and then Sunday we drove up to Seattle to meet up with some friends and participate in a puzzle event (think, Amazing Race only with puzzles to tell you where to go next instead of envelopes).  On the way north, we stopped by a fellow demonstrator’s open house.  If you know Cristena Bagne, she is a super talented and very nice demo in the Puyallup, WA area and this was the first time I got to see her home and stamping space.  She is so organized and has an awesome stamping room.  I now have some ideas for how to organize, if I can actually act on them. (Isn’t that always the hardest part).  Well, as part of her open house, we did a couple make and takes.  They were so cute I had to share them with you.  ty_butterfly_wm

    dreamsdujuor_candypurse_wm


    dreamsdujuor_candypurse_inside_wm


    And now I’m off to do some more stamping with friends.  Don’t forget to let me know if you want a Designer Paper sampler!  Happy Monday!

  • Happy Valentine’s Day!

    vday09_2Ok, so I know this post is a little late, but better late then never, right?  I just wanted to say thank you to all of you who have been visiting and leaving me comments.  It really perks up my day to have you all stopping by and saying hello.  Especially with weeks like this one where work has just been crazy as we have been going bonkers trying to hit a deadline at the end of the week.  I ended up staying late at work on Friday just so I could have my three day weekend free of work stress.  So, this is my weekend to catch up on all my crafting.  I plan to be back on Monday with lots of fun things to show you.  Until then…


    Have a fantastic weekend and a wonderful Valentine’s Day!


    Recipe:
    Stamps:
    Love You Much
    Inks: Cranberry Crisp
    Paper: Cranberry Crisp CS, Very Vanilla CS
    Accessories:  Scallop Circle Punch, 1 1/4″ circle punch, 1″ circle punch, scallop edge punch, Very Vanilla 5/8″ grosgrain ribbon, Cranberry Crisp stitched ribbon

  • Congrats and Thinking of You Cards

    This weekend was a lot of fun.  I hosted an Open Scrap day at my home on Saturday.  I had planned on sitting an working on my personal projects while the other ladies worked on their projects; but of course, I was way to social for that. 🙂 I was playing with my new BigShot, showing folks how to use it, and other fun techniques.  So, it wasn’t until 5 of the 6 ladies had headed home that I finally sat down with my kitty scrapbook and started working.  But it was fun to have 6 crafters over.  So, I still have all my stuff out in hopes that I will make more progress on my scrapbook, but I have a feeling tonight will be filled with getting ready for my technique night tomorrow.  Tomorrow we are playing with Crystal Effects and I’m really looking forward to it! 

    Here are the other two cards I made for my card kits for Saturday.  These last two came together very quickly and have helped me be an even bigger fan of the SAB sets.  Oh yeah, and the paper in the SAB catalog is so yummy! 

    congrats_wm
    stamps:Congrats (SAB) paper:whisper white cs, night of navy cs, bashful blue cs, certainly celery dp inks:bashful blue, night of navy accessories:glue dots, fresh favorites II buttons


    sab_thinkingofyou_wm
    stamps: Polka Dot Punchs (SAB), Sincere Salutations paper:Very vanilla cs, bashful blue cs, delecate dots DP (SAB) inks:bashful blue, certainly celery, sahara sand accessories:certainly celery twill tape (SAB), circle scallop punch, 1 1/4" circle punch


  • One of the cards from this weekend’s card kit

    pinkgreydreamsdujuor_wnWhile I waited for my UPS delivery to arrive so I can finish my scrapbook layouts, I spent last night working on cards.  This card grew a bit organically from me starting with the grey base, then picking the pink, then finding a layout, and then deciding on the stamp set.  I don’t know quite how to classify the card (valentine’s day, for you, or what).  But I think it’s cute anyway.  🙂

    I just got home and my packages were here including my new BigShot!  Yay!  So, I’m going to leave this short so I can go play with my new goodies.  Have a fantastic week!

    And if you are in the Portland area, just a reminder that you are welcome to attend my FREE Open Scrap day tomorrow from noon until 6pm.  Bring a project of your own to work on or I will have kits available (a card kit, a scrapbooking kit, and a mini-book).  Contact me and I’ll send you the details!

    Recipe:
    Stamps:
    Dreams Du Jour
    Inks: Pink Pirouette, Basic Grey
    Paper: Basic Grey CS, Basic Black CS, Whisper White CS, Bella Rose DSP
    Accessories: Stampin’ dimensionals, Basic Grey taffeta ribbon

  • Two Stamping Challenges in One Card!

    bright_happiness_wm1I sat down this evening to get started on my card kits for Saturday.  And instead, I decided to try out a card sketch challenge.  Then, I decided to get more ambitious and checked out SCS to see what color challenges were up.  I haven’t participated in any SCS challenges before and I’ve been meaning to for a while.  Its funny, I actually had a moment where I felt like I was cheating by using a card sketch.  Then I had to laugh at myself and say “inspiration is a good thing”.  No need to reinvent the wheel everytime.  Especially if you don’t have a design sitting top of mind, itching to get down on paper.


    I ended up changing the sketch challenge that I used.  But thought it would work well with the stamps I choose.  And the colors… my oh my the colors!  I picked this recent bold bright challenge because I can never seem to get myself to use many of my Bold Brights (heck, my Gable Green was still in the shrink wrap and I’ve had it for about a year!)  I always gravitate towards the Earth and Jewel tones in Earth Elements and Rich Regals.  So, I figured I needed to do this challenge to break out of my mold.  I think the blue flowers are bit bright for me, but I decided to stick with it once I had it stamped. 


    Recipe:
    Stamps:
    Happiness Always
    Inks:  Tempting Turquoise, Lovely Lilac, Pink Passion, Gable Green
    Paper: Whisper White CS, Lovely Lilac, Pink Passion

  • My last index card – Sweet Stems

    My last index card I needed to make for Splitcoast Stampers was for the stamp set Sweet Stems.  I was hesitent to buy this set because I had bought and regreted Pocket Silhouettes, another small flower set.  However, after looking at the stamp set and all the coordinating items (besides the stamp set you have matching paper – Tea Party – which has some cute designs, and an embosslit which will emboss one of the flower images), I’ve decided this set is more my style and a bit more fun.  I guess the natural looking sets are just not for me. 

    Anyway, as part of my new catalog order, I also ordered the small oval punch which I’ve been wanting for a while.  So, it all came together as a chance for me to try out this design I’ve been eyeing for a while.  Sure, I could have added a bunch of layers, but it was nice to make something really simple and straightforward.  I made sure to place the vases just below the bottom of the stamped image so what you see with the flowers is exactly what you get.  Oh yeah, and if you haven’t tried sponging yet, you totally should.  Its super easy, adds neat texture, and is fun to do!

     sweet_stems_index_wm

    And one other tip.  I have both blender pens and an aqua pen.  I most often use the technique of lifting color from the lid of an ink pad and coloring in a stamped image, and I never quite new which to use when.  So, I used this card as an opportunity to play with both of them. 

    What I realized is that the aqua pen is good for adding colors lightly and for a true watercoloring effect.  Blender pens are great for slightly richer colors (pink pirouette will actually show up using a blender pen) and are the right tool for the job when coloring in small spaces.  The aqua pen, being based on water, has a tendancy to bleed which is fine if you are coloring in a slightly larger space, but is not nearly so great for small dots and the like.  (I’m sure using real watercolor paper helps this though).  And I believe you can turn blender pens into markers by using a reinker to dye the end of the pen, though I haven’t tried this yet. 

    So, my tip – use blender pens for precision work, you will be much happier with the result.

  • And now for a little bit of muzak

    Well, I finished my last index card last night and had a lot of fun with it.  It is one of my rare, very simple cards.  No layers even!  Unfortunately, I waited until this morning to try to take a picture of the card before work (I’ve found the early morning light tends to be good lighting for pictures).  Sadly, we had a ton of fog and so none of my pictures turn out.  So, I’m waiting until tomorrow to try again.  Until that time…. here is my version of muzak — a non-stamping post.  I promise to get back to the stamping stuff tomorrow! 🙂


    My story of the new haircut:


    I’ve started getting into the bad habit of all of the sudden looking in the mirror, deciding my hair has turned into an emergency and I must get it colored/cut/styled asap.  That happened to me yesterday and so this afternoon I made an appointment for this evening for a haircut.  Of course, it being so last minute, I had no idea what I wanted other than “better than it is now”.  My stylist showed me a picture of a cute bob and I thought “what the heck” and said sure.  Unfortunately, the part I didn’t think about too well is that this hair style has bangs.  Not in the traditional blunt cut across the eyebrows way, but the sideswept, falling into your eyes kind of way.  I realized the full consequence of this when I saw all the hair falling to the floor and now am brushing my bangs to the side ever two minutes.  The worst part though, was that I was still adjusting to the haircut when my husband and I met up after he got off work.  His response? 

    Him: “Did you get your haircut?” 

    Me:  “Yep”. 

    Him:  “Um….okaay”.   Sigh. 

    I still don’t quite recognize myself in the mirror, but I think I’m going to like it tomorrow.  I think the problem is that this is a hipper haircut than I’m used to. 
    But what is true in crafting is true in hair — try something different and new, it may not be perfect the first time, but you may turn out with something great you never would have thought to try.

  • Thank You Kindly Index Card and the Philosophy of Card Fronts

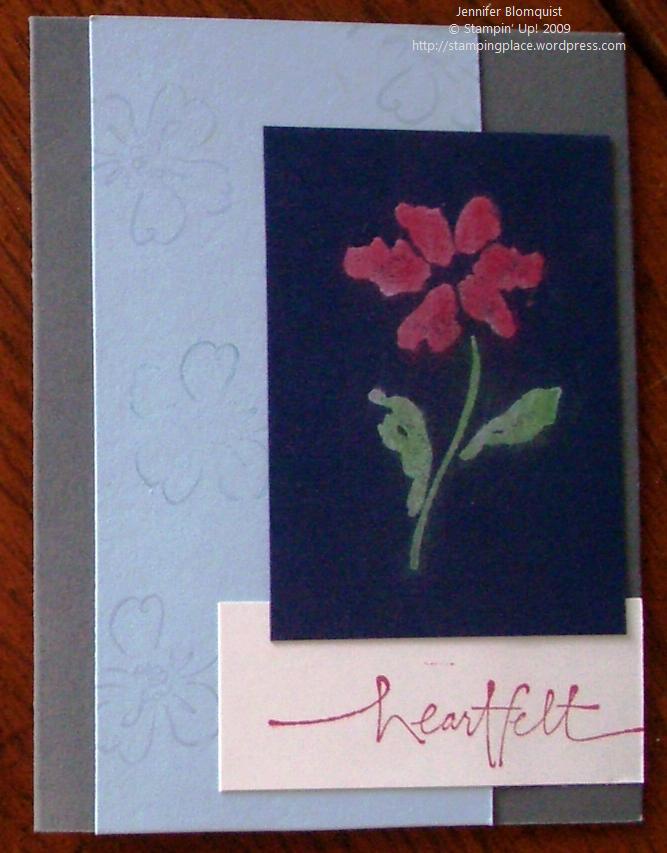
    For a while now, I’ve been a member of the card front club.  That is, someone who participates in card front swaps and who creates card fronts when making new card projects.  I always told myself, “I’m saving cardstock this way” and some folks say it saves a lot of room when storing your cards.  cardfront_projectIt made perfect sense, right? Well, I realized that I’m not nearly as organized as I’d like to be and often I’m just grabbing a card last minute from my stash.  (Thankfully, I have a large enough stash, I can still tailor my choice to the recipient.)  In any event, I like to have my cards ready to go so I only have to write on the inside and put it in an envelope. 

    So, this weekend I started project “turn cardfronts into cards”.  Over the course of three nights, I cut, scored, folded, and glued card bases to 46 of my cardfronts.  And last night, I finished the last card.  It was during this time that I realized that I like how cards look better when I go ahead and use a half sheet of cardstock for the card base instead of making a card front and later trying to line-up the front on a separately cut base (I wasn’t so good at that sometimes).  Plus, while I might be saving a few cents not using as much colored cardstock, sometimes it really does look nicer to have the color for the base (I even used a half sheet of colored cardstock for some of my cardfronts – definitely using more cardstock that way!).  So, now I’ve swung over to the “just do it” camp and will leave card fronts for pretty much swaps and special uses only.  I’d love to hear other people’s thoughts on this topic though.  What do you like better?


    Once that was all done last night, I didn’t have much time or energy for much else.  So, I tried working on my index card project.  I picked up my Thank You Kindly and some paper and got to work. 

    thankyoukindly_index

    This was one of those times that you think you have a great card idea and as soon as you start stamping you realize that “great” isn’t quite the right adjective. 🙂  It also doesn’t help when you cut your cardstock and then realize you totally cut at the wrong sizes!  So, I kept tweaking it as I went until I got to the point where I knew it needed something but everything seemed too much.  So, I finally went with putting on the button latte buttons (I love, love, love these buttons!!!) because the empty space was driving me nuts.  So, while its not my most shining work, its not bad for a card that had to use every thank you sentiment in the stamp set and no other stamp set period.  I call this one good enough and will be moving on tonight to Simple Stems. I’m feeling a little more optimistic about that set.   


    And yes, for those of you who left comments about my Video Game Live concert experience.  You are right, I had a camera. 🙂 Though the host actually encouraged use of recording devices at one point, so I don’t really feel bad.  Unfortunately, my pictures were mostly blurry so I can really only share the costume contest line up.  These were concert goers who dressed up for fun, glory, or a prize.

    vglive_sm vglive2_sm