Northwest Stamper

Category: Cards

  • Another Star Card with Pictogram Punches

    Another Star Card with Pictogram Punches

    Happy Friday!  It’s going to be a busy one around here between swim lessons, lego summer camp, a vet appointment, and trying to finish finalizing my samples for Monday’s Let’s Make Birthday Cards class.  But, its always nice when the work is fun work!  And if you are in the Seattle/Bellevue area – I’d love for you to join me for my last class before convention!

    Let’s Make Birthday Cards
    7/14 at 7pm
    Panera in Redmond
    details and RSVP here

    Ok, so on to the card share for today… I thought I’d continue the star theme from yesterday with this little guy:

    This is one of the cards the folks in my online In Color Club received in their packets last month.  We were focusing on Lost Lagoon but I just loved the pop of Gold Gimmer Paper and Hello Honey cardstock (which by the way will the be color you all will be getting this month!)

    See, I love this Pictogram Punches stamp set because of all the cute little stars and hearts that are part of the words.  You can either leave them stamped, or punch out your own matching shape to add some extra dimension to your sentiment.

    imageimage

    Pictogram Punches Stamp Set

    Itty Bitty Accent Punch Pack

    I kept it simple by using one of the stars in the set to stamp out my background on the card and then just used the matching punch from the Itty Bitty Accent Punch Pack to make the Gold Glimmer star for the center of the card.

    Yay for star power!  Smile   Have a wonderful Friday!

    Card Supplies Used

    spaced shop now sig bar

    July Online Stamp Club Hostess Code – 7RDHVEKR
    Use this code to get free exclusive tutorials & project kit! 
    Learn more

  • Throwback Fun with Some Old Stamps and New

    Throwback Fun with Some Old Stamps and New

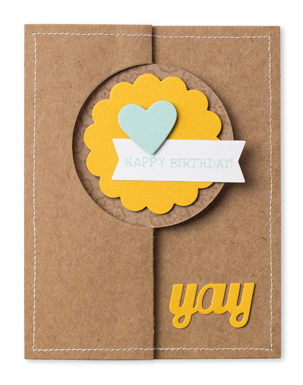
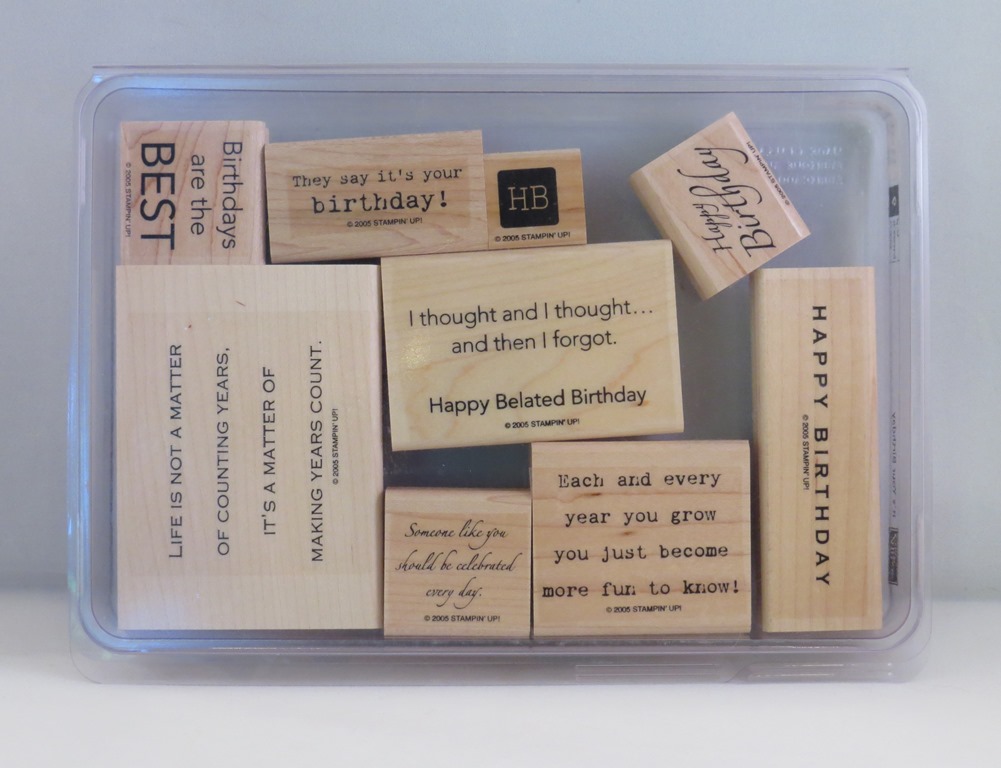
    Today is the Stylin’ Stampin’ Squad blog hop and I LOVED the theme idea this month.  Our task was to take our “oldest” stamp and our “newest” stamp.  How fun is that!  I had fun looking through my retired stamps that I’ve been holding on to to see what was my oldest set.  I had a hard time deciding but in the end found a stamp set I had almost forgotten I had – It’s Your Birthday.  And for the newest sets, I had to use my Be The Star set (Love, Love, Love this set!) with a little bit of Work of Art for good measure.

    As you hop along, please be sure to comment and show some love on every blog! We are always excited to hear from our followers! You should have just left stop number #2 on the Stylin’ Stampin’ Squad Blog Hop – Darcy at Stampin’ DJ.  If so, you are in the right spot. If a link doesn’t work or you get off track, you will find the full blog hop lineup below.

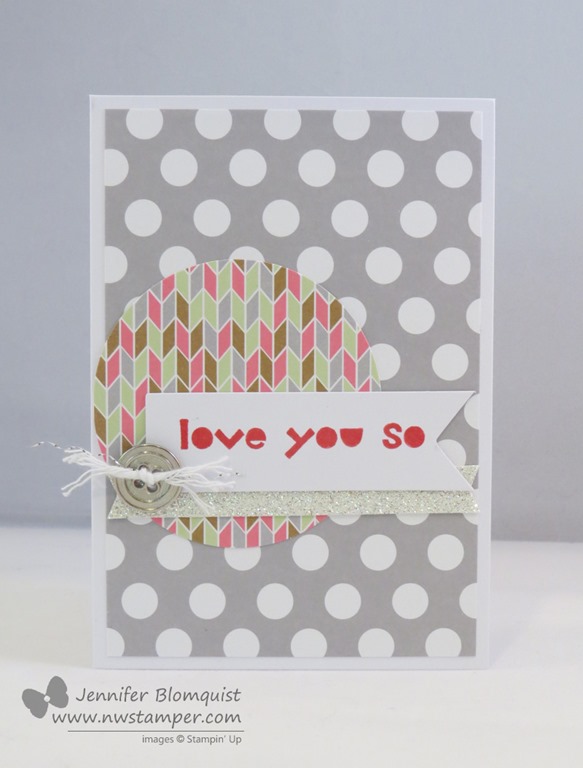
    So, here is my share for you today:

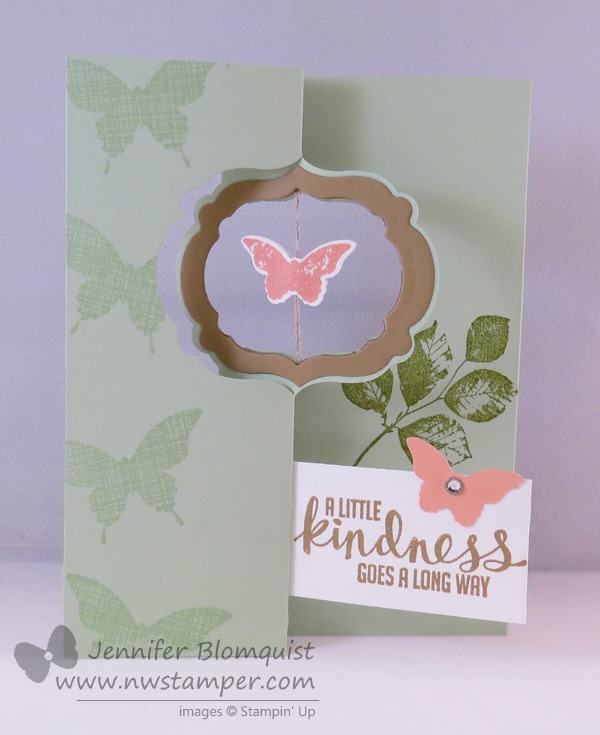
    I just love this sentiment from the It’s Your Birthday stamp set.  Honestly, that is pretty much the reason why I keep holding on to this set because everything I see it, I think of all the cards and scrapbooks I can make for my kids where this is such a true sentiment!


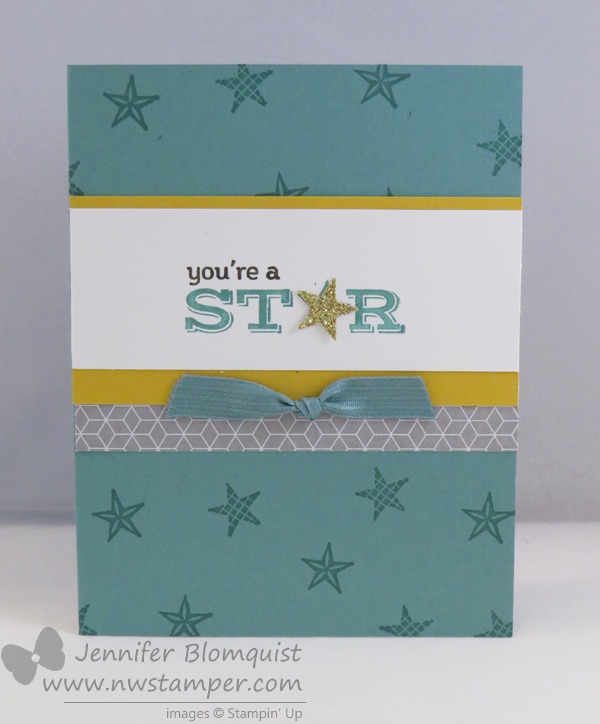
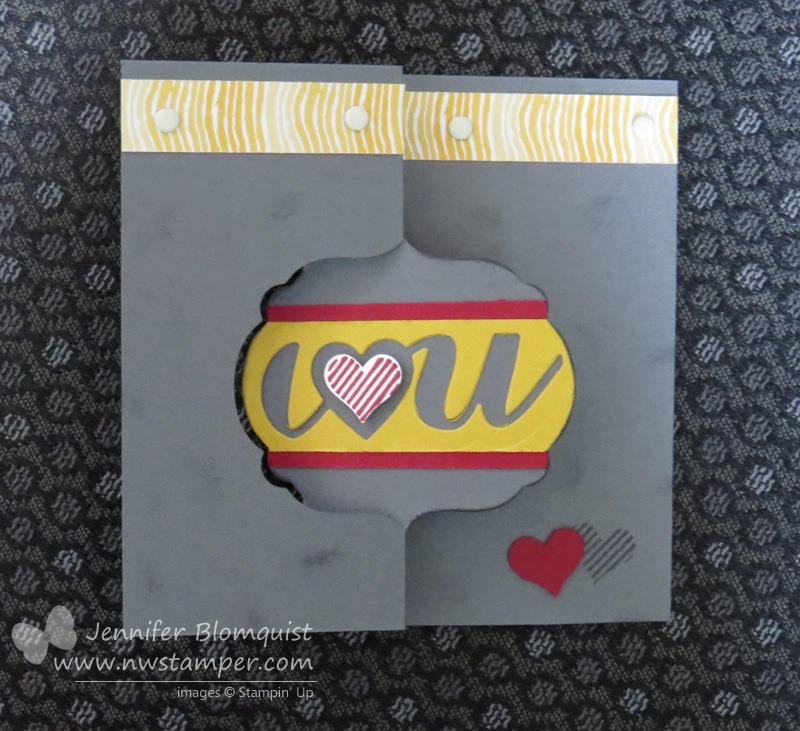
    And the birthday sentiments just go so perfect with the Be The Star stamp set.  It has a matching set of framelits which I have been using like crazy… guess I’m on a star kick right now.  But I had seen the idea of using the long swoosh from the Work of Art stamp set to make a star tail and I had a flash of inspiration!

    (Be the Star stamp set & Work of Art stamp set)

    The nice thing about the new Firm Foam ink pads from Stampin’ Up is that they transfer a lot more ink – this gives you a saturated image as well as, if you move fast, the ability to heat emboss with your regular classic ink pads!  So, that enabled me to have 3 different types of shine on my card.

    1. Iridescent Ice embossing powder – after stamping my swoosh, I immediately added the embossing powder and heat set.  Voila!  A shimmering star tail!
    2. In Color Sequins
    3. Silver Ink – for a few more background stars to complete the sky.  Did you see that there is actually ink refills for the gold and silver pads now???  YAY!

    And that star is colored with the new Blendabilities and a little help from Mr. Color Lifter.

    Seriously, if you haven’t gotten your Blendabilities yet…. well, lets just say you won’t be sad if you take the plunge!  I colored the star using the three Daffodil Delight markers and then lightened up a spot in the middle using the Color Lifter.  I got it a little too light so I had to go back and color over with the lightest color, but I think in the end it didn’t turn out too bad!

    And for my final touch, I first inked up my little swoosh image from the Work of Art stamp set and *stamped it off one time* on scrap paper and then stamped in the corner of my card front.  It made it just light enough to be a great background for my sentiment.

    So I hope you enjoyed my contribution, and hop along to check out what everyone else picked for their old & new!

    Blog Hop Participant List:

    1. Erica B. of Stamping Starlette
    2. Darcy J. of DJ’s Stampin’ Place
    3. Jennifer B. of Northwest Stamper  <—YOU ARE HERE
    4. Diana E. of Stampin’ Fun with Diana
    5. Donna S. of Organized Chaos
    6. Cynthia R. of Ink-a-Doodle Creations
    7. Kim R. of Stamping with Kim
    8. Kathy P. of Katrina P’s Creative Corner
    9. Shellie G. of Craft Smashup

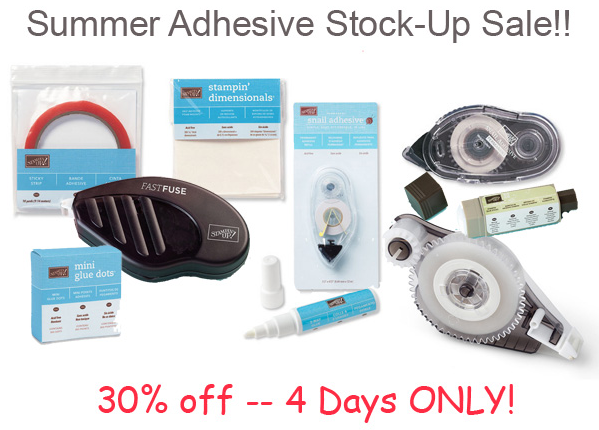
    PS – If you didn’t catch the news on my Facebook page, the Clearance Rack should be updated today (7/10) with new goodies for you!  So, make sure to check it out as soon as you can because some items may go fast!

    I’ll be putting in a group order if I have interest by 10:30 AM pst, so if you want to join in on that let me know at jennifer@nwstamper.com.
    (note – if you are hopping and have a demonstrator, make sure to contact them as they would love to help you out!)

    spaced shop now sig bar

    July Online Stamp Club Hostess Code7RDHVEKR
    Use this code to get free exclusive tutorials & project kit!  Learn more

  • Christmas In July with a 2014 Holiday Catalog Sneak Peek!

    Christmas In July with a 2014 Holiday Catalog Sneak Peek!

    Now, I’ll admit, I’m one of those people that think I’m going to get my Christmas cards done early but then I keep putting it off until suddenly it is December 5th and I haven’t done a single one!  However, I know a lot of folks are really good about starting their Christmas cards in July – so that you’ll have plenty of time to actually get them done without madly crunching at the last minute.  So, if you are looking for some new inspiration, check out these brand new stamps that were just released to help get you started!

    beauty of the season

    Beauty of the Season – 2014 Holiday Catalog Sneak Peek set!

    We love our cardinals don’t we?  And this just looks so pretty watercolored!  I forget how a simple card base in watercolor paper lets you give the focus to your main element and then you don’t need lots of layers to have a beautiful card.  Add a sentiment and you are good to go!

    This will be coming out in the new Holiday Catalog at the end of August but you can actually get it right now if you love it and want to get going on your holiday cards.  Smile  

    Card Supplies Needed

    beauty of the season

    If birds aren’t your thing, then you can check out this more funky and modern stamp set that just came out in Photopolymer called Christmas Bliss!

    christmas bliss

    Christmas Bliss photopolymer stamp set

    This is one of those while supplies last stamps but I love how fun it is, especially with your non-traditional colors.  In this case, Pistachio Pudding, Baked Brown Sugar, and Calypso Coral!

    And isn’t that polka dot bag cute??  Gotta love things that make gift giving easy. Smile

    Supplies Needed

    christmas bliss stamp set_thumb

    So, pick your style and enjoy a little holiday cheer while you can still also enjoy the warm and sunny weather!

    oh.. and psst – make sure you are keeping your eye out on the Clearance Rack…. there may just be some new and fun stuff popping starting around Midnight MST tonight!!

    spaced shop now sig bar

    July Online Stamp Club Hostess Code7RDHVEKR
    Use this code to get free exclusive tutorials & project kit!  Learn more

  • Dear Heart for those Great Boy Cards

    Dear Heart for those Great Boy Cards

    I don’t know if you remember the Sweetie Pie photopolymer stamp set that came out a few months ago.  It was filled with these cute sketch art girl faces and a couple frames and accessory stamp images.  Turns out it was popular and sold out pretty fast.  Well, today, Stampin’ Up put out another stamp set like that only this time its all about the boys!  It’s called Dear Heart and look at some of the cute stuff they are making with it:

    dear-heart-1

    Both of these cards were designed by the concept artists as Stampin’ Up, and I think they are so fun!

    dear-heart-2

    You can see all the options and different images in the set – can I just say that alligator/dinosaur guy just makes me smile. Smile 

    dear heart stamp images only

    And as a reminder, today is Tuesday which means new weekly deals!  I especially love that Washi Tape!  If you would like any, let me know and I can try to organize a group order.

    weekly deals 7-8

    spaced shop now sig bar

    July Online Stamp Club Hostess Code7RDHVEKR
    Use this code to get free exclusive tutorials & project kit!  Learn more

  • Fun n’ Crafty Blog Hop–Let’s Use That Designer Paper!

    Fun n’ Crafty Blog Hop–Let’s Use That Designer Paper!

    Are blog hop imageyou ready for some inspiration for your designer paper?  Yes, all that beautiful patterned paper that you either have at home or have been eyeing up in the catalog.  Then hang on to your hats because today is the monthly Fun n’ Crafty blog hop and we are featuring projects that use designer paper! Many of the papers featured are included in the July Buy 3 get 1 free promotion, so if you find some favorites along the way, you don’t have to feel so bad because they are on sale! Winking smile

    Idea #1 – Let Your Designer Paper be Your Focal Point

    I’m going to be sharing two cards today, but this first one is the type that would have had me cringing a year ago… because I use “big” pieces of 2 sheets of paper!  Gasp! I know, right?  But the thing is, I realized that when I actually let myself use my papers, they make great borders and backgrounds. These patterns are from my new favorite paper collections from the Stampin’ Up catalog – Maritime Designer Paper. image I’m not normally a nautical person, but I love how many of the prints can be used for any type of card… but especially masculine cards!! I added some Silver Foil paper, some baker’s twine, a Cherry Cobbler button, and the sentiment from the Hip Notes stamp set. And if you noticed from the first picture, I had the Silver Foil paper curved so that it gave some dimension to the banner.  To help hold that curve in place, I stacked 2 Stampin’ Dimensionals on top of each other and then placed the stack under the raised curve part of the banner to keep it held up.  The other end is glued straight down to the card front.

    Idea #2 – Try Some Paper Piecing

    I’ve been meaning to try paper piecing with this stamp set (Vivid Vases) for ages, so now seemed like the perfect time to actually get it done! If you aren’t familiar with paper piecing, it is the idea of taking a stamp set with outline images that you would normally want to color in and instead of coloring in with markers, you stamp your image again on a piece of patterned paper and cut it out to glue on top of your stamped image. paper piecing example So, in this case, I used the new Flower Pot designer paper to give me a fun and funky floral background as well as for patterns for each of my pots.  Each paper used in this card are all from this one paper set. image Then when I was done, I was grateful for Stampin’ Up’s color cordination between products because I needed something and really wanted some ribbon to match without competing with all the colors and images I already had used.  Thankfully I was able to grab some Calypso Coral seam binding ribbon and Mossy Meadow stitched satin ribbon to complete the card. So hopefully you enjoyed these ideas for using up some of the paper in your stash! Lets keep the fun going and hop on over to Kathy’s blog for more ideas to try! Blog Hop Participants:


    spaced shop now sig bar

    July Online Stamp Club Hostess Code7RDHVEKR Use this code to get free exclusive tutorials & project kit!  Learn more

  • Quick & Easy Thank You Card with Stampin’ Up Blendabilties

    Quick & Easy Thank You Card with Stampin’ Up Blendabilties

    Today over at Stylin Stampin’ Inkspiration, the girls are sharing Quick and Easy cards.  Now, you know me… I LOVE quick and easy stuff – it is my go to style for cards.  Well, most of the time anyway.  So, I thought this card would be a perfect contribution to the theme:

    I had the chance to play with the new I Like You hostess stamp set because my mom recently earned it.  ~ side note, it is SO awesome when you have a nearby family member who loves crafting as much as you and gets different stamps and dies as you! ~

    Anyway, I thought this set would be perfect for using with Blendabilities (don’t forget, they come out TOMORROW!!!)  I not only used them to color in my flowers, but I also used them to color in my pearls.  Yup, that is right, double duty!

    You can color:

    • Pearls
    • Rhinestones
    • Ribbon
    • Clear Buttons

    Just to name a few.  All you have to do is pick your favorite colors and go at it.  In this case, I used the medium and light Daffodil Delight Blendabilities markers.

    And just to add some depth, I cut out one of the set of flowers and popped it up on dimensionals.  I promise, it is still quick… and easy.  The nice thing with the white paper base and for the raised image, you can be imprecise with your cutting and no one will notice!

    Finally, I had made a promise to myself that this year I’m going to use more designer paper.  I love it all and end up hoarding it so that at the transition of catalogs, I have a TON left over and of course want all the new stuff.  So, I’m working to use what I have and enjoy it!

    In this case I used the Moonlight Designer Series Paper stack and then added some texture by using the new Daffodil Delight cotton ribbon.  It is so soft and flexible to work with.

    Stampin’ Up Supplies Used:

    You can make this same card with whatever you have in your stash.  So whip up a bunch of quick thank you cards to have on had and enjoy that paper!

    spaced shop now sig bar

    June Online Stamp Club Hostess CodeACANDKB4
    Use this code to get free exclusive tutorials & project kit!  Learn more

  • Spinning Butterfly Flip Card for Class

    Spinning Butterfly Flip Card for Class

    Have I mentioned how excited I am for class tomorrow night?  I am running my Beyond the Basic Flip Card class and showcasing some different variations on the Label and Circle Thinlit flip cards.  I thought today I would share one of the cards that they will be doing in class, so hopefully it will give you some inspiration as well!

    I had seen cards with the center circle punched out and a spinning element, and so I thought I would give it a go with the Label Thinlit.  Turns out the Bitty Butterfly punch is a perfect fit  to go inside! 

    All it takes is using the smallest label framelit (from the Label Framelit collection) to punch a hole in the center flip piece of the card and in a piece of contrasting cardstock (in this case – Baked Brown Sugar) and then using the label framelit that comes as an accessory to the Label Thinlit flip card die to cut around your Baked Brown Sugar hole to make a cute frame.  Add your spinning element to the middle with floss or linen thread (which is what I did)  and decorate!

    For my inside, I wanted to make sure I had room to write a note to the recipient of my card, and so I used a flap of whisper white cardstock to place my sentiment on the front, and to cover up a place for me to write on the inside of my card.

    It turns out really cute in person – its just really hard to photograph! Smile  Plus, with the framelit and thinlit dies, it makes it super quick and easy to put together too!

    Stampin’ Up Supplies Used

    This is another one of those dies/tools that the more you start using it, the more ideas start flowing (at least they did with me).  So, start playing and trying out all the combinations you can come up with with all the extra dies they include in the pack.  And if you want more ideas – you are invited to join me for my class tomorrow night (just please RSVP so I know your coming) or I’ll be putting together an online class soon with videos and pdf details and more soon! 

    spaced shop now sig bar

    June Online Stamp Club Hostess CodeACANDKB4
    Use this code to get free exclusive tutorials & project kit!  Learn more

  • Stampin’ Up Adhesive Summer Stock Up Sale–This Weekend Only!

    Stampin’ Up Adhesive Summer Stock Up Sale–This Weekend Only!

    As I look in my adhesive drawer, I realized I’m getting woefully low on many of my favorite tacky stubstances.  So, it is time for me to restock and I figured I might not be the only one.  And thus, I’ve decided to create the….

    imageDiscounts available through 6/30/2014

    Yep!  We can always use more adhesive and we can always use a sale, so here you go – the best of both worlds!

    Note – these prices are only available through me, Jennifer Blomquist 

    AdhesiveDetails
    imageSnail Tape Runner
    Normally $6.95

    ON SALE for $4.87 each!

    – 13.1 yds of double sided tape
    – great for cards, scrapbooks, and other craft projects
    – acid free

    imageSnail Tape Runner – REFILL
    Normally $4.50

    ON SALE for $3.15 each!

    – 13.1 yds of double sided tape
    – refills the Stampin’ Up Snail tape runner and some Tombow tape runners
    – great for cards, scrapbooks, and other craft projects
    -acid free

    imageStampin’ Dimensionals
    Normally $3.95

    ON SALE for $2.77 each!

    – 300 double sided foam hexagons
    – perfect for adding layers and dimension to projects
    – great height for scrapbook pages

    imageStampin’ Up Glue Dots
    Normally $4.95

    ON SALE for $3.47 each!

    – 300 dots that are 3/16” diameter
    – great for adhering bows, buttons, wood die cuts, and other odd shaped embellishments

    imageSticky Strip
    Normally $6.95

    ON SALE for $4.87 each!

    – 10 yds of double sided adhesive
    – super strong adhesive
    – perfect for boxes and other 3D items, heavy items, and glitter

    image2-Way Glue Pen
    Normally $4.50

    ON SALE for $3.15 each!

    – adhesive that can be applied as a permenant adhesive or left to dry slightly and become repositional adhesive!
    – perfect for those skinny areas and tiny corners, and small touches of glitter
    – dries clear

    imageFast Fuse Tape Adhesive
    Normally $9.95

    ON SALE for $6.97 each!

    – 13.1 yds of double sided tape
    – New heavy duty tape, that provides extra hold for cards and 3D projects
    – Acid Free

    imageFast Fuse Tape Adhesive – REFILL
    Normally $7.50

    ON SALE for $5.25 each!

    – 13.1 yds of double sided tape
    – New heavy duty tape, that provides extra hold for cards and 3D projects
    – Acid Free

    imageStampin’ Up Glue Stick (2 PACK)
    Normally $3.95

    ON SALE for $2.77 each!

    – 2 diamond shaped glue sticks
    – shape is great for getting into little corners
    – Great hold to your projects
    – Perfect for paper to paper glueing

    Order as many as you like!
    Just let me know by emailing me your order to jennifer@nwstamper.com by MONDAY 6/30.

    How it works:

    • Email or call me with (1) which adhesives you want and (2) how many you want of each type.
    • Provide either a credit card number to use when I order or an email that I can invoice you via Paypal.
    • I will contact you within 24 hours to collect any extra details I need and to provide your total to you with taxes and shipping.
    • I will put in the order at the end of the flash sale period and ship out your adhesives at the most economical shipping rate directly to you shortly after.
    • Note – this is only available through me – Jennifer Blomquist – as a personal sale offering. 
    • Taxes and shipping are not included in the prices above.

    Prefer to shop online? Shop using the hostess code496777JK and I will mail you a check to reimburse you for the discounted adhesive amounts. Smile

    If you have any questions or just are ready to hop on this great deal – email me at jennifer@nwstamper.com and I’d be happy to get you all squared away!


    spaced shop now sig bar

  • SSI Friday Favorite–Label Thinlit Cards!

    SSI Friday Favorite–Label Thinlit Cards!

    Yay, I’m back with a project to share with you!  Over on Stylin’ Stampin’ Inkspiration some of the girls are sharing their favorite items from the Stampin’ Up catalog and I had to get in on the action and share a newly re-discovered favorite of mine – the Thinlit Flip Card Dies!

    See, I schedule these technique classes each month but usually have NO IDEA what samples I’m going to be doing in the classes until about a week or so out from the class.

    (Yes, I know I should get better that the whole idea of preplanning and premaking my class samples… I totally will…. someday….)

    But as I was working on the samples for Monday’s Beyond the Basic Flip Card class, I was creating different variations of default Label flip card and the Circle flip card – and holy cow was it super fun!!!

    I love that this type of card is so easy to make thanks to the dies.  I mean, seriously, you get this super crazy cool flipping action and all it takes is one run through the Big Shot?!  Scoring and detailed cutting is done —  SOLD!  Seriously, once I started playing with variations, I ran out of time before I could make them all. Smile

    This card was actually a left over “oops” card where I didn’t mean to cut it short the way I did.  So, when closed it is basically a 4-1/4” x 4-1/4” card.

    To make a Square Flip Card:

    • Cut your paper to 4-1/4” x 11”  (you are actually going to end up with a chunk cut off the end, but you can save it and use it in a different project, right? Smile )
    • Turn it so the short end is lined up in the upper, left corner of the framelit and the long edge is going along the top of the thinlit die.
    • There will be a gap between the bottom of your cardstock and the bottom of the thinlit die.
    • Run it through your Big Shot (or other die cutting machine) and it cuts and scores it all for you! 
    • Decorate and you are done!

    I had fun pairing my cut outs (the I <3 U comes with the flip card die) with the little heart stamp and punch from the Itty Bitty Accents punch pack and Pictogram Punches stamp set

    Stampin’ Up! Supplies Used:

    If you are coming to my Beyond the Basic Flip Card class (6/30 at 7pm), you’ll be doing a variation on this specific card, only with an added twist!  You’’ll love it!  Don’t forget to RSVP if you haven’t already.

    Not local?  I’m putting together an online class with videos and pdfs going over all the variations we’ll be talking about in class!  Shoot me a message if you want to be notified when the class is ready to go (hopefully very soon).

       ———————————————————

    And just a reminder… this weekend only.

    stampin up adhesive stock up sale

    View details here


    spaced shop now sig bar

    June Online Stamp Club Hostess CodeACANDKB4
    Use this code to get free exclusive tutorials & project kit!  Learn more

  • Fun w/ Thinlits & a Flip Card Class

    Fun w/ Thinlits & a Flip Card Class

    I normally forget to post here on the blog reminders about my upcoming classes and events until the day before, not always the best time to advertise, huh?  But today I’m actually remembering and so I wanted to share a little about my next class that is coming up on Monday June 30th that is all about using the Thinlit dies in fun ways!image

    Beyond the Basic Flip Card

    6/30/2014 – 7pm at Panera in Redmond ~OR~ get the TO-GO class kit my mail
    RSVP here or email me at jennifer@nwstamper.com

    So the idea is that you have your basic flip card (shown above) where you pull open the left flap and the center circle or label shape flips over to reveal a message on the other side.  They are really cute and can be fun to decorate – and did I mention SUPER EASY thanks to the die!  Honestly, I had never tackled this type of card because I was nervous exact-o knives would be involved.  Smile  But once they came out with a die that did it all for me…. heck ya!  I was all over it!

    image

    The cool part is there are lots of variations you can do with these cards that are really fun and give you lots of variety with the single die.  So, in the class we’ll walk through the basics of using the die for the base card and then jump right in to some fun variations.

    • like changing the orientation of the card
    • to have a spinner in the middle of your flip shape
    • having an extra flap for more space to write your sentiments
    • to even doing a double flip (or more!) card!

    In class we’ll be using both the dies:

    imageimage
    Circle Thinlit DieLabel Thinlit Die

    I’ll have extra samples of flip cards to give you more ideas, but you’ll go home with completed cards that you made doing the different variations.

    image

    It should be a lot of fun and a nice change from your typical cards!

    I hope you can join me either in the class or virtually through class videos for the TO-GO option!  RSVP here or email me at jennifer@nwstamper.com


    spaced shop now sig bar

    June Online Stamp Club Hostess CodeACANDKB4
    Use this code to get free exclusive tutorials & project kit!  Learn more

  • Congratulations Card in Blue

    Congratulations Card in Blue

    Tis the season for graduations and transitions, so it is a great time to pull out your congratulation stamps and put together some fun congratulations cards.  Today’s card uses on of the new Photopolymer stamps from Stampin’ Up called Bravo – and if you are on my mailing list, you got the PDF tutorial for making this card in your latest newsletter.  If you aren’t getting my newsletters, you can sign up here and you’ll be all set for future tutorials and tips!

    Congratulations Card with Bravo stamp set

    Now you are totally going to laugh at me, but I saw the images from this stamp set long before I got the set (I earned it free as part of a promotion for demonstrators) and I thought,” Oh, this has some nice sentiments and fonts”.

    I knew the set was called “Bravo”, I saw the images… but somehow it wasn’t until I got it in the mail and went to go use it that it suddenly hit me that all of the sentiments were some form of congratulations! Smile  Doh!   How did that totally escape my notice? I had a good laugh for my blockheadedness and got to work on my congratulations stamp.

    Anyway, I did like the idea of using this set to create my own background image.  I started by laying out the stamps on my paper (image side down) until I had positioned everything to where I wanted it.  Then I grabbed my big clear block (block F) and placed it on top of my set of stamps so that when I picked up the block, I had everything exactly where I wanted them.

    2014-05-22 21.06.20

    Then all I had to do was ink and then stamp and my background is done!  Exactly how I wanted it. 

    Add some glimmer stars using the new Itty Bitty Accents punch pack and some ribbon and you are done.  Switch up the colors and you can use this for any school colors or event.  Yay for flexibility!

    Stampin’ Up Supplies Used

    You can do this idea with any of your clear mount stamps – arranging them on your paper first and them positioning the clear block to pick them up and keep them in just the right spot.  So, have fun and give it a try!

    spaced shop now sig bar

    June Online Stamp Club Hostess CodeACANDKB4
    Use this code to get free exclusive tutorials & project kit!  Learn more

  • A Couple Quick Creations Thanks to the Happenings Card Kit

    A Couple Quick Creations Thanks to the Happenings Card Kit

    With the release of the new Stampin’ Up catalog, it is always fun to chat with folks after they have had a little bit of time to flip through it a time or two (or four or twenty… ha ha!)  Always there is a stamp set or accessory or something that has been around for a while that we have TOTALLY MISSED and think are so stinkin’ cute.  And then there are the few items that you see but can’t really picture how cute they can be until you see someone else using them.  For example, this Happenings Card Kit.

    happenings card kit

    I remember completely skimming past it in the Occasions Catalog (yep, this has been around since January) but it wasn’t until they gave us a kit at the Leadership conference in TX that I started to notice it.

    Then finally the last weekend in May I put together a class using this kit which turned out to be a TON of fun!  Everyone got their own card kit- I brought the stamps, ink, and lots of samples for ideas; and we sat around creating our own versions of the 15 cards in the kit.  For example:

    Did you know that the sentiments from the Geometrical stamp set fit really well in the banners?  Since the circle, the banner, and the glimmer paper piece were all die cut – this card was as easy as stamping the sentiment and then assembling!

    Or you can get extra creative with what is left over once you punch out your die cut shapes.  Like this:

    I popped out the big green banner piece and set it aside for another card.  Then there was a little bit left of the green pattern printed on the die cut sheet and so I just grabbed my scissors and started trimming around the patterned shape to get that banner outline!  Totally fun, huh?

    And seriously, multiple people finished all 15 of their cards – each one being unique, I might add, in the 2 or so hours we had allotted!  So, kits can be great for that time saver crafting.

    Stampin’ Up Supplies Used

    I’ll have more projects to share with you using this kit… or if you order this kit from me, I’ll email you a PDF with all 15 of my unique samples!  Gotta make sure you have some fun inspiration to get you started.  Smile

    And if you want some more inspiration, here is one set created by Tanya Cabral at that stamping afternoon:

    Happenings Kit project ideas

    Enjoy and Happy Friday the 13th!

    spaced shop now sig bar

    June Online Stamp Club Hostess CodeACANDKB4
    Use this code to get free exclusive tutorials & project kit!  Learn more