Northwest Stamper

Tag: oval framelits

  • Sweet Hello Baby Card

    Sweet Hello Baby Card

    Every now and then a card comes together that is a little bit of this and that and I just love the end result.  This is one of those cards.  I actually made it for last summer’s convention display boards and realized that I don’t think I ever posted it, so I wanted to share!

    Tips for making this card:

    • This is a perfect card for using up a bunch of your scraps because it is lots of little die cuts and scrap strips of paper.
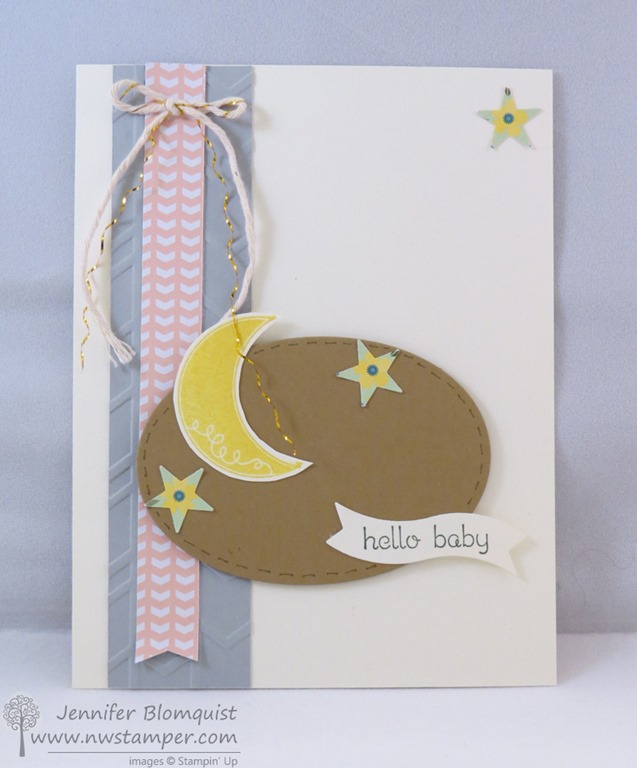
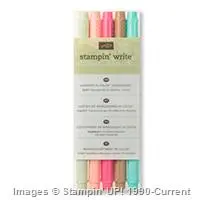
    • Cut out an oval framlelit shape and then add a little bit of detailing by creating faux stitches using your Baked Brown Sugar marker.
    • Don’t be afraid of letting your stamped elements go off the edge of the oval.  It keeps it more interesting to look at and not too stuck together.
    • Mix and match your stamps like the moon from Pictogram Punches and then the sentiment from Teeny Tiny Wishes for just the card you want.
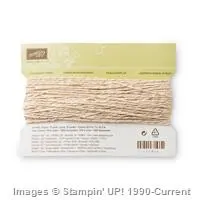
    • Add some flair to your bows by tieing a bow with the Gold Baker’s twine and then AFTER you tie the bow, unwrap the gold piece for a bit of tinsel.
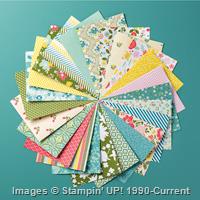
    • Both the pink designer paper and the paper for the little stars come from the All Abloom designer paper stack.  You can give your paper new life by punching out shapes (like the flowers in the paper) with a different shape (the star from the Itty Bitty Accent Punch Pack)

    Sale-a-Bration Update!

    Did you catch the extra set of annual catalog items that are now available as Sale-a-Bration freebies?  The items in the Sale-a-bration catalog and flyers are while supplies last and with Blendabilities now being available, they wanted to make sure there were enough choices for everyone for the last week and a half of the promotion! 

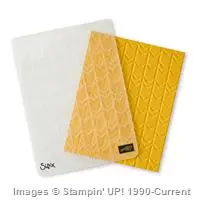
    So if you want to do some embossing like how I used the Arrows embossing folder above, check out some other options you could earn for free!

    11046535_1060613977288096_7649050778645325773_n

    See the rest of the Sale-a-Bration Items here:

    Start shopping here to get your favorites before they are sold out!

    NWstamper signature_thumb[9]

    order online button for sig 3_thumb[4]

    Project Supplies Used:
    Easy shopping anytime!  Click the images below to see the item in the online store

    Price: $99.95

    Supply List

    Built for Free Using:  My Stampin Blog

  • Framed Flowers Card for a Friend with Pictogram Punches

    When I saw that the paper stacks in the Stampin’ Up catalog were on the weekly deals this week for 25% off, I was pretty excited.  I love my paper and though I need to work on using it more (hence why I’m planning my technique class this month to be all about Using You Paper!)  I have had some fun with it already including this card:

    Tips for making this card:

    • Die cut the center of a piece of the All Abloom designer paper stack (I thought this looked like some fab wallpaper) and then layer over a piece of Whisper White cardstock to make the focal point in your card.
    • Take the same oval you used to cut the piece out of your patterned paper and the next size bigger and nest them on a piece of scrap Soft Suede cardstock.  Run them together through your big shot to get a “frame” for your cut out.

    • Use the colors from the paper you chose to decide which colors to stamp your vase and flowers from the Pictogram Punches stamp set and then punch out the flowers with the matching Itty Bitty Accent Punch Pack.
    • Make a dimensional sentiment by taking a strip white cardstock and folding in both ends to make a “Z” shape on each side.  Then glue the ends flat to your cardfront while holding up the middle with a dimensional.

    LAST CALL!  Stacked with Love Valentine’s Day Class

    Just a reminder, I’m getting ready to order all the supplies and start cutting and prepping for the Stacked with Love class next week.  If you would like a kit and/or the instructions, don’t forget to sign up ASAP.  It’s a lot of fun and everything is cut and ready for you to do all the fun part.

    Sign up here!

    NWstamper signature_thumb[9]

    order online button for sig 3_thumb[4]

    Project Supplies Used:
    (if you are reading this in email, click here to see the list of supplies)

  • Fun with Vivid Vases

    Fun with Vivid Vases

    This week, I thought I’d share some inspiration for some of the fun new stamps from the Spring Catalog.  In my downline group (the demonstrators in my Fun n’ Crafty group) all created some amazing cards and I wanted to make sure everyone got a chance to be inspired by them!

    Today, I wanted to share a stamp that I LOVE that is also great because it is a single stamp, so it doesn’t take up much space, is inexpensive, and can be used a number of ways (even in ways that may surprise you).  For now, though, I thought I would share a couple ideas to get you started!  I’m talking about Vivid Vases.

    This was a make & take from Leadership this year and I loved how they used the geometric paper because I sometimes have a hard time figuring out how to use bold patterns but I loved this as a basic black and white striking background for the card.

    But really, the main thing we got to play with for this card is watercoloring the flowers and vases.

    When you want to do watercoloring like this, it works best when you start by

    1. Stamp your image with Stazon ink on watercolor paper.  By using watercolor paper, it lets you use extra moisture to get the mottled and diffused look without it tearing or pilling up your paper.
      Plus it gives your cards a fun texture because the watercolor paper is thicker and textured.
    2. Squeeze your desired ink pad while it’s closed so a little bit of the ink transfers to the top of the ink pad.  Use that like a paint pallet and pick up the ink with an Aqua Pen.
    3. Color your image with the pen like you would with a marker.  Add more color if you need.
    4. When you are done with that color, scribble your pen on a piece of scrap paper until no more color shows on the paper.  Then you can move on to your next color.

    Cute, right?

    Or get more fun colors by using paper piecing like my friend, Liz Mitchell!  Check out her great idea with this stamp set.

    I love how she took contrasting designer paper patterns (in this case from the Gingham Gardens paper pack) and made a mat for her card base and then cut out a smaller piece that she cut an oval out with the Oval framelit.

    Doesn’t it make a perfect picture frame?

    Then to add an extra pop of color with the vases, she stamped the stamp image again on scraps of patterned paper and then just cut out the individual vases.  Then you just glue them down to your main stamped image on a piece of white paper!

    Color in the flower buds with markers and you have a bright cheery card!

    spaced shop now sig bar

    Virtual Stamp Club Hostess CodeBNDDMDVU
    Use this code to get free exclusive tutorials & project kit! Learn more

    Stampin’ Up! Supplies Used
    Stamps – Vivid Vases
    Ink – Stazon, Melon Mambo, Daffodil Delight, Pumpkin Pie, Tempting Turquoise
    Paper – Watercolor paper, Daffodil Delight, Tempting Turquoise cardstock, kaleidoscope designer paper
    Accessories – Scallop edge punch, Aqua Pen