Northwest Stamper

Tag: hello you thinlit

  • Hello You Vellum Overlay Card with Washi Tape Stickers

    Last night we had a fun Technique class focusing on Washi Tape and so I thought I’d share one of the cards we made here today!  I love vellum overlays and they paired up well with a couple Washi Tape techniques… what do you think?

    This was also a great excuse for me to get out my Black Glimmer paper and play some more too.  I love how the Black Glimmer paper looks with the thin word dies like this “Hello” from the Hello You thinlits.  It is just so sparkly and pretty!  I tried getting a better picture so you could get the idea.

    The Hello and the black washi tape (from the Everyday Chic washi tape set) went on a piece of Vellum Cardstock that was glued onto the top of a Whisper White card base.  I used Tear n Tape to hold down the vellum to make sure it didn’t fly off over time.

    Then on the Whisper White card front, we created Washi Tape stickers!  This is such a cool technique… I’ll have to put together a video, but for now, here is how you make them:

    1. Take two pieces of wax paper and overlap them about a 1/2”
    2. Start laying strips of washi tape down across the wax paper, keeping the overlap seam about in the middle of your strips
      make sure your strips are wider than the image you want to punch or cut out
    3. After you have enough strips (it took 4 pieces of tape for my 2” circle punch), place the wax paper w/ washi over a piece of computer paper or we used a scrap of used Stampin’ Up Grid Paper and punch out all the layers at one time.
      TIP – if you try to punch out your shape using just the wax paper with washi, you will tend to not get a complete cut.  So, definitely use that extra scrap of thin paper!
    4. Apply your sticker like you would apply a band-aid.  Peel off one of the pieces of wax paper… since you overlapped them in the middle, you will expose about half of the shape but still have a big piece of wax paper holding all the strips in place.
    5. Stick down the exposed washi tape where you want your image to go and then slowly peel off the remaining wax paper and smoothing down the sticker as you go.  Seriously… just like a band-aid. Smile

    Add a few rhinestones to the front and you are done!

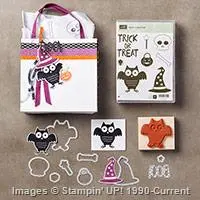
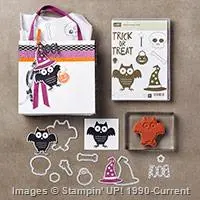
    If you like the idea of making washi tape stickers, check out the Year-End Sale as there are a BUNCH of washi tape sets on sale for as little as $1.98 for 3 rolls!  Gives you lots to work with, and if you have any oops while you are practicing… you know you got it at such a good deal that it doesn’t feel too bad!

    Oh, and you saw how we wrapped the card with the Bermuda Bay baker’s twine?  It is even on sale as part of the weekly deals!

    10391558_10205858796452445_1556057037489910698_n

    NWstamper signature_thumb[9]

    order online button for sig 3_thumb[4]

    Use Hostess Code BEFX37ZS at check out to get a special thank you from me!

    NEW ITEMS ADDED – BIG Year-End Clearance Sale!  See what is on sale here.

    See all the tutorials & classes by mail here

    Check out the Holiday Catalog Retiring List & Sold Out Updates

    Save 25% on the Latest Weekly Deals

  • Just Saying Hello with the Howl-o-ween Owl

    When I splurged on this Howl-o-ween stamp set, I did it because I was just loving this super cutie pie owl.  Something about him made me smile and so I had to splurge and get the set.  Since then, I’ve done some Halloween themed projects, but when I was getting ready for a card class recently, I decided to give him a go in a NOT Halloween fashion.  I think it turned out pretty cute, don’t you?

    Use different colors and keep to your basic sentiments and this owl is happy to deliver any message you could want!

    Tips for making this card:

    • If you are going to get the Howl-o-ween stamp set, you really ought to upgrade to the bundle.  Not only do you save that 15% off both the stamp set and framelits, but there are framelits for ALL the shapes in the stamp set.  So you can cut out everything you would want quick and easy (and I KNOW some of you are not a fan of fussy cutting, so that is a total win for you!)image
    • I kept this card in fall colors, but you could easily shake things up and do a spring, summer, brights, pastels, whatever color scheme you want.  Like this one?  I used Tangelo Twist, Rich Razzleberry, Soft Suede, and Crumb Cake.
    • Mix your ribbons!  It may be a little hard to see, but I combined TWO Razzleberry ribbons.  I started by adhering a long strip of the NEW Into the Woods cotton ribbon – being sure to not have adhesive in an area over my circle.  Then I tucked a small piece of the 1/4” Rich Razzleberry cotton ribbon under where I had not used adhesive and used that spot to tie the smaller ribbon into a knot.  The color is the same but the ribbon size and textures are subtly different.
    • I used my Circles framelits to cut out a pattern from the Into the Woods designer paper (sensing a theme here?) and then used the next size up circle to cut out a Soft Suede cardstock circle.
    • When your matted circle looks a little too plain, grab your Stampin’ Write marker and use the same color ink to faux stitch around the circle (ie – draw little lines so it looks stitched)
    • The owl is cute, and had tiny dots for eyes, but brighten him up by using the Owl Builder Punch and layer on some slightly bigger eyes, like these with Rich Razzleberry cardstock

    So, super cute, and fun to make.  And has lots of little details without being over the top.

    What do you think?  Good enough for a non-Halloween use?  Smile

    NWstamper signature_thumb[9]

    order online button for sig 3_thumb[4]

    Project Supplies Used:
    use Hostess Code FHRCKER7 to get a special thank you from me!

    Supply List

    Built for Free Using:  My Stampin Blog

  • Wednesday Walkthrough: Birthday Card with the Hello You Thinlits

    In an effort to help encourage myself to stick to the plan to do at least one video a week, and since folks seem to be liking the tutorial videos I’ve posted lately, I’ve decided to start a new feature on my blog – Wednesday Walkthroughs!

    The idea is that each Wednesday, I’ll walk you though a card…start to finish…in a video giving you tips and technique tricks along the way.  So this is the card I’m kicking things off with:

    It is a bright and cheery birthday card that you can make in any color that fits your recipient, especially when you use the retiring Chevron Background stamp!

    Featured Retiring Products:

    Get them before they are gone by the end of the month!

    Tips for making this card:

    • First off, I have to say, this stamp uses a Background stamp, which I love… but I’ve discovered that I don’t love these big stamps in Clearmount Rubber.  They are a pain to put the stickers on the back, if you are like me and have to do a sticker that is perfectly lined up, and I like the comfort of knowing that the rubber won’t move around as I’m doing different techniques with the stamp.  Now, the clear mount stamps work totally fine… I just wanted to share that I *always* recommend getting my background stamps in wood mount.  They make take up a little more room, but I think it is worth it in this case.
    • When stamping along the edge of the paper like I did here, turn your stamp upside down on the table so the rubber is facing up and then ink it up.  Press your paper onto the upright stamp and burnish with a bone folder to make sure you get a solid image.

    • I wrapped my taffeta ribbon around the entire card and glued it down on the FRONT of the card.  I know it sounds strange, but since you will be covering up a large portion of the front with the sentiment, hide your ribbon ends under that paper for a clean look on the rest of the card!
    • Check out the video below if you haven’t used wax paper with your thinlit dies.  It makes getting your die cut out so easy and everything looking perfect!
    • Don’t forget some extra accents, I LOVE my candy dots and they are just the perfect touch for this card, don’t you think?  Use your paper piercer to make sure they are aligned exactly how you want them with ease!  (also shown in the video below)


    Wednesday Walkthrough Video

    Want to make this card with me?  Check out this video and you can do just that!

    (ps – if you are reading this in email, click here to view the video)

    Quick Links:

    So, if you like this idea for a new video feature on my blog, let me know!  Leave a comment here or on the video!  Or shoot me a note over on Facebook.  I love hearing from you and hope to keep bringing you more fun projects soon!

    NWstamper signature_thumb[9]

    order online button for sig 3_thumb[4]

    Project Supplies Used:


  • Customer Thank You Cards with my New Favorite Color Combo!

    This weekend I needed to make some more thank you cards for Stampin’ Up orders this month.  I really appreciate all my customers and stamping friends who support me and my business, and so I like to send them a card they can use themselves (so if you get a card from me and wonder why I wrote my note to you on a post-it note, now you know!)

    I was looking around for inspiration and came across this card by Glenda Calkins and I just LOVED the color combination and knew I had to make my own!  So, here is what I am sending out to anyone who orders from me this month! 

    Tips for making this card:

    • First up, I LOVE LOVE LOVE this color combination.  If you haven’t tried it already, you should.  Especially since we only have a couple months left with the fabulous Coastal Cabana! 

      image
    • Use the Crazy About You bundle (save 15% off too when you get the stamp set and thinlit at the same time!) to use this same card design for almost any sentiment you want!  Birthday, thank you, Mother’s Day, Easter, you name it!  The fun combo of the die cut word with the stamped sentiment keeps it interesting.
    • When cutting out your word with the thinlit die, it will come out so much more easily if you put a piece of wax paper between the thinlit die and your cardstock!  Best trick ever!!
    • The Oval Framelits give you a perfect die cut for your focal point and a nice mat around it by just going up one size in framelit.
    • Adhere your patterned paper from the Sale-a-Bration Best Year Ever designer paper onto your Sahara Sand cardstock, and then wrap a piece of Coastal Cabana ribbon from the Sale-a-bration Best Year Ever accessory pack making sure to only glue the ends of the ribbon.  When you leave the middle of the ribbon unglued, it lays more nicely and lets you take a second piece of ribbon and slide it under your first ribbon and tie a knot.  So, you get a perfect faux bow everytime.

    And just in case you want to make your own, here are the dimensions:

    Card base – 4 1/4” x 11” folded in half
    Sahara Sand cardstock – 4” x 5 1/4”
    Best Year Ever striped designer paper – 4” x 2 5/8”

    Don’t forget, this designer paper and ribbon are while supplies last and only available until the 31st with your $50 order!  So, don’t miss out!

    Curious about the Starter Kit or have questions about becoming a Stampin’ Up Demonstrator?  Join me for a Live Chat this Saturday!

    I often get a number of questions from folks such as –

    • Can I join for the discount? 
    • Can I really earn money with Stampin’ Up?
    • What comes with the starter kit? 
    • Do you have recommendations for what I pick in my starter kit?
    • What are the minimums required for staying active as a Stampin’ Up demonstrator?
    • Do I have to actually sell anything?
      • Why would I want to sign up?
    • What do I get for signing up before Sale-a-Bration is over?

    So I thought I would put together a Live Chat as a chance to not only answer these questions but also give multiple folks a venue for asking YOUR questions!  So if you have been curious about what it means to be a Stampin’ Up demonstrator, register and join me on Saturday morning at 10am PST.  If you can’t make it, register anyway and I’ll make sure to send you the recording afterwards.

    *** Register for the I Love Stamping Live Chat here ***

    NWstamper signature_thumb[9]

    order online button for sig 3_thumb[4]

    Project Supplies Used:
    Easy shopping anytime!  Click the images below to see the item in the online store

  • LAST DAY for the Holiday Catalog and one more Sneak Peek with the Hello You Thinlit Dies

    It’s true, it’s the last day of the Holiday Catalog. So if you were wanting some of the items from the catalog, now is the day to make sure you grab them!  Plus, it is also the last day of the Year-End Clearance Sale and many of these great deals will go away after tonight.  There are a few items that are carrying over from the Holiday Catalog and I’ll share that list at the end of this post. 

    In the meantime, I wanted to share one more project that came out of my “Use up all the scraps on my desk” project. Smile

    I had extras of the wreaths that I had stamped and die cut using the Wondrous Wreath bundle, back when I was experimenting with colors for a class this fall.  I kept them lying around and so I though I would finally use them.  I decided to pair them with the retiring Color Me Autumn designer paper (50% off through tonight!) and use the new Hello You thinlits that are available starting tomorrow to make my own unique thank you cards!

    Tips for making this card:

    • The Hello You thinlits include the words “Hello”, “Thanks”, “You”, and “Happy”.  Snip off the “s” on the Thanks and you can create your own custom Thank You sentiment!thank you sentiment from Hello You Thinlit die
    • Just because a paper pack’s name implies it is a “fall” or “christmas” pack… many of the papers can be used anytime!  Like this yellow painted looking paper from the Color Me Autumn pack.  It totally works for anytime of year.
    • When stamping your wreaths, not only mix and match the colors you use, but mix and match the ORDER you stamp them as well!  In the sample above, I stamped first with Hello Honey, then Soft Suede, and then Blackberry Bliss.  In this sample below, I stamped first with Crumb Cake and then did Hello Honey and Blackberry Bliss.  I still can’t decide which I like better. Smile 
    • Don’t want to hassle with a bow? Tie a knot in a piece of ribbon and trim the ends.  Attach to your project with a glue dot! Easy peasy!

    10646980_782080281839792_4434187347945494541_n

    I’m getting excited!  I’m going to try to film a catalog walkthrough tonight of the new Occasions Catalog so you can get the full scoop tomorrow.  So, if you have any questions, let me know and I’ll try to make sure to cover them!

    ———————————————-

    SAVE THE DATE – 4/20/2014!

    Earn your spot at the Saleabration CELEBRATION in April!


    Come to a very special event where I will spoil you!  Sweet treats, specials, sneak peeks, stamping make n takes, gifts, games, prizes and more!

    FREE! You can only EARN your way in!

    1. Host a Saleabration workshop or Private Class  (Hostesses earn 25.00 MORE for FREE! *must be min. 250 in sales)
    2. Purchase the Starter Kit  (Get 2 FREE Saleabration choices! Or a Project Kit!)
    3. Spend at least 150.00 during the months of Saleabration! (Jan.-March)

    Monday, April 20th. (If you qualify and can’t attend, I will mail you the make n takes and gifts that will be passed out!)  This is something new I’m doing this year and I can’t wait to start planning all the fun for this event!
    This is only available through me, Jennifer Blomquist – so shoot me an email at jennifer@nwstamper.com to get the details and save your spot!.

    ———————————————-

    NWstamper signature_thumb[9]

    order online button for sig 3_thumb[4]

    Project Supplies Used:
    (if you are reading this in email, click here to see the list of supplies)