Northwest Stamper

Tag: flower shop

  • Mix & Match those Flower Punches for this Great Dimensional Birthday Card

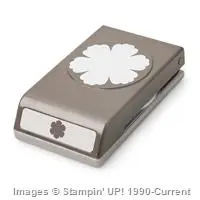
    Over the last couple catalogs, I’ve collected many of the flower stamp sets and matching punches from Stampin’ Up!  Because you know how much of a sucker I am for stamp sets that match punches – it makes it so easy!  So, I was playing around and started combining my different flowers and it turns out they look pretty great together.  Check it out –

    Tips for this project:

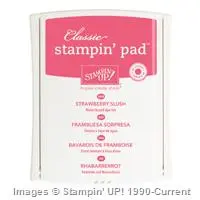
    • Stamp the flower image with the same color ink as your cardstock (in this case, Strawberry Slush) before stamping to create a custom look.
    • Mix in between your layers flower punches out of Whisper White cardstock and sponge with the same color ink you used on the other flowers to create a pop of color and make your flower layers distinct.
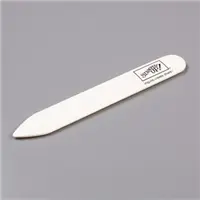
    • Use a Bone Folder to curl up the petals of your flower to help make it be more 3D and come to life!
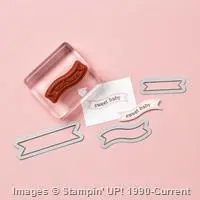
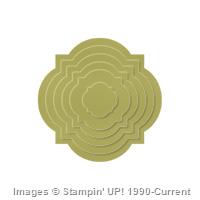
    • The Window Frame framelits make the perfect opening to allow some of your patterned paper peek through behind your flower and frame your flower.
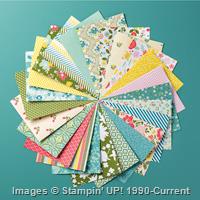
    • Cut your patterned paper to 1/4″ larger than your Whisper White cardstock to give an extra coordinating border.

    I often get asked if I recommend purchasing stamp sets in wood mount, clear mount, or photopolymer – and often I say it depends on the type of stamp set for me.  With these flowers and matching punches, I know that 90% of the time, I’m going to be stamping and punching out my flowers and so I optimized for Easy and Speed in stamping.

    –So I buy them in wood mount

    This is because I know that I won’t need precision placement most of the time and it makes it easy to grab and go when I want to stamp, and especially if I want to punch out a few different flower images from the same set.  I don’t have to clean my stamp and change the block between stamping, they are all ready to go and I can just do all my stamping at one time and then do all my cleaning.  Easy, peasy, done!

    NWstamper signature_thumb[9]

    order online button for sig 3_thumb[4]

    Project Supplies Used:
    Easy shopping anytime!  Click the images below to see the item in the online store.
    Use Hostess Code EGR29JBV to receive a free gift from me when you place your order!

    Price: $16.95

    Price: $15.95

    Price: $99.95

    Price: $6.95

    Supply List

    Built for Free Using:  My Stampin Blog

  • A Sweet and Simple Monochromatic Card with Hello Honey

    As part of my In Color Club, I send out a card that focuses on the In Color of the month.  This was one of the cards I sent out for the last Hello Honey month.  It is a quick card that was fast and easy using the In Color supplies they received that month.

    Tips for making this card:

    • Keep your colors simple.  I added a touch of Mossy Meadow to my Hello Honey card just to ground everything and make the embossed flower pop.
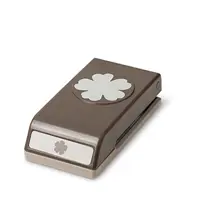
    • Use the Flower Shop stamp set to heat emboss with White Embossing powder on Hello Honey cardstock and punch out with the Pansy punch.

    • Add a second pansy punch piece under the top flower and offset it for make some green leaves.
    • The Bravo stamp set isn’t just for congratulations!  Use the “Sweet” stamp set for anything from birthday, new baby, or a fun thank you card!

    • Use White cardstock to break up the designer paper and the solid cardstock.  It helps keep the pattern from getting too overwhelming.

    NWstamper signature_thumb[9]

    order online button for sig 3_thumb[4]

    Project Supplies Used:
    (if you are reading this in email, click here to see the list of supplies)

  • A Long Version of the Pop Up Card in a Box

    A Long Version of the Pop Up Card in a Box

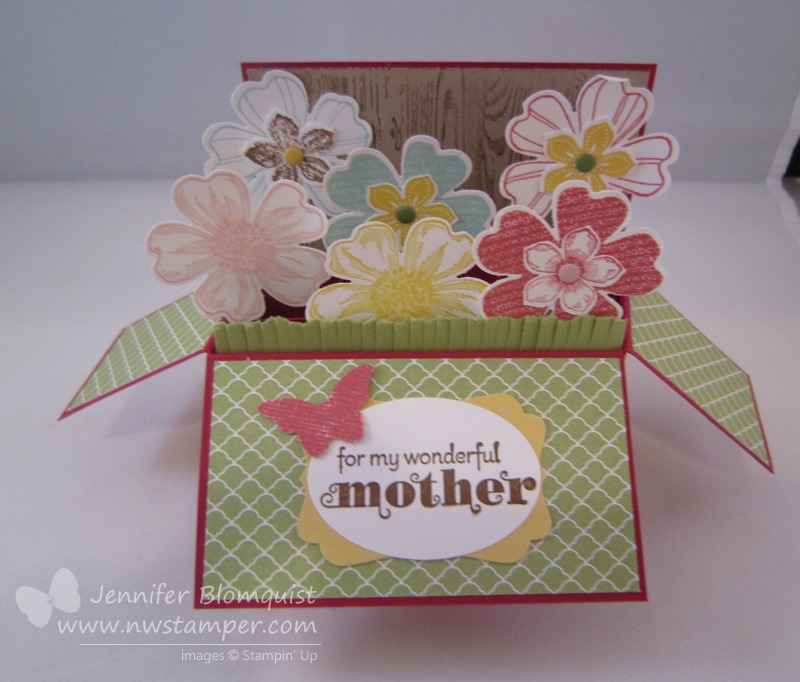
    I planned to post this yesterday but had forgotten about our Fun n’ Crafty Blog Hop (if you haven’t seen the projects CASE’d from the new catalog, you should totally take a look!)  But never fear!  I’m back with my customized version of the card in a box so that it will be a long card AND you can use an 8-1/2” x 11” piece of cardstock.  Here is the card I made as my prototype:

    If you recall, my other card in a box was skinnier and taller.  This was the default size I saw all over the web.  But I really wanted something longer and so I started futzing with the dimensions and other example I saw online.  The important thing for me was to have it only use an 8-1/2” x 11” piece of paper.  Most of the dimensions I kept coming up with would have made me use a 12×12 piece of cardstock, which is totally fine, but I have WAY MORE letter sized paper and so I wanted to use that.

    It still fits in a regular envelope….

    And when you pull it out, it lays flat… see the white looking edges around the cardstock.  Did you know if you sanded Core’dinations cardstock just on the edges you get this cool border look without needing any ink?

    And for the back, I didn’t know what I wanted to say, so I just added more of the Flower Shop and Petite Petal flowers to perk it up.

    I used a TON of tools on this card but that is the fun of this type of card.  You can keep embellishing and decorating to make it as fun and fancy as you want.   I loved the touches of the Hardwood stamp on Crumb Cake cardstock in the background to make it look like a fence.  And making the grass by taking a strip of Pear Pizzazz cardstock and tearing off one edge (the long edge) and then cutting down with the fringe scissors.  It makes it look so much nicer than if you don’t tear and then just cut with the scissors.


    I’ve decided to post my instructions for how to make this card/box. They don’t include the decorating instructions for the card above, but it gives you the templates and directions for making both sizes of the base box.  From there you can decorate in whatever way your heart desires!

    Get the PDF Instructions for the Card in a Box

    If you are going to make this type of card at home you can use the supplies you have lying around, but I HIGHLY RECOMMEND you use the following for the best effect on your card:

    imageimage
    Sticky Strip – for making sure everything holds together because you will be folding and opening and moving it a LOTWindow Sheets – So your pop up elements can have some movement and take center stage without cardstock strips getting in your way


    So, I hope you enjoy this card and tutorial – and if you do, leave me a comment and let me know!  I don’t normally do tutorials but I thought you might like this one.

    spaced shop now sig bar

    June Online Stamp Club Hostess CodeACANDKB4
    Use this code to get free exclusive tutorials & project kit!  Learn more

     Stampin’ Up Supplies Used
    Stamps – Flower Shop, Petite Petals, Hardwood, Delightful Dozen (retired)

    Ink – Chocolate Chip, Daffodil Delight, Blushing Bride, Primrose Petals (retired), Pool Party
    Paper – Crumb Cake cardstock, Whisper White cardstock,  Subtles Designer Series Paper Stack, Raspberry Ripple Core’dinations cardstock (retired), Pear Pizzazz cardstock, So Saffron, Window Sheets
    Accessories – Pansy Punch, Petite Petals Punch, Fringe Scissors, Decorative Label Punch, Wide Oval punch, Bitty Butterfly Punch, Subtles candy dots

  • Group Project Creations from our Team Iron Stamper Challenge!

    Group Project Creations from our Team Iron Stamper Challenge!

    *** Reminder – Tomorrow (June 1, 2014) is the LAST DAY to order from the Occasions Catalog!  So make sure you’ve gotten your favorites before their gone by shopping online now. ***

    I have been so excited to watch my Fun n’ Crafty team grow and so I’ve been wanting to start doing more to try to provide opportunities for everyone to get together, learn from each other, and have fun stamping together.  So, I’ve started working on roughly quarterly group events I’m calling Stamp  & Shares.  This last time, I wanted to have some kind of game for everyone to play.  So, I came up with the idea of an “Iron Stamper” challenge for us to do early in the afternoon.  The idea was that everyone would be broken up into teams and we would have to work as a group to create projects using predefined supplies.  No one knew what the supplies would be ahead of time, so it was fun for everyone to brainstorm and create together on the fly! 

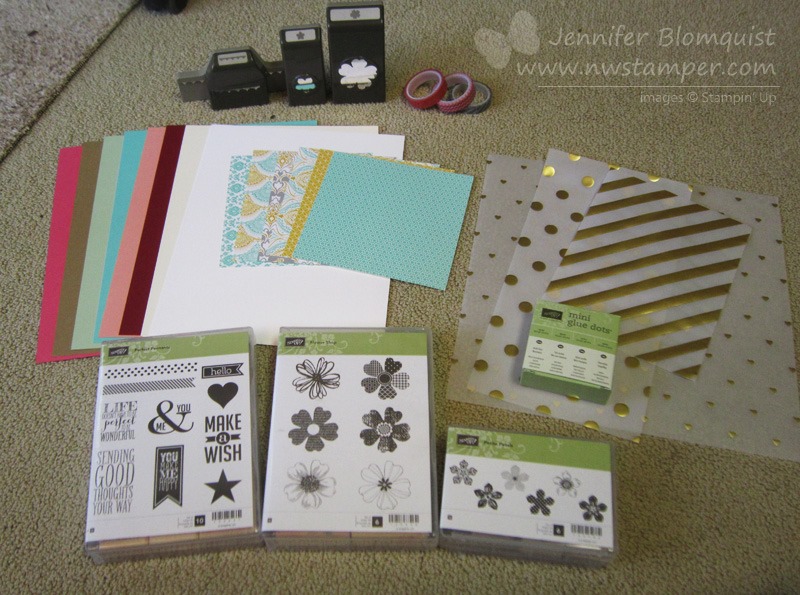
    The supplies they all had to work from were:

    They couldn’t use any other supplies than what was provided in the box and the only had 40 minutes as a group to design and create 2 projects using what was in their box.  I have to say, I was so impressed with the creativity that came out in that short amount of time! 

    Check out what they created:

    Team 1 – Liz Mitchell, Kathy Thisted, and Rose Bryson

    First they created a card.  And I love how they came up with using one of the petals from the Pansy punch to make a heart!  Way to work with what you have!  Plus I thought it was such a great idea to add Washi tape to the bottom of a piece of cardstock and THEN punch with the scallop punch.  Aren’t they clever?

    At the last minute, they realized the instructions for the challenge was to create 2 projects, so they pulled together this box very quickly:

    I loved how they stamped and punched the Flower Shop image and then punched out a piece of the Gold Foil vellum and used it as a punched overlay too.

    Team 2 – Tanya Cabral, Annie Lee, Jennifer Blomquist

    This group stuck more to cards but really got into the vellum paper.  And Tanya came up with the fun idea of stamping directly on the vellum for a central layer:

    For the second card, I thought it was cool how Annie came up with the layers of scallop edge punched designer paper on the left side… like a little layer of ruffles!  Then the combination of stamping under the vellum and adhering stamped images over the vellum.

    You can kind of see that the Petite Petals images and the Flower Shop punched flower are BELOW the vellum, and one of the punched out petite petal flowers is ON TOP of the Vellum.

    It was a great afternoon and I’m working on our next group demo event!  It is looking like I may hold it off until July so I can run it right after convention and share all the projects and details I learned at convention with everyone!  If you would like to be on the email list for more details for when the event is announced and registration opens, let me know at jennifer@nwstamper.com and I’ll make sure you are kept in the know!

    spaced shop now sig bar

    May Online Stamp Club Hostess CodeZUBHUEK6
    Use this code to get free exclusive tutorials & project kit!Learn more

  • Comparing the Different Flower Stamp/Punches in One Card!

    Comparing the Different Flower Stamp/Punches in One Card!

    Last night was my monthly Stamp Club night and we always make a couple cards using the latest stamps and products.  But this month I wanted to focus on different ways to use some of the stamps, dies, and punches they already had and maybe mix in a few new things they hadn’t tried.  Because isn’t that always the big challenge?  You see a card or a project using a paper and stamp and you know you have to have it.  You get it, make the project, and then go… now what?  Smile 

    This card was all about showing how the different flower stamps and punches can go together to make a cool layered flower… check it out!

    I found this card idea from Becky Roberts over at Inking Idaho and thought it was such a cool design.  It also reminded me to pull out that Chevron background stamp and get it inky!

    But back to the flowers…

    This flower uses three different sizes of flowers:

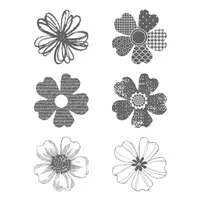
    1. Mixed Bunch flower & Blossom punch
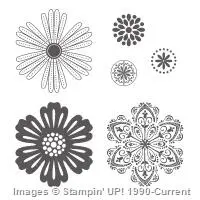
    2. Flower Shop stamp & Pansy punch
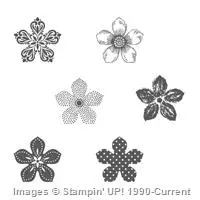
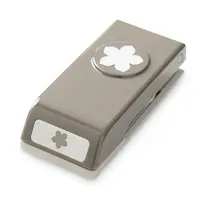
    3. Petite Petals & Petite Petal punch

    Turns out they layer together really well, don’t you think?

    I stamped the flowers using the same color ink and cardstock (Coastal Cabana) and then glued them together and used a Candy Dot brad base and Candy Dot to add a little POP to the middle of the card.

    And that fun little polka dot paper behind the flower?  That is the pretty Sweet Sorbet designer paper from the Sale-a-bration catalog.  So, don’t forget you only have a couple weeks left to get your freebies with your $50 order!  So, pick up a couple of these flower stamp/punch bundles and get the paper for free!

    spaced shop now sig bar

    March Online Stamp Club Hostess CodeXEWP4DFD
    Use this code to get free exclusive tutorials & project kit!
    Learn more

    Supplies Used:

    125537s
    125603s
    132726s
    134821s
    130496s
    130933s
    132293s
    133521s
  • Final Thank You Thursday 1-Day Sale!

    Happy Halloween everyone! I hope you’ve been having a great October and if you celebrate Halloween are all ready for it!  Today is the LAST THANK YOU THURSDAY and so check out the fun ribbon deals below!

    I also thought I’d share what kept me busy last night…. we finally got around to carving the pumpkin we picked up from the pumpkin patch!

    Nicholas knew exactly what image he wanted to draw and so he helped me design our “mad face” pumpkin.  I even let him do a little carving with the itty-bitty-careful you don’t bent it-carving knife. 2013-10-30 19.58.56

    And while Caitlin didn’t care much about carving the pumpkin, she thought it was cool after the candle was in!

    2013-10-30 20.20.52

    So, that took a lot of my evening, so I’ll be back a little bit later this morning to share some CUTE halloween swaps I received at Founder’s Circle (since I totally forgot to photo graph them last night).

    In the meantime, don’t miss today’s LAST THANK YOU THURSDAY!

    Basic Black 3/4″ Chevron Ribbon
    Item # 130010

    Regular Price: $8.95 /Discounted Price: $6.71
    Calypso Coral 3/4″ Chevron Ribbon
    Item #130018

    Regular Price: $8.95 / Discounted Price: $6.71
    Crushed Curry 3/4″ Chevron Ribbon
    Item # 130019

    Regular Price: $8.95 / Discounted Price: $6.71
    Island Indigo 3/4″ Chevron Ribbon
    Item # 131151

    Regular Price: $8.95 / Discounted Price: $6.71


    I’ll be putting in a group order tonight if you would like some of this ribbon and want to save a bit on shipping!


    Email me at jennifer@nwstamper.com or give me a call if you want in on this deal!


    Smoky Slate 3/4″ Chevron Ribbon
    Item # 131152

    Regular Price: $8.95 / Discounted Price: $6.71
     

    Shop online to grab these deals and combine them with this weeks Weekly Deals!

    Surprising to me, out of all the colors of the Chevron Ribbon (and I have them all) I’ve almost completely run out of the Calypso Coral!  I didn’t expect to love this color but turns out I do!

    Here are some samples that I’ve created

    spaced shop now sig bar

  • Fun with Flower Shop stamps and Doilies

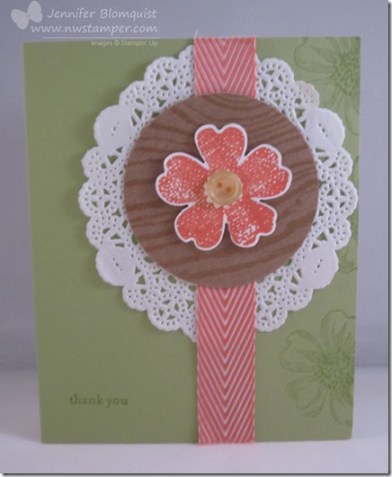
    Just a quick card share today – this was another card we made at our recent club night.  I was playing with a little bit of everything at my craft table to create this texture-rich card.

    The one thing that is a little different about this card, but can be hard to tell when looking at it, is that we actually cut the white Tea Lace Doily in half and overlapped the pieces so that the total size of the doily is a little bit smaller than normal. That let us have the look of the doily without it taking over the entire width of the card.

    The nice thing is that the Calypso Coral chevron ribbon covers up the seam where we glued together our halves of the doily so no one would ever know!

    Add some Naturals Specialty Composition paper and some images from the Flower Shop stamp set and you have yourself a card!

    Stampin’ Up! Card Supplies
    Stamps:  Flower Shop, Teeny Tiny Wishes
    Ink:  Pear Pizzazz, Calypso Coral
    Paper:  Pear Pizzazz, Naturals Composition designer paper
    Accessories: Tea Lace doily, Calypso Coral chevron ribbon, Subtles Buttons, Pansy Punch, 2-1/2” Circle punch


    spaced shop now sig bar

  • Adding a Splash of Washi to Your Cards

    So turns out when I start working on something, I can get really focused on that task.  In the case of last week, that task wasn’t any of the handful of crafting projects and event prep I needed to work on, but instead was an even more daunting task – picking a preschool for Nicholas!  2013-08-23 12.29.45

    Awww….aren’t they getting so big? Smile 

    I thought it would be a quick and easy thing to figure out, and I’d be back working on my other projects right away.  But, no…. there are so many choices and variations.  Thankfully, we were able to find some good options and start the process for getting him enrolled, so now I’m able to get back in the crafty mindset!

    And first on the docket – Thank you cards!

    I always like to send thank you cards to everyone who places an order with me and I wanted something bright and cheery to remind us that summer hasn’t quite ended yet!

    I used 3 of my favorite items right now:  Washi tape, Flower Shop bundle, and the Oh Hello stamp set to put this together.

    Card Supplies Used
    Stamps –
    Oh Hello, Flower Shop
    Ink – Island Indigo, Daffodil Delight, Rose Red, Gumball Green
    Paper – Rose Red, Whisper White
    Accessories – Posy Punch, Gingham Garden washi tape, Stampin’ Dimensionals

    So, if you’ve ordered with me in the last few weeks… check your mailbox for your own copy of this card!

    If you’ve ordered with me in the last month and NOT received a card, please let me know!  There have been some hiccups in the Stampin’ Up! ordering system and some demonstrators have not been receiving notice about orders placed.  I want to make sure I’m giving you the best possible service, so if you haven’t heard from me, let me know so I can fix it. Smile 


    But no matter what, THANK YOU for stopping by and please come back soon!


    spaced shop now sig bar

  • Stamping with an Embossing Folder for a Scrapbook Sketch

    Happy Monday!  Today over at the Stylin’ Stampin’ INKspiration blog, we are sharing a fun scrapbook sketch idea. 

    I didn’t create the sketch, but let me tell you how much I LOVE designing off of sketches.  It makes the scrapbooking process so much easier for me because I don’t have to think too hard about the set-up of the page (or card!) and instead can focus on things like which color do I want to use and what should I write in my journaling.


    Oh, and did I mention that my layouts are typically like my cards…. I start from a sketch or design, pull in key elements, and then totally change everything else up.  But hey!  It’s the inspiration that is important – and the fact that I’m actually getting my photos in an album!

    You may be wondering how I got that honeycomb look on my base paper for my scrapbook…. well, check this out… I used my embossing folder as a stamp!!!

    Seriously, its totally cool!  First I wiped my ink pad across the raised side of the embossing folder to ink it up.

    Then I just flipped over the embossing folder and pressed it down like I would a stamp!  I liked the distressed (didn’t get all the ink down on the paper) look, so I didn’t worry about evenly pressing and getting it all off on the base paper.

    Then for my accents, I created my own layered ribbon banners in the upper corner.  I took some of the Strawberry Slush Ruffle Trim and the Natural Trim ribbons and layered them.  Then snipped the ends at an angle.  Then to soften it even more, I use the Flower Shop bundle to get the simple flower to go on top.

    Finally, I needed a title and ended up actually cutting out my letters using the Typeset Alphabet Bigz dies in the same Wisteria Wonder as the background paper.  But that was a little too tone-on-tone and so I drew around the outside of the letters with my white gel pen to make them pop a bit more. 

    I would say that it worked!  And look at that face… isn’t Sweet a good title too?  Smile  Ok, I really didn’t know what to title these too pictures but I loved them so much that I had to scrap them somehow!

    So, I hope you got some inspiration!  Play along and create your own scrapbook page with this sketch and let me know what you think!

    spaced shop now sig bar

  • Fabulous Flower Shop Summer Card (Convention CASE)

    I had to continue my sharing of the great convention with another card that I loved so much that I had to share it in a class last week.  I really wanted to start playing with my goodies from the Holiday catalog but I couldn’t quite let go of summer yet, and so I gravitated to this cute idea.

    Card designed by Sherrie Schintz

    I loved how this card uses all 5 of the 2013-2015 In Colors together and after you emboss them with the Perfect Polka Dots embossing folder, they are pretty cheery wouldn’t you say?

    We added some of the flowers from the Flower Shop bundle (which includes the stamp set and the posy punch) and of course a bit of glitz with a rhinestone in the center of each.

    Now, I loved the card, but I wanted to add a little bit of something, so we all lined an envelope by creating our own matching designer paper.  Now, when playing with the liners recently I noticed that if you use designer paper that has a dark pattern, you can sometimes see it through the front of your envelope.  So this was an example of using Whisper White cardstock and stamping one side with your preferred image (in this case, we stamped the same flower images in a random pattern).

    Then, grab your NEW, AWESOME Envelope Liners!  Sigh, I love these things… Smile

    image

    They come in 3 sizes:

    1.  A2 – to fit 4.25” x 5.5” cards

    2. Notecards – to fit the 3.5” x 5” cards from the Stampin’ Up! notecards & envelope set

    3.  Square envelopes – to fit 3” x 3” cards

    So, we cut our Whisper White paper to 6”x6” (so you can get 4 out of a 12×12 piece and stamped our flowers.  Then cut it out using the largest envelope die.  Because you have white on the back, you don’t see anything through the front of your envelope, but on the inside you have lots of cute flowers!

    Plus, the liner stops just short of the adhesive on the envelope, so you still have the gummy to seal your envelope when you are ready.  Sweet, huh?  So, grab these dies and get creative and I know you’ll love the results!

    spaced shop now sig bar

  • It’s Stampin’ Up! Convention Time!!

    I’ve been getting super excited over the last week as convention approached and I started getting exciting wondering what amazing ideas I’d see, what new products would be revealed, and have a chance to hang out and reconnect with some wonderful people.

    As I do each year I’ll be posting live updates to my Facebook page (as long as my battery holds out each day) and I’ll give you the full scoop and pictures each night here on the blog.  So even if you can’t be here in person, you can still participate in the excitement and get a feel for it with me.

    Travelling to Salt Lake City!

    So, today was my traveling day and I was very lucky to have 4 members of my group plus a great stamping friend traveling with me from Seattle to Salt Lake City.  We hopped on our plane last night and were treated to the most amazing sunset as we came in to land in SLC.

    salt lake city sunset

    We got our bags and a shuttle and headed to our homebase for the weekend – the Radisson at the convention center.  Check out the cool wall art about the nice beds:

    Convention 2013 Radisson hotel room

    And while I should really be sleeping in that bed right now (since breakfast comes waaay to early in the morning), I thought I’d show you some of the other fun things I brought with me to kick things off. Smile

    1.  My nametag & convention buttons!

    My first year at convention, I saw people with their lanyards full of pins and buttons and I realized that many people collect their convention pins and acheivement pins on their lanyard and I set out to start collecting mine.  It’s taken me 5 years, but I love that it is getting more full.  I know… its silly, but sometimes the little things make it more fun!

    convention 2013 name tag and lanyard

    Plus with 6,000 demos in attendance, they are checking badges this year and so I got to make it fun to look at!

    2.  Swaps!!

    What would a Stampin’ Up! event be without swaps?  I started out with making a ton of this Flower/Doily card… it was fun and easy to make a bunch.  But when I was done, I had made 76 cards and I decided a few days ago that a few more wouldn’t hurt and so I made the Christmas cards as well.

    Flower Shop Doily Card

    stampin up convention 2013 flower shop swap

    I used the new Flower Shop bundle to create the cute flowers and then just accented with one of the Whisper White doilies.

    I decided I needed a few more swaps and I thought of this fun way to use the new Christmas Collectibles stamp set.
    (psst – sneak peek alert!  New holiday catalog goodies including the new stamp set, punch, and embossing folder.)

    Christmas Collectibles Ornament Card

    stampin up convention 2013 christmas swap card


    3.  Fun n’ Crafty group gifts!

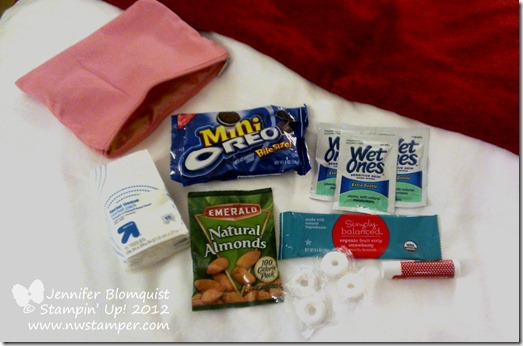
    And finally, I put together a little Convention Survival Kit for everyone in my group since it was the first convention for many of them.  Some people have the tradition of downline gifts and roommate gifts… I just was excited to have so many downline and friends going with me I wanted to put a little something together for them.

    Stampin up convention 2013 survival kit

    • I figured a few emergency snacks and mints would be nice.
    • Wet wipes for cleaning up after snacks or when you are stamping during make & takes and need a little extra clean up power.
    • Some tissue, because there is always some touching story or presentation that gets the whole room crying!
    • Chapstick – I swear, I always forget this and buy a new stick every year when I am here!
    • Band-aids were supposed to be in the bag, especially for when you are walking all day and your shoes start rubbing
    • …and of course a cute bag they can reuse each day to easily find their essentials.

    Today they get their handmade gift from me… but I’ll save that surprise for my next blog post!  Ooh, I can’t wait to give everyone theirs!

    So, today will be a day full of Stampin’ Up! home office tours, swapping, opening session, and a big party afterwards!  I’ll post as I go on my Facebook page and then back here later for the full report.

    I’m so excited!

    Now for a few hours sleep while I can….7:15am comes too early!

    spaced shop now sig bar

  • A New Way to Color Your Stamped Images with Marker

    Recently, my mom showed me a new way to try coloring in your images with your markers.  To show me what she was talking about she created this card:

    It uses the new Flower Shop stamp set and punch sitting atop the stem from Field Flowers.  Great idea, huh?

    Now, to do the coloring, she took a lighter colored marker (in this case, the Crisp Cantaloupe marker) and then swiped one side of the marker tip along the side of the Calypso Coral ink pad.  This gives you a darker side to the marker. 

    Then you can color in your stamped image and twist your marker as you are coloring so you end up getting both tones forming a cute spectrum of color on your image.  Now if it is a little hard to see, she created the following examples to help show it better:

    On the left is a flower colored in with a blender pen, the middle is using the two-tone effect, and the right flower is colored in only using the Crisp Cantaloupe marker.  There was more of a difference between the three than I expected!

    And I thought the whole card was a neat idea so I created a simpler version to send out as a customer thank you card this month.  So if you’ve placed a Stampin’ Up! order with me in June, you’ll have one of these in your inbox soon!

    Stampin’ Up Supplies Used:
    Stamps – Flower Shop, Field Flowers, Petite Pairs
    Ink – Calypso Coral, Pistachio Pudding, Daffodil Delight, Baked Brown Sugar, Crisp Cantaloupe marker
    Paper – Whisper White, Subtles Designer Series Paper stack (top card), Pistachio Pudding cardstock (bottom card)
    Accessories – Posy Punch, Itty Bitty punch pack, Pearls, Distressing tool


    spaced shop now sig bar