Northwest Stamper

Tag: clean and simple card

  • A Simple Elegant Card Perfect for a Birthday, Wedding, or White Christmas!

    Today is my Birthday and I am so excited for an afternoon where I don’t have to do anything except kick back with some great music and pull out all my preorder goodies and craft, craft, craft!  But before I got elbows deep in paper and ink, I wanted to share with you a card I put together for Stamp Club this month!

    I had had someone ask about a birthday card and I had seen a card that used white embossed paper over a white cardbase that I loved and so I set out to replicate and tweak that idea using my Stampin’ Up supplies I had at home.  I just love how elegant it turned out and I was so excited to share it with everyone at my events this month!  I made mine be birthday but switch out the sentiment and it would be great for just about any occasion!

    Tips for making this card:

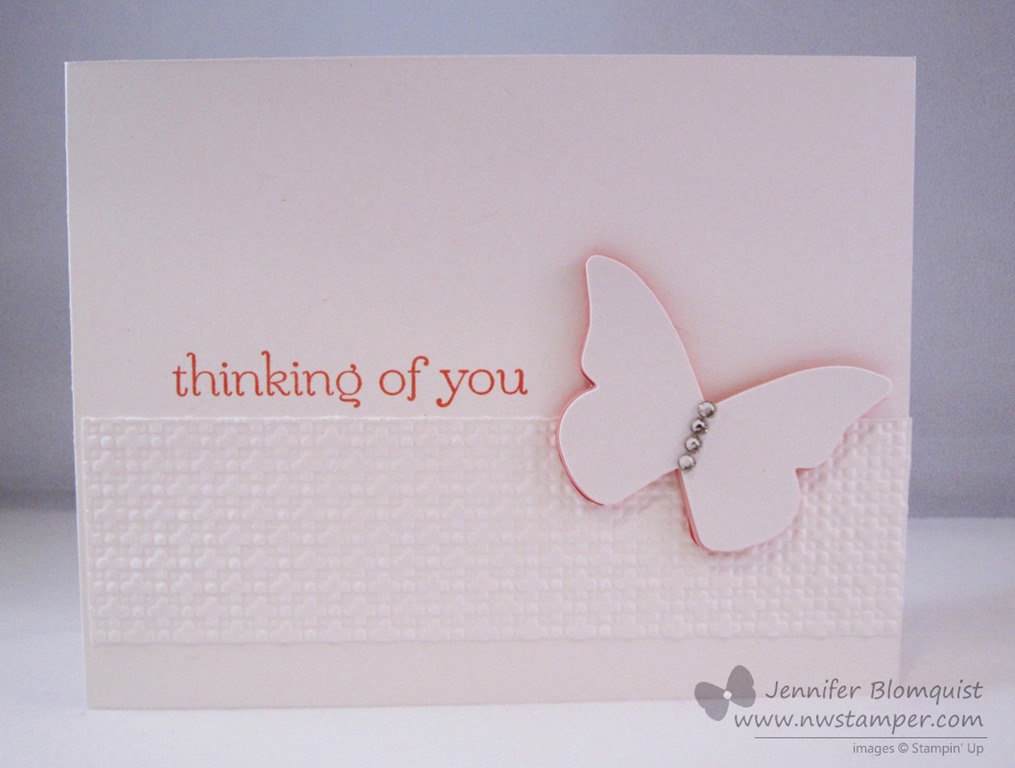
    • Emboss a smaller piece of cardstock (in this case 2-3/4”x 3-3/4”) with your favorite embossing folder.  I liked the Mosaic embossing folder because it was a simple repetitive design that felt elegant and gave the card some visual structure.) and then mat it on a 3”x4” piece of white cardstock.
    • Since everything is based in white, pick a contrasting ribbon to anchor your color.  I love Black & White and so this Black Chevron ribbon was just the thing!
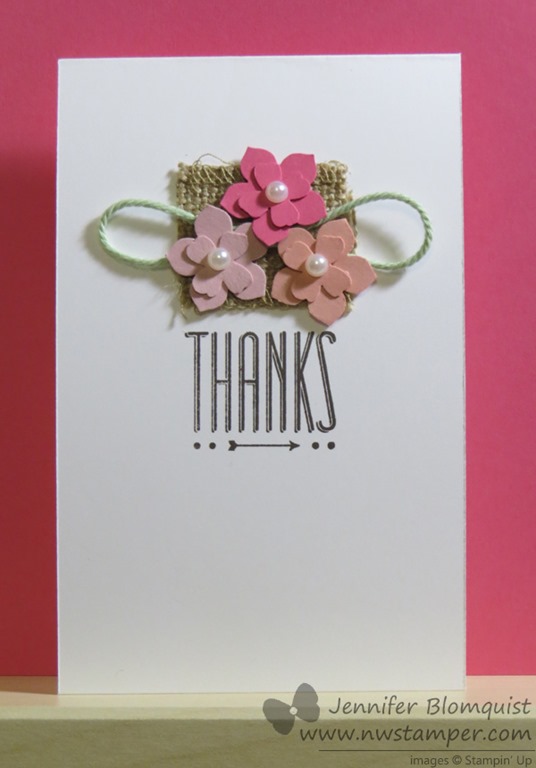
    • Punch 6 Petite Petal flowers and crumple each one up into the smallest ball you can in your hand.  Don’t worry if the petals are smashed in all the wrong directions, that is good!  The important thing is getting them extra wrinkled and textured.
    • Adhere the flowers together using glue dots and add a rhinestone to the center for sparkle amongst the texture.
    • Need extra sparkle?  Add a strip of Dazzling Diamonds glitter paper for a mess-free glitz on your card.

    You don’t need a lot of supplies to make a card that will wow them everytime. So, grab some paper and a flower punch, and have fun creating!

    My Birthday Gift is a Gift for You!

    maestro%20clipart

    I love celebrating birthdays… all the fun, cheer, and even a few presents!  I’ve been so amazed to receive some very sweet gifts this year (some fun crafty goodies, some shopping money to get more, and even some pampering by my hubby!) So I wanted to share the joy by giving you all a gift as well!

    I’m giving YOU a $5 gift certificate to be spent starting January, for every $25 you order today and tomorrow!
    This even counts if you order gift certificates from me or Paper Pumpkin prepaid subscriptions!
    So you can finish up your holiday shopping and get a little something fun for you as well. Smile

    Shop online or email me your order to jennifer@nwstamper.com and I’ll get your certificate emailed out to you right away!
    If your order is less than $150, then please use hostess code XMUM7PJZ.
    To purchase a gift certificate
    , email me so I can make sure I have all the details.  If you are interested in giving a Paper Pumpkin Subscription, you have the option to order them online here.

    And can I just brag about my super hubby today?  In the past we haven’t done much for birthdays but he has been amazing today including this yummy breakfast in bed!  Eggs, sausage, and the oh so delicious Orange Rolls!  Talk about spoiling a girl! 2014-12-18 08.01.11

    So I hope you all have a wonderful day too!  Until tomorrow!

    NWstamper signature_thumb[9]

    order online button for sig 3_thumb[4]

    Project Supplies Used:
    (if you are reading this in email, click here to see the list of supplies)

  • Quick and Easy Card with a Little Help From My Blendabilities

    Today over on the Stylin’ Stampin’ Inkspiration blog, we are sharing some quick and easy cards for you.  So, I thought I’d share one of the cards I created for my Stamp Club this fall.

    I kept it quick to go together thanks to my handy Big Shot and the Scalloped Tag Topper punch, so that we could focus on playing with the Blendabilities!

    Tips for making this card

    • By using an embossing folder for your contrasting color of paper, it keeps your simple card interesting to look at without overwhelming the stamped image.
    • Dimensions for this card:
      Hello Honey cardstock – 8.5” x 5.5” folded in half
      Lost Lagoon cardstock – 5.5” x 1.75”, which is just right for two rows of the large polka dots on the Large Polka Dot Embossing folder
      Whisper White cardstock – 4.25” x 2”
    • Cut a piece of the Mossy Meadow ribbon and hold it in place by stapling it to the top of the tag
    • The flower images from the Bloom with Hope hostess stamp set are perfect for coloring with Blendabilities.  In this case, we use the Night of Navy trio!  Who knew the dark sounding color could be so light and pretty when you stick with the lightest color marker for most of your image?!

    Just a small amount of stamping, a little embossing, and a little coloring and you have a pretty card that is perfect for any occasion.

    Just a reminder, we are on week 3 of Gratitude Month and the special thank you gift this week is a bonus punch on your Northwest Stamper rewards card!  Get to your free stamp set even faster this week when you shop online & use hostess code UCJDBQH4.image

    Finally, next week will be the kick off for the Holiday Shopping Sale!  I’ll be getting details soon, but I know you’ll have the special Gratitude Month week 4 gift from me PLUS all the great deals from Stampin’ Up!  If you want to be one of the first to hear about the details, make sure you are on my mailing list as I’ll be sending out the details once I have them so you are ready to go. Smile 

    Get on the newsletter mailing list here

    NWstamper signature_thumb[9]

    order online button for sig 3_thumb[4]

    Project Supplies Used:
    (if you are reading this in email, click here to see the list of supplies)

  • Quick and Easy Thank You card with Kinda Eclectic

    I hope you don’t mind one more card using Kinda Eclectic but I think this one is pretty different from a lot of the other cards I showed you.  I’m sharing it as part of the Stylin’ Stampin’ Squad’s Quick & Easy Cards post for today.  So check out my contribution:

    See, quick… easy… and just a little bling to keep it sparkly fun!  It was another display board card and I was sad to see it didn’t make it up on the boards this year… but I noticed another card that had a similar design so I can understand why they had to pick one.  So this is mine and if you order from me in the next month or two, don’t be surprised if one of these guys makes it to your mail box as a thank you for your order!

    Tips for making this card:

    • The green polka dots are the polka dot image from the Kinda Eclectic stamp set, stamped twice on the card front.  If you have the clear-mount version of the stamp set, you can “best guess” line up the images (which is what I did for this card… total eyeballing and luck!) or get precise by grabbing your Stamp-a-ma-jig (see it here).
    • Use In Color Sequins to add a little sparkle to your dots (and help cover up any that didn’t stamp perfectly!).  I used a glue dot to hold them down which gives you a little dimension as well!
    • Wrap some linen thread  around the inside edge of your card (right next to the red cardstock) to add some subtle texture and keep everything from blending together.

    As you can tell, this card comes together quick with very few layers (yeah, like 1 – ha ha) and just a few of those embellishments you get because they are so cute but you always forget to use!  Pull them out and enjoy them.  Smile

    LAST DAY for the Buy 3 Get 1 Free Paper promotion

    So, since I’m the one who is totally prone to remember a sale is ending the day after the sale is finished, I thought I would try to help you not be me and let you know that TODAY is the LAST DAY for this promotion.  You can check out Tuesday’s post where I shared my 3 favorite designer paper packs and card samples for each one.  So, check them out and you can pick them up before 11:59pm MST tonight using the following link:

    See all the paper on sale here

    Join me tomorrow when I promise to share a project that is NOT Kinda Eclectic or Amazing Birthday… you know, because I gotta keep mixing it up for you, right?  Winking smile  But I will tell you that they will help give you an idea for a new promotion starting tomorrow!!  (Lets just say if you’ve been wanting a BigShot, you are going to be getting a sweet package in the month of August!)

    spaced shop now sig bar

    July Online Stamp Club Hostess Code – TT2NETD4
    Use this code to get free exclusive tutorials & project kit! Learn more

    Card Supplies Used:

  • Love My Layered Flower Punches and Burlap

    Love My Layered Flower Punches and Burlap

    Every month as I start working on cards for my monthly card class and stamp club, I remember why I love doing this.  It is always fun to create a card of a scrapbook page based on what I see, but for me, it gets even more exciting when I think about what I can share with others and how excited they will be to try it out themselves.  I think it challenges me to come up with something that is not only pretty but really fun to make. 

    Well, today’s card is one that I was soooo excited to try out and I loved it so much that I’m using it for some of my thank you cards this month as well as teaching it in my Cute & Classic cards class tonight and my stamp club next week!

    The card is inspired by a card created by my friend Julie Gunhus who was inspired by a card on the Stampin’ Up Incentive Trip cruise.  I’ve never seen the original and I changed up her version for mine, so if you know who made the original, tell them that I think they are brilliant!

    I made mine a skinnier size so that the proportions looked right to me, so the end result is a card that is 3-1/2” x 5-1/2”. 

    I used the new Itty Bitty Accent punches for the smaller flower to go with my Petite Petal flower.  Seriously, when the Petite Petals stamp & punch came out earlier this year I thought it was the smallest flower I would need… but boy do I love the new itty bitty punch pack! 

    This card is so quick and simple to make and just looks gorgeous, don’t you think?  My burlap is just a 1-1/2” piece that I adhered my twine and flowers to the front with glue dots.

    Stampin’ Up Supplies I Used

    I also used the colors Strawberry Slush, Crisp Cantaloupe, and Blushing Bride for my flowers.  If you want to come make this card with me, I’d love to have you join me at my card class tonight in Redmond, WA.  Let me know by RSVP’ing on my calendar or email me at jennifer@nwstamper.com and I’ll reserve one of my extra spots for you!

    spaced shop now sig bar

    June Online Stamp Club Hostess CodeACANDKB4
    Use this code to get free exclusive tutorials & project kit!  Learn more

  • Stacked Die cuts for a Cool Ombre Effect

    Stacked Die cuts for a Cool Ombre Effect

    I was working on cards for an upcoming card class for The Scrapyard Chicks April Workshop and one great technique Kerry mentioned was stacking die cuts to get a cool ombre or rainbow effect on your cards and projects.  It looked so simple but just a neat effect that I just had to try it!

    I decided to make life easy on myself and I started out with a bigshot die that can handle multiple pieces of cardstock at the same time (got to love those Bigz dies!!)  So, I grabbed my Beautiful Butterflies die and got to work creating this card:

    I kept the card really simple so that the butterfly and the subtle colors would stand out.  It is just a plain white cardbase with a strip of white cardstock that has been embossed with the Square Lattice embossing folder.

    Then I picked a few colors to make the butterfly.  I cut out 3 die cuts of each color– Calypso Coral (darkest), Crisp Cantaloupe (medium), and Blushing Bride (lightest) and then glued them together.  And you know when you use the thick dies in the Big Shot you can cut all the sheets of the same color out at the same time, right?  So, it only took a few runs through the machine to get my diecuts all done!

    Then I cut out 1 die cut of Whisper White to place on the top of the stack.

    Glue them together and add a string of rhinestones just a hint of glitz.  I kept it to only 3 pieces of paper per color just to keep the die cut from not being too tall off my card, but you could add more sheets and more colors to make them stand out even more!

    So, have some fun with your Big Shot, dies, and some cardstock and see what fun creations you can come up with. Smile

    spaced shop now sig bar

    March Online Stamp Club Hostess CodeXEWP4DFD
    Use this code to get free exclusive tutorials & project kit!
    Learn more

    Stampin’ Up supplies uses.  Click any photo for more details:

  • Too Kind – A Clean and Simple Card with Vellum

    It’s been a crazy few days around our house here in freezing cold Washington… surprizingly it has been actually hanging out in below freezing temperatures here (normally we are cold but not this cold!) My stamping and blogging time has been put on hold a little bit as we’ve celebrated my daughter’s 2nd birthday this weekend as well as dealing with serious health issues with our oldest cat.  But, I wanted to stop on by and share another card from my recent vellum class.

    This is one of the simplest ways to use vellum and it is a great way to add an elegant touch to your cards.  In this case, I stamped the flowers from the Too Kind stamp set and kept the card pretty simple so the flowers would really be the main focal point.  But when I wanted to add the sentiment (also from the same set) I wanted it to fit in with the feeling of the card… so vellum to the rescue!

    I stamped my sentiment directly onto the vellum and held it in place with Silver Mini Brads so that it wouldn’t go sliding anywhere.

    It is a great way to add a fun touch without adding a heavy layer to your card.  You should definitely give it a try!

    Don’t Miss the Deals!

    Just in case you thought you missed it, there are still tons of great deals on the Clearance Rack as part of the Clearance Rack Blitz.  The items are while supplies last so don’t delay in checking it out and grabbing your favorites before they are gone.  Plus, while you are there, check out this week’s Weekly Deals to save even more.

    Alright, time to tend to the kitty… have fun stamping and I’ll be back tomorrow with more!

    spaced shop now sig bar

  • Cute Card Idea for Using Up Paper Scraps

    I don’t know about you but last week was crazy busy for me!  I had 2 classes, a craft fair, Halloween events, and the usual everyday life stuff (if you are curious to see some of what I’ve been working on, I’ve been posting pictures up on my Facebook page here).  It was one of those weeks that by Sunday morning I was trying to figure out what to start catching up on first (let me say that the house did not win the coin toss for what I worked on first Winking smile)

    But I finally got lots of photos taken of projects and started editing them and just HAD to share with you one of the cards we made on Friday.  It was inspired by a card I found on Pinterest by Jennifer Rzasa from 2011 and I think it turned out super cute and is the perfect way to use up paper scraps!

    And the fun bright colors from the I Am Me designer paper just make me smile when I look at them.

    All you have to do to make a card like this is to:

    1. Pick up to 7 patterns from designer paper you like
    2. Punch out 1” squares using the square punch in each design
    3. Cut out 1-1/8” squares from coordinating cardstock
    4. Round two opposite corners on each square using the corner rounder punch
    5. Adhere to your card base using Stampin’ Dimensionals
    6. Stamp a sentiment and you are done!

    See, totally easy peasy!  And seriously, how fabulous is that “Smile” sentiment with the camera pattern designer paper? hee hee

    Stampin’ Up! Supplies Used
    Stamps:  Happy Day
    Ink:  Calypso Coral
    Paper: I Am Me designer paper, Whisper White cardstock, Smoky Slate cardstock
    Accessories:  1” Square punch, Corner Rounder punch, Stampin’ Dimensionals

    Ok, I’ll be back tomorrow with more fun for you once I get a few more photos edited!  Talk to you then!

    spaced shop now sig bar

  • A New Way to Color Your Stamped Images with Marker

    Recently, my mom showed me a new way to try coloring in your images with your markers.  To show me what she was talking about she created this card:

    It uses the new Flower Shop stamp set and punch sitting atop the stem from Field Flowers.  Great idea, huh?

    Now, to do the coloring, she took a lighter colored marker (in this case, the Crisp Cantaloupe marker) and then swiped one side of the marker tip along the side of the Calypso Coral ink pad.  This gives you a darker side to the marker. 

    Then you can color in your stamped image and twist your marker as you are coloring so you end up getting both tones forming a cute spectrum of color on your image.  Now if it is a little hard to see, she created the following examples to help show it better:

    On the left is a flower colored in with a blender pen, the middle is using the two-tone effect, and the right flower is colored in only using the Crisp Cantaloupe marker.  There was more of a difference between the three than I expected!

    And I thought the whole card was a neat idea so I created a simpler version to send out as a customer thank you card this month.  So if you’ve placed a Stampin’ Up! order with me in June, you’ll have one of these in your inbox soon!

    Stampin’ Up Supplies Used:
    Stamps – Flower Shop, Field Flowers, Petite Pairs
    Ink – Calypso Coral, Pistachio Pudding, Daffodil Delight, Baked Brown Sugar, Crisp Cantaloupe marker
    Paper – Whisper White, Subtles Designer Series Paper stack (top card), Pistachio Pudding cardstock (bottom card)
    Accessories – Posy Punch, Itty Bitty punch pack, Pearls, Distressing tool


    spaced shop now sig bar

  • Clean and Simple Any Occasion Card for the Button Buddies Class

    Since tomorrow is the last day to get in on the Early Bird pricing for my All Occasions Stamp a Stack featuring Button Buddies, I thought I would share another card we will be making next Friday.

    This may be my favorite card from the set, just because of the simplicity of the card but all the pops of color keep it from being boring.

    Button Buddies Clean and Simple Flower Vase card full


    The thing I really liked about this stamp set is that it literally is made to match the designer buttons.  So this card has flower images coming out of the vase, but they are the right shape and size to be perfectly covered up by the flower designer buttons (which, I might add, I am very sad to see retiring this year.  Sure the new buttons are cute, but I like my little flowers Smile)

    Button Buddies Clean and Simple Flower Vase card

    So if you want to make this or want a kit to make all the cards we will be creating in the class next week, let me know asap!

    Early Bird Savings ends Tomorrow!

    Like I mentioned, we’ll be making 8 cards!  Yup, one for each stamp in the Button Buddies set.  And you get to make them all for only $20 if you RSVP with your prepayment by tomorrow!  After that it goes up to $25 for the class fee.  Oh, and did I mention you’ll be entered for a drawing to win a Button Buddies stamp set?!

    So, don’t miss out!

    Button Buddies Class Options


    To Order Stampin’ Up! Products Anytime, click here!

    See the Latest Availability & PDFs of all the retiring stamps and accessories here

    Supples Used
    Stamps
    – Button Buddies, Petite Pairs
    Paper – Whisper White, Old Olive
    Ink – Old Olive, Real Red
    Accessories – Brights designer buttons, Whisper White baker’s twine, Glue Dots, Paper Snips

  • Trying Out Ombre with a Fun Piercing Card

    At a recent class, I focused on different ways to use Paper Piercing in your projects.  Well, we made this card as a way to show how you can use a design from the Paper Piercing Templates without needing to have the matching Big Shot die or punch.

    See, as much as I think of myself as a hoarder of Big Shot dies and embossing folders, I still have managed to get by without the Apocathary Accents framelit set (I’m sure this will be fixed in the future though Smile)  But I had the piercing template and thought this shape would be a nice accent for some punched out butterflies.

    You can see it a bit better in this picture:

    I also pierced my Whisper White paper and glued it down so that the “backside” of where I pierced was what was facing up on my card (the pierced parts poke up and out from the paper instead of pushing into the paper).

    Plus this was a fun attempt to try out the Ombre trend.  I played with a few color themes but settled on Blues as my colors of choice.  I used the following blues in this card:

    • Baja Breeze
    • Pool Party
    • Island Indigo
    • Night of Navy

    But grab your favorite colors and try it out with pinks, greens, or purples.  Or you can step it up like some of the gals in my class did and start layering in on different blues using the Bitty Butterfly punch and layering them over these Elegant Butterfly punch outs.  Let me just say they look super pretty!


    To Order Stampin’ Up! Products Anytime, click here!

    Supples Used
    Paper – Whisper White, Baja Breeze, Pool Party, Island Indigo, Night of Navy
    Accessories – Paper Piercer, Essentials Paper Piercing Pack, Piercing Mat, Elegant Butterfly Punch

  • Oh, Hello… and Thanks So Much!

    I was going to share this card today because it was a card that I created recently as some customer thank you notes and I just loved how it turned out.  It is so easy to try to overcomplicate a card and feel like you need to keep adding layers and embellishments… or maybe that is just me. Smile

    But then I noticed this week that my Facebook page has hit 300 “likes” and I couldn’t help but do a little happy dance and feel a bit in awe that that many people could enjoy my ramblings and my project shares to want to connect up with me on Facebook!

    So today’s card is not just a thank you to everyone who supports my hobby and business as a customer; but also to those of you who like me enough to connect up on Facebook… or to stop by my blog here and say hello!

    Alright, everything I keep typing is getting a little mushy so just imagine a virtual {hug} (or a virtual high-5 if you aren’t the hugging type) and you’ll catch my drift!

    So, have a wonderful weekend and I can’t wait to finish editing the photos of the projects I did this week and get them up on the blog!  So, I’ll be back soon with more creative ideas.

    Oh, and if you are local –

    I finally got my February classes posted!  I know, took me forever, right?

    The next class is February 1st at 7pm. 

    It is Cute & Classic Cards and we’ll be meeting at the Panera Bread in Redmond.  I’d love for you to join me, so please let me know ASAP if you will be able to join us!

    Get details and RSVP here


    To Order Stampin’ Up! Products Anytime, click here!

    Are you earning your Northwest Stamper Rewards?

    Every order gets you closer to your FREE stamp set!  Click here to learn more!

    Oh Hello Simple Thank You Card
    Stamps:
    Oh Hello
    Ink: So Saffron, Chocolate Chip, Regal Rose (marker), Always Artichoke (marker)
    Paper: So Saffron CS, Chocolate Chip CS, Whisper White CS
    Accessories: Sponge Dauber, Basic Pearl embellishments

  • Thanks for the Cute Birthday Wishes!

    It is days like my birthday that I’m reminded of how much a homemade card really means.  This year, I felt really special to receive some unexpected cards in the mail (and in person) and they were cute cards too!  So cute in fact that I just had to share them with you all!

    card designed by Pam Wu

    Way to make a girl feel special, Pam! Smile  I love this card too because it is totally something I would never have come up with either.  I love this dsp but never knew quite how to use it but I like how she used it here.

    card created by Tanya Cabral

    Tanya is a queen of clean and simple (and stunning) cards!  I love her colors and the simple design that totally pops.  Again, I just felt special that she made such a cool card for little ol’ me.

    So, thanks ladies!  You really put a smile on my face for my birthday this year and I really appreciate it!

    I honestly just feel lucky to have met and become friends with such amazing and talented people!


    To Order Stampin’ Up! Products Anytime, click here!

    Are you earning your Northwest Stamper Rewards?
    Every order gets you closer to your FREE stamp set!Click here to learn more!