Northwest Stamper

Tag: watercoloring techniques

  • Easy Watercoloring with Birthday Blooms

    So, just last week I had my Terrific Techniques class focused on heat embossing.  I always forget how fun and how many options you get with heat embossing and when I remembered this card I made recently, I figured it was another great way to share one of the awesome things you can do with heat embossing – make watercoloring gorgeous and really easy!  Check out this idea with the Birthday Blooms stamp set –

    Watercolored Birthday Blooms by stampin up

    White Embossing Powder + Aqua Painters = Gorgeous Watercoloring!

    I love how this flower seems to be this fragile, delicate image on the card.  It is all thanks to the white embossing powder I started with!  Heat emboss your image by stamping in Versamark Ink and then coating in White embossing powder.

    TIP – Don’t forget to wipe the area first with your Embossing Buddy!  This is REALLY important for images with fine lines and details!  The embossing buddy de-statics your paper and makes sure stray embossing powder doesn’t stick to parts of your card that you don’t want it at.

    Once you’ve heat set the embossing powder, it then acts like a guide for your watercoloring.  I told the folks in class, it is like bowling with the bumpers down in the gutters!  Smile  Use your Aqua Painters to pick up color from the lid of your ink pad and color over your image.  You don’t have to worry about the ink sticking to the embossed areas, so just color straight over the top of them.

    close up of heat embossing and watercoloring of Birthday Blooms

    Since the embossed areas resist the ink, you end up with an amazing delicate result!

    Don’t forget the finishing touches!

    I pierced the edge of the my embossed cardstock … an no it isn’t hard to do!  Grab the Essentials Piercing Pack and place the template with the rows of dots along the edge of your cardstock and start poking to your hearts content!

    updated essentials piercing pack

    And yes, I realize there are dies out there now the do the poking for you, which is awesome… unless you have a piece of cardstock that you want to be a different size, or you want your dots to be closer or further from the edge. Smile  Just saying, it is nice to have options!

    And then I had to punch out the sentiment from this same Birthday Blooms stamp set because I wanted to sponge the edge in Wisteria Wonder to match the flower and the card base.  And then I just balanced out the flower by layering my sentiment over one of the small gold Metallic Doilies from the annual catalog.  Seriously, why aren’t you all using these more… they rock!

    metallic doilies as accents
    Oh, and don’t forget to add the White Perfect Accents to the upper corner for the finishing touch.  They come with adhesive on their back, so it is easy to just grab and go.
    birthday blooms friend card

    What I Used to Make This project
    Click any picture below to shop or see it in the online store 

    What do you think?  Like the watercoloring with white embossing powder?  Try it with different colors and see what comes out!

    NWstamper signature_thumb[9]

    order online button for sig 3_thumb[4]

    Use Hostess Code Z4ZAG9TD at check out to get a special thank you from me!

  • Easy and Classy Watercoloring with Remarkable You

    As I go to post this picture, I realized that if it was a poppy, it would have been even more perfect for Veteran’s Day today.  But that is ok… it is still fair to say to all the men and women who have joined our Armed Forces and been willing to do what is needed to protect our country and folks who cannot protect themselves around the world… thank you.  You are remarkable!

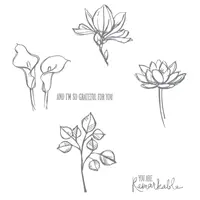
    Isn’t this such a pretty card!  It just makes me happy when I see it.  And I’ll tell you, I can’t really take the credit for it.  While I did make this copy you see here, it is a CASE from the lovely Diane Dimich and you can see her original here.  But I needed an idea for card class and wanted to use this stamp set because I LOVE watercoloring with it, and I just loved the colors and how easy to put together this card is.

    Tips for making this card:

    • One of the best things about this card is how easy it is to put together… here is all you need for it:
        –  Basic Black cardstock for the base – 5 1/2’ x 8 1/2”
        –  Whisper White cardstock – 4” x 5 1/4”
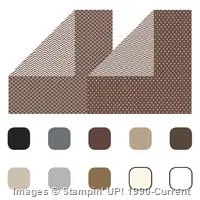
        –  Polka Dot designer paper from the Neutrals Designer Paper stack – 1 3/4” x 5 1/4”
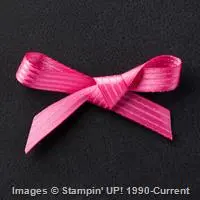
        –  Melon Mambo stitched satin ribbon – 6”
    • Just adhere the designer paper to the bottom of the Whisper white cardstock and then wrap the ribbon over the seam before adhering to your card base!
    • When you are doing watercoloring, you will want to stamp your image onto Watercolor Paper – this is a special type of paper that is thicker and the fibers are designed to be able to handle lots of water going over them without the paper pilling up or wearing a hole through. 
    • And make sure you are using Staz On ink for your stamping!  You don’t want the ink to start bleeding into your image as you are coloring. Smile
    • Once you’ve stamped your image, you can just start layering on the color until it looks the way you want.  YES!  You can go over the same area over and over again to get it darker if needed.
    • TIP – if you’ve never done watercoloring before, it is really easy!  Here is what you need to know:
        – Start by stamping your image onto watercolor paper with StazOn ink (both are available in the Stampin’ Up online store)
        – Take the ink color you want to color with and SQUEEZE the ink pad so that ink transfers to the TOP of the ink pad
        – Open your ink pad and use an Aqua Pen and use it like a paintbrush to pick up the color from the lid – NOT from the surface of the ink pad.  You don’t want to pick up the ink from the ink pad because you will end up diluting the ink in your pad and getting funny spots where you were getting the ink. Smile
        –  Brush on your color over your image and repeat until you get it looking how you’d like.  If your color isn’t spreading on smoothly when you are coloring, squeeze the barrel of the Aqua Pen slightly to get more water to the tip of the brush.
    • After you like how it looks, we just cut it out and adhered to the front of the card using dimensionals.  Add your sentiment and some rhinestones and it looks great!

    Fun and easy, right?

    Don’t forget the savings on my Flurry of Wishes Class by Mail!  Through Monday 11/16!

    Just a reminder that since the Snow Flurry punch is on sale this week as part of the weekly deals, I’m passing the savings on to you with my Flurry of Wishes Class by mail!  Purchase either the class kit & punch or the best value bundle and I’ll take $4.50 off your class fee! 

    Sign up here!

    NWstamper signature_thumb[9]

    order online button for sig 3_thumb[4]

    But use Hostess Code PU2EYZJY to get a special thank you from me!

    Project Supplies Used:

  • More Watercoloring Card Samples–crayons & markers

    Today I wanted to share a couple more samples from my watercoloring class.  In my last post, I shared a card we did using chalks and for today, I thought I’d show some cards using watercolor crayons and markers.  As you can see, the medium you use for your watercoloring gives you totally different effects!

    Also, one more PSA – I always tell folks that the paper you stamp on makes a huge difference in your image quality and with watercoloring that is especially true.  Both of the techniques I ‘m showing you today need watercolor paper.  With the crayons, your image will not stamp well on the semi-gloss of Whisper White paper and with markers, you’ll tend to have your paper pill up or curl.

    Watercolor Crayons


    This card uses the watercolor crayons and I’ll admit it isn’t the best sample in the world; but it shows you how the crayons give you a more artsy watercolor look. With the crayons you color directly on your stamp and then mist it with water before stamping.  So, depending on how much you color on your stamp and how much water you use, you will get a more or less “blurred” image when you stamp.

    tip: Be careful not to completely douse your stamp with water when you are wetting it because you can either have your colors run together or become so diluted that they barely color your page.

    Watercoloring with markers


    This is one of my favorite watercoloring techniques because it is so easy and I really like the look you get from it.  This technique uses markers to lay down your color and then using your blender pen to pull the color around to fill in your stamped area.  When I was a kid, I used to outline my pictures in my coloring books and then color in lightly inside the lines and so it gave me a similar effect as I got on this card.  So, maybe this has always been my thing. 🙂

    tip: You will want to pick a medium to dark color marker for this technique.  If you use a lighter shade, you won’t really see the colors very well as you blend them into your open spaces.


    Well, I hope this gave you some new ideas to try!  They are all so different and fun that it is worth trying them all!

    If you haven’t done any watercoloring before, pick up some blender pens, watercolor paper, and your favorite color method (like ink pads, markers, chalks, etc).  Need help deciding which to start with?  Send me a note at jennifer@nwstamper.com and I’ll help you figure it all out and get them on their way to you!


    To Order Stampin’ Up! Products Anytime, click here!


    Are you earning your rewards points?  With each purchase, you can be earning your way to free stamps!  Check out all the details on my Customer Rewards here.

  • Watercoloring with Chalks Card Sample

    One of the things I love about teaching technique classes is that I’m often reminded of how cool a technique or a product is that I haven’t used in ages.  In this case, it is using my Stampin’ Pastels (chalks).  I ran a watercoloring technique class this weekend where we used 5 different methods for watercoloring on your card and when I do this, one of the mediums I always use is chalks.  And I think this is the first time in about a year my chalks go pulled out.  Well, it won’t be another year I can tell you that!


    I kept my cards simple so that folks would have more time to focus on the actual technique.  When I was making this sample, I was struck with how vibrant of a color you can get with chalks!  I use a blender pen to apply the color and when you are using chalks(just take the pen directly to your chalk), the pen actually picks up some of the chalk itself – so it is more like you are painting on your color.  Plus, since you are depositing a thicker layer of color (a thin layer of the chalk), when you try to layer your colors, you can get rich colors on top of another color.


    It was so easy to do, I wished I had stamped a more complicated image or tried to use more colors in my sample.  So, I know I’ll be playing with this more since I love how it turns out!  If you have any quesitons about how to use your Stampin’ Pastels for watercoloring, let me know and I’ll try to answer them in an upcoming blog post!


    To Order Stampin’ Up! Products Anytime, click here!

    Watercoloring with Chalk Card Recipe:

    Stamps:  Easy Events
    Ink:  Basic Black classic
    Paper: Watercolor paper, Pear Pizzazz Cardstock, Chocolate Chip CS, Concord Crush CS, River Rock CS
    Accessories:  Concord Crush 1/2” Poly Stitched ribbon, Dotted Scallop Ribbon Border punch, Blender Pen, Stampin’ Pastels

  • A Little Watercoloring with On The Grow

    I decided to participate in another challenge with week – again with the Late Night Stamper group.  This week was challenge #133 and you were to create a thinking of you card that has blue on it.  Seemed easy enough and so I grabbed my poor neglected On The Grow stamp set from the summer mini and got to work.

    When I saw this stamp set, it screamed,”Watercolor me!”.  So, I thought I would try to get a little artsy with my card and pulled out the watercoloring paper, my aqua pen, and some inks and got to work.

    A few watercoloring tips:

    • If you are going to use a lot of colors, make sure you use watercolor paper.  Because you will be going over the same area lots of times with a wet pen, most cardstocks and paper like Whisper White will start warping or pilling up on you.  Watercoloring paper is more fiberous and can absorb the water without a problem giving you a really nice image.
    • Use Staz-on ink for best results for your outlined image.  Staz-on won’t bleed as you go over the same area with a wet brush multiple times.  Stampin’ Up’s Basic Black and Basic Grey are water-resistant so they will work too for your watercoloring projects but your best bet would be to use Staz-on
    • If you want a really precise placement of color – grab your blender pen.  It uses an alcohol-base to pick up and place your color and the tip is firmer so you can be exact with placement and you won’t get extra liquid.
    • If you want to be more artsy – grab your aqua pen.  It is a refillable pen that just contains water with a more flexible-brushlike tip.  When you color, you can squeeze a little and make the pen more wet letting you color spread a little more or just get a more damp and traditional watercolor look.

    Click here to shop online 24/7 and start earning your NW Stamper rewards!

    Thinking of You Watercolored card recipe:
    Stamps: 
    From the Garden
    Ink:  Stazon Black, Island Indigo, Baja Breeze, Blushing Bride, Perfect Plum, Pear Pizazz, Crumb Cake
    Paper:  Baja Breeze cardstock, Marina Mist cs, Soft Suede cs, Watercolor paper
    Accessories:  BigShot die cutting machine, Lattice embossing folder, Paper piercer, Neutrals 5/8” brads, Aqua Pen, Stampin’ Dimensionalsimage

  • Watercoloring Techniques: Chalks and Markers

    If you saw my last post, I started sharing some of the cards we are doing in my watercolor technique class (if you haven’t seen it, check it out here).  These cards are meant as a way to introduce you to some of the different ways you can play with watercolor styles.  So, last time was Inks and Watercolor Crayons; and so today is Chalks/Pastels and Markers.  If you have any questions, leave me a comment or send me a note and I’d be happy to help you out.

    Watercoloring with Chalks

    Stampin’ Pastels are the chalks offered by Stampin’ Up! and they used to come by default in your Stampin’ Up! starter kit.  So, I had a big set for ages but kept forgetting to pull it out.  But that is when a class like this is great, it reminded me of the different ways you can use your chalks, including watercoloring.  In this example, we did one of the easiest methods which is just to pick up the chalk using a blender pen and then coloring your image.  The nice thing with this method is that you can get a rich color without it being as streaky or dark like you might with a marker.  The difference is that you are essentially picking up the physical chalk with the pen and smoothing that out on your image as opposed to just having some of the ink pigment soaking into the tip of your pen like when you are using inks.

    **If you are interested in chalks, there is a set in the Clearance Rack for a steal!  Its while supplies last so snag it while you can! **

    This is only one of the ways to use chalks.  I have a blog post on other technique ideas for using your Stampin’ Pastels – check out more Pastel Techniques here.

    Watercoloring with Markers

    So, this is a technique I LOVE because it is sooo easy and turns out beautifully.  For this technique, all you are doing is using the Stampin’ Write markers to outline a stamped line art image.  Then pull the color from the outline to wherever you want there to be color fill.  So, in the image below, I outlined the flower head in Rich Razzleberry marker and then used a blender pen to pull the Razzleberry color to fill out the petals.  You want to use the brush head of the marker when drawing your outline so there is enough ink on the paper to blend around.  Also, this technique really works well if your marker is a dye based ink.

    You can also use your markers to do watercoloring in other ways including using the marker to color onto a clear block, ink pad lid, etc and then picking up the color with your blender pen.  The one thing you do not want to do is to try to pick up the color off the tip of the marker using your blender pen.  If you do this, you may start diluting the color in your marker because you can have some of the water or alcohol base in your blender pen soak into the marker tip when you are trying to pull off color, which is no good.

    Card 5
    I’ll be back to post the last card at the end of the week.  Hope you stop back by to see!

    Interested in trying these cards & techniques out yourself?

    In Person
    Do to multiple requests, I’m running my class again on March 28th in the Mountain View, CA area.  I’d love to have you join us. Check out the full details on my meetup site.

    Online
    Or, if you are not local, purchase the supplies for these techniques from my online store and send me an email.  I’ll send you written tutorial instructions for these cards for FREE!  Not sure what you need, email me at jennifer@nwstamper.com and I’ll send you a basic supply list and you can see what you have in your stash and what you would still need.

  • Watercoloring Techniques: Inks and Watercolor Crayons

    Each month I run at least one technique class to give folks a chance to try something different or learn new ways to use something they might already have.  Well, a recently ran my popular watercoloring technique night during which we made 5 cards, each using a different method for watercoloring.  It was so much fun to create the cards and even more fun to see the different ways people used the techniques on their cards.  This week, I thought I would share some of the cards we did at this class.

    Watercoloring with Inks

    This is your basic watercoloring technique that most people, if they have only done watercoloring one way with stamping, it is this method.  To do this technique, you want to squeeze your ink pad so that some of the ink gets deposited onto the inside of the lid of your stamp pad.  Once you open your ink pad, you will see the ink deposited on the lid and you can lift it off with a blender pen or aqua pen.  Then use your pen like it was a marker to color your card.  In this case, we did a sweet Build-a-Bear cheery card.

    Watercoloring with Watercolor Crayons

    Next we did a card using the hostess set – Because I Care and the Watercolor Crayons.  Now, this is a medium that I often completely forget about but there is so many cool things you can do with watercolor crayons.  I won’t go into all of them today because that would make this post way to long but if there is interest, I can highlight them another day.

    Anyway, for this card we did a technique I haven’t done in a long time.  We used the crayons to color directly onto the stamp rubber – placing all of our colors on the image at the same time.  Then you spritz your rubber with water and stamp.  The water you spray on the rubber interacts with the wax of the watercolor crayons to create the more classic watercolor look.

    I just had to show you too the other thing we did with the card that was just for fun and I guess thinking back on it now, was a theme with this card: spritzing things.

    We used the gold Smooch Spritz to add gold shimmer to the background So Saffron paper.  Its fairly tone on tone but is sooo pretty in person.  Here is an attempt at a photo to show you what I mean.

    Cards 3-5
    Check back later this week as I post the other cards we created in this class.


    Interested in trying these cards & techniques out yourself?

    In Person
    Do to multiple requests, I’m running my class again on March 28th in the Mountain View, CA area.  I’d love to have you join us. Check out the full details on my meetup site.

    Online
    Or, if you are not local, purchase the supplies for these techniques from my online store and send me an email.  I’ll send you written tutorial instructions for these cards for FREE!  Not sure what you need, email me at jennifer@nwstamper.com and I’ll send you a basic supply list and you can see what you have in your stash and what you would still need.