Northwest Stamper

Tag: too kind

  • Build Your Own Stamped Palm Trees and New Weekly Deals

    Build Your Own Stamped Palm Trees and New Weekly Deals

    My family and I are off on an adventure this week as we take our kiddos to Legoland California!  My son is a HUGE lego fan… seriously, he only just turned 5 and we have a ridiculous amount of legos already. Smile  So while we are exploring here in sunny California, I thought I’d share a card idea for bringing the sunny beach to you!

    See?  It’s a build your own palm tree! Smile 

    Tips for making this card:

    • To make your palm tree, grab your Too Kind stamp set and instead of making flowers, turn one of the little stamps upside down and stamp in brown to make the tree!imagesffds
    • Make yourself some whispy clouds by punching out the top to the cupcake builder punch (make it really easy on yourself and do it out of a post-it note, making sure to punch some of the adhesive part).  Use that as a mask as you sponge Soft Sky ink over whisper white cardstock.  Move the cloud around to make as many or as few as you want!
    • To get your beach, just grab scraps of Crumb Cake cardstock and tear the tops off.  Layer on the front of your card for a one of a kind beach!
    • Add your favorite sentiment and embellishments and there you go. Smile 

    And in case you didn’t see these yesterday, new Weekly Deals are up too! 

    11010580_10204053349717405_2159798156492252091_n

    Shop the weekly deals here

    And with that, we are off to see and explore amazing creations with Legos!  If my son in the Legoland Hotel lobby is any indication, this should make for an awesome adventure for my kiddos. Smile 

    2015-02-17 20.16.46


    order online button for sig 3_thumb[4]

  • Another Catalog CASE with Too Kind and Hello Honey

    Another Catalog CASE with Too Kind and Hello Honey

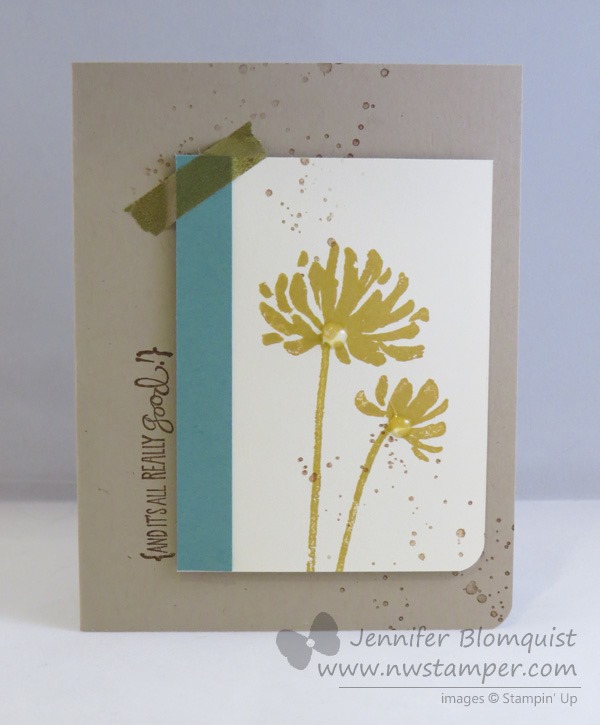
    Last week, I participated in a Blog Hop with other gals from my Fun n’ Crafty team of demonstrators (which you should totally join, by the way, with the $50 limited time starter kit deal. 😉 )  We all picked a project in the 2014-2015 Stampin’ Up catalog and made our own version.  This was a card I made for the hop but ended up not posting that day:

    And this was the card I saw in the catalog that I was inspired by:

    image

    Obviously, I had a few differences, starting from the stamp set ; but that is because I didn’t own the stamp set in the picture.  So instead I looked through my shelf of stamps and decided to grab my Too Kind set instead.  It is the same idea, a solid image flower, just with different shapes. Smile  I also wanted to play with my new inks including the Hello Honey and Lost Lagoon.

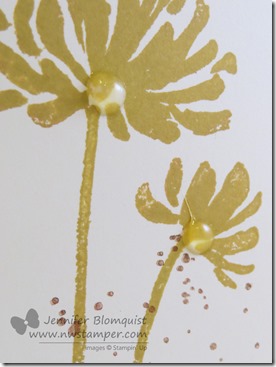
    I also thought my flowers needed a little something so I added a drop of Crystal Effects in the center of each flower.  A little shiny center for each one!

    I was asked recently when I showed this card in a class I was asked how I got the splatters on the card.  In this case, I used the stamp set Gorgeous Grunge – really, it is the perfect set for little background touches!

    Stampin’ Up Supplies I Used

    I love the new catalog and its layout for getting lots of new ideas and inspiration.  So, check it out (you can see it online here) and give it a try!

    spaced shop now sig bar

    June Online Stamp Club Hostess CodeACANDKB4
    Use this code to get free exclusive tutorials & project kit!  Learn more

  • Scalloped Peek-a-Boo Flower Catalog CASE

    Scalloped Peek-a-Boo Flower Catalog CASE

    Today the girls over at Stylin’ Stampin’ Inkspiration have put together a fun collection of cards to share.  We all picked a card from the Annual Catalog to CASE (Copy-And-Share-Everything) and then share for the blog post.  So I thought I would share a card we did recently for my monthly stamp club!

    This card was actually made because one of the ladies saw it in the catalog and really wanted to see how to make it.  And, of course, I was happy to oblige!

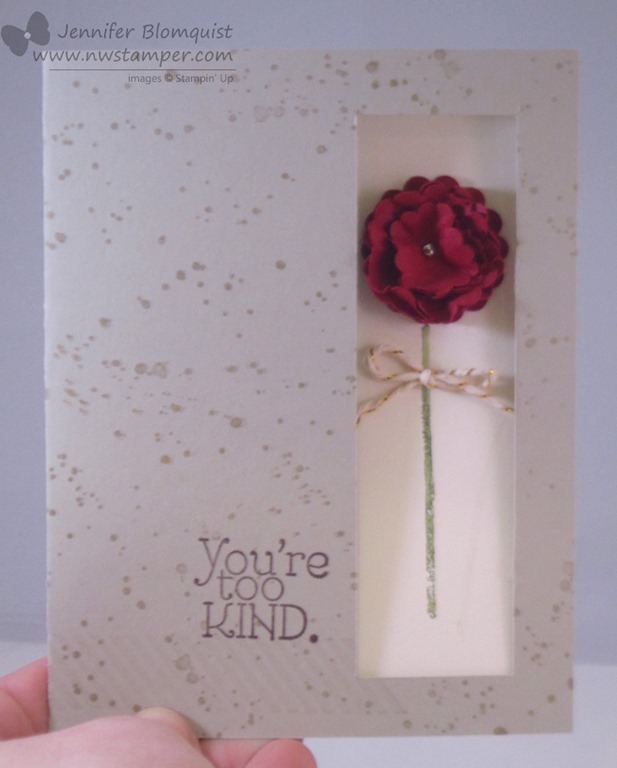
    This is my card:

    This is the card in the catalog on page 176:

    image

    Wow… maybe I need to photo graph my cards on top of bright colored paper because comparing their photo to mine, it makes quite the difference! Smile 

    In any event, the fun thing about this card was trimming out a rectangle from the front of the card so that your flower can pop through.  I cut it out 1/2” from each of the top, right, and bottom edge of the card and make it 1-1/4” wide.

    Then I could use the 1-1/4” scallop punch and the 7/8 scallop circle punch to create a cute flower to show through.  Add some decoration with Gorgeous Grunge stamps and some Gold Baker’s Twine and you have a fun alternative!

    If you have any specific questions about this card, leave me a comment and I’ll be sure to get back to you! 

    My club ladies had a lot of fun creating this card and I hope you take the time to try it out too.  With the Stampin’ Trimmer, it is really quick and easy to create these cut outs on your card fronts.

    spaced shop now sig bar

    April Online Stamp Club Hostess CodeG4VQJ7VB
    Use this code to get free exclusive tutorials & project kit!Learn more

  • Quick Spring Easter Treat Bag Tutorial with Punch Art Daffodil!

    Quick Spring Easter Treat Bag Tutorial with Punch Art Daffodil!

    Happy Easter weekend! I don’t know about you, but we still need to do a lot of our prep for Easter.  Today we’ll be spending time coloring Easter eggs – and I’ll be making sure I have everything I need for Easter baskets and Easter dinner! 

    (PS – don’t forget to enter the Retirement List Prediction Contest!  It is free to play along and you could win up to $30 in free Stampin’ Up products!)

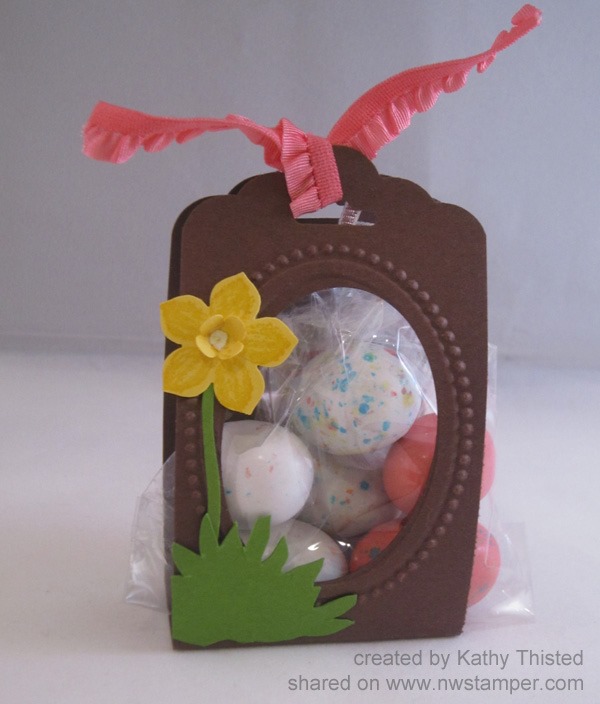
    So, back to Easter treats!  I thought I would share a quick spring or Easter treat idea that you can pull together at the last minute!  This was created by my Mom, Kathy Thisted, for our Fun n’ Crafty team Stamp & Share a few weeks ago and I just love it.

    Scallop Tag Topper & Punch Art Treat Bag

    There are lots of fun elements to this treat bag, but the nice thing is that with a few punches, it is super quick to make!

    Start with a 2”x8” piece of cardstock (this is Chocolate Chip) and score at 3-1/2” x 4-1/2” to help it stand up on it’s own.  Then, grab the Designer Frames Embossing Folders and use the oval to one to emboss your frame. 

    Use the Extra Wide Oval Punch to punch out the center of your oval.  LOVE that it is an almost perfect match!

    Punch both ends of the strip of cardstock with the Scallop Tag Topper Punch to give you that pretty finished look!

    Then grab your Petite Petals punch  and the four petal flower punch from the Bitty Punch Pack to make your Daffodil.  I punched one of each shape out of Daffodil Delight cardstock.

    In the sample, the flower is stamped first using the Petite Petals stamp set – and I think it definitely adds something to it.  But for the sake of this tutorial, I didn’t end up stamping.  I hope you don’t mind. Smile 

    Fold up the small punched flower and adhere it to the center of your larger flower with liquid glue or a glue dot!  I love how my mom colored in the center of the little flower with the White Gel pen for a little extra definition!

    Add a scrap of cardstock for the stem and grass at the bottom.  Want to hear a fun trick?  Stamp out one of the flower heads from the Too Kind stamp set and then cut it out and use the backside for your grass!  Neat huh?

    image

    Add some candy, tie it with a ribbon and you are done!  Easy Peasy!


      Reminder! Get your guesses emailed in!

      If you haven’t gotten in your guesses for my Retirement List prediction contest, don’t forget to get those in!  You have until tomorrow afternoon but since I know many folks will be busy with Easter activities, you may want to send them in today. Smile 

    Pick 10 stamp sets from the annual catalog that you think will be retiring and email me your list to jennifer@nwstamper.com.  If you have the most guesses correct when the list is posted Monday morning, you will win a shopping spree from me!  See all the details here.

    spaced shop now sig bar

    April Online Stamp Club Hostess CodeG4VQJ7VB
    Use this code to get free exclusive tutorials & project kit! Learn more

  • Too Kind – A Clean and Simple Card with Vellum

    It’s been a crazy few days around our house here in freezing cold Washington… surprizingly it has been actually hanging out in below freezing temperatures here (normally we are cold but not this cold!) My stamping and blogging time has been put on hold a little bit as we’ve celebrated my daughter’s 2nd birthday this weekend as well as dealing with serious health issues with our oldest cat.  But, I wanted to stop on by and share another card from my recent vellum class.

    This is one of the simplest ways to use vellum and it is a great way to add an elegant touch to your cards.  In this case, I stamped the flowers from the Too Kind stamp set and kept the card pretty simple so the flowers would really be the main focal point.  But when I wanted to add the sentiment (also from the same set) I wanted it to fit in with the feeling of the card… so vellum to the rescue!

    I stamped my sentiment directly onto the vellum and held it in place with Silver Mini Brads so that it wouldn’t go sliding anywhere.

    It is a great way to add a fun touch without adding a heavy layer to your card.  You should definitely give it a try!

    Don’t Miss the Deals!

    Just in case you thought you missed it, there are still tons of great deals on the Clearance Rack as part of the Clearance Rack Blitz.  The items are while supplies last so don’t delay in checking it out and grabbing your favorites before they are gone.  Plus, while you are there, check out this week’s Weekly Deals to save even more.

    Alright, time to tend to the kitty… have fun stamping and I’ll be back tomorrow with more!

    spaced shop now sig bar