Northwest Stamper

Tag: stitched with cheer

  • Vintage Christmas Card with Clear Block Stamping

    Vintage Christmas Card with Clear Block Stamping

    lovely-as-a-tree-clear-block-stamping-christmas-card
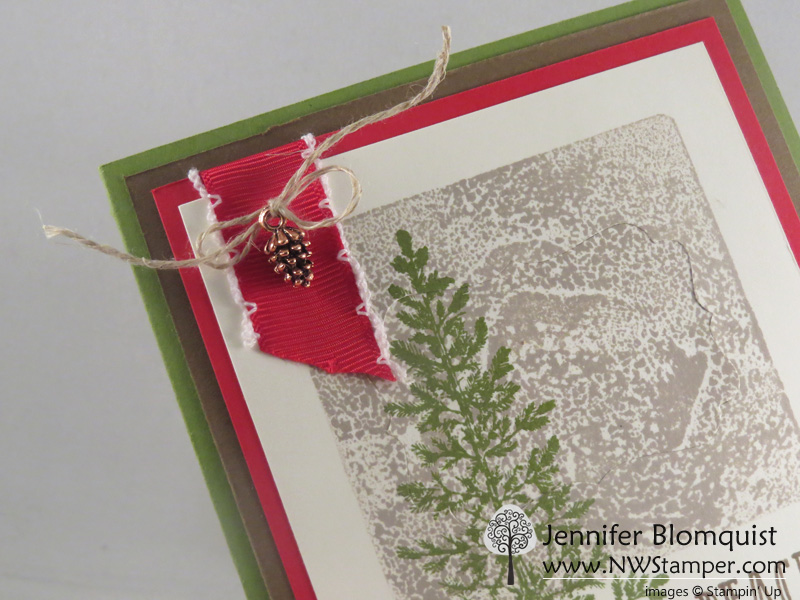
I have totally had a crafting-crush on these Mini Pinecones embellishments since I first got a chance to play with them.  They are so little, but oh so details and super cute!  My biggest challenge was actually getting them out of the container and onto my projects.

    Between the “don’t want to use them up” and trying to figure out where to put a 3D embellishment (though it is little so, it is still possible to mail), I just kept admiring them on my desk.  Come on, admit it… you have something like that in your craft goodies too. 🙂

    Well, as I was working on my Christmas card stamp-a-stack class, I found a way to break them out and I love it!
    lovely-as-a-tree-christmas-card-mini-pinecone-accent

    Thread a piece of linen thread through the top of the pinecone and tie a bow… then just attach to your project with a glue dot.  It couldn’t be cuter!

    It also pairs perfectly with my FAVORITE ribbon from the Holiday catalog – the Real Red Stitched Edge Ribbon.  I discovered a trick last night that let me see if certain items are going to be discontinued after the Holiday Catalog ends and *sniff* *sniff* both the pinecones and this ribbon are on this list.  So, I’m just going to snuggle this card, and then make a bunch more to enjoy the heck out of them. 😉

    Clear Block Stamping Backgrounds

    So, I realize I’ve been going on about the small embellishment piece in the corner of my card, but need to talk about the fun background image – that Sahara Sand square behind my tree!  It is so easy to do and adds a cool look to your cards.lovely-as-a-tree-clear-block-stamping-christmas-card-close-up

    • Pick the perfect shape for your background – its as easy as pulling out your clear blocks and setting them on your project (or over the stamps you plan to layer with) so you can decide which size is the right one for you.  Since the blocks are clear, you can easily tell which size will look the best for what you want.
    • Foam ink pads work best – now you can do this technique with the older linen ink pads, but I find that I like the look better with the foam ink pads.  (If you aren’t sure what I’m talking about, Stampin’ Up changed the actual pad that holds the ink a few years ago – the new style are a smooth-topped squishy foam pad.  The old style look more textured and aren’t shiny as they are a linen material.)
    • Gently tap the clear block onto the ink pad to pick up the color – you will find that you see a pattern in the ink on the clear block.  If an area didn’t get covered or you don’t like the pattern, just keep tapping!  Each time you tap you will get a slightly different look, so just go until you like what you see.
    • Use a foam or pierce mat under your paper – since the clear block is all acrylic, it doesn’t have any give if there is any uneveness in your table.  So, you will get a more solid image if you place a piercing mat under your cardstock so that when you stamp with the block, the foam can cushion as necessary to make sure all parts of the block make contact.

    I loved the background stamped in Sahara Sand and then layered with the tall tree from Lovely as a Tree, but I’m sure you can imagine a bunch of other combinations too!

    I’d love to hear what you think we should try next with this technique!

    And just a reminder, you have TODAY and TOMORROW to take advantage of the 25% off stamp sale.  Then December 1st the official retirement list is coming out for the Holiday catalog and the Year-End Closeout sale items will be announced.  So, lots to look forward to. 🙂 25% off Stampin' Up Stamp Sale

    UPDATED November Hostess code – FUYTBWNK

    NWstamper signature_thumb[9]

    order online button for sig 3_thumb[4]

    Project Measurements

    • Old Olive cardbase – 4 ¼” x 11”, score at 5 ½”
    • Soft Suede cardstock – 4″ x 5 1/4”
    • Real Red cardstock  – 3 3/4″ x 5
    • Very Vanilla cardstock – 3 1/2″ x 4 3/4″
    • Real Red ribbon – 3.5″
    • Linen Thread – 8″

    Product List

  • Clean and Simple Vintage Christmas Card with Stitched with Cheer

    If you are like me, you love making those beautiful holiday cards with all the details and the fun pieces and touches.  However, I can’t imagine mass producing a TON of cards like that.  So, I have fun making onesies and twosies of the time consuming cards and then fill in the gaps when I start running out of time with simple but classy cards that I can turn out a bunch in a short amount of time.  Now, I LOVE the Paper Pumpkin kit we got this month for that sort of thing (and in fact, I plan to order a refill pack so I can make more this year… LOVE THEM!)

    But I wanted to share another idea with you – this was one of the make and takes for my Northwest Crafty Escape Weekend this year – using the FABULOUS Stitched with Cheer stamp set!

    It starts by creating some fun layers on the card base.  I stamped the knitting image from the Stitched with Cheer set about 2/3rds of the way down from the top of the card base in Memento Black ink.  Doesn’t it look awesome all by itself?  Then add a strip of Garden Green cardstock, then we start getting fancy!

    • Use the Banner Triple punch to create easy banner edges for your designer paper strips.  Since the punch is designed to make it easy to punch 1”, 1 1/2”, and 2” strips, you can mix and match patterns and sizes for great layered looks.
    • Make it a little vintage by sponging the edges of the paper using a soft brown (my favorite for this is Crumb Cake ink) and a sponge dauber. It makes it look a little older and more rustic.
    • Texture made easy – I used the This Christmas Specialty paper so it is a little bit thinner/lighter weight than your typically designer paper.  Which means it is perfect for crumpling up and then smoothing back out again.  It adds texture and looks great on your vintage style cards!

    PS – did you see, I’ve started adding measurements for my cards at the end of my blog posts?  Makes it easy to recreate at home!

    Then I made the sentiment the focal point and used my Layering Squares dies to really help it pop out!  But just to add the touch of love, I stamped the heart from the same stamp set in Cherry Cobbler and hand cut it out.  It is small, so it trims out in no time!  Sponge the edge of the Vanilla square sentiment to keep up the vintage feel and glue together for easy peasy done!

    BONUS – The Stitched with Cheer stamp set is on sale with the Online Extravaganza too!  Save 10% off the stamp set this week Smile   Check it out here

    November Savings and Specials

    November Hostess Code – DSUGDGH4

    NWstamper signature_thumb[9]

    order online button for sig 3_thumb[4]

    Project Measurements

    • Very Vanilla cardbase – 4 ¼” x 11”, score at 5 ½”
    • This Christmas specialty designer paper
      • Music notes paper – 1 ½” x 4 ¼”
      • Red designer paper – 1” x 4 ½”
    • Garden Green cardstock – ½” x 4 ¼”
    • Cherry Cobbler – 2 ¼” x 2 ¼” (die cut with layering squares framelit)
    • Very Vanilla cardstock – 1 ¾” x 1 ¾” (die cut with layering squares framelit), scrap for little stamped and cut out heart

    Product List