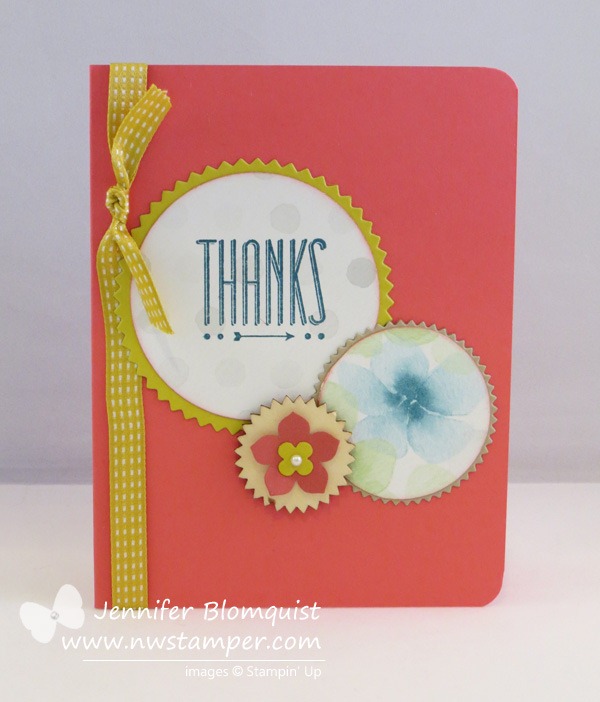
Gratitude Month–Thank You Card using Kinda Eclectic and In Colors
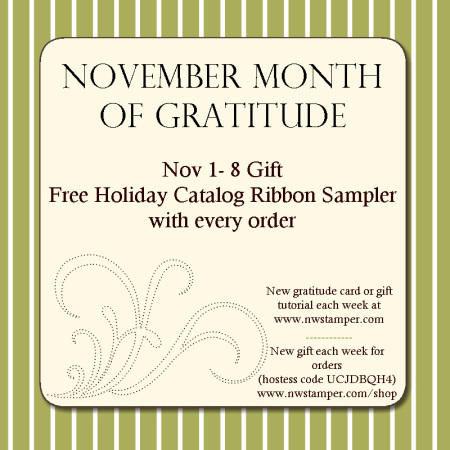
Happy November! As I mentioned yesterday, I’m kicking off my Month of Gratitude with a free gift for you and a project tutorial. Today I’m sharing a card I created as a different way to use your Kinda Eclectic stamp set and have a neat thank you card that you can use for guys, girls,…
Amazing Birthday Thank You Card–Display Board Sample
I’m back! I made it home from the 2014 Stampin’ Up convention and had a great time. As I mentioned before, I was honored to be invited to create samples for the display boards this year. Everyone coming to convention received 3 stamp sets – Amazing Birthday, Kinda Eclectic, and Seasonally Scattered (coming soon in…
A Card Sketch Thank You Card for SSInkspiration
Today I’m getting back in the saddle with the girls over at Stylin Stampin’ Inkspiration and made a card for today’s card sketch. I actually got some time to do a little crafting yesterday and I thought It would be fun to show some of the retiring 2012-2014 In Colors some love. So, with a…
Bright Retro Fresh card with Starburst Sayings

It’s funny. I tell myself that I’m going to focus on getting caught up on some other tasks I’m behind on (like making sure the last few people who participated in my Online Stamp Club at the end of the month have their project passwords & make and take packets in the mail!) So, I’m…
Happy St. Patricks Day with a Pansy Punch Shamrock

Happy St. Patrick’s Day! It snuck up on me, but thanks to my hubby, I remembered to wear green this morning. 🙂 Well, last week for my stamp club, I shared this cute little tag as a bonus project to show another great way to use that Pansy Punch. Turn it into a fun shamrock…