Northwest Stamper

Tag: snowflake elements

  • Sparkly Sleigh Scene with the Sleigh Ride Edgelits

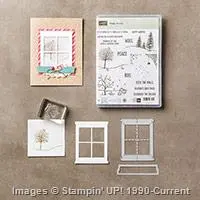
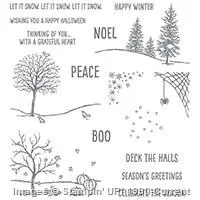
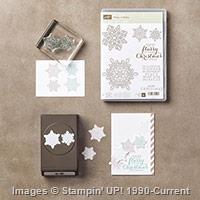
    I remember when I first saw the Jingle all the Way stamp set and Sleigh Ride edgelits, I wasn’t sure what I thought about them.  But after playing with them a bit, I think they can pull together rather stunning cards and projects… don’t you agree?

    PS – these dies & stamps are on the Holiday Catalog retiring list, so make sure to grab them before they are gone!

    I wanted to use these dies in a project for my Stamp Club but wanted to do something a little bit different than the normal, 3 strips of paper across the full cardfront with the die cut edges.  So I got the idea in my head to go for a snowglobe effect and this card started coming together!  Let me share a little about how I made it:

    • I started by cutting out a circle using the Circle Framelits to use as my background piece on which I would be layering everything else.  I also used that same sized circle to cut out a piece of Crumb Cake cardstock, but when I cut the Crumb Cake cardstock, I also layered the NEXT-SMALLEST circle framelit inside so that I was cutting using 2 framelits at the same time, both nested together when cutting.  This gave me the brown frame to go around the outside of my snow scene.
    • Then it was just cutting the pieces for the different layers.  You need:
      – a piece of Dazzling Diamond glimmer paper
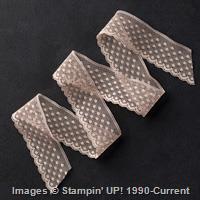
      – 3 strips of Very Vanilla cardstock: 2 with the edge cut using the tree edgelits & 1 with the edge cut using the sleigh edgelit
      – 1 strip of Crumb Cake cardstock with the edge cut using the sleigh edgelit.
    • TIP – Use the Precision Plate when cutting out your sleigh ride edgelits!  It makes them come out of the dies so much easier and WITHOUT breakage of skinny pieces of paper!
    • Trim off the sleigh and horse from the Very Vanilla piece and then start layering your strips onto your Very Vanilla circle you cut out in the beginning. Trim the parts that hang over the edge of the circle and then glue the frame down!
    • Then I just used my Hardwood background stamp to give a pattern to the circle I cut out from the middle of the Crumb Cake cardstock and cut it in half to place behind my main circle.
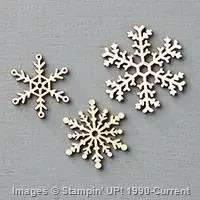
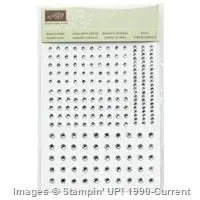
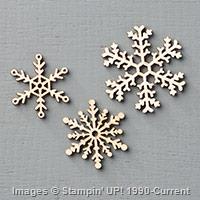
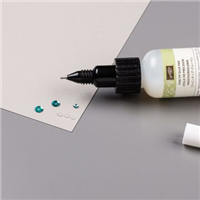
    • Add the retiring Snowflake elements piece with an Iced Rhinestone in the center and you have a gorgeous scene!

    If you were at the OnStage event in Vancouver, I had this card up on the almost artisan display board.  And you’ll agree it is even prettier and more sparkly in person!

    So, don’t forget to get the Sleigh Ride edgelits on your wishlist before they are gone!  Smile  Or bump it up to the bundle and save with the Jingle All The Way bundle that includes the edgelits and coordinating stamp set!

    Get your Wishlists Ready! The BIG Online Extravaganza is Coming!

    I just learned the details of the big “Black Friday” sale that Stampin’ Up is holding this year.  They will be starting Nov 23rd (Monday) and going through Nov 30th (the following Monday) with One-Day Doorbusters each Monday!  Plus lots of awesome items for 20-50% off!  I’ll be sending out email with more details and easier ways to look (not on the mailing list? join here!), but you can get a peek now using this SALE LIST:

    2015 Online Extravaganza – See What’s On Sale! pdf

    NWstamper signature_thumb[9]

    order online button for sig 3_thumb[4]

    Use Hostess Code PU2EYZJY at check out to get a special thank you from me!

    Through 11/18 – Get a free Class by Mail tutorial with every $35 purchase! See all the classes by mail here

    Check out the Holiday Catalog Retiring List & Sold Out Updates

    Save 25% on the Latest Weekly Deals

    Don’t miss up to 60% off in the online Clearance Rack!

  • Happy Scenes Wonderful Winter Window Christmas Card

    I hope you don’t mind me sharing another Christmas Card with you today! I know, I know, Halloween has only just passed us by and we still have some time in Fall and Thanksgiving before Christmas time really hits… but well, I just loved this card and since I have it all edited and ready to go, I thought I would share it today instead of making you wait while I work on editing my other card pictures. Smile  Because more craft ideas are better than none, right?  Always so many fun idea to try and to share!

    So, I absolutely loved this card.  It was cased from Amanda Bates (her card is here) but I just loved it so much I had to make it and share it with my folks in class recently.

    Tips for making this card:

    • Start by stamping your background image of the trees using the trees from the Happy Scenes stamp set.  This set is awesome because it perfectly fits with the Hearth and Home thinlits to create the window frame.  From the spiderweb or frost for the corner of the window, to the fall and winter scenes to fit behind the window frame. image
    • But don’t feel like you have to keep your background constrained to the window!  Let them break free and stretch across the page!  In this case, I stamped the trees three times to make it reach all the way across the card front.
    • Add the falling snow using smoky slate ink and the snow fall stamp in the same Happy Scenes stamp set.
    • Add some color by sponging with Soft Sky using a yellow Stampin’ Sponge over the background to really set the scene.
    • Finally I added a little of the Dazzling Details glitter glue to the snow on the trees and along the black lines of my snowy hills.
    • Did you notice?  The “let it snow. let it snow. let it snow” is the exact right length to fit below the window frame?! 
      Tip – since this stamp set is in Photopolymer, so you can see right through it.  Adhere your window frame FIRST using Stampin’ Dimensionals and THEN stamp your sentiment below.  That way everything lines up all nice and pretty. Smile
    • I needed a little more though, so we added the Wooden Snowflake Element to the corner of the window frame with the rhinestone in the center.

    Easy, peasy and oh so pretty!  I think I may be making a bunch of these for my holiday card!

    PS – don’t forget! you can get the stamp set and the window frame die together in a bundle and save 15% off both!  And who doesn’t love a good deal? Smile 

    NWstamper signature_thumb[9]

    order online button for sig 3_thumb[4]

    But use Hostess Code FHRCKER7 to get a special thank you from me!

    Product Supplies Used:

  • Flurry of Wishes Vintage Elegance Christmas Card & NEW Class by Mail!

    This last weekend I held the first of my Holiday Card Series – this is something new I’m doing this year where I’m running 4 Holiday Card classes between now and the end of November and each one will give you a stack of cards that will get you well on your way to getting your holiday cards done this year.  PLUS – everyone who participates in 3 of the card series classes will receive a $15 shopping spree from me at the end of the series.  Participate in all 4 and you get a $20 shopping spree!  How stinkin sweet is that?  And yes!  This even goes for those of you participating in my class by mail program. Smile   You can get more details about this at the bottom of this post!

    But back to the card I wanted to share today – this oh so pretty vintage & elegant Christmas card using the Flurry of Wishes!

    LOVE!  If I do say so myself. ha ha ha!  Like I mentioned, it was part of the first Holiday Card class that was all about the Flurry of Wishes stamp set – here is everything we made:

    But we are talking about this card today… and I wanted to share with you a few of my favorite touches with it.

    Tips for making this card:

    • Stamp your main image in a slightly darker ink color than the cardstock – in this case, we stamped with Tip Top Taupe ink on to Sahara Sand cardstock.
    • Fill in a few of the outlined shapes using the white Chalk Pen.  It gives a soft look and highlights some of the detailing of the image.
    • Take it up a notch by adding a few small pearls as well!  They are subtle but really add to the elegance factor.
    • For the sentiment, layer your cardstock over some of the A-MA-ZING In Color lace trim – again we were using the Tip Top Taupe trim.  It is wide enough to be a great layering ribbon.
    • I am in love with the wooden Snowflake embellishments so one had to come out for this card and again, a few more little pearls!

    It all comes together for a great card that doesn’t actually take that many supplies and can be quick to mass produce as well.  Always a perk, right?

    Flurry of Wishes – Class By Mail is Here!

    Everyone loved this class this weekend and raved about the cards and the value; and I wanted to share it with those of you who aren’t able to attend my classes in person!  So, I am offering this (and the rest of the Holiday Card Series) as a class by mail.

    In this class you’ll get:

    • Precut supplies & accessories for 10 cards – 2 of each of the 5 designs
    • Pre-punched elements for the cards
    • PDF instructions walking you step-by-step through how to complete each of the cards
    • Priority shipping of your kit to you
    • (optional) the Flurry of Wishes photopolymer stamp set and Snowflake punch!  <— BEST VALUE ADD-ON  —  SAVE over $10 off the class kit when you include the stamp set & punch in your kit

    Live outside the US or don’t need the kit – PDF instructions ONLY option is also available

    NOTE – I am finishing up the pdf instructions now, so they will start being emailed out to everyone Friday, Oct 2nd.  Class kits will be mailed starting next week.


    Kit choices – includes priority shipping


    If you have any questions, don’t hesitate to let me know at jennifer@nwstamper.com .  So, give this idea a try and have fun playing as we head into the fall and holiday season!

    NWstamper signature_thumb[9]

    order online button for sig 3_thumb[4]

    Project Supplies Used: