Northwest Stamper

Tag: mosaic madness

  • Stampin’ Up Display Stamper 2014 Submission

    Stampin’ Up Display Stamper 2014 Submission

    So, every year I go to the Stampin’ Up convention… and every year I’m blown away by the amazing ideas and inspiration on all the different display boards.  (To see what I’m talking about, here are a few past posts I’ve done showing the display boards.)  Well, this year they are doing a call for display board stampers and to throw your hat in the ring, you need to pull together some of your best/favorite projects and put them together in one post to show your style and ability.  So, I thought it would be a fun way to flip through my past projects and put them together to share with you here.  And maybe they will love them too and I’ll get to share even more ideas on a display board at the Stampin’ Up Convention 2014!

    oh, and PS – if you love the idea of checking out all the display boards, don’t forget that anyone who joins Stampin’ Up as a demonstrator right now will get free registration to convention this summer!  So, you just get yourself to Salt Lake City, and you can be blown away by inspiration for FREE!  Yay!  Email me at jennifer@nwstamper.com for more details if you are interested or check out this page to learn more about the perks of being a demonstrator!

    So Here You Go!
    3 Cards

    so very grateful colored

    So Very Grateful Thank You

    Burlap and Gold Masculine Card (blog post here)

    Negative Heat Embossing with Pleasant Poppies (blog post here)
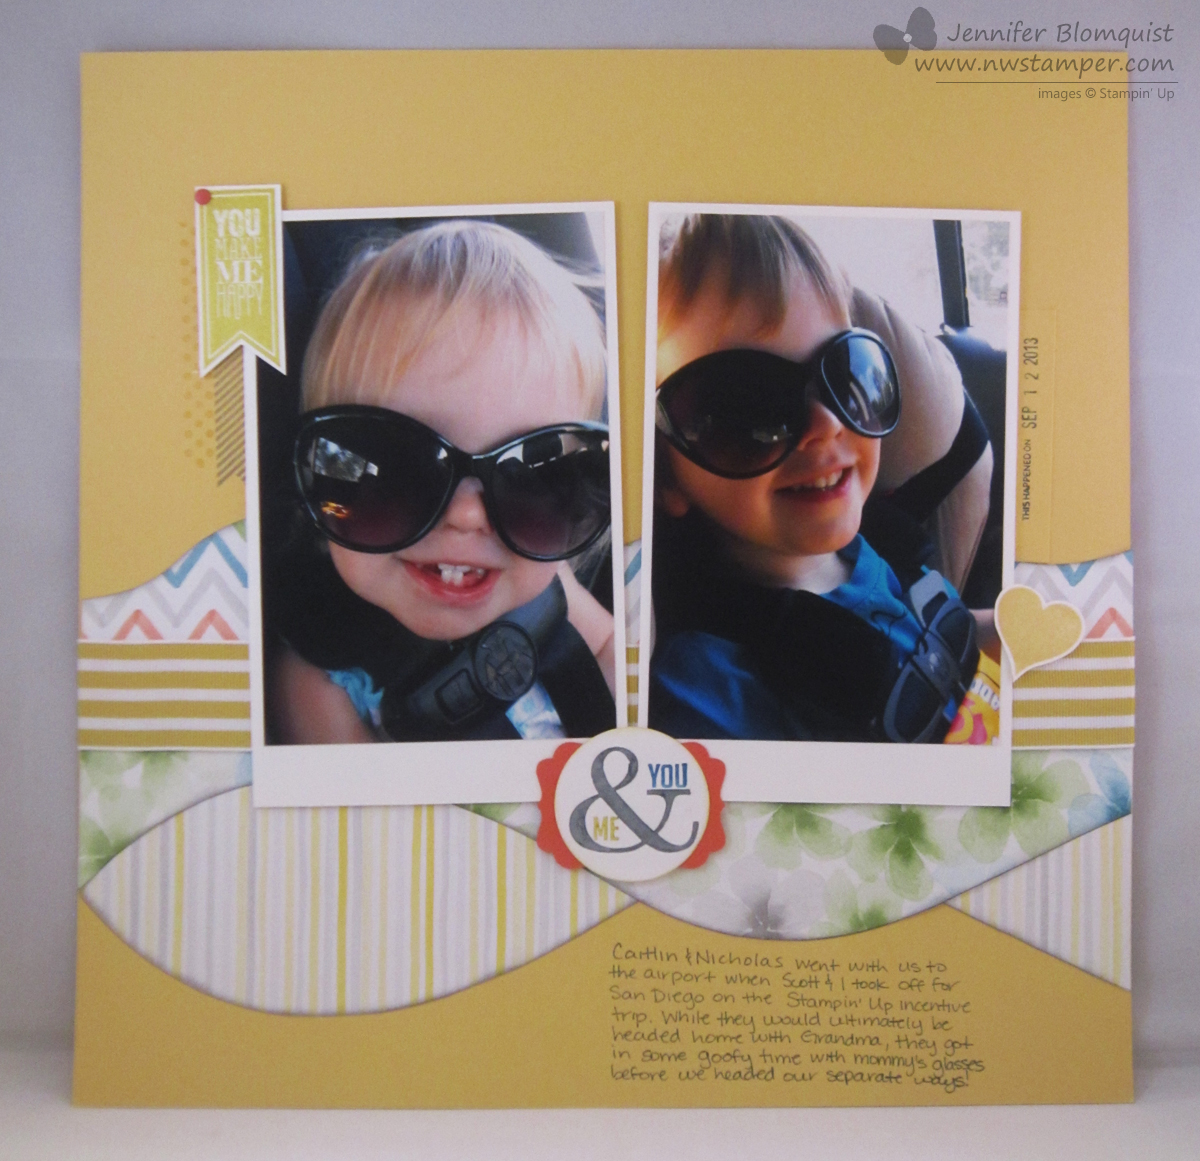
    1 Scrapbook Page

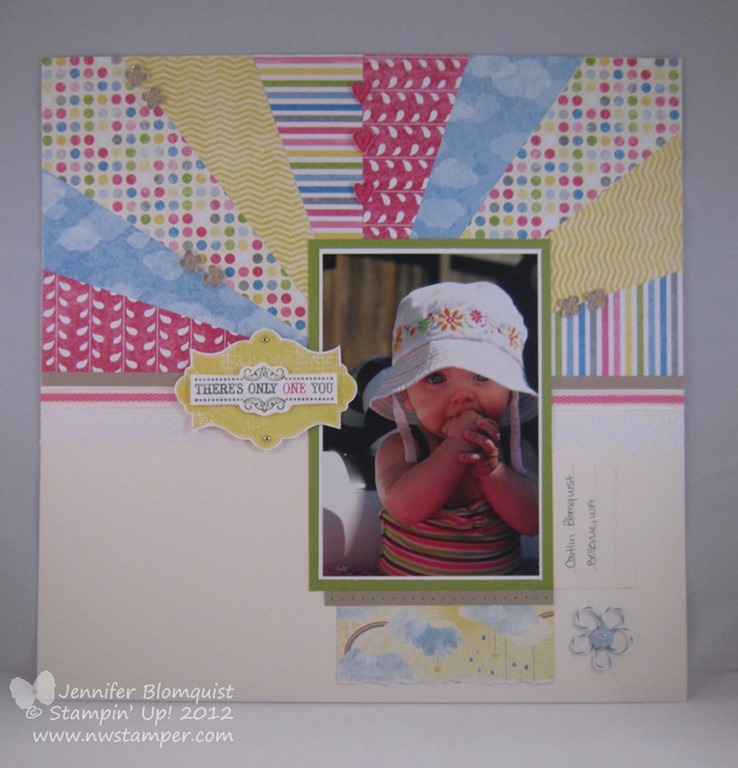
    This was so hard for me to narrow down and decide which scrapbook page to show.  I think my favorite layout may actually be this older one, but I figured the one I’d show here is this –

    Perfect Pennants with Watercolor Wonder Waves (blog post here)

    Or maybe it is just that these photos always make me smile!

    2 3D items

    Ok, this is where I don’t make and post nearly enough.  So here is what I decided was the nicest from things I actually designed myself – instead of flat out copies of what other people had created. Smile

    Card organizer for holding cards and envelopes (blog post here)

    Easter Treat Bag (blog post here)

    Awww.  So much fun to walk down memory lane.  I hope you enjoyed the ideas and inspiration. Smile

    spaced shop now sig bar

    April Online Stamp Club Hostess CodeG4VQJ7VB
    Use this code to get free exclusive tutorials & project kit!Learn more

  • Fun with Window Sheets and Rainbows for a Card

    Fun with Window Sheets and Rainbows for a Card

    Today I wanted to share another card I created for the Scrapyard Chicks Weekend Workshop (save 10% off your registration by using the coupon code NWstamper).  I’ll be teaching 6 different cards and I was trying to come up with designs that were fresh and a bit different than I’ve done before.  And I just love how this one turned out.

    So, you can make this card with any paper you have at home but I went for some fun rainbow colors that I punched out with a 1” circle punch and adhered to a Baked Brown Sugar cardbase.  But here is where it gets a bit different –

    We add a window sheet over the top and stamp it with White Craft ink!

    I cut my window sheet to 4” x 5-1/4” so it was a little smaller than the front of my card (and more efficient for cutting up your 12×12 sheet that they come in from Stampin’ Up).  I laid it over my card front and then stamped each flower using the Mosaic Madness stamp set on top of each circle and the White ink.  Then I stamped the “and I’m so very grateful” on the card base itself in brown ink.  I found it useful to stamp the “inside” sentiment first because then I could stamp the window sheet just above that brown stamped image.

    Finally, I glued down my window sheet and hid my adhesive by wrapping white baker’s twine around the top of the window sheet.  Add some tiny pearls in the middle of each flower and you are done!

    Tip:  I found that using the White Craft ink on the window sheets take a really long time to dry.  So the sample above is using White craft ink, but for my class I’ll be switching out for White Stazon ink instead!

    spaced shop now sig bar

    April Online Stamp Club Hostess CodeG4VQJ7VB
    Use this code to get free exclusive tutorials & project kit! Learn more

    Stampin’ Up! Supplies Used
    Stamps – So Very Grateful, Mosaic Madness
    Ink – White Stazon, Early Espresso
    Paper –Baked Brown Sugar, Calyspo Coral, Real Red, Pumpkin Pie, Daffodil Delight, Pistachio Pudding, Gumball Green, Midnight Muse, Tempting Turquoise, Raspberry Ripple, Window Sheets
    Accessories – White baker’s twine, pearls, heat gun


    Favorite Products:

  • All About Mosaic Madness

    If you are a member of my newsletter, you have already seen this card (and if you aren’t a member, sign up here and you can get the inside scoop first too!)

    But I love how this card turned out and it has been a fun way to use all the coordinating Mosaic items (the stamp set, the punch, and the embossing folder).  Check it out:

    This was my first time really going all out with the Strawberry Slush new In Color.  I was afraid I was going to be overwhelmed with pink, but I think it turned out more summery bright than eye-searing pink.  Do you agree?

    And with the punch and embossing folder, this card comes together in a snap too which is always a bonus!

    Card Supplies Used
    Stamps:
    Mosaic Madness, Great Greetings
    Ink: Strawberry Slush, Coastal Cabana, Baked Brown Sugar
    Paper: Strawbery Slush, Very Vanilla
    Accessories: Big Shot, Mosaic Embossing folder, Mosaic punch, Rhinestones, Stampin’ Dimensionals, Sponge daubers


    Plus, don’t forget that if you love the punch and stamp set, you get 15% off when you order them at the same time!  See this discounted bundle here.

    spaced shop now sig bar

  • Colorful Flower using the Mosaic Punch & Pressed Clay

    imageOk, I’ll admit it.  I wasn’t sold on the Pressed Clay when Stampin’ Up! announced it’s release during the demonstrator preorder in advance of the new Annual Catalog launch.  I kept hearing people get all excited about it but I didn’t order it because I couldn’t see myself actually using it.

    Wanna know what just showed up in my recent order? 

    Yup, that is right!  The clay!

    My mom, Kathy Thisted, ordered the clay and molds during the preorder and so I figured I’d make one or two to samples to show.  But I found once I got started playing it, I had a hard time stopping. ha ha!  Its kind of like being 5 again and playing with play doh.  Once you get started there are endless possibilities of what you can create!

    So while I haven’t gotten all my experiments photographed, I had to share with you one cool sample that she shared with me recently.  Check it out:

    Its this cool mashup of a bunch of new products in ways I never would have thought to do (isn’t that why sharing is awesome?!)  She took the Mosaic punch to punch out the petals and then stamped each one with the Mosaic Madness stamp set.  Then she dyed some Simply Pressed Clay with Daffodil Delight reinker and pressed it into the flower mold to create the pretty center.  Creative, no?

    Card Supplies used:
    Stamps – Mosaic Madness, Field Flowers, Sweet Essentials
    Ink – Whisper White, Wild Wasabi, Baked Brown Sugar, Daffodil Delight reinker
    Paper – Soft Sky, Coastal Cabana, Strawberry Slush, Baked Brown Sugar, Pistachio Pudding, Crisp Cantaloupe
    Accessories – Simply Pressed Clay, Buttons & Blossoms Clay Molds, Stampin’ Dimensionals, Bone Folder


    So if you haven’t tried out the clay yet, you totally should!  Its easier to work with than I expected and has tons of potential.  I’ll try to get photos taken but I’ve seen:

    • Coloring with a marker
    • Multiple color coloring
    • Using the molds
    • Creating an impression with stamps
    • Creating an impression with a decorative brad
    • Turning molded images into brads
    • Creating a shiny accent with Crystal Effects
    • Heat embossing the finished embellishment

    And I’m sure there are more ideas I haven’t even seen or come up with yet!

    So, leave a comment with your ideas if you have been playing or pick up some clay today and start experimenting!

  • Using Punches to Create a Fun, Colorful Bookmark

    Each year when the new Stampin’ Up! catalog comes out, they release the latest set of In Colors.  So, I usually figure that when I’m sending out my catalogs to customers that it would be nice for them to see what these new colors look like in person.  So I create a little bookmark to show off the different colors.

    This is what I came up with for this year:

    2013 In Color Bookmark with Mosaic Punch

    I had just gotten the Mosaic Madness stamp set, Mosaic punch, and Mosaic embossing folder.  Plus of course the new In Colors:
    Crisp Canteloupe, Coastal Cabana, Baked Brown Sugar, Pistachio Pudding, and Strawberry Slush.

    Oh, and I had to throw in there the new core color – Smoky Slate as well. Smile  I mean, if you are going to play with some new products, why not jam as may new things as you can on your project!

    And this is what it looks like when you are trying to mass produce 36 copies of a bookmark like this:

    2013 In Color Bookmark pieces

    Let me just say that was A LOT of punching!

    But I love how they turned out and if I end up with one left, I may just mount it on a card for another fun use of the bookmark.

    Still need a new catalog?  Shoot me an email at jennifer@nwstamper.com or let me know with my catalog request form and I’ll get one in the mail to you right away!  Plus, you’ll get one of these cute bookmarks too!