Northwest Stamper

Tag: metal rimmed pearls

  • Beautiful Buttons and Fun Christmas Card w/ Masking Ideas

    So, when Stampin’ Up posted the weekly deals yesterday, I was initially surprised that there were fewer than in previous weeks.  But after looking at the items, I realized that just because there were fewer, didn’t mean they weren’t great items!  I LOVE some of these buttons and the masks and heck 25% off is still 25% I don’t have to pay – right?  And who doesn’t love a sale?  Smile 

    So today, I thought I’d share a few project ideas using the fun goodies on sale this week:

    image

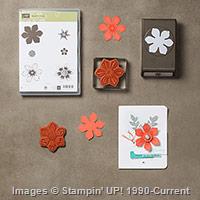
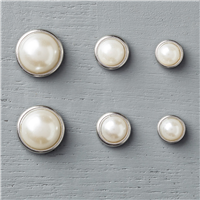
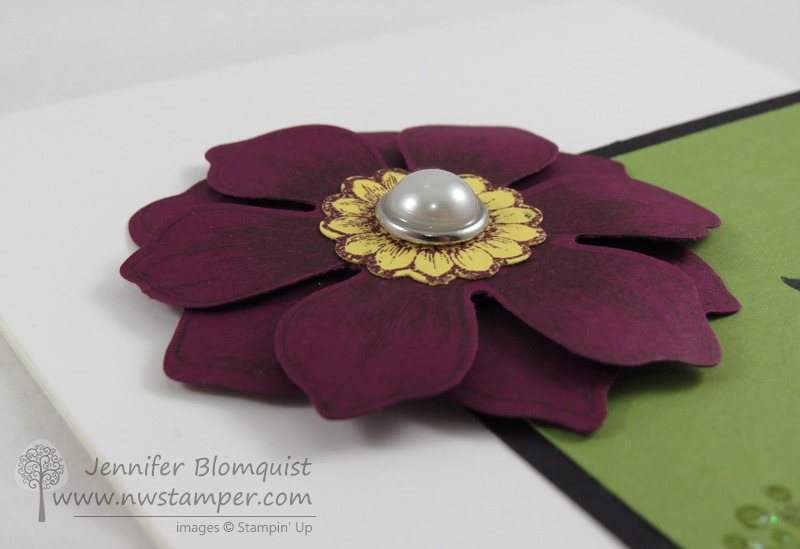
    Metal Rimmed Pearls – Easiest cute accessory around!

    I love these little embellishments because they are super cute and did you know – they come with adhesive already on the back?!  Talk about making it so easy even my kiddos can do it!  In fact they did – here is the card I made for a recent class.  Check out  the matching blog post to see my kiddos recreate this card all by themselves and turning out pretty darn well, I would say too. Smile

    Beautiful Bunch birthday card – check out the details on this blog post

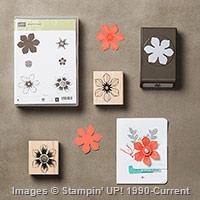
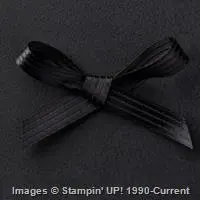
    Hearts & Stars Mask – Cute in any season

    The hearts and stars mask is a great way to easily make your own custom background in any color you like!  I have use it a few times but this was one of my favorite and most popular designs.  Perfect for easy Christmas cards!

    Festival of Trees Christmas card – get all the details in this blog post

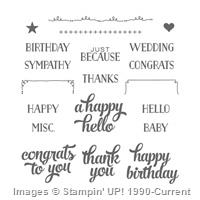
    Classy Designer Buttons – Perfect accents for any card!

    I also really like the Classy Designer Buttons.  I know I used them on a few cards lately but it appears I haven’t posted them to the blog yet.  So instead, I thought I’d share this cute card from my Stampin’ Up website (that page of mine with my class calendar, promotions, and all about the perks of joining my fun group as a demonstrator!)  Anyway, I love how this card is great for any paper you may have lying around.  It is just so easy to cut or punch a few squares, stamp a sentiment and embellish with some linen thread and the classy buttons!

    image

    Baby Girl card – get all the details here

    Ok, off to do a little more prep work for my Northwest Crafty Escape Weekend coming up on Friday!  I have the goodie bag supplies being delivered today and their wrappings and baggies all made and ready to go!  Now to finish up some samples for some of the on site classes and we will be rockin’ and rollin’.  I can’t wait! 

    ** Make sure you are a fan of my Northwest Stamper Facebook page so you can see all the fun and inspiration as it happens! **

    NWstamper signature_thumb[9]

    order online button for sig 3_thumb[4]

    use Hostess Code FHRCKER7 to get a special thank you from me!

  • Classy and Not-to-Flowery Birthday Card using Beautiful Bunch

    Ahhhh…. finally getting back in to creating!  Last Friday I had my monthly Creative Cards Class and so while I was on my family trip to Orcas Island at the beginning of the week, I had packed a few supplies and I started playing around and I was so excited when this idea started coming together!  (I mean, really excited!  I had been having a total creative road block before!)

    It is a card that is great to pull together for those last minute needs, or spend extra time and gussy it up to make it even more fancy than my clean and simple version here.

    Tips for making this card:

    • Keep it simple with an always elegant Whisper White card base.  I just changed it up a little by cutting my cardstock to 4-1/4” x 11” and then scoring at 5-1/2” so that it made it extra easy for me to wrap my ribbon around the front flap of the card.
    • Speaking of ribbon, it always looks just a little bit nicer when you can actually wrap it around the paper instead of just cutting the ends off at the edge of your cardstock.  Do even more to hide the seams by starting one end of your ribbon just under the left side of the black cardstock and then wrapping around the front flap of the card and ENDING just underneath the right side of the black cardstock!  It keeps it smooth and lovely on the inside of your card.
    • Add a pop of color with a single accent piece for your card – in this case the flower.  It is built up using the Beautiful Bunch stamp set and matching Fun Flower punch (Get them as a bundle together and you save 15% on both!)

      Beautiful Bunch Bundle
    • Stamp the flower image onto a piece of scrap Blackberry Bliss cardstock using Blackberry Bliss ink (or pick your own tone on tone coloring), punch out and then layer together using Stampin’ Dimensionals for flowers that wow!

    • Did you know? You can punch out the center of the flower using the 7/8” scallop circle punch!  That is what we did to give us that contrasting Daffodil Delight flower center.
    • Oh!  And aren’t those Metal Rimmed Pearls the perfect touch for the center of the flower??  They come with adhesive already on the back so they are SUPER EASY to use too!
    • Finishing touches are key!  We used another stamp from the set to create the spotted accent line and then blinged it up by using some Dazzling Details.  Seriously, for $2.50/bottle, I {heart} this stuff so much!

    • Find so many elegant sentiments that are the perfect size for almost every project with the Tin of Cards stamp set – see, it’s not just for the Tin of Cards project kit!

    Easy and fun, right?  My son, Nicholas is 5 and since he was a year and a half, he has been wanting to play along with creating with my stamps.  It was adorable… he actually asked me earlier this week if an ink pad was the “twist twist tap tap” kind or just “tap” kind (linen pad vs foam ink pad)!

    Well, he often sees me getting ready for card classes or swaps and wants to the do the cards with me.  I usually don’t have the time to walk him through it then and so tell him to grab HIS craft supplies and create a card.  But lately he’s been insisting he wants to do one of my cards from my classes.  So I had a couple extra kits from this class, so I let him and his sister (Caitlin who is 3) have at it.  I think they did pretty well!

    2015-08-18 18.08.59

    And their finished cards:

    2015-08-18 18.35.21-1

    2015-08-18 18.36.42-1


    They did all the work themselves! I didn’t do any stamping or punching for them! Smile  I see many fun years of crafting together coming….

    NWstamper signature_thumb[9]

    order online button for sig 3_thumb[4]


    Project Supplies Used: