It’s that time of the year where I need to start saying good bye to some wonderful Stampin’ Up stamps and products as we count down to the new catalog change over in June. So over here on the blog I’m going to start sending off many of my retiring products by featuring some of my favorite projects using them (and next week. you’ll start seeing some of the new Sneak Peek stuff popping in as well! That UPS man can’t get here fast enough!) But here is my first card share for you –

Featured Retiring Products:
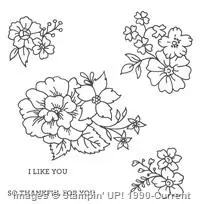
- I Like You stamp set (hostess)
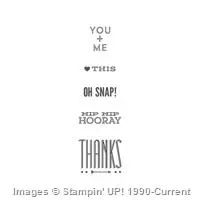
- Hip Notes stamp set
Get them before they are gone at the end of the month!
Tips for this project:
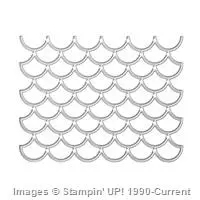
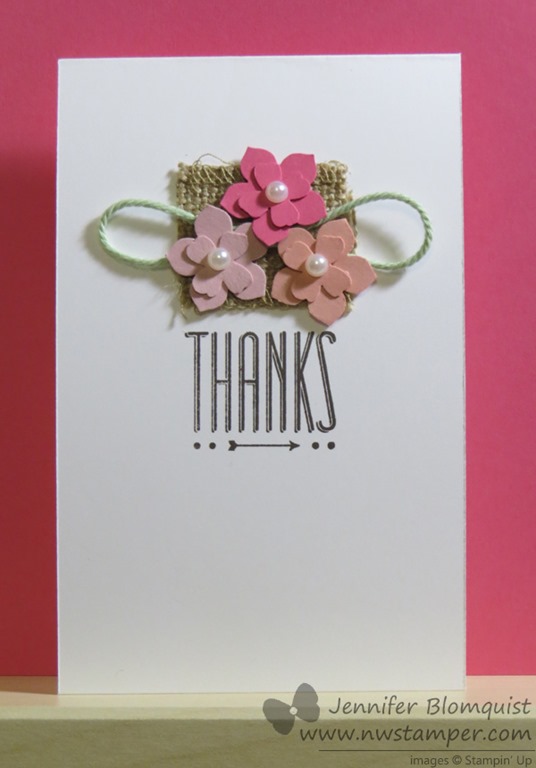
- The Striped Scallop Thinlit makes a beautiful background, especially when you use it to die cut glimmer paper – like this Dazzling Diamonds glimmer paper.
- Make it easy and NOT MESSY to glue your scalloped background by using the 2-Way Glue pen to draw glue on the backside of the thin cut image. I LOVE using this glue for all of my thin cut dies like words or butterflies!
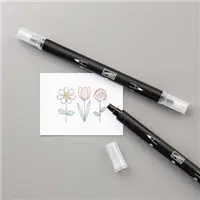
- The I Like You stamp set is one of those full of images that is perfect for coloring! I colored this using Blendabilities, but you could also color with your Aqua Pen or your Blender Pens for similar pretty effects.
 Tip – This stamp set is a hostess exclusive set – which means you need to either host a party (online or in person) or place a personal order of $150 or more. There is still time to earn this for free, so let me know how I can help! Plus, hostess benefits are changing with the new catalog in June so consider doing your order now and get a little bit more for your $150 order!
 - Break up your background with a strip of white cardstock stamped with your sentiment, like this Thanks from the Hip Notes stamp set.
Have fun using your stamps and picking one to color or highlight with a pop of color!

I’ll be back with more fond farewells and starting next week some fun new goodies to share!
Need a new catalog? Let me know! If you’ve placed $50 in orders with me in the last 6 months, yours will be on your way starting late next week. If you haven’t ordered, you can do so in my online store
- Check out 50% off retiring items!
- 25% off weekly deals!
- Up to 80% off clearance rack finds!
Or fill out my form here – New Catalog Request Form – and after I hand out catalogs to customers and Stamp Club members, I’ll start sending them out based on the request list!
![NWstamper signature_thumb[9]](https://i0.wp.com/www.nwstamper.com/wp-content/uploads/ad87b4046c1e_C9F6/NWstamper-signature_thumb9.png "NWstamper signature_thumb[9]")
Project Supplies Used:
Easy shopping anytime! Click the images below to see the item in the online store.


Built for Free Using: My Stampin Blog


 Welcome to the Fun n’ Crafty Blog Hop for June! I’ve been seeing the amazing talent of the folks in my Fun n’ Crafty group of demonstrators and I thought it would be fun for us to start a monthly hop to showcase everyone’s work and give you lots of ideas around different themes.


 Stampin’ Up Supplies Used
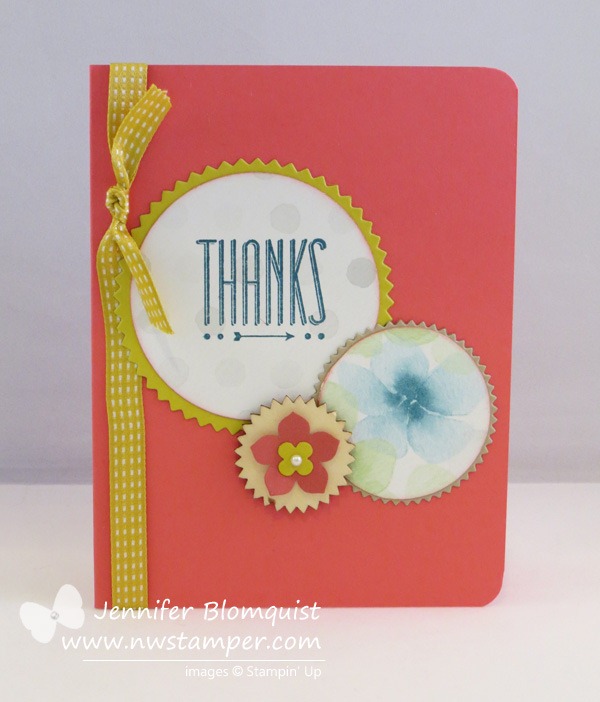


