Northwest Stamper

Tag: halloween

  • Quick and Easy Halloween Treat Bags – Fun n’ Crafty Blog Hop

    Quick and Easy Halloween Treat Bags – Fun n’ Crafty Blog Hop

    Fun n Crafty Blog Hop Team Badge

    I’m so excited to be getting back to blogging and get started by sharing a fun and EASY project ideas as part of the Fun n’ Crafty Stampers Blog Hop this month!  Though I haven’t been blogging for a while, I have been doing lots of creating for my local classes, retreat, and demonstrator training event – all of which have taken place in the last month or so.  So, when it was time for a blog hop with the theme Fall and Halloween, it was the perfect kick off to get back into sharing here with you!

    Easy Halloween Treat Bag using Gusseted Bags!

    Now, I know some people are big Halloween people and make and send Halloween cards… and if that is you, I think that is awesome!  For me, I love to make Halloween cards and projects, but the ones that seem to actually get the most use turn out to be anything that involves candy.  Because who doesn’t love getting candy, especially when it is wrapped up all cute!

    So, I came across this idea from Patty Bennett for using designer paper inside one of Stampin’ Up’s 3″x6″ Gusseted Bags to create an easy treat bag and I just had to create my own version!AScored Spooky Night designer paper in a 3"x6" gusseted bag from Stampin' Up

    All you have to do is :

    1. cut a 2 7/8″ strip of your favorite designer paper to 7″
    2. score at 1″ from the top
    3. Slide the patterned paper into the bag (make sure it is tucked into the back gusset)
    4. add your treats
    5. and fold over at the score line to seal things up!

    I recommend sealing it closed by either using some Fast Fuse adhesive or simple stapling the flap down. Once you have your treats safely tucked away – and didn’t I tell you that this was a super quick and easy project – you can decorate the front as much or as little as you want.Spooky Cat Halloween Treat Tag using Everyday Label Punch
    I grabbed the new Spooky Cat stamp set and stamped the spiderweb treat tag onto a piece of scrap Very Vanilla cardstock.  Then I added the Happy Halloween sentiment (also from the same stamp set) in contrasting Pumpkin Pie ink.

    Now the best part is that this tag image, stamps out PERFECTLY using the Everyday Label punch!   Then you can just add some black rhinestones on each side for a fun tag.  I also wanted to use some of the Vintage Crochet Trim for a little fun behind it.  I just taped the ribbon to the back of the tag before adhering it to the front of the bag.

    Quick and Easy Halloween gusseted treat bag with Spooky Night paper

    These treat bags are perfect for parties or handing out to friends and co-workers

    Quick, easy, and cost effective too!  The gusseted bags are only $4.50 for 25 bags!  Plus, you can get up to 48 pieces of the right size patterned paper from one pack of designer paper!  So, one pack of patterned paper, one set of bags, and some candy and you are set for a party worth of trick or treaters!

    Check out more great ideas in the Fun n’ Crafty Group Blog Hop

    Thanks for checking out my project and taking part in our blog hop! If you want to try this at home – and I encourage you to do so – card dimensions and supplies are listed for you at the bottom of this post.

    There are more amazing ideas and inspiration you don’t want to miss. If you just started, make sure to hop back and check out the cute creations by Merit and then continue on to Susan’s blog.
    *** Please leave a comment at the end of this post and on the blog hop stops, and let us know what you think!***

    1. Tobe – The Craft Sea
    2. Christine – Artful Musings
    3. Merit – MB Squared Designs
    4. Jennifer – NW Stamper<—YOU ARE HERE
    5. Susan – Stampin’ By the SF Bay

    Fun N Crafty Blog Hop - Visit Previous Blog
    Fun N Crafty Blog Hop - Visit Next Blog

    Make this project at home! Here is what you’ll need:

    • Spooky Night designer paper (potions) – 2 7/8″ x 7″, scored at 1″
    • Very Vanilla cardstock – scraps to punch out the Everyday Label punch
    • Vintage Crochet Trim – 8″


    Supply List

  • A Howl-o-Ween Trick or Treat Bag

    My kids are so excited that Halloween is just a day away – and after some last minute Halloween candy shopping, I think we are all ready to go!  Now if you are looking for something fun to do for your Halloween party or favorite trick or treaters, I thought I would share this little goodie bag I put together using the fun Howl-o-Ween bundle with my oh so favorite adorable owl!

    A few runs through the Big Shot and this comes together really easily.  Here are some Tips for making this bag:

    • Make life easy on yourself and start with the Kraft Tag-a-Bag gift bags.  They are packs of 10 ready-to-go bags that are food safe for only $3.50.  Perfect for stamping or embellishing!
    • Pick your highlighted element – the star of the bag if you will… for mine, it was the owl from the Howl-o-Ween Treat stamp set & bundle:image
    • I stamped the “treat” from the “trick or treat” sentiment onto a piece of scrap cardstock and then sponged it with Delightful Dijon ink.  Rip the ends of the white strip for a more interesting “rough edge” look before sponging!
    • Then stamp your owl and cut him out using the matching framelit.  Gotta love things that make it easy to cut out!  Now, the one thing you will notice once you do that is that when you layer your sentiment over your owl, his feet are covered up!  Now that is no good!  But it is an easy fix!Do a little surgery on your owl by cutting him in half along the top of his tummy stripes.  Then glue him to the back of your sentiment so that his arms are holding the sign and his feet are sticking out the bottom! 
    • And do you see his eyes?  How fun are those?!  Just take the White Perfect Accents and place one on top of each of his eyes, then color in the centers with a black sharpie.  Easy, almost-googlie eyes in seconds!
    • My owl needed a fun hat too… so back to the Howl-o-ween stamp set I went, and stamped the hat in Rich Razzleberry and then added some fun accents by adding Black Glimmer paper stars over the white stars!How did I get those stars you ask?  Just grab your Star confetti punch and a scrap of Black Glimmer paper and punch away! Pick up a few of the confetti pieces and glue down using the Fine Tip Glue pen or your favorite liquid glue.

      image
    • Finally layer everything down on your treat bag including some strips of your favorite patterned papers.  I used the In Color Envelope Paper in Delightful Dijon to add some stripes, then a tiny strip of Black Glimmer Paper covered by a piece of the Into the Woods Razzleberry ribbon.  Seriously people! This ribbon is so yummy to work with!!
    • Stamp the rest of the “Trick or” above your striped paper, add some extra confetti stars, and of course the Jack-o-lantern from the Howl-o-Ween bundle for our owl to collect his treats in! Smile 

    And if you don’t have this stamp set yet… it is still worth the add!  I know I’ll be using it for scrapbook pages since all the images are a really good size for layouts.  Plus, I’ve already seen some fun ideas that I’m going to start playing with for using the owl and hat die for Christmas and even Thanksgiving pilgrims!  So stay tuned for that!

    Reminder – Holly Jolly Christmas Card Kits are going out this weekend!  Is yours?

    Just a quick reminder that those of you who have told me you were planning on ordering your kit, don’t forget to sign up today so I can get your kit out with the rest that are going out this weekend!

    You have a few options too – kit w/ stamp set, just the kit, pdf instructions only.  So pick your favorite and RSVP now.
    NWstamper signature_thumb[9]

    order online button for sig 3_thumb[4]

    use Hostess Code FHRCKER7 to get a special thank you from me!

  • Stampin’ Up Convention 2015–Day 1

    Stampin’ Up Convention 2015–Day 1

    ——————————-

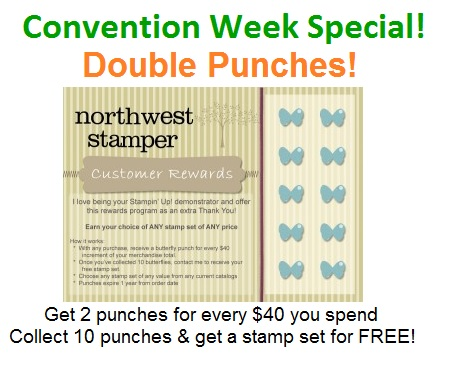
    double punchesWhile I’m away you can play and earn free stamps twice as fast!
    Get double punches on your Northwest Stamper Rewards card all week
    when you shop with me online or email me.

    ——————————

    What a busy but great first day here at Convention!  It was all about NEW and the NEW Holiday Catalog!  From the very first session as they revealed the upcoming catalog to fun throughout the day as we learned, stamped, and got new ideas based on some the great stuff coming out in September.

    So here is your daily recap!

    We started out by checking out the Convention Center and getting the CUTE convention bag this year.  I think it is my favorite yet!

    2015-07-23 08.45.48

    As we were waiting in line, we spotted one of the staff in the blinky sparkly outfits which meant if we said hello and played his game (name the cardstock color) we won prizes!

    2015-07-23 09.24.36

    Of course we rocked it… most of the gals got logo travel purses/badge holders – which they were really excited about, and a few of us got ribbon spools. WINNING!

    2015-07-23 09.28.28

    And btw – doesn’t everyone look great in our team shirts?  This is our Fun n’ Crafty  crew representing at Convention! The bright blue clumps of people made it SOOO much easier to find each other Smile

    2015-07-23 17.19.18-2

    Finally we were let in and we got to see main stage.  Seriously people, the décor is so fab this year!

    2015-07-23 11.46.35

    They started out with the “Daily Share” which essentially was a 2 hour long new holiday catalog reveal party led by Bonnie Farley, Brian Piling, and Carrie Cudney

    IMG_0371

    I will say though, one of my favorite little clips was of Brian aka “Quick and Easy” trying to go out on the streets with a Quick and Easy Card Project on a cart randomly asking people if they wanted to make a quick project with him.  I’ll say, that man has way more guts than me! Smile

    2015-07-23 10.29.35

    2015-07-23 10.31.34

    Different this year was that most of the catalog reveal was showing a completed project or two as someone talked about their favorite new item in the catalog or how they would share the catalog with others.  So, mostly, lots of photo ops of cute new stuff.

    Like new stamps, red pom pom trim, new festive buttons…. 

    2015-07-23 10.42.40-2

    New specialty designer papers, new word thinlit dies!!!

    IMG_0376

    And even more dies!  Many of the new stamp sets in the catalog now have coordinating dies so you can easily cut out and create neat layered projects.

    There is also a new Precision Plate for the Big Shot that they say will help you eliminate the need for wax paper with your intricate dies.  GREAT concept!  I get to play with it today so I’ll keep you posted on what I discover after playing with it.

    2015-07-23 10.55.16

    Who loves this die?!

    2015-07-23 10.55.32

    And finally we got our copy of the holiday catalog too!

    2015-07-23 13.56.52

    Here is a better picture, with the more important part in focus Winking smile

    2015-07-23 14.07.58-2

    Then it was time to head to lunch, classes, and the Gathering Place where there were lots of samples and all the products in the Holiday Catalog on display for us to check out.

    Kicked off the party with the Interim CEO Sara Douglas

    2015-07-23 12.07.33

    Even the décor for some of the Make & Takes put you in the festive spirit

    2015-07-23 16.10.49

    PSST – Those deer are from some of our upcoming designer paper!  Love the vintage!

    2015-07-23 15.36.43

    More vintage sneak peeks with this cute tag we made – check out the striped satin ribbon, the santa cut out from patterned paper, and the Pointsettia button!

    2015-07-23 16.06.52

    Then it was back to the Gathering Place for more relaxing and checking out boards.

    IMG_0394

    This is the stamp set and matching framelit that I HAVE TO HAVE!  This WILL be coming to my house in August when I can preorder it. Smile 

    2015-07-23 16.21.32

    New kits were out…totally doing these shaker cards as a class!

    IMG_0397

    And lots more:

    IMG_0402

    foo

    IMG_0413

    foo

    IMG_0430

    foo

    IMG_0436

    Finally it was time to grab some dinner and then get gussied up for Awards Night and the Roaring 20’s after party.  Monica Van Tassel from our Fun n’ Crafty group was extra crafty and MADE us all feather headbands to wear.  How fun is that??

    2015-07-23 18.50.47

    They kicked off the party with a neat dance show by some local dancers

    IMG_0446

    Then Sara got things started recognizing so many demonstrators for their outstanding achievement this last year.  Let me just say, a lot of people had AMAZING years!

    IMG_0459

    Then it was time to party!

    2015-07-23 23.31.07

    2015-07-23 23.00.35

    They had food, a live band, and event dance lessons.  Of course, Mom, Beatie, and I had to arrive in style Smile

    IMG_0465

    IMG_0467

    IMG_0472

    IMG_0474

    Then we headed back to our hotel where Liz had brought some wine so we had late night happy hour in her room.  So, more fun socializing and discussing our have-to-haves from the upcoming catalog and preorder!

    2015-07-23 22.44.36

    2015-07-23 22.08.52

    2015-07-23 22.09.04

    All in all, a great day!  Make all the better by the wonderful people I was with!  Now off to get going for Day 2! 

    I’ll see you over on Facebook for more real time updates throughout the day!

    NWstamper signature_thumb[9]

    order online button for sig 3_thumb[4]

  • Free Paper Promotion ends Tomorrow! Plus some Not-So-Scary Ghost Cards

    Reminder!  Tomorrow is the LAST DAY to take advantage of the free paper promotion! 
    Get $125 in your favorite craft supplies for only $99 and get free shipping on that order plus a pack of paper a month added to your orders for FREE for the next 6 months!  It’s a great deal and awesome way to get a great deal on your wishlist and get in some holiday shopping for friends and family at a discount too!

    free paper promotion

    So, I know Halloween is tomorrow, but I had a few more not-so-spooky cards that I wanted to share to help get us in the mood.  (Because I know the stores are already switching over to Christmas mode, so we have to help each other keep the Halloween fun going until tomorrow night, right? Smile)

    This was the card I created for my Fun n’ Crafty stampers Stamp & Share event I ran earlier this fall.  The Stamp & Share is our event we hold a few times a year to come together and share ideas, new stamping techniques, business tips, and of course, stamp together!  So much fun!  Anyway, I wanted to use the Fall Fest stamp set and framelits for our make & takes and so I knew I wanted to do something with that adorable ghost.

    Tips for making this card:

    • Turns out, he looks AWESOME when you stamp the ghost with versamark onto Basic Black cardstock and then heat emboss with white embossing powder!  Then just die cut out your ghost and he is perfect! 
    • Added some of the same ghost stamped in Smoky Slate onto the Lost Lagoon cardstock for his fellow ghost buddies.
    • Use the Holiday Invitation stamp set for those cute bats and the Be Scary sentiment for a finishing touch
    • Save with bundles!  This card uses a lot of the new 2014 in Color cardstock – get a little bit of all the colors without breaking the bank in the Family Pack of cardstock – or get the In Color ink pads and get the cardstock free with the In Color bundle!  Plus save 15% on the Fall Fest stamp set and framelits when you buy them at the same time in their bundle too!

    Now, I thought I’d also share a card that was my first attempt at this general card idea.  I decided it didn’t quite work the way I wanted so I came up with the version above.  But I thought I’d share it in case it gives you some other inspiration.

    The main difference is that I stamped the ghost onto the Lost Lagoon cardstock and then cut him out and glued the die cut onto the other part of the Lost Lagoon cardstock.  Then in the hole that was cut out, I stamped the ghost directly onto the cardbase and glued the Lost Lagoon cardstock over the top.  Clear as mud?

    Hopefully that picture helps. Smile  So, enjoy the next couple days of haunting and if you have any questions about the details of being a demonstrator or joining my team, I’d love to chat with you!  Email me at jennifer@nwstamper.com and we’ll chat!

    NWstamper signature_thumb[9]

    order online button for sig 3_thumb[4]

    Card Supplies Used:
    (if you are reading this in email, click here to see the list of supplies)

  • Final Thank You Thursday 1-Day Sale!

    Happy Halloween everyone! I hope you’ve been having a great October and if you celebrate Halloween are all ready for it!  Today is the LAST THANK YOU THURSDAY and so check out the fun ribbon deals below!

    I also thought I’d share what kept me busy last night…. we finally got around to carving the pumpkin we picked up from the pumpkin patch!

    Nicholas knew exactly what image he wanted to draw and so he helped me design our “mad face” pumpkin.  I even let him do a little carving with the itty-bitty-careful you don’t bent it-carving knife. 2013-10-30 19.58.56

    And while Caitlin didn’t care much about carving the pumpkin, she thought it was cool after the candle was in!

    2013-10-30 20.20.52

    So, that took a lot of my evening, so I’ll be back a little bit later this morning to share some CUTE halloween swaps I received at Founder’s Circle (since I totally forgot to photo graph them last night).

    In the meantime, don’t miss today’s LAST THANK YOU THURSDAY!

    Basic Black 3/4″ Chevron Ribbon
    Item # 130010

    Regular Price: $8.95 /Discounted Price: $6.71
    Calypso Coral 3/4″ Chevron Ribbon
    Item #130018

    Regular Price: $8.95 / Discounted Price: $6.71
    Crushed Curry 3/4″ Chevron Ribbon
    Item # 130019

    Regular Price: $8.95 / Discounted Price: $6.71
    Island Indigo 3/4″ Chevron Ribbon
    Item # 131151

    Regular Price: $8.95 / Discounted Price: $6.71


    I’ll be putting in a group order tonight if you would like some of this ribbon and want to save a bit on shipping!


    Email me at jennifer@nwstamper.com or give me a call if you want in on this deal!


    Smoky Slate 3/4″ Chevron Ribbon
    Item # 131152

    Regular Price: $8.95 / Discounted Price: $6.71
     

    Shop online to grab these deals and combine them with this weeks Weekly Deals!

    Surprising to me, out of all the colors of the Chevron Ribbon (and I have them all) I’ve almost completely run out of the Calypso Coral!  I didn’t expect to love this color but turns out I do!

    Here are some samples that I’ve created

    spaced shop now sig bar

  • Happy Halloween! Plus some tips for your Artist’s Tray

    Halloween is finally here and while I didn’t get all of the projects I meant to get done for Halloween, I did have some fun this weekend getting ready with the kids.  I love the fun crafts and activities that go with the holiday season.  In this case, carving pumpkins, painting little pumpkins,IMAG0631


    or in Caitlin’s case, trying to eat the paint for painting pumpkins! 🙂

    IMAG0630


    But I also thought I would share my Halloween craft project, too.  This is the Halloween Artist’s Tray project that Stampin’ Up! offered as part of a promotion when you joined Stampin’ Up! (or had someone join your group during the promo period).  It was way cuter in person than I expected and I got some friends together to make it.

    Halloween Printer's Tray


    Artist Tray Tips:

    I thought I would share some tips that I discovered while making the tray, in case you have this project at home still to make or you want to make something similar!

    • I adhered all of my inserts to my tray using slim velcro dots.  This was to make it easier to pull out and replace the inserts with a different holiday or design so I can use this tray year round.  Then I can reuse the inserts each year. In this picture, I took a slim velcro dot and cut it in half so it would hold the top and the bottom of the paper down.  The easiest way to apply your velcro is to stick both sides of the velcro together and put them into the tray.  You’ll have adhesive exposed, and then you can just press your paper into the space and know your velcro will be lined up.


      Halloween Printer's Tray close up

    • Use a stamp-a-ma-jig and grid paper if you care about precision in lining up your images (like the gravestone images in the bottom left space).  I positioned my paper in the center of the grid paper, so my paper was always lined up the same way and used the stamp-a-ma-jig to make sure I was stamping the same depth in each time.
    • When making your rosettes, use hot glue to hold them together.  If you use the silicone mat, it is SUPER EASY and NO MESS!!  I’m serious, I was a little afraid of my hot glue gun but the mat made it so easy and I LOVE it! 
    • And one more rosette tip, if you have to make a half rosette (like the orange one in the bottom right), you will have to hold it in a half circle shape and add lots of glue.  Make sure you squeeze the center together tightly!  I didn’t and my rosette was too big. Oops!
    • The project called for a bow in the Striped Satin ribbon near the polka dot designer series paper.  Normally I don’t have a problem with bows…. um, this time…. I couldn’t make a nice bow no matter what I did!  So, if it doesn’t work for you, chuck it!  You don’t need a bow for a cute project. 🙂
    • Ok, last tip – When you hang your banners from the top of the tray handle and adhere to the back of the tray, your banners may or may not hang how you like.  I ended up using a glue dot to hold the middle banner in place on one of the tray lips so I knew it would hang how I like.

    Alright, so those are my tips for now.  I’ll be making more inserts and can’t wait to share them with you in the future.  If there is interest, I’ll put together some kits for you to make your own as well!


    But until, then, have a very Happy and Safe Halloween!  From me and my monsters, to you. 🙂

    IMAG0600_BURST001IMAG0606

    To Order Stampin’ Up! Products Anytime, click here!

    Check out the 2012 Holiday Catalog

    Are you earning your Northwest Stamper Rewards? Every order gets you closer to your FREE stamp set! Click here to learn more!

  • Jack-o-Lantern Gift Card Holder

    As I was thinking about projects for the Halloween Punch Art Blog Hop, I came up with this idea in my head for an interactive Jack-o-Lantern.  I had ideas for making it hold a gift card and some other stuff, but when I sat down to make it, it just wasn’t coming together.  Finally today I got some more time with it and this is what I came up with:

    He may look small in the picture, but he is actually made using the Scallop Oval Bigz Die for the BigShot.  I think he is about 5”x4.5” or something like that.  But you see the scallop cut at the top of the pumpkin?  That’s because…. Surprise!  He’s a gift card holder.

    I wanted this to be a stand alone card/project but at first I had a hard time making it work.  I even have a card base all ready to adhere him to; but after I had the sticky strip in place, I was inspired to try one more time to make him all pumpkin.  So, 3 more ovals later….

    This entire card was made using punches and BigShot dies.  Once I had the design down, it was really easy to make and fun too.  The gift card rectangle part actually slides into and out of the pumpkin, so when you have the gift card in place, it just looks like a pumpkin front and back.  So, something a little different, but a lot of fun.

    Funny side note – I don’t actually have the scallop oval Bigz die, so I made this guy by tracing the oval from a swap I had received and then using that to trace and hand cut out 6 ovals!  What we do for the love of our craft. 🙂

    Punches used –
    Bigz die (Scallop oval), Large Star punch (eyes & nose), 1/2” circle punch (eyes),  Large Oval punch & Wide Oval punch (mouth), Modern Label (stem), Corner Rounder (gift card holder), Slit punch (gift card holder), 3’/4” circle (spider), Curly Label punch (spider legs)

    Want the tutorial?
    I have had numerous requests for the instructions and so I’ve created a full tutorial with step-by-step instructions and photos for each step.  The 14 page, full-color pdf will be emailed to you for only $1.95.


    In the San Francisco Bay Area? I’d love to stamp with you!  Check out my calendar of events at http://nwstamper.stampinup.net/events or drop me a line to schedule a time for your own personal crafting time!

  • Halloween Punch Art blog hop

    Man, can you believe the stores are already putting out their Halloween decorations and candy?  I guess that means the holiday season is creeping up on us.  But that also means fun holiday projects like a ton of fabulous Halloween Punch art.  I’m participating in a blog hop with 13 other extremely creative folks.  I had a ton of ideas and they are mostly half done on my craft table.  So, while I work on figuring out what to do with my little creatures on the table, here is a quick card I created after being inspired by a skull image I saw online.

    I have to say that Mr Bones here  looks even cuter in real life. 🙂 I made his head by punching out a 1 3/4″ circle and then using the word window punch to cut out the sides of his face for cheeks.  I used a few different circle punches to get his eyes and the small heart from the Heart to Heart punch to make his nose.  His jaw is made using the wide oval punch.  You punch out an oval from white cardstock and then punch the center of the oval out using the wide oval punch again.  His bow tie is the modern label punch that I trimmed in the top and bottom to make the bow tie shape and then added some additional circles for the knot.  Kinda snazzy, huh?  I love what a few basic punches can do!

    Check out these other amazing projects that folks have posted for you today.

    Paper Punch Addiction
    Blinkin’ Thinkin’ & Inkin’
    It’s A Stamp Thing
    Kelli’s Korner
    Northwest Stamper
    Ink Paper Stamps
    Gwen’s Paper Expressions
    Stamping My Life Away
    Gettin’ Crafty
    Krafty Kate’s Kupboard
    Brenda’s Stamping Corner
    Beth-a-Palooza
    Bonnie’s Creative Place
    Craft Chaos
    Stamping with Heather


    Mr Bones Recipe:
    Stamps: Teeny Tiny Wishes
    Ink: Rich Razzleberry
    Paper: Basic Black CS, Whisper White CS, Rich Razzleberry CS, Old Olive CS, Wicked Fun DSP
    Accessories: 1 3/4″ circle punch (head), wide oval punch (jaw), 1/2″ circle punch (black eye, razzleberry bow tie), itty bitty shapes punches circle (white eye,black bow tie), crop-a-dile 3/16″ punch (sm black eye), Heart to Heart punch (nose), Modern label punch (bow tie), word window punch (sentiment, cheeks cut out), Stampin’ Dimentionals