Northwest Stamper

Tag: greenhouse gala

  • A Curly Cute Congratulations

    So, to continue the celebratory mood, I thought I would post a fun little Congratulations card.  I actually made this card while traveling in Portland and so I was limited to mostly scraps and a small amount of supplies I had on hand.  However, having limited resources can sometimes bring out some cool combinations you wouldn’t have thought of before.

    For example, in this card, I wanted a hint of color and had some scraps of the Elegant Soiree DSP and the Greenhouse Gala DSP.  Mix them together and you get a neat collage of patterns.  Plus, they were mellow enough colors that I thought they would do well to accent a piece of Elegant Eggplant cardstock for the base (oohh… did you see what I did there?  Elegant Soiree and Elegant Eggplant!  Ok, yeah, that was totally accidental, but I’ll still call it fate.)  🙂

    I added some adhesive backed pearls to the corners for a little extra flair and finished it off with a box from Old Olive satin ribbon.  And let me just say, this is the easiest bow you will ever make! 

    To make the bow:
    Cut one length of ribbon and adhere the ends together making a loop.  Then, cut a second piece of the ribbon and wrap it around your first loop, adhering the ends of that second piece together to make the cinch in the middle of your box.  Stick to your card with glue dots and you’re done!  No tying required!

  • Square Card Challenge – LNS challenge #92

    I earned the hostess set Northern Hearts recently and was excited that it matched my Northern Trim letterpress die.  So, its funny that the first card I created with it ended up having nothing to do with the matching die, even though I had finished scraps from the right die lying around.  Oh well, this let me play with my other item I just had to have, but hadn’t used yet – the big buttons from the holiday mini.

    I used markers to color the stamp set and then added one of the biggest buttons in the pack!

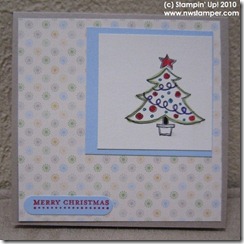
    I can’t decide if this is a Christmas/holiday card or not.  What do you think?  Would you send this as a Christmas card?

    Northern Heart Birds Recipe:
    Stamps:
    Northern Hearts
    Ink: Cherry Cobbler marker, Pear Pizzazz marker, Blushing Bride marker
    Paper: Crumb Cake CS, Very Vanilla CS, Greenhouse Gala dsp
    Accessories: Paper piercer, Candy Cane Big Designer Buttons

  • Thanks Joy Fold Card

    Tonight was another fun technique night with my meetup group and we spent the night creating three different “fancy fold” cards.  Specifically, we made a Joy Fold card, a Gate Fold card, and an Easel card.  Here is the first card we created –

    IMG_1563 (3) (800x568)

    This is a Joy Fold card.   That means, instead of the typical folded in half card, you use two pieces of card stock to create your fold.  Here is what it looks like when open:

    IMG_1562 (800x779)

    This is actually a very easy card to create.  Here are the dimensions to create this card yourself:

    1. Cut your base cardstock (in my card it is Poppy Parade) 4 1/4” x 8 1/2”.  Score at 5 1/2”.
    2. Cut one piece of DSP at 4” x 5 1/4” (the Greenhouse Gala blue flower paper above)
    3. Cut a second piece of DSP at 4” x 2 3/4” (the Greenhouse Gala green flower paper above)
    4. Cut your inner cardstock piece at 3” x 8” (I used Daffodil Delight).  Score at 4”.
    5. Adhere your DSP, then position the base cardstock piece in the center of your large DSP.
    6. Decorate your inner cardstock as you wish.  We stamped the ala carte So Many Thanks stamp on a piece of Whisper White paper and then sponged the edge with Daffodil Delight.
    7. Use a punched or cut element to hold down the corner of your inner cardstock on the outside flap.  I used dimensionals on the heart from the Heart to Heart punch out to make a pocket for the corner of the cardstock to fit into.

    These are fun cards to create and gives you a chance to be creative as you play with color combinations of cardstock and different designer paper patterns.  What are your favorite combinations?

  • World Card Making Day Projects–Part 2

    Like I mentioned earlier this week, at my World Card Making Day event, I brought supplies for everyone to make cards based on two different layouts.  I shared the first layout in a previous post and so I thought I would share the second layout today.

    So, here is the card that I made as a sample:

    It is a super quick and easy card and it lets you feel like you are an artist (even if you are like me and can’t paint or draw worth anything Smile) by giving you space to color using markers and/or water coloring.

    So, given those card components, here are some of the cute creations the other folks came up with:

    Karolina’s cards

    Pam’s card –
    this is another example of why I love it when folks take my samples and do their own thing.  I love how she tucked the sentiment label between the designer paper layer and the scalloped edge.  It’s a different way of layering I probably wouldn’t have thought of on my own.

    Card Recipes:
    Stamps: Fun and Fast Notes, Teeny Tiny Wishes
    Paper: Real Red CS, Basic Gray CS, Crumb Cake CS, Bashful Blue CS, Greenhouse Gala DSP, Celebrations DSP
    Ink: Basic Black, Pacific Point, Stampin’ Write markers
    Accessories: Scallop edge punch, Scallop trim punch, Word Window punch, Modern Label punch, Blender pens, Watercolor pen


    Want project outlines, technique details, and the latest promotions and deals information delivered to your inbox?

    I’m getting ready to send out my monthly newsletter for October and would love to share these ideas with you.  Sign up today and you’ll be all set to receive this month’s newsletter filled with fun ideas for the upcoming holidays.

  • World Card Making Day fun

    I meant to get this post up sooner but my camera suddenly did not want to talk to my computer and so the photos were in limbo for a while.  Thankfully, after much massaging, sweet talking, and cajoling, my camera finally decided to let me pull off the pictures. Smile 

    Did you do something fun for World Card Making Day this last Saturday?

    I met with some folks to create some cards to donate to Operation Write Home and send our cards out to the troops overseas.  We ended up with a small group, but it was still a very fun group and we enjoyed hanging out for a couple hours and just letting our creative sides loose.

    This was the first to two cards I designed for the day.  However, instead of cutting all the same paper for everyone, I cut a bunch of different color cardstock and designer series paper in the dimensions needed for the cards.  Then everyone could use the same basic design but get creative on color combinations, stamps, and even the layout.  I have to say, I got some new fun ideas from what everyone made.

    So from that, folks mixed and match and came up with some fun variations on this card.  Here are some examples of what folks did using the same dimensions of base layers:

    Bethani’s Cards   

    Karolina’s Cards

    Pam’s Christmas Card

    Kind of neat how the same idea could be used in different ways?  Later this week, I’ll share the other designs we made on Saturday. 

    What did you make on World Card Making Day?  Leave me a comment and share what you did!