Northwest Stamper

Tag: gold ink

  • Butterfly Basics Bokeh CASE–a Pretty Purple Card!

    I’m back with another Bokeh card for you.  I’ll keep it quick since I shared how to do the Bokeh technique with you a couple times already.  But I do love how this card came together.

    This card was a CASE of a card by Monica Davis that I loved and had to play with for my Bokeh technique class.

    Tips for making this card:

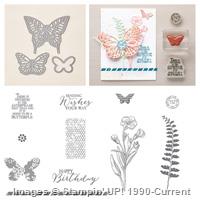
    • Rely on bundles to make the supply needs for a card quick and easy to pull together!
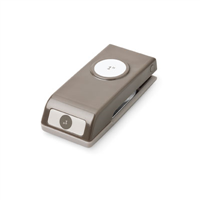
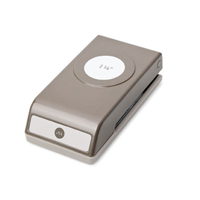
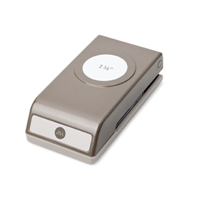
    • I stuck with just using the Butterfly Basics Bundle (the Butterfly Basics stamp set and the Butterfly Thinlits) and then a few purples for my inks.   Seriously, you cannot go wrong with this stamp set!  It is one of those, “any way you layer it” and “any combinations of stamps” they always seem to come out looking great!
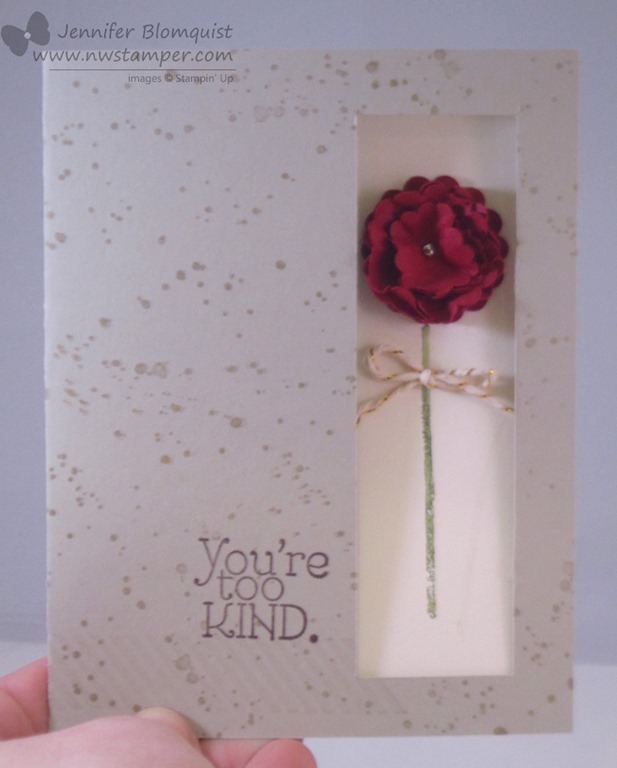
    • I also had fun expirimenting with stamping first before you do the white circles (like with the Rich Razzleberry leaf) and stamping after you do the white circles (like the Memento Black Sending Wishes Your Way sentiment).  Pick if you want it soft (under) or strong (over) and go from there.
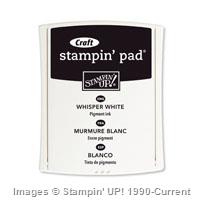
    • Sometimes plain white paper is exactly what you need!  With the darker colors of the background, the Whisper White butterfly needs no embellishment to stand out just enough!
    • Layer a piece of Vellum just to add a subtle contrast under your butterfly without being distracting.

    • In this card I just used my 2-Way glue pen to only adhere the butterfly in the center so the wings pop up and float free.  Similarly I only adhered my vellum to the card underneath the center of the butterfly.  I know it means the vellum doesn’t sit quite flat at the ends, but it looked nicer than seeing the adhesive show through on the ends of the paper! Smile
    • Want a reminder for how to do the Bokeh Technique, you can check it out

    If you want a reminder how to do the Bokeh Technique, you can check out my first Bokeh blog post or watch my Walkthrough Wednesday card with Watercolor Wash and Bokeh technique video!

    Did you sign up for the Sprinkles of Life class by mail yet?

    I realized that when I sent out my email about this class to my newsletter list (along with my June Customer Coupon – missed it?  Get on my mailing list here) that the link to sign up wasn’t working.  Oops!  So if you wanted to get a kit for this class, I’m ordering supplies for everyone who signed up so far TONIGHT and would love to get some sent your way too. 

    Sign up using the paypal buttons on the registration page here

    NWstamper signature_thumb[9]

    order online button for sig 3_thumb[4]

    Project Supplies Used:

  • Sharing Thanksgiving Memories with the Happiness Is Project Life Kit

    Yesterday was National Scrapbooking Day and while I normally like to celebrate by actually trying to catch up on some scrapbooking pages, this year I opted for some family time as my husband and I had both returned from business trips on Friday.  The kids had been with Grandma and so it was our turn to hang out and have fun with them. Smile

    But I did have the honor of getting to create a couple layouts using the Happiness Is kit for Stampin’ Up’s National Scrapbooking Day blog post and they were posted for you to see this weekend!  I’ll admit I got a little school girl excited when I saw my name in print on their blog.  Though, I discovered that the photos they shared were TINY!  So, since one of the coolest things about Project Life is how easy it is to add a little pizzazz to your quick and easy pages, I thought I’d share some up close photos of the details of my layout with you today.

    Happiness is Project Life 2 page layout ver 3

    Bear with me, I’m still trying to figure out the best way to photograph my layouts.  But the thing I love about Project Life is how easy it can be to put together layouts.  I grab a card kit & the matching accessory kit (seriously, this is the BEST THING EVER!) and lay them out on my table and just go.

    Happiness is accessory pack

    1. Pick a few photos you love
    2. Print them out wherever is most convenient for you
    3. Slide them into pocket pages (look! almost done!)
    4. Pick a Project Life card kit & matching Accessory pack

      image
    5. Grab some matching cards and write what is happening in the pictures – add embellishments if desired
    6. Put in your album and you are done!

    Here are a few of my favorite things about this layout:

    • Layer 3×4 cards onto 4×6 cards with Washi Tape (it’s included in your accessory pack!) for a quick title card.  I just had to add the year numbers (also in the accessory pack) and write in the dates!Happiness is project life embellished layout title card close up
    • Don’t feel like every card has to have writing on it! Sometimes just a couple embellishments or even just the way it is printed is perfect.
    • Bust out your “fancy” techniques like layering vellum over a 3×4 card and heat embossing the sentiment (in this case the “love” from the So You stamp set)Happiness is project life embellished layout right close up
    • Don’t forget you can stamp on your photos too!  It was hard to photograph, but I stamped the sun image on the bottom photo with the Metallic Gold ink and it was the perfect touch!Happiness is project life stamping on photos
    • The Happiness Is kit also comes with these little wood accents that are laser etched with images and words.

    Happiness is accessory pack wood embellishments

    A fun little bonus for your layout… especially with that adorable face, am I right?
    Happiness is accessory pack wood embellishment close up

    • I also liked taking multiple stamps and putting them on my clear block at the same time – like these hearts (also from the So You stamp set).   They are two separate stamps but I wanted to use them together. Position on your card, press onto the block, and then ink and stamp!
       So You stamps with Project Life on a journaling card So You stamps with Project Life

    So this layout had a lot of little touches and accents, but it took me way less time than a traditional scrapbook layout and still has all the personal & handmade touches.

    If you have photos on your computer, in your phone, printed out and sitting in those photo envelopes from the printer – why not give this a try?  Get those photos out where everyone can enjoy them and you don’t need a craft room of supplies to do it!  It’s fun, it’s easy, and your family will love it!

    Get a Great Deal with 50% off Retiring Project Life Kits

    Through June 2nd (or while supplies last) many of Stampin’ Up’s Project Life kits and accessory packs are on sale for 50% off as the patterns are being discontinued!  You have great sets for kits, baby, and everyday Including this cute Happiness Is card kit and accessory pack that I used.

    image

    So snag them while you can in the online store!


    NWstamper signature_thumb[9]
    order online button for sig 3_thumb[4]

    Project Supplies Used:
    Easy shopping anytime! Click the images below to see the item in the online store.

  • Scrapbooking Sunday: Use Up those Paper Scraps with this Layout

    I love my cards… love doing card making, but I used to scrapbook and the other day I was flipping through some of my scrapbooks (which don’t think they are complete themed affairs that complete a given year or all about a trip or what not… Smile  I’m not that good!) and realized I missed it.  So, I want to start back up my Scrapbooking Sundays here on the blog so I can have something that reminds me I need to get my photos in albums on a regular basis.  So here is my first for 2015!

    Strategy for keeping up with photos:

    So, I am guilty of having thousands of photos on my phone and on my computer and on my camera…. but not out where anyone can see them.  And where I will totally forget the context for some of the fun pictures I’ve taken.  I found a photo album from when I was in high school and while I remember many of the people and general stories of what was going on… I have no idea when the pictures took place or who everyone was.  And when I look at photos from when I was a kid or pictures from my parents or my husband’s parents, I have no idea what is going on.  *total sad face!*

    I didn’t like that and needed a strategy!  So, here is what I plan to do

    1. Once a month, send the photos from the month to Costco.  It could be 2 photos or it could be 50… whatever memories I want to keep and be able to share with my family later.
    2. Use the Project Life journaling pens (since they are archival safe) and jot a quick note on the back of the photo with the date and people in the picture (so if they ever get separated from my album, I know what the scoop is later)
    3. Drop them into the Project Life photo album page protectors and grab some of the Project Life cards to quickly write out what was happening in the pictures.
    4. DONE!

    5. Then, if there are extra special memories or photos, I’ll print extra copies and do a full 12×12 traditional scrapbook layout.  I love doing traditional layouts so I want to keep doing them, I just don’t want to hold up getting photos off my camera and into albums because it takes me a while to get a traditional layout done.

    Using Up Scraps with Scrapbooking

    I always forget that the scrapbooking is “SCRAP”booking.  Which means it is great for using up your extra paper scraps.  And that was the inspiration for today’s layout

    • Use up all those extra strips of paper that you trim off for your card and other projects as a fun accent in your layout.  I combined two photos across the page and then placed the Moonlight designer paper stack strips at different heights behind the pictures (don’t forget, this paper is 25% off through Monday!).  Sometimes cutting the strip in half so I had enough to go out the top and the bottom of the picture

    • Use extra cardstock scraps to make elements for the page like the letters for your page title!  I used the Tiny Letters thinlit dies to cut out most of the letters from my Blackberry Bliss cardstock.
    • Then to keep it interesting, I used my Metro Alphabet stamps to stamp the word “Hunt” and emphasize it.  You could get a similar effect by cutting out a different paper color or pattern to emphasize a word or words in your title.
    • Use extra elements you may have lying around to add some dimension, like these Wooden Elements from the Stampin’ Up variety pack.  I wanted to add some shine so I inked the top of the circle with my Gold Encore ink pad and then heat set it with my heat tool.

    So there you have it.  Some ideas for getting those scraps off your table and into some created project!

    Want to learn more about Project Life and photo album pocket memory keeping?

    I have a video talking about Project Life and then another where I walk through creating the layout I shared above.

    You can also email me or give me a call, I’d be glad to chat with you about it and give you some suggestions for getting started!  Plus, get free cards as part of the Sale-a-Bration promotion with any $50 purchase!  Score!

    image

    Shop and earn with Sale-a-Bration here

    I’m also happy to set up a Memory Keeping free demonstration with make & take for you and your friends… just let know!

    NWstamper signature_thumb[9]

    order online button for sig 3_thumb[4]

    Project Supplies Used:
    (if you are reading this in email, click here to see the list of supplies)

  • Elegant Gold Stamping with the Curvy Keepsake Box

    Wanna a peek at one of the boxes we’ll be making in my Too Cute Curvy Keepsake box class?  I had said that we would be making 4 boxes including one that was stamped… but when I went to go actually make the stamped box I stalled out.  I had wanted to use my Endless Wishes stamp set, but had forgotten I had loaned it to a downline member.  So I needed an alternate option and this is what I came up with:

    Turns out Mixed Bunch is a great substitute!  Especially when you use gold and Early Espresso.  Didn’t it turn out nice?

    I used the KRAFT cardstock – it is sturdier and a bit heavier than the Crumb Cake cardstock.  We’ll use Early Espresso ink and Encore Gold ink and then sponge with some Soft Suede ink.  But I really loved the extra touches to add to the bling – like the stamped sentiment which I stamped directly onto the Gold Foil sheets and then die cut out with the Starburst framelits.  Then add some gold sequins and 1/4” cotton ribbon to the top and you are set.

    I think these could be cute favors for events or just nice little gifts.  Can’t you imagine a pretty pile of these?  Smile

    If you would like to try out the fun boxes that you can make with this die, check out this fun class & class by mail I’m running tomorrow!  (Yes! You can still RSVP if you hurry)

    Tuesday 9/30 at 7pm, Panera in Redmond – RSVP here
    $15, save $5 with purchase of the Curvy Keepsake box die
    (Bonus kit – bring a friend and you both get to make the Turkey box for free!)
    Kit by mail option available!

    KIT BY MAIL – Get all the pieces precut and mailed to you in a kit to make all 4 boxes we make in class plus instructions for all of the boxes and the Turkey box!
    Cost is only $15+$3 shipping  (only $10 if you have purchased the die from me!)
    BONUS – have a friend sign up for the class too and I’ll include the Turkey kit for each of you!


    INSTRUCTIONS ONLY – Get access to the instructions for all 5 boxes so you can use your dies and punches at home to make these cute projects.
    Instructions will include all the dimensions, supplies used, and tips for making them as easy as possible!
    Cost is only $4.95  (that is only $1/box!)


    spaced shop now sig bar

    Hostess Code:  C2HYWWQM Use this Hostess Code and receive a free gift!
    (Please do not use the Hostess Code if your order is $150 or more)

    Project Supplies Used

  • Scalloped Peek-a-Boo Flower Catalog CASE

    Scalloped Peek-a-Boo Flower Catalog CASE

    Today the girls over at Stylin’ Stampin’ Inkspiration have put together a fun collection of cards to share.  We all picked a card from the Annual Catalog to CASE (Copy-And-Share-Everything) and then share for the blog post.  So I thought I would share a card we did recently for my monthly stamp club!

    This card was actually made because one of the ladies saw it in the catalog and really wanted to see how to make it.  And, of course, I was happy to oblige!

    This is my card:

    This is the card in the catalog on page 176:

    image

    Wow… maybe I need to photo graph my cards on top of bright colored paper because comparing their photo to mine, it makes quite the difference! Smile 

    In any event, the fun thing about this card was trimming out a rectangle from the front of the card so that your flower can pop through.  I cut it out 1/2” from each of the top, right, and bottom edge of the card and make it 1-1/4” wide.

    Then I could use the 1-1/4” scallop punch and the 7/8 scallop circle punch to create a cute flower to show through.  Add some decoration with Gorgeous Grunge stamps and some Gold Baker’s Twine and you have a fun alternative!

    If you have any specific questions about this card, leave me a comment and I’ll be sure to get back to you! 

    My club ladies had a lot of fun creating this card and I hope you take the time to try it out too.  With the Stampin’ Trimmer, it is really quick and easy to create these cut outs on your card fronts.

    spaced shop now sig bar

    April Online Stamp Club Hostess CodeG4VQJ7VB
    Use this code to get free exclusive tutorials & project kit!Learn more