Northwest Stamper

Tag: everything eleanor

  • Water Drop Bokeh Technique Card with Everything Eleanor (VIDEO TUTORIAL)

    Did you see? Did you see??  Today is another video this week! Smile  I’m planning on getting back into videos and tutorials again and aim to have a new video project for you each Wednesday.  Sweet, right?!

    Today I wanted to share with you this cool technique I’m calling Water Drop Bokeh!  Check it out:

    See that colored blobby area?  It is just masked and sponged area of the Whisper White cardbase!  So it is easy and perfectly customizable to any project you want!

    Tips for making this card:

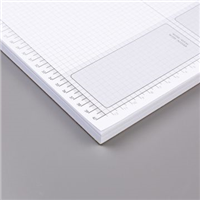
    • Use your Grid Paper to help make sure you are masking off straight and even lines across your white card base (in this case they are at 1” from the top and 2 1/4” from the top)
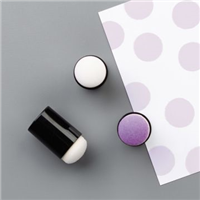
    • Sponge Daubers will give you rich color which helps make the technique turn out better because concentration of ink on your paper is key!
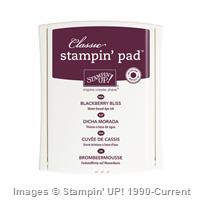
    • Swirl on your favorite colors of dye-based ink (all Stampin’ Up Classic Ink pads are dye based) on Whisper White cardstock
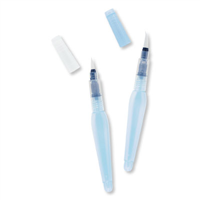
    • Use an Aqua Painter to drop bits of water onto your sponged area – from just the tip of the Aqua Painter for small circles to squeezing out full drops for bigger circles
    • Let it start to air dry and then you can stamp over the top almost immediately to create cool, layered effects.
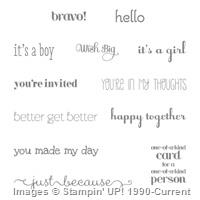
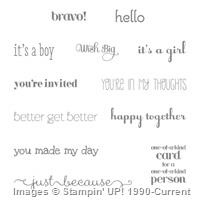
    • Mix and match your stamp sets, like in this case Everything Eleanor for the bird and swirl, and A Dozen Thoughts for the sentiments
    • Each card you make will be different, but that is what makes it fun!

    Want to see how it is done?  Check out this Video Tutorial as I walk you through making the full card step by step.  Then, let me know what you think and if you like this style of video so I know what to do more of. Smile 


    (If you are viewing this in email, check out the video here)

    Quick Links:


    NWstamper signature_thumb[9]

    order online button for sig 3_thumb[4]

    Project Supplies Used:

  • Playing a Bit with Stamping on Vellum

    What is that item in your craft room that you completely forget about and then when you find it, you suddenly remember how cool it is?  For me, I always do that with vellum!  I never think to pull it out, but when I do, I have the best time with it.

    Take today’s card for example:

    It is simple card, but the vellum gives you a way to add a little extra pop without worrying about finding the exact right color designer paper.  Its like a frosted window in a way. Smile 

    Plus, don’t you love this message?  I need to make something for my desk with this sentiment reminding me to everyday live the life I want to be living, not doing the same old thing wishing things were different.  I love my life but I know there is always room to grow and make things even better!

    Stampin Up! Supplies Used

    Stamps: Everything Eleanor, Really Good Greetings
    Ink: Coastal Cabana, Basic Black
    Paper: Very Vanilla, Whisper White, Basic Black, Coastal Cabana, White Vellum
    Accessories: Scallop Trim Border punch, Basic Rhinestones, 2-way Glue Pen, Stampin’ Dimensionals

    Have an item in your craft room that you need inspiration or a reminder how to use?

    I want to start up a new feature on the blog where, based on suggestions from readers, I highlight some fun ideas and uses for an often forgotten or unused item in your craft room. 

    So, if you have a great candidate, shoot me an email at jennifer@nwstamper.com or leave a comment and I can feature your favorite soon!


    spaced shop now sig bar

  • What To Do With Extra Easter Egg Dye

    So, now that Easter is over, grab that extra Easter egg dye that is on sale in the stores because I have a fun project for you!  Making your own custom dyed ribbon!

    I was making Easter eggs with the kids and I loved how vibrant the colors came out.  (I always us the formula where you use 3 Tbsp of vinegar to dissolve the dye pellets) and I thought it was a shame to dump all the extra when we were done.

    So, I thought – why not try using it on other things.  So, I thought why not ribbon?  Turns out it works great!

    Once you’ve colored your eggs, leave the dye in your bowls and grab some ribbon.  I particularly love the white Organza Ribbon for this technique.

    Leave your ribbon in each of the bowls for a few minutes to let it soak up the dye completely.  You can pull it out to check on the color and if it isn’t as deep as you want, put it back in for a little bit longer.  Then when you take them out, lay them out on paper towels to catch drips and let the ribbon dry.

    You’ll see your ribbon go from shiny white to something like this:

    Once you have all the colors done, they will probably look like this:

    I found the Twill tape ribbon and the Victoria Crochet ribbon didn’t turn out as vibrantly as the satin-y part of the Organza ribbon.  So, I would probably stick to that type of ribbon for best results.

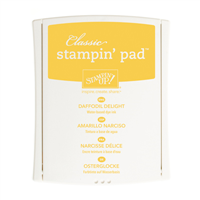
    Once you are done, use it like any other ribbon on your projects.  I thought that the yellow reminded me of Daffodil Delight, so I used it in a spring card with lots of bright colors:

    See, here is a close up of the ribbon (and some Dazzling Details on the flower that is really hard to see in a picture Smile):


    I hope you enjoyed this idea for your extra dyes… and don’t forget, FREE SHIPPING starts tomorrow morning!  So, it is a perfect time to grab some extra ribbon, clearance Easter egg dye in the store, and get creative!


    Click here to shop online 24/7 and start earning your NW Stamper rewards!

    Don’t Forget!  RSVPs and mail order kit orders are due soon for the Print Poetry Class coming up on April 20th!
    Can’t make the party?  Class by mail and instruction only options are available – check it out here

    Print Poetry Camp & Class by Mail

  • Scrapbooking Sunday: Sunburst w/ Sunshine & Sprinkles

    Look, it’s back!  It’s Scrapbooking Sunday!

    I love, love, love making cards.  But boy did I miss making scrapbook pages.  I have photos piled up in my craft room and that is only the ones I’ve printed in the last year thinking I was going to be getting way more scrapbooking done than I did!  So, I decided to play along with a sketch challenge at ScrapbookSteals and um… I think I jumped back in at a challenging time.

    We had to make a sunburst on our scrapbook page! I had never done that before and it was a challenge for me.  But I just LOVE how it turned out!

    I used the Sunshine and Sprinkles designer paper because I liked the bright and cheery colors and how they matched so well with the summery colors and feel of the photo (that is my daughter Caitlin last summer in our new inflatable swimming pool.  Also one of my favorite pictures of her!)

    The sketch called for buttons in your sun rays but as I was playing with my buttons I realized that my “x” buttons from the Bitty Buttons set looked kind of like stitches and I was sold.  Smile

    And as I tried to figure out what I would use for a title for this page, I remembered the Vintage Verses stamp set (on of the Free exclusive sets from Sale-a-Bration) and thought the “There’s Only One You” was a perfect fit.  Combine that with the cool background shape from Everything Eleanor, and BAM! Title done!

    You can also see in that picture the Melon Mambo striped organdy ribbon (which I’m way more in love with than I thought because it is so soft and vibrant!) and the Delicate Details lace tape which I thought would be a great subtle accent for the page.

    Finally, I have to show you the last touch that I’m kind of proud of… the Baker’s Twine flower!  I made it myself!

    I started with a glue dot on the page and a piece of Island Indigo Baker’s Twine.  Then I formed loops and with each loop, I ran the twine back over the glue dot in the center  (I had to add a second glue dot over the first to help hold it all down but it all worked out).  Then to finish off the center I had a Wisteria Wonder printed brad that I covered in Crystal Effects and dipped in Dazzling Diamonds glitter.  Let it dry and then set in the middle of my flower for a cute finishing touch!

    I love how this page turned out and hopefully you got some fun ideas for incorporating into your own scrapbook pages.


    To Order Stampin’ Up! Products Anytime, click here!

    Are you earning your Northwest Stamper Rewards?

    Every order gets you closer to your FREE stamp set!  Click here to learn more!


    Sunshine & Sprinkles Sunburst Scrapbook Layout Recipe:
    Stamps: 
    Vintage Verses, Everything Eleanor
    Ink:  Daffodil Delight, Markers: Basic Grey, Melon Mambo, Gumball Green
    Paper: Sunshine & Sprinkles designer paper, Crumb Cake cs, Whisper White cs, Lucky Limeade cs, Very Vanilla cs
    Accessories:  Bitty Buttons, Itty Bitty punch pack, Crystal Effects, Stampin’ Trimmer, Paper Piercer, Paper Piercing Template, In Color Designer Brads, Island Indigo Baker’s Twine, Delicate Details Lace Tape, Melon Mambo striped organdy ribbon, mini silver brads, Stampin’ Dimensionals, glue dots

  • Vellum Fun with Everything Eleanor

    How about a clean and simple card for today?  🙂  This is one of those cards that started out SUPER simple but I kept thinking it needed just a touch more here and touch more there until I made myself stop with this:


    This card all started because I was going to CASE a card that used vellum over the Pleasant Poppies stamp set (which I didn’t have at the time).  So I grabbed Everything Eleanor and the card just started going in a wildly different direction from there.

    But the highlight here was to stamp the flower head and stem using the NEW Firm Foam ink pads on Very Vanilla cardstock.  The new ink pads give such a strong and saturated image, that I liked using the vellum to soften the look.  Then I stamped the sentiment directly onto the vellum using Early Espresso ink (stamping it onto the vellum so you could actually read it easily!)

    Then, I used sticky strip and some Gumball Green stitched satin ribbon to cover up where I attached the vellum to the Very Vanilla cardstock.  Plus a gold brad in the center of the flower to help keep the top part of the vellum secure.

    And then, it is really hard to tell in the picture, but I also rounded the corners of the cardbase itself, sponged the edges with Crumb Cake ink, and then – when the cardbase was still too plain – I spritzed the cardstock using my Color Spritzer and the Crumb Cake marker.  I love how that combo makes for a soft speckled look, kind of like the “natural” cardstock you used to see.

    So, as you can tell, it was a little bit here and a little bit there… but it was all fun and easy stuff to do and I hope you got some ideas too!


    To Order Stampin’ Up! Products Anytime, click here!

    Its INK-REDIBLE November!
    Get a FREE set of 10 ink pads with a qualifying order or party; or get them free when you join the Stampin’ Up! family!  Learn more

    Are you earning your Northwest Stamper Rewards? Every order gets you closer to your FREE stamp set! Click here to learn more!


    Vellum Everything Eleanor Card Recipe
    Stamps:
    Everything Eleanor, Petite Pairs
    Ink: Raspberry Ripple, Early Espresso, Gumball Green, Crumb Cake, Crumb Cake marker
    Paper: Very Vanilla, Early Espresso, Raspberry Ripple, Cardstock Vellum, First Edition Specialty designer series paper
    Accessories: Gumball Green stitched satin ribbon, Sticky Strip, Gold brads, corner rounder punch, sponge dauber, color spritzer, Stampin’ Dimensionals

  • Creating a Scallop Border with Stamped Circles

    starter circles from Everything EleanorAfter creating my Everything Eleanor swap cards for convention (this card), I was left with a bunch of circles that I punched out from the middle of the scallop circle image from the stamp set.  I think it is meant for journalling but since I had been trying to make a wreath, I didn’t need them on the card.  But I though they had to be useful for something so I saved them, even though I had no idea what to do with them.

    Well, I started laying them out to make a polka dot background for a scrapbook page or card but wasn’t loving what I was creating so I started overlapping them and realized that I liked the fun effect of getting all the lines to match up so it looked like you had a continuous pattern even though you were using a bunch of different pieces.  So, I started adhering them together into strips to use as a scallop border.

    front of scallop edge with circles


    This could make a cute scallop trim for a card or scrapbook page depending on how many circles you adhere together.  In my case, I sponged the edge of each row and layered them together to be accents for my photo on a scrapbook page.


    I tried to line up my rows so that the stamped lines matched up and it looked kind of like you had one continuous pattern.  As you can see, I didn’t always get it exactly right but I was more focused on using up my scraps than making sure everything was perfect! 🙂

    I like how in the end it is a cool fluffy effect without looking too frilly or girly for a picture of my son from this past July.

    I also tried to keep the page simple by only using 2 colors of cardstock, 2 colors of ink, 2 extra embellishments (Faceted buttons and Early Espresso Baker’s Twine), and one stamp set – Everything Eleanor.

    And speaking of my son… after I had just finished the page and had gone upstairs to feed the baby, my son came up a few minutes later looking like this:

    Nicholas and the marker

    After freaking out trying to figure out what he had eaten, he told me he had “colored with a marker!”  Yup, that same marker I had used to journal on that scrapbook page!  I got him to bring me the marker and the caps (that took 2 different requests).  But then my husband checked on where he had used the marker and told me

    “He colored all over some paper on the table and the table”  **heart attack again!**

    I asked what had happened to the scrapbook page and Scott said he hadn’t seen the scrapbook page.  So I raced downstairs and saw this:

    Nikos coloring adventure

    I am very thankful to report that while he colored on much of my table, that he managed to miss the scrapbook page entirely!  Whew!

    So there you have it, hopefully that gives you another idea for what you can do with your scraps.  Leave me a comment and let me know what you think of this idea!


    To Order Stampin’ Up! Products Anytime, click here!

    Check out the 2012 Holiday Catalog in PDF form

    Are you earning your Northwest Stamper Rewards? Every order gets you closer to your FREE stamp set! Click here to learn more!

    Everything Eleanor 12×12 Scrapbook Page Recipe
    Stamps: 
    Everything Eleanor

    Ink: Lucky Limeade, Crumb Cake
    Paper: Lucky Limeade, Crumb Cake, World’s Greatest designer series paper
    Accessories: 1 1/4″ Circle punch, Paper Snips, Sponge Dauber, Early Espresso bakers twine, Faceted Buttons, Glue Dots, Crystal Effects

  • Cheers! with Everything Eleanor

    Psst! Wanna know a secret?  This card was totally made using scraps and left over pre-stamped and/or assembled elements that I had hanging around on my craft table.  But, the fun part was knowing that I was creating this as a card for one of my downline and friends, Pam, and trying to see what I had that I thought she would like. 🙂

    The white cardstock actually had a sentiment stamped in the lower right corner but I decided it wasn’t right for Pam’s card, so I stamped and cut out some flowers from the Everything Eleanor stamp set to make a decorative way to cover up that unwanted stamping.  The center flower is Basic Black ink stamped on Wisteria Wonder cardstock and the smaller flowers are Basic Black ink stamped on Whisper White cardstock and then colored in with my So Saffron marker.


    Add a pearl to the center of two of the flowers and then create a fun little sentiment flag by stamping on a piece of Wisteria Wonder cardstock.  Then cut a triangle out of one side of the banner and use your bone folder to curl the flag so it looks like it is waving in the wind (I used a dimensional under the center bump to help it hold it’s shape).

    Clean and simple, and utterly relaxing for me to create as well!

    Do you need a Holiday Catalog?

    I am getting ready to order some extra catalogs and I wanted to make sure everyone who wanted a copy had one!  So, if you don’t have a copy and would like one mailed to you, send me an email at jennifer@nwstamper.com.

    To Order Stampin’ Up! Products Anytime, click here!

    Are you earning your Northwest Stamper Rewards? Every order gets you closer to your FREE stamp set! Click here to learn more!


    Cheers Clean and Simple Card
    Stamps:
    Delightful Dozen, Everything Eleanor
    Ink: Basic Black, So Saffron marker
    Paper: Whisper White, River Rock, So Saffron, Wisteria Wonder
    Accessories: Basic Pearls, Stampin’ Dimensionals, Simply Scored board, Paper Snips

  • Everything Eleanor Christmas Swap Card

    Alright, I’m finally getting caught up which is nice!  Up next, getting ready to have a bunch of great ladies over on Wednesday night to check out all of my samples, swaps, and goodies that I brought back from Convention and then make a few projects to take home!  It should be a fun night
    (if you are interested in coming check out the details and rsvp here!)

    Anyway, this year, I took with me a ton of swap cards… normally I end up with 30-50 cards but this year I took 100!

    I didn’t mean to make so many but I discovered that I could almost exactly use the scrap from my Snow Much Fun swap to make this Everything Eleanor swap card, that I just kept making cards until I was out of scraps!  But that just means I have a whole bunch of great cards to use as inspiration now.

    So, want to see what I was swapping?


    I thought the flourish-y, journal stamp would make a fun wreath and my original idea had the bird stamped red for a cardinal… but I wanted the bird to stand out.  It took a little more work than I expected but I thought it was a fun use of the set.

    And before I sign off for the night, I thought I’d share all the fun goodies I got while I was at convention.  This is just the stuff I got for free as part of my registration, giveaways, and prizes.  Not too bad, huh? 🙂

    Stampin Up Convention Free Items

    That is a bag, red glimmer paper, 2 packs of designer fabric, 8 stamp sets, a journal made in My Digital Studio, 2 spools of satin ribbon, 1 pack of rhinestones, a pack of In Color Dahlias, a Holiday Mini catalog, a main catalog, and a hand fan!

    See, you know you totally want to come to convention next yere, huh??
    Shoot me an email and I can help you figure out how you can come with me and my team next year!


    To Order Stampin’ Up! Products Anytime, click here!

    Are you earning your Northwest Stamper Rewards? Every order gets you closer to your FREE stamp set! Click here to learn more!


    Make a Cake Pennant Card Recipe
    Stamps:
    Everything Eleanor, Curly Cute
    Ink: Garden Green, Basic Grey
    Paper: Real Red, Basic Grey, Whisper White
    Accessories: Big Shot, Square Lattice embossing folder, large Scallop circle punch, 1 1/4” circle punch, 1/8” Real Red taffeta ribbon, glue dots, snail, stampin’ dimensionals

  • A Little Bit More Everything Eleanor!

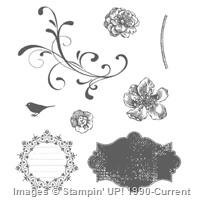
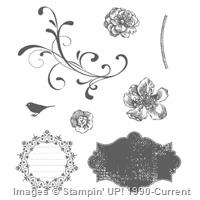
    I love chances to earn free stamp sets and recently I did just that!  So, thanks to Stampin’ Up! I got to pick this Everything Eleanor stamp set for free!  (So, in case you were wondering why you kept seeing this stamp set pop up, it is one of my newest sets and so I’ve been having fun playing around with it).  Anyway, today’s card is actually a pretty simple one.  Yes, there is a lot of hand-cutting of shapes, but overall, a pretty straightforward card.


    However, one of my favorite things is this ruched ribbon!  Yes, I know that this gathering style for ribbon has been around for ages and lots of folks already know how to do it…. but I was all thumbs everytime I tried to make ribbon look like this, always getting it to start looking cool but then pulling my thread out completely leaving the ribbon looking a bit silly.  But…after reading a tutorial, it all makes sense now!!

    So, for those of you who are like me and never could figure this out, the trick (which made so much sense after reading it) is to grab a thread that runs through the middle of your ribbon and hold onto on one end of your ribbon.  While holding it, push the ribbon away from where you are holding the ribbon so it starts gathering.
    Now here is the aha moment for me!
    Stop when you’ve pushed the ribbon so that half of the ribbon is gathered.  Now, go grab a middle thread on the OTHER end of the ribbon.  Start pushing the ribbon in, towards the ribbon that is already gathered.

    I know, it sounds so obvious, but I swear it was a total lightbulb moment for me! Smile

    Then just glue it down to your card front (and behind the vintage label) using something strong like sticky strip and you have a cute accent!

    See, no matter how much you craft, there is always something new (or new to you) to learn!

    Well, I’m off for another fun day in the hot Portland sun!  Enjoy your Thursday!

    To Order Stampin’ Up! Products Anytime, click here!

    Are you earning your Northwest Stamper Rewards? Every order gets you closer to your FREE stamp set! Click here to learn more!

  • Everything Eleanor Card Box

    If you can’t tell, I love making cards. 🙂  But between class samples and playing around with my stamps and tools, I often end up with more cards than I need at a given time.  Which means I need a way to store them and what better way than a cute box on my shelf?  So, here is a new box I’ll be using that I made recently with the Everything Eleanor stamp set.


    This was super easy to make (just a single piece of cardstock scored and folded up into the box); but my favorite part is the ribbon flower in the middle of the front.  It is just sticky strip laid down in the middle of the scallop circle and then twist the Crumb Cake seam binding ribbon to look kind of like a rope as you spool it around into a circle on top of the sticky strip.  Doesn’t it look perfect in the middle of the circle stamp from the set?


    We’ll be making this as part of my card stash class on Friday July 6th.  So, if you are in the Seattle area and want to come make it, let me know at jennifer@nwstamper.com and I’ll get you all the details!


    To Order Stampin’ Up! Products Anytime, click here!

    Are you earning your Northwest Stamper Rewards? Every order gets you closer to your FREE stamp set! Click here to learn more!