Northwest Stamper

Tag: embossing folder

  • Fun Birthday Card with Big Designer Candles!

    Fun Birthday Card with Big Designer Candles!

    So, I hope you’ve been enjoying all the blog posts recently, full of technique and project ideas!  As I headed off on my big European adventure on the Stampin’ Up incentive trip, I knew I had so many project that I’ve loved lately and wanted to share.  Plus I’ve been meaning to get back on track with posting at least every other day here on the blog… so what better way to start the habit than having a post-a-day heading all the way into June!  I have more fun planned for you coming up including starting on Friday, I’ll be sharing each day the projects I made for Stampin’ Up displays boards at OnStage in Salt Lake City.  They are full of sneak peeks and fun scrapbooking and 3D project ideas in addition to my many card projects for the boards.  So, be sure to come back and check it out.

    Psst – did you know?  You can subscribe to my blog and get an email in your inbox each time I post a new blog post!  You get the full post with all the details and pictures that you can view at your convenience or save for later!  Just sign up to subscribe to the blog by entering your email address in the Subscribe to the Blog box on the right side of the blog. Smile  –>

    Ok, now back to today’s super fun card!

    So, this card came together because I wanted to do a birthday card for my Fond Farewell card class (this was my recent card class where I focused on having one last hurrah with many of the retiring product that Stampin’ Up is discontinuing at the end of the month).  But I wanted to do something different.  I had seen cards where people had made big candles, but many of those used a stamp set I didn’t have and fussy cut and image I didn’t have.  So I decided to get creative!

    Enter the Bird Builder punch!

    Yes, that is right!  See these candles?  The flames on top are the wings of the bird from that punch. 

    And for the candles, instead of cutting out a stamped image, I just grabbed the It’s My Party designer paper stack and picked out a few fun patterns and cut them into rectangles for my candle sticks.  Easy Peasy!  One tip though- I did end up sponging the edges of the patterned paper because I found with busy patterns, you really need some ink or something around the edge to help define the edge of the shape.  Otherwise it tends to blur into the background easily.

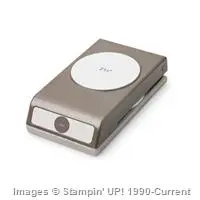
    Can we also please have a moment of silence for my beloved 2 1/2” Circle punch?

    …..

    Seriously, I love love love my big circle with the convenience of a punch.  I know there are circle framelits but I still am sad about this punch being on the retirement list.  Oh well,  at least I have mine!  Better believe I’m keeping that puppy around for future crafting. Smile

    Oh, and don’t let me forget, I wanted to share what brings these candles to life – why the clear Wink of Stella brush of course!  Just a quick swipe along one side of the wing/flame and you get some sparkle to really twinkle up your candlelight!

    It’s pretty, it’s fun… Sadly a lot of this card is retiring.  Here is a list of what is going away at the end of the month so you don’t miss out on anything!  (See the bottom of the post for links to any of these items in the online store)

    Retiring Items on this Card

    • Bird Builder Punch
    • 2 1/2” circle punch
    • It’s My Party designer series paper
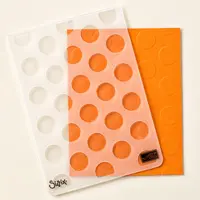
    • Decorative Dots embossing folder

    While I'm Cruisin' Special ad

    Start shopping here


    NWstamper signature_thumb[9]

    order online button for sig 3_thumb[4]

    Product List

  • Bling Up your Card with Glitter Ribbon–A Birthday & Thank You card (BLOG HOP)

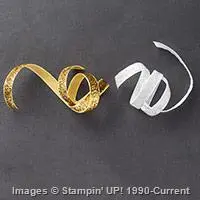
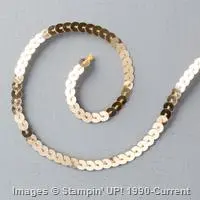
    I’m so excited to be able to join a fun blog hop today for the first time!  Welcome to the Grand Vacation Achievers Blog Hop for December. This is a monthly blog hop with many fabulous and talented Stampin’ Up demonstrators who work and play hard with their business. Smile  This month our theme is Bring on the Bling. You know I love me some sparkle and shine but I thought I’d be a bit different from my regular rhinestones (or even glimmer paper) and share some ideas using the fabulous – but retiring – Gold Glitter Ribbon!

    Holiday Catalog Ribbon – Perfect for Any Occasion!

    I wanted to share a couple ideas that used some of the Holiday Catalog items that are retiring in a few days that can give some bling and shine any time of year.  Like this Birthday Card featuring the Winter Wonderland Specialty designer paper & the Gold Glitter Ribbon.

    Tips for making this card:

    • Look for “anytime” patterns in your “Holiday” designer paper packs!  I had the Winter Wonderland designer paper in my stash and because it was in the Holiday Catalog in a Christmas section, all I could see in it at first were the snowflakes, acorns, and trees.  But when I started really trying to figure out how I could use the paper, I realized there were lots of neutral patterns that were good anytime.  Like this crackled glass pattern.  Plus, an extra bonus was that it had little shiny gold dots speckled throughout the paper so you got some subtle bling going on.  Who said gold is only for the holidays?
      PS – this paper pack is retiring on Jan 4th but yay! it is on sale as part of the Year-end Sale!
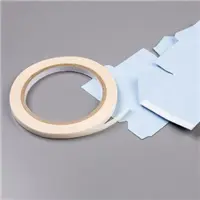
    • Layer your ribbon for cool new looks – The next thing was that I liked the idea of the Jute ribbon… but it was too wide and plain as it was.  So why not spiff it up and layer your favorite ribbon over it.  Adds a whole new dimension don’t you think?  I thought it helped balance the bright and sparkly gold in the Gold Glitter ribbon.  You can use SNAIL tape runner to adhere the ribbon together, but I might suggest a stronger adhesive like the Tear Tape to make sure that your gold ribbon really gets a good grip on the slightly fuzzy Jute Ribbon below.
    • Perfectly cut out banners from the Amazing Birthday stamp set with the bundled Banner Framelits – Did you know that the Banner framelits are a perfect match for the Amazing Birthday stamp set I used?  The stamp images fit great inside the different banner shapes for easy cutting.  Plus, you can get them together in a bundle and even save 15% off both.  How sweet is that?

    image

    So now moving on from Birthdays, another type of card that I need all the time is a Thank You card.  I was trying to use up some scraps on my desk and stumbled onto this design.  I loved the touch of gold at the bottom of the card.

    Tips for making this card:

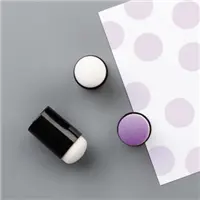
    • Get fun effects by mixing your embossing folders and ink!  These cool polka dots are easy to do!  Just grab the Large Polka Dot embossing folder and the use a sponge dauber to sponge ink directly INSIDE the indented side of the embossing folder.  THEN put your paper in the folder and run it through your Big Shot.  As the paper is smashed into the impressions in the folder, they will also be pressed uniformly into the ink creating cool distressed looking dots of color on your paper!
    • Layered punches really help them stand out – I had fun with my cutting and punches here.  Start by stamping the leaves from the Kinda Eclectic stamp set and then cut those out (yes, it has to be by hand… sorry Smile) and then grab your punches!  I used my Petite Petals punch to punch out the Blackberry Bliss flower.  Then stamped onto white cardstock, the little flower from the Something to Say stamp set and punched it out using the Itty Bitty Accent punch pack.  They all layer together for a fun, unexpected flower!
    • Mix your metallics – Finally, just because I had used gold by adding the touch of the Gold Glitter ribobn at the bottom of the card… don’t you think it just grounds the card nicely?  I decided to add a hint of gold into the rest of the card by adding two gold sequins from the Gold Sequin trim next to my flower.  Just enough to balance the gold ribbon, but not too much that we are worried about getting gaudy or feeling like King Midas was having a field day with the card!  I stuck with gold but you can also get some fun looks by mixing gold and other metallic colors too.  So have fun and play around.

    So I hope you’ve enjoyed these two ideas for adding some bling to your projects that you can not only use anytime of year… but you can also use the Gold Glitter Ribbon to add some bling to GUY cards too!  I’d love to hear what you think!

    But keep the great ideas going by checking out the other ideas and inspiration you don’t want to miss. Remember that currently you are at my blog – JENNIFER BLOMQUIST, so check the blog hop line up list to see who is next in the list. Smile


    NWstamper signature_thumb[9]

    order online button for sig 3_thumb[4]

    Use Hostess Code BEFX37ZS at check out to get a special thank you from me!

    NEW ITEMS ADDED – BIG Year-End Clearance Sale!  See what is on sale here.

    See all the tutorials & classes by mail here

    Check out the Holiday Catalog Retiring List & Sold Out Updates

    Save 25% on the Latest Weekly Deals

    Price: $110.00

    Price: $40.00

    Price: $5.00

    Price: $5.00

    Price: $5.25

  • Friday Favorite–Amazing Birthday the Display Board Swap Card

    Friday Favorite–Amazing Birthday the Display Board Swap Card

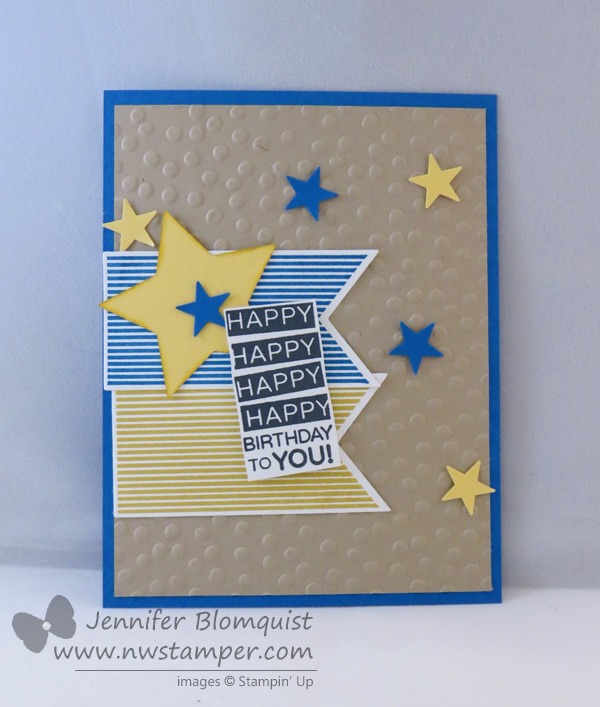
    Today over on the Stylin’ Stampin’ Inkspiration blog, the girls are sharing some of their favorites items.  I thought I would do a spin on that and share one of my favorite Convention Display Board cards and the stamp set that I loved working with – Amazing Birthday.  Like I’ve said before, I really like that this set is not just about Birthday but can be used for thanks, guys, or anything in between.  But in this case, I stuck to birthday and my favorite shape of the season – STARS!! No joke, I am so digging the stars thing right now and when I finished this card, it was the first one from the set of display board projects that I really got excited about.  So much so that I used it for our group swap where we picked on of our cards from the board to create and trade.

    (SPOILER ALERT! If you love stars, get excited because in the upcoming Holiday Catalog, there is a stars embossing folder & a stars confetti border punch!!! Um, yes please!!)

    Tips for creating this card:

    • Pick a neutral color and then two contrasting colors (I picked Crumb Cake, Pacific Point, and Hello Honey) and then repeat them all over your card.  Don’t be afraid to use a non-traditional color for your shape like blue for stars.
    • Offset your die cut images for a more interesting look.  You’ll notice that I had the Hello Honey banner aligned with the edge of the Crumb Cake whereas the Pacific Point is aligned to the edge of the card base.
    • Sponge the edge of bigger cardstock elements (like the the bigger star) to help them have more dimension even if you don’t pop them up on a dimensional.  Often just using the same color as the cardstock is enough.
    • When die cutting a shape with the matching framelit, like I did here with the banners, USE the Magnetic Platform!  Yes, you can use a post-it note… or the hope really hard methods Winking smile  but you will have a better time getting an even edge around your images when you use the magnetic platform because it is strong enough to keep the framelit where you set it!

    Card Supplies Used

    Oh, I forgot to mention, the sentiment is actually hand cut out… and yes, that Happy doesn’t have the dark line to the left of the “H”… that is intentional. Smile When I was doing this for a swap, I cut long strips for Whisper White cardstock (around 1.25” wide) and stamped my sentiment on the strip and then trimmed down with my snips to the narrower width. But this is a fun color combination, so grab some cardstock and give it a try with your projects.  I hope you enjoy it as much as I did!

    spaced shop now sig bar

    July Online Stamp Club Hostess Code – 7RDHVEKR Use this code to get free exclusive tutorials & project kit! Learn more

  • A Summery Emboss Resist Card plus LAST DAY for Free Shipping!

    A Summery Emboss Resist Card plus LAST DAY for Free Shipping!
    Before I get to the card for today, I wanted to remind everyone that today is the LAST DAY for Free Shipping on any Stampin’ Up order.  So, if you were thinking of grabbing your favorites from the retirement lists before they sell out, or you’ve been eyeing that big purchase – don’t miss out on the extra savings with free shipping! 
    Shop Online Now  |  View the Retiring Stamps list  |  View the Retiring Accessories list

    Ok, now on to the card!

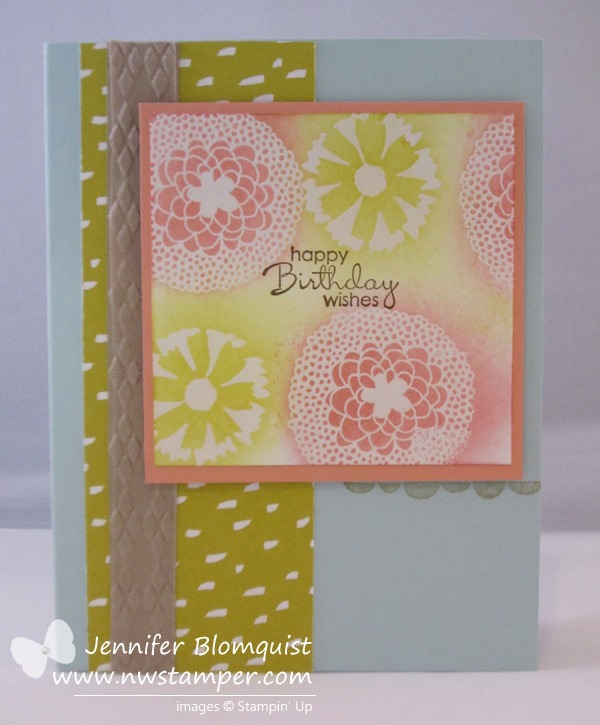
    Have I mentioned how much I love doing emboss resist cards?  Today I thought I would quickly share another sample I made for my embossing class using the Petal Parade stamp set from the Sale-a-Bration catalog from this year.  See.. it is possible for me to do this technique with a stamp set other than Lovely & Lacy!  ha ha.

    I love how it looks like citrus and lemonade to me with the pinks and the yellows.  That is actually Crisp Canteloupe and Summer Starfruit as the inks for this card; they actually go together really well don’t you think?

    To make it, I recommend stamping your sentiment in the middle FIRST! 

    And then randomly stamp your images using versamark. 

    Heat emboss with clear embossing powder to give you your shapes. 

    Then take your yellow sponges and starting from the MIDDLE of each embossed shape, sponge in a spiral pattern to get the saturation of color that you want

    Once you have all your colors added, uses a little extra of one of the colors to sponge the in-between spaces to fill in all the white gaps.  That is it!

    Oh, the other thing I wanted to show you from this card… embossing ribbon!  That is right, you heard me…. embossing RIBBONSmile 

    image

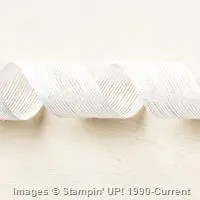
    It’s a little hard to tell the texture from the photo, but this is piece of the Crumb Cake seam binding ribbon that I placed over a piece of Crumb Cake cardstock to give it a bit of stiffness.  Once it is glued down – and I recommend glue stick for adhering the ribbon – then you can run it through the Big Shot in an embossing folder.  It gives you the texture and fabric look of ribbon, customized to any embossing folder pattern you have!  It’s actually really cool.

    And don’t forget to get in on the FREE SHIPPING that is ending TODAY.  So if you have been looking at some items and want to save a little bit of money. Visit my online store and take advantage of the free shipping – especially combined with clearance rack and weekly deals!

    spaced shop now sig bar

    April Online Stamp Club Hostess CodeG4VQJ7VB
    Use this code to get free exclusive tutorials & project kit! Learn more

    Stampin’ Up! Supplies Used
    Stamps – Petal Parade, Petite Pairs
    Ink – Early Espresso, Summer Starfruit, Crisp Cantaloupe, Crumb Cake, Versamark
    Paper –Pool Party, Whisper White, Crisp Cantaloupe, Crumb Cake, Sweet Sorbet designer paper
    Accessories – Big Shot, Argyle embossing folder, Heat gun, embossing buddy, clear embossing powder, Stampin’ Dimensionals

  • Stamping with an Embossing Folder for a Scrapbook Sketch

    Happy Monday!  Today over at the Stylin’ Stampin’ INKspiration blog, we are sharing a fun scrapbook sketch idea. 

    I didn’t create the sketch, but let me tell you how much I LOVE designing off of sketches.  It makes the scrapbooking process so much easier for me because I don’t have to think too hard about the set-up of the page (or card!) and instead can focus on things like which color do I want to use and what should I write in my journaling.


    Oh, and did I mention that my layouts are typically like my cards…. I start from a sketch or design, pull in key elements, and then totally change everything else up.  But hey!  It’s the inspiration that is important – and the fact that I’m actually getting my photos in an album!

    You may be wondering how I got that honeycomb look on my base paper for my scrapbook…. well, check this out… I used my embossing folder as a stamp!!!

    Seriously, its totally cool!  First I wiped my ink pad across the raised side of the embossing folder to ink it up.

    Then I just flipped over the embossing folder and pressed it down like I would a stamp!  I liked the distressed (didn’t get all the ink down on the paper) look, so I didn’t worry about evenly pressing and getting it all off on the base paper.

    Then for my accents, I created my own layered ribbon banners in the upper corner.  I took some of the Strawberry Slush Ruffle Trim and the Natural Trim ribbons and layered them.  Then snipped the ends at an angle.  Then to soften it even more, I use the Flower Shop bundle to get the simple flower to go on top.

    Finally, I needed a title and ended up actually cutting out my letters using the Typeset Alphabet Bigz dies in the same Wisteria Wonder as the background paper.  But that was a little too tone-on-tone and so I drew around the outside of the letters with my white gel pen to make them pop a bit more. 

    I would say that it worked!  And look at that face… isn’t Sweet a good title too?  Smile  Ok, I really didn’t know what to title these too pictures but I loved them so much that I had to scrap them somehow!

    So, I hope you got some inspiration!  Play along and create your own scrapbook page with this sketch and let me know what you think!

    spaced shop now sig bar

  • It’s Stampin’ Up! Convention Time!!

    I’ve been getting super excited over the last week as convention approached and I started getting exciting wondering what amazing ideas I’d see, what new products would be revealed, and have a chance to hang out and reconnect with some wonderful people.

    As I do each year I’ll be posting live updates to my Facebook page (as long as my battery holds out each day) and I’ll give you the full scoop and pictures each night here on the blog.  So even if you can’t be here in person, you can still participate in the excitement and get a feel for it with me.

    Travelling to Salt Lake City!

    So, today was my traveling day and I was very lucky to have 4 members of my group plus a great stamping friend traveling with me from Seattle to Salt Lake City.  We hopped on our plane last night and were treated to the most amazing sunset as we came in to land in SLC.

    salt lake city sunset

    We got our bags and a shuttle and headed to our homebase for the weekend – the Radisson at the convention center.  Check out the cool wall art about the nice beds:

    Convention 2013 Radisson hotel room

    And while I should really be sleeping in that bed right now (since breakfast comes waaay to early in the morning), I thought I’d show you some of the other fun things I brought with me to kick things off. Smile

    1.  My nametag & convention buttons!

    My first year at convention, I saw people with their lanyards full of pins and buttons and I realized that many people collect their convention pins and acheivement pins on their lanyard and I set out to start collecting mine.  It’s taken me 5 years, but I love that it is getting more full.  I know… its silly, but sometimes the little things make it more fun!

    convention 2013 name tag and lanyard

    Plus with 6,000 demos in attendance, they are checking badges this year and so I got to make it fun to look at!

    2.  Swaps!!

    What would a Stampin’ Up! event be without swaps?  I started out with making a ton of this Flower/Doily card… it was fun and easy to make a bunch.  But when I was done, I had made 76 cards and I decided a few days ago that a few more wouldn’t hurt and so I made the Christmas cards as well.

    Flower Shop Doily Card

    stampin up convention 2013 flower shop swap

    I used the new Flower Shop bundle to create the cute flowers and then just accented with one of the Whisper White doilies.

    I decided I needed a few more swaps and I thought of this fun way to use the new Christmas Collectibles stamp set.
    (psst – sneak peek alert!  New holiday catalog goodies including the new stamp set, punch, and embossing folder.)

    Christmas Collectibles Ornament Card

    stampin up convention 2013 christmas swap card


    3.  Fun n’ Crafty group gifts!

    And finally, I put together a little Convention Survival Kit for everyone in my group since it was the first convention for many of them.  Some people have the tradition of downline gifts and roommate gifts… I just was excited to have so many downline and friends going with me I wanted to put a little something together for them.

    Stampin up convention 2013 survival kit

    • I figured a few emergency snacks and mints would be nice.
    • Wet wipes for cleaning up after snacks or when you are stamping during make & takes and need a little extra clean up power.
    • Some tissue, because there is always some touching story or presentation that gets the whole room crying!
    • Chapstick – I swear, I always forget this and buy a new stick every year when I am here!
    • Band-aids were supposed to be in the bag, especially for when you are walking all day and your shoes start rubbing
    • …and of course a cute bag they can reuse each day to easily find their essentials.

    Today they get their handmade gift from me… but I’ll save that surprise for my next blog post!  Ooh, I can’t wait to give everyone theirs!

    So, today will be a day full of Stampin’ Up! home office tours, swapping, opening session, and a big party afterwards!  I’ll post as I go on my Facebook page and then back here later for the full report.

    I’m so excited!

    Now for a few hours sleep while I can….7:15am comes too early!

    spaced shop now sig bar

  • Elegant Embossed Vellum Card

    Its been a busy week and I’m suddenly realizing how much I still need to catch up on!  I’ve been reorganizing my craft room to make space for all the new catalog goodies that just came in…of course in the process I’ve discovered items that I forgot I had and really need to use more!  One of those items is Vellum

    I have had a pack sitting on my shelf for a while and had completely forgotten about it, so a few weeks ago, I ran a Terrific Techniques class all about Vellum.  This card was one of my favorites from the class:

    You start out by running a piece of vellum through your Big Shot with an embossing folder (in this case I used the Flower Garden embossing folder).  Then on the back side of your vellum, I grabbed my Sponge Daubers and sponged my colors as if to color in the embossed image.

    The cool thing is that by sponging the back side of your vellum, it gives a pretty, soft glow to the front of your image.  And when you think you have made it too dark on the back, it turns out to be just perfect on the front!

    Adhere your vellum to the front of your card by glueing it to the front of a white cardbase and add a strip of patterned paper to the edge for an accent.

    I finished it off by punching out a sentiment from the fabulous Petite Pairs stamp set and sponging it with the same Wisteria Wonder sponge dauber I used for coloring in the back of the flowers.  And if you don’t have this stamp set yet, don’t forget it is available for 25% off until June 30th!


    image

    Check out all the greeting stamp sets that are available in the June 25% off sale!

    So grab your vellum and embossing folders and experiment with what fun designs you can create. Smile

  • Fun with Texture Thank You Card

    As I was playing with ideas for thank you cards for February, I decided to get inspired by the Sycamore Street designer paper from the Sale-a-Bration flyer for my colors and then start adding texture as I went along.

    The most obvious bit of texture was my chevron embossing folder that I used on the top half of the card.  Then I added some ribbon to get something different from paper in the lower half of the card.  And then my favorite – heat embossing!

    I inked up my Thanks sentiment from the Vintage Verses stamp set with Versamark, and then before stamping I inked it up again with Rich Razzleberry ink.  Then, stamp, cover in clear embossing powder right away, and apply heat with your heat gun.  Ta da!  Embossed ink in whatever color you want!

    To Order Stampin’ Up! Products Anytime, click here!

    Are you earning your Northwest Stamper Rewards?

    Every order gets you closer to your FREE stamp set! Click here to learn more!

    Vintage Verses Thank You Recipe:
    Stamps:
    Vintage Verses
    Ink: Rich Razzleberry, Versamark
    Paper: Whisper White cs, Rich Razzleberry cs, Baja Breeze cs, Sycamore Street designer paper
    Accessories: Sycamore Street Ribbon (Tangerine Tango), Clear embossing powder, Heat gun, sponge daubers, Stampin’ Dimensionals

  • Super Simple Valentine’s Card

    Alright, I’m back with another project using the stamp from the Happy Valentine Heart bundle.  I showed you yesterday a Valentine Treat idea but I wanted to play with the stamp for a card.  This was the first quick card idea I came up with:

    And as always, it is super hard to see but I used my 2-way Glue Pen and some Dazzling Diamonds glitter to fill in the little cupid heart.  Maybe this picture will show it a bit better?

    Or not… but you get the idea. Smile

    I swear I always start getting into a stamp/paper/embellishment right as it is going away.  So, reminder today is the LAST day to order this bundle or the My Little Valentine/Simply Sent bundle.

    See the details on these bundles in the online store

    But I think this stamp is kind of adorable so you may see it pop back up in the next few weeks between now and Valentine’s Day.

    To Order Stampin’ Up! Products Anytime, click here!


    Are you earning your Northwest Stamper Rewards?
    Every order gets you closer to your FREE stamp set!  Click here to learn more!

    Happy Valentine Heart Card
    Stamps:
    Happy Valentine Heart
    Ink: Raspberry Ripple
    Paper: Twitterpated designer series paper, Crumb Cake cs, Whisper White cs, Raspberry Ripple cs
    Accessories: Big Shot, Adorning Accent embossing folders, Full Heart punch, 2-way Glue Pen, Dazzling Details, Stampin’ Dimensionals

  • Snowman Snowglobe Holiday Card

    My son keeps telling me that it isn’t wintertime because there is no snow.  Apparently to his 2 – going on 3- year old view of the world:

    fall = leaves fall off the trees and winter = snow.

    That a pretty close approximation!  Unfortunately we don’t get too much snow up here in Seattle.  So I thought I would make my own “dreaming of snow” card today! Smile

    I stamped this cutie of a snowman from the No Peeking stamp set and then decided to punch him out and make him his own snowglobe!  I sponged the edge of the circle with Midnight Muse ink for a subtle edge and then made a base out of the Curly Label punch.  Finally, add some snow by using Dazzling Details glitter glue.


    He looks so happy in his little globe, don’t you think?

    Last Day for the Ink-Redible Ink promotion
    Don’t forget, you can get a FREE set of 10 ink pads with a qualifying order or party; or get them free when you join the Stampin’ Up! family! Learn more

    To Order Stampin’ Up! Products Anytime, click here!

    Are you earning your Northwest Stamper Rewards?
    Every order gets you closer to your FREE stamp set!Click here to learn more!


    Snowman Snowglobe Card Recipe
    Stamps:
    No Peeking
    Ink: Basic Black marker, Gumball Green marker, Real Red marker, Midnight Muse
    Paper: Gumball Green, Basic Black, Whisper White
    Accessories: Big Shot, Perfect Polka Dot embossing folder, 2 1/2” Circle punch, Curly Label Punch, Dazzling Details, Stitched Satin Ribbon – Gumball Green, Stampin’ Dimentionals, Sponge Daubers

  • Birds of a Feather Thank You

    Every year there is a pack of designer paper that I completely overlook until I get the paper in for my new catalog DSP paper share.  Then, as I pull out the sheets to cut it down to 6×6 pieces, I discover some hidden gem.  This year, Birds of a Feather is that paper pack!

    So, I wanted to make some thank you cards for folks who ordered at a recent workshop, and so I pulled out this paper and started playing around.


    And since I was so torn on which pattern of the paper I liked more for this card, I had to make a second version with a different pattern from the same pack.


    I don’t know if it is the colors or the “cute” feel from these designs, but I’m totally digging this paper set!


    Did you know? You can see a big picture of each pattern in a pattern pack online?  It took me a while to realize that even though the information page looks like this with tiny strips of samples from the pattern, you can still get to bigger pictures.  So start out on the product page like this:

    image

    If you click the “More Images” link under the picture, you can flip through bigger pictures of each of the patterns!

    image

     I know it took me a while to figure that out so hopefully that helps someone else!


    To Order Stampin’ Up! Products Anytime, click here!

    Are you earning your Northwest Stamper Rewards? Every order gets you closer to your FREE stamp set! Click here to learn more!

  • Scrapbooking Sunday: Mixed Bunch Color-blocked Page

    So, this is my last weekend to prep before the big Northwest Women’s Show here in Seattle.  I’m grateful to have the opportunity to present a crafting demonstration on their Home Style stage on each of the 3 days; so I’ve been trying to square away exactly what I’m going to demo.  Well, this is one of the projects I’m planning on showing on Sunday (please forgive the awful photo):

    I saw a layout by a crafty friend of mine named Brettaney Q, who is a super talented scrapbooker, and was inspired to scraplift from it for the show this coming weekend.  She was so nice to give me permission and I love how my version turned out thanks to her inspiration.

    I changed things up because I was using all Stampin’ Up! supplies and it was fun to get to pull out and play with all my tools!

    This layout ended up being all about texture as I cut my strips for the color-blocked bottom of the layout and ran them through my Big Shot using the Perfect Polka Dots embossing folder.  And on the top half of the layout I stamped with the Mixed Bunch stamp set with Versamark and embossed using clear embossing powder.  I added some Wisteria Wonder bakers twine along the middle which softens it all a bit.  And then I played with my Mixed Bunch stamp set and the matching Blossom punch to make the flower next to my photo.

    Oh, and the last thing I did was add a simple title to my page.  I again reached for my Big Shot and grabbed my Timeless Type alphabet sizzlets, and cut it out of Rich Razzleberry cardstock.

    I love how it turned out and I hope the visitors to the Women’s show enjoy it too!  I’ll be showing them this project on Sunday along with a matching card using the same layout for those of you who aren’t scrapbookers. 🙂
    If you’d like to come visit me at the show – I’ll be presenting at the following times:

    • Friday 3/2 at 3:30pm on the Home Style Stage
    • Saturday 3/3 at 3:00pm on the Home Style Stage
    • Sunday 3/4 at 11:30am on the Home Style Stage

    I’ll be demo’ing for about 30 minutes and have a display table next to the stage with more samples, information, and of course a show special!  I still have a lot to do but I think the show will be a lot of fun.  Hope you can come say hello if you are local!


    To Order Stampin’ Up! Products Anytime, click here!

    First Tooth Scrapbook Page Recipe:
    Stamps: 
    Mixed Bunch
    Ink:  Wisteria Wonder classic, So Saffron classic, Versamark
    Paper: Chocolate Chip textured cardstock, Whisper White cs, Wisteria Wonder cs, Pink Pirouette cs, Rich Razzleberry cs, Lucky Limeade cs, So Saffron cs, Island Indigo cs, Crumb Cake cs, Concord Crush cs, Very Vanilla cs
    Accessories:  Blossom punch, Scallop Trim border punch, Scallop edge punch, 1” circle punch, Wisteria Wonder bakers twine, Big Shot, Perfect Polka Dots embossing folder, Heat gun, Clear embossing folder, Timeless Type Junior Alphabet, Stampin’ Dimensionals