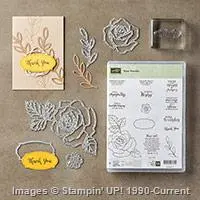
Sometimes you just need something simple, a way to wrap up a little gift or note to someone you care about and you want to make it prettier than those basic fold over envelopes that gift cards come in. Well, look no further than the very versatile Mini Treat Bag thinlit die! Plus it is a great canvas on which to play with some of your new tools that you may be experiementing with… like I was doing with this Rose Garden die.

I had been playing with different ways to use the Rose Garden thinlit and after having some fun with the die cuts, I needed somewhere for them to go and I was in the mood for something a little different than the usual card. Enter the Mini Treat Bag die – something useful and perfect for me to play with.
Jennifer’s Project Tips:
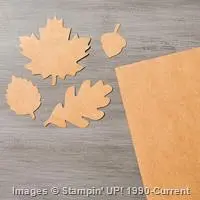
- Pick the perfect paper for your project – the great thing about using a die to create your treat bag is that you can pick the perfect paper to go along with your project. Normally when I’m using this die, I use patterned papers to match the season or holiday, but in this case, I wanted to keep it simple so that my rose could shine so I grabbed the slightly heavier duty Kraft cardstock for my base.
- Create a fun shadow for your diecuts – when there is a coordinating stamp to go with your die cuts, have fun creating backgrounds or neat shadows by stamping the image onto your background paper and then layering the die cut shapes on top. It looks best if you can have your die cuts up on dimensionals so that you really emphasize the shadow/3D look!
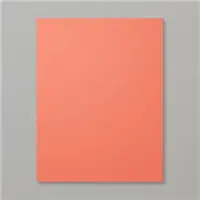
- Add gorgeous glitz with Wink of Stella! I was so excited when Stampin’ Up announced Clear and Gold Wink of Stella brushes in the Occasions catalog. They are amazing for adding fast drying glimmer to all of your projects. In this case, I LOVED how it turned out when you layered the Rose Garden diecut onto a piece of Calypso Coral cardstock. I trimmed out the rose and then use the Clear Wink of Stella brush to color in all of the showing Calypso Coral petals. It is hard to see in the picture but it is an amazing effect!

- Use the right adhesive for the job! I almost forgot, one of the big questions I get is which adhesive to use for which projects. Well, I wanted to share my recommendations for this project:
– Holding together the treat bag – use Fast Fuse
– Adhering the rose diecut to the coral cardstock – use the Fine Tip Glue Pen
– Adhering the rose to the bag – use Stampin’ Dimensionals

So, give it a try! You’ll totally be glad you did!
Love techniques or just want to give them a try? Join my 2016 Terrific Techniques Series!
If you missed it, I just started a new technique series this year. Each month, we’ll explore a new tool or technique. I’ll be sharing how to do that technique plus multiple variations of the technique so you’ll be not only learning the basics but lots of options and new ideas!
Each month, we’ll make a page in your 2016 Technique Instruction book, plus 2 cards or other projects. You can join me in person or place an order in my online store and receive the completed instructions page for the book, video tutorials for the technique and their variations, plus the supply kits for the 2 monthly projects.

Since I didn’t get this announced until now, I’m leaving the January Kit up until Feb 15th. So, you can place your order and earn that kit and tutorial access until then. Then we’ll switch to only offering the February kit. If you have questions or need more details, feel free to email me at jennifer@nwstamper.com
![NWstamper signature_thumb[9]](https://i0.wp.com/www.nwstamper.com/wp-content/uploads/ad87b4046c1e_C9F6/NWstamper-signature_thumb9_thumb.png?resize=322%2C118 "NWstamper signature_thumb[9]")
![]()
Use Hostess Code PGHMVNJM at check out to get a special thank you from me!
Pick a FREE item with every $50 you spend! See the Sale-a-Bration catalog.
See all the tutorials & classes by mail here
Save 25% on the Latest Weekly Deals


Built for Free Using: My Stampin Blog