Northwest Stamper

Category: Birthday

  • More Ideas for those Big Shot Bundles with the Fun n’ Crafty Blog Hop

    Fun n Crafty Blog Hop badgeWelcome to the first Wednesday of the month… otherwise known and the super, awesome, and amazing Fun n’ Crafty Stampers blog hop!  Well, at least it is fun for us and inspiring to you hopefully. Smile

    This month we are taking our cue from the Big Shot promotion going on this month and sharing with you some ideas for using this must-have tool, as well as give you some ideas for the bundles (including a holiday catalog sneak peek!) that you can get for FREE when you purchase a Big Shot this month.

    But to get you started, here is my card for the hop today:

    Tips for this card

    • Pick a color palette and run with it!  In this case, I decided on Melon Mambo (pink) and Basic Black with a touch of Whisper White for a third color.  I find that the rule of threes seems to apply to colors on my cards too.  I try to pick 3 colors for each card and have a really good reason if I need to add more than that. Smile
    • Another fun function of your new Blendabilities, color over a mostly black image!  I stamped my image in Black & White, but thought it needed some color.  So I made sure I had inked using my Momento pad so that I could color over the outer edges with my Melon Mambo blendabilities.  I didn’t do any fancy shading, just different colors for different elements of the image.
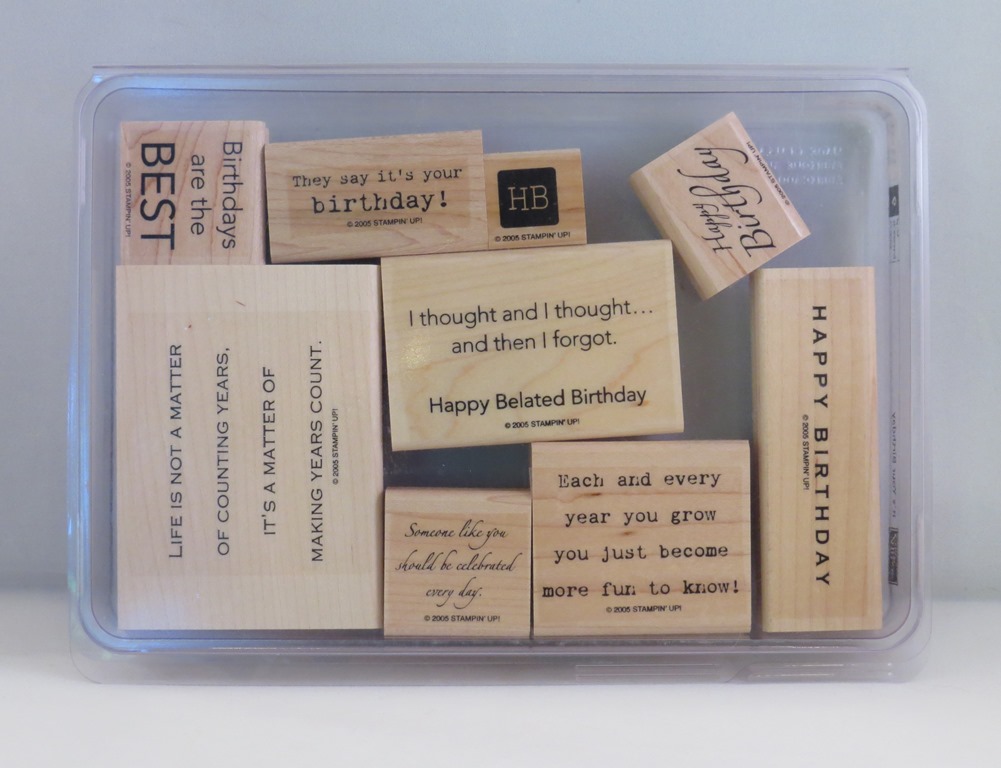
    • I also noticed that the background pattern of the Umpteenth Birthday image from the Oh My Goodies stamp set matched the mosaic embossing folder and so that had to find it’s way into the card as well.

    • Don’t be afraid to pull things apart if it just isn’t working.  I stared at this card for about 15 minutes knowing it was probably good enough but just not happy with it.  I decided to be bold and us the vanilla smooch spritz but I over did it and so it just made the card worse.  So I pulled up the black paper and started over again.  Thankfully this time worked!

    Like I mentioned, this stamp set and matching dies are part of the Stampin’ Up special this month and you can either get the bundle FREE when you puchase the Big Shot or choose to save by getting 15% off the bundle (prices listed below are after the discount.)Big Shot Bundles Flyer 2014

    Ok, are you warmed up and excited yet??  Well hold on to your britches because the fun is only just begun!  Keep on hopping to see what other amazing creations these wonderful members of my Fun n’ Crafty Stampers group created to share with you.  Just hit the next button below and you are on your way!

    Blog Hop Participants:

    And if you are looking for fun ways to expand your stamping knowledge or you just want to earn some cash, we would love to have you join us on our Fun n’ Crafty stampin’ up team!  Not only will you be able to see the Holiday Catalog early, but you can order from it, join in swaps with our group using it, and even hop with us next month!  Learn more about the benefits of joining Stampin’ up.

    spaced shop now sig bar

    July Online Stamp Club Hostess Code – TT2NETD4
    Use this code to get free exclusive tutorials & project kit! Learn more

    Card Supplies Used:

  • Birthday Banner Card with Amazing Birthday

    Alright, lets continue on the Convention Display Board sample roll…. you see, I have 24 projects that I want to share and so this is going to take us a while.  But that just means you know there will be fun projects on the horizon, right?!  Well, today I’m back with another of the Amazing Birthday stamp set cards.  For this one I stuck to the Birthday theme and instead played with the idea of lots of banners.

    See what I mean?  All Banners… All the Time… whabam!  Smile 

    I was having fun with the 2013-2015 In Colors (you know all those Strawberry Slush, Crisp Cantaloupe, Pistachio Pudding, etc ones) and trying to keep it really simple.  The only complicated thing – aside from having to use the Big Shot – is tying the knots onto the Gold Baker’s twine to highlight the sentiment in the center. 

    Tips for making this card:

    • The stamps in the Amazing Birthday stamp set are perfect matches for 1-1/4” Circle punch AND the Banner Framelits!  So, stamp to your hearts content knowing you don’t actually have to fussy cut everything by hand.
    • After cutting your stamped banner pieces, layer them on your card overlapping each other and starting at different heights.  The uneven-ness of the card will make it more visually interesting and will hide any imperfections you may have gotten when stamping or cutting out your banners.
    • Wrap your Gold Baker’s Twine around your card in straight lines first. THEN take a second (and third) piece of twine and tie them each in a knot.  Trim the ends and adhere over your long pieces of twine using glue dots. 
      Or you can tie your knot around one of the pieces of twine so that you don’t distort the straight line of the base baker’s twine, but also have something for your knot to hold onto.
    • I love the fact that the gold foil part of the twine is just wrapped around the more natural colored fiber.  That makes it easy when you are trimming your ends to UNWRAP some of the gold foil so you can leave it longer than the natural cotton twine.  This gives you some extra “tinsel” hanging out of your knot.

    This is a great card to do in a class or when you just want something that is fun but doesn’t require a lot of brain power or measuring to pull together.  Any time you can layer die cut pieces, the easier it is in my book! 

    Hope you enjoyed this card.  I’ll be back tomorrow with another quick and easy card, only this time using the Kinda Eclectic stamp set.  See you back here tomorrow!

    spaced shop now sig bar

    July Online Stamp Club Hostess Code – TT2NETD4
    Use this code to get free exclusive tutorials & project kit! Learn more

    Card Supplies Used:

    foo

  • Throwback Fun with Some Old Stamps and New

    Throwback Fun with Some Old Stamps and New

    Today is the Stylin’ Stampin’ Squad blog hop and I LOVED the theme idea this month.  Our task was to take our “oldest” stamp and our “newest” stamp.  How fun is that!  I had fun looking through my retired stamps that I’ve been holding on to to see what was my oldest set.  I had a hard time deciding but in the end found a stamp set I had almost forgotten I had – It’s Your Birthday.  And for the newest sets, I had to use my Be The Star set (Love, Love, Love this set!) with a little bit of Work of Art for good measure.

    As you hop along, please be sure to comment and show some love on every blog! We are always excited to hear from our followers! You should have just left stop number #2 on the Stylin’ Stampin’ Squad Blog Hop – Darcy at Stampin’ DJ.  If so, you are in the right spot. If a link doesn’t work or you get off track, you will find the full blog hop lineup below.

    So, here is my share for you today:

    I just love this sentiment from the It’s Your Birthday stamp set.  Honestly, that is pretty much the reason why I keep holding on to this set because everything I see it, I think of all the cards and scrapbooks I can make for my kids where this is such a true sentiment!


    And the birthday sentiments just go so perfect with the Be The Star stamp set.  It has a matching set of framelits which I have been using like crazy… guess I’m on a star kick right now.  But I had seen the idea of using the long swoosh from the Work of Art stamp set to make a star tail and I had a flash of inspiration!

    (Be the Star stamp set & Work of Art stamp set)

    The nice thing about the new Firm Foam ink pads from Stampin’ Up is that they transfer a lot more ink – this gives you a saturated image as well as, if you move fast, the ability to heat emboss with your regular classic ink pads!  So, that enabled me to have 3 different types of shine on my card.

    1. Iridescent Ice embossing powder – after stamping my swoosh, I immediately added the embossing powder and heat set.  Voila!  A shimmering star tail!
    2. In Color Sequins
    3. Silver Ink – for a few more background stars to complete the sky.  Did you see that there is actually ink refills for the gold and silver pads now???  YAY!

    And that star is colored with the new Blendabilities and a little help from Mr. Color Lifter.

    Seriously, if you haven’t gotten your Blendabilities yet…. well, lets just say you won’t be sad if you take the plunge!  I colored the star using the three Daffodil Delight markers and then lightened up a spot in the middle using the Color Lifter.  I got it a little too light so I had to go back and color over with the lightest color, but I think in the end it didn’t turn out too bad!

    And for my final touch, I first inked up my little swoosh image from the Work of Art stamp set and *stamped it off one time* on scrap paper and then stamped in the corner of my card front.  It made it just light enough to be a great background for my sentiment.

    So I hope you enjoyed my contribution, and hop along to check out what everyone else picked for their old & new!

    Blog Hop Participant List:

    1. Erica B. of Stamping Starlette
    2. Darcy J. of DJ’s Stampin’ Place
    3. Jennifer B. of Northwest Stamper  <—YOU ARE HERE
    4. Diana E. of Stampin’ Fun with Diana
    5. Donna S. of Organized Chaos
    6. Cynthia R. of Ink-a-Doodle Creations
    7. Kim R. of Stamping with Kim
    8. Kathy P. of Katrina P’s Creative Corner
    9. Shellie G. of Craft Smashup

    PS – If you didn’t catch the news on my Facebook page, the Clearance Rack should be updated today (7/10) with new goodies for you!  So, make sure to check it out as soon as you can because some items may go fast!

    I’ll be putting in a group order if I have interest by 10:30 AM pst, so if you want to join in on that let me know at jennifer@nwstamper.com.
    (note – if you are hopping and have a demonstrator, make sure to contact them as they would love to help you out!)

    spaced shop now sig bar

    July Online Stamp Club Hostess Code7RDHVEKR
    Use this code to get free exclusive tutorials & project kit!  Learn more

  • Fun n’ Crafty Blog Hop–Let’s Use That Designer Paper!

    Fun n’ Crafty Blog Hop–Let’s Use That Designer Paper!

    Are blog hop imageyou ready for some inspiration for your designer paper?  Yes, all that beautiful patterned paper that you either have at home or have been eyeing up in the catalog.  Then hang on to your hats because today is the monthly Fun n’ Crafty blog hop and we are featuring projects that use designer paper! Many of the papers featured are included in the July Buy 3 get 1 free promotion, so if you find some favorites along the way, you don’t have to feel so bad because they are on sale! Winking smile

    Idea #1 – Let Your Designer Paper be Your Focal Point

    I’m going to be sharing two cards today, but this first one is the type that would have had me cringing a year ago… because I use “big” pieces of 2 sheets of paper!  Gasp! I know, right?  But the thing is, I realized that when I actually let myself use my papers, they make great borders and backgrounds. These patterns are from my new favorite paper collections from the Stampin’ Up catalog – Maritime Designer Paper. image I’m not normally a nautical person, but I love how many of the prints can be used for any type of card… but especially masculine cards!! I added some Silver Foil paper, some baker’s twine, a Cherry Cobbler button, and the sentiment from the Hip Notes stamp set. And if you noticed from the first picture, I had the Silver Foil paper curved so that it gave some dimension to the banner.  To help hold that curve in place, I stacked 2 Stampin’ Dimensionals on top of each other and then placed the stack under the raised curve part of the banner to keep it held up.  The other end is glued straight down to the card front.

    Idea #2 – Try Some Paper Piecing

    I’ve been meaning to try paper piecing with this stamp set (Vivid Vases) for ages, so now seemed like the perfect time to actually get it done! If you aren’t familiar with paper piecing, it is the idea of taking a stamp set with outline images that you would normally want to color in and instead of coloring in with markers, you stamp your image again on a piece of patterned paper and cut it out to glue on top of your stamped image. paper piecing example So, in this case, I used the new Flower Pot designer paper to give me a fun and funky floral background as well as for patterns for each of my pots.  Each paper used in this card are all from this one paper set. image Then when I was done, I was grateful for Stampin’ Up’s color cordination between products because I needed something and really wanted some ribbon to match without competing with all the colors and images I already had used.  Thankfully I was able to grab some Calypso Coral seam binding ribbon and Mossy Meadow stitched satin ribbon to complete the card. So hopefully you enjoyed these ideas for using up some of the paper in your stash! Lets keep the fun going and hop on over to Kathy’s blog for more ideas to try! Blog Hop Participants:


    spaced shop now sig bar

    July Online Stamp Club Hostess Code7RDHVEKR Use this code to get free exclusive tutorials & project kit!  Learn more

  • My Favorite Banner Card Yet!

    My Favorite Banner Card Yet!

    I just realized this morning that I hadn’t shared this card yet and I love it so much that I figured I needed to fix that!

    This is my favorite card yet that I’ve made with the Sale-a-Bration set Banner Blast and I know a lot of it is the color… and the bling… and the sentiment.  Ahhh, don’t you just love it when a card comes together for you?!  Smile 

    Isn’t Bermuda Bay and Basic Black a GORGEOUS color combination??  I just loved the colors and so I wanted to keep the whole card to those tones.

    From the sentiment that I love from the See Ya Later stamp set – “I don’t believe it’s your birthday.  You don’t look any older than you did last year.”  to the clean white background to show off the banners.

    Now, I don’t know why it took this long for me to think of stamping one of the Banner Blast pennants onto colored cardstock… for some reason I kept only stamping a colored ink onto white cardstock.  But look at how great the black ink looks on the Smoky Slate cardstock:

    I also connected the banner by adding rhinestones instead of bakers twine or some other line.  Just the right amount of glitz.

    Yes, both of these stamps sets are only available during Sale-a-Bration, so don’t forget there is only 1 week left to get them free with a $50 order!  Shop online and then pick out your favorite free item(s) and they will appear in your box!

    spaced shop now sig bar

    March Online Stamp Club Hostess CodeXEWP4DFD
    Use this code to get free exclusive tutorials & project kit! Learn more

  • Getting Ready for a Card Bonanza!

    I stayed up last night to start sorting out my card kits for my upcoming Card Bonanza this weekend.  On Saturday, I’m hosting the event at my house and it is an All-You-Can-Stamp crafting event!

    I was shocked to discover that I have over 130 card kits ready to go based on over 50 card designs!  See, this event is what I do to use up all my extra card kits left over from my technique nights, card classes, swaps, and events.  I deeply discount the kits and invite everyone over to make as many cards as they want.

    Here is the scoop:

    • Come and stamp for only $1.50/card
    • Come and stamp as many cards as you want for $10  (you just have to let me know when you get started)
    • Pick up a premade card with envelope from my big stash for only $2

    Can’t attend in person?

    • Get a set of 5 card kits for $11 mailed to you to make at home
      (note – due to Stampin’ Up policy, kits will not include stamped images, but they will include all paper and accessories precut and portioned)

    Either way, that is WAY LESS than Hallmark for some really fun and cute cards!

    Here is a small sample of some of the cards available to make:

    Fun, right?!

    So, check your calendar and if you are free this Saturday (2/22) between 1pm- 5pm, let me know and plan on coming over for this fun event!  RSVP here

    Can’t attend in person but would love some kits?  Email me at jennifer@nwstamper.com or order here and I’ll get you hooked up with some cute card kits!

    Card Kit Grab Bag – 5 card kits shipped w/in the US for ONLY $11!


    Now I’m off to finish pulling all the supplies needed for all the different cards – that is going to take me a while! But it will be fun and I can’t wait to see everyone creating on Saturday.

    spaced shop now sig bar

    Virtual Stamp Club Hostess CodeBNDDMDVU
    Use this code to get free exclusive tutorials & project kit! Learn more

  • The Gift Bow Die is Back!

    Do you remember all the super cute creations that were made with the Gift Bow Die over the holidays?  I was shocked that the die wasn’t carried over when the Holiday catalog ended, but then I checked my computer today and IT IS BACK!

    Gift Bow die

    Gift Bow Bigz Die – #129977

    See, you can make cute FLAT bows for your cards like this :

    How perfect would that be for Father’s Day?  Details for how to make this bow are here.

    Or make bows for gifts like this:

    (These are gift boxes my Mom and I made for craft fairs this fall!  If you are curious to see the insides or want one, you can see the details here.)

    Plus, the bows are super easy to make too!  Check out this video for how to make the different bow shapes:

    Get your Gift Bow Die online here

    Have fun, and I’d love to see/hear what you create!

    spaced shop now sig bar

    Stampin’ Supplies Used

    Stamps – Seasonal Sayings
    Ink – Chocolate Chip
    Paper – Gumball Green, Cherry Cobbler, Whisper White, Season of Style designer paper (retired)
    Accessories – Burlap Ribbon, Regals candy dots, Big Shot, Gift Bow die, Crystal Effects

  • Fringed and Fabulous Birthday Card

    Today, the design team over at Stylin’ Scrappin’ Inkspiration decided to do a post sharing ideas using the upcoming Sale-a-Bration items (if you have no idea what that means, Stampin’ Up has a promotion every spring – this time starting January 28th – where for every $50 you order, you can pick any item in this special catalog to get free with your order; which is what we are playing with today!)  And since I wanted to play along, I dug through my limited stash of Sale-a-Bration goodies to come up with a fun project to share. 

    So today I have another “Little bit of this and that” style card to share –

    It all started with the pair of fringe scissors on my desk and a vision of this super duper great fringed card that my downline, Stacey shared in our team facebook page.  I took the inspiration of layered fringing and started grabbing what was lying around on my desk. 

    This included a card base that got ink and spots on it at a recent card class:

    IMG_3986

    And the plan to use my fringes to cover it up… because darn it… it is still a totally usable card base!

    So, I grabbed some scrap paper and started cutting and layering.

    Then I needed something for the top – so Washi to the rescue!  Yup, I used the Gold washi tape and the Gingham Garden washi tape.  Mix and match away!

    Where is the Sale-a-Bration stuff you ask?

    All in the top of the card!

    First up, the super cute sentiment from a new See Ya Later stamp set (and yes, it has a sentiment that says “See Ya Later, Alligator”!  I had to color it in with markers because, well, I just did.

    And then see that flower and those diamonds?  More SAB goodies!

    These are the Sweet Sorbet self-adhesive cork embellishmentsI will warn you – this isn’t your kiddos adhesive.  I stuck one of those diamonds down and when I decided I wanted to move it, it was NOT going anywhere!  I had to carefully slice it out of my card using scissors to get it to move.  So, word to the wise, they are great embellishments, just make sure you have it where you think you want it before pushing it down.

    Stampin’ Up Supplies Used:

    Stamps – See Ya Later (free Sale-a-Bration item)

    Ink – Sahara Sand, Markers: Early Espresso, Raspberry Ripple, Primrose Petals, Daffodil Delight

    Paper – Whisper White, Primrose Petals, Raspberry Ripple, Sahara Sand, Coastal Cabana

    Accessories – Sweet Sorbet Accessory Pack (free Sale-a-Bration item), Gingham Garden washi tape, Watercolor Wonder washi tape, Fringe Scissors

    spaced shop now sig bar

  • Make a Wish–Neutrals and Gold Birthday Card

    So, if you saw my blog post from yesterday, I shared a card that used the Oval Framelits to cut out a frame to highlight some vellum in the center of the card.  The frame effect was really cool, but I was left with two, pretty big ovals when I was done.  Wanna see what I did with them?

    Now, I am a hardcore crafter and pack rat… yes, fine – I’ll admit I’m a bit of a hoarder. Smile  So, that means any scrap that is bigger than itty bitty makes me think, “I could use that… that is big enough to use on another card, or to punch a shape out of…”etc.  And typically I stuff them in a box or bag near my craft table

    …. never to be used again!

    So, I’ve made it a new rule for me.  If I want to keep a punched/die cut/stamped scrap, I need to use it right then (or pretty soon to right then) otherwise it goes in the recycling bin. 

    (Seriously, if you were at my craft garage sale this summer, you saw the gallon ziploc bag FULL of punched and die cut pieces that I never used and decided to let go of!)

    And create I did!  I used the two ovals as backgrounds for the card and then started layering elements on top.  I grabbed the new Naturals Chevron ribbon and then to spice it up, I tied some linen thread around the top and frayed what was above the thread.

    Also, if you look close…. you can see that the party hat in the lower right hand corner is fussy cut and glued onto the card front.  Wanna know why?

    Because I was too chicken to stamp directly on the cardfront!

    Ha ha, it’s true!  I thought the card needed something and I thought the hat would look good in the corner but I didn’t trust that it would really work out.  And since everything else was already glued down, I just stamped on a piece of the same Crumb Cake paper and cut it out.  Turns out I liked it so I just glued it down as is!

    So, to make this card – here are the supplies I used:

    Stamps – Perfect Pennants, Sketched Birthday
    Ink – Chocolate Chip, Crisp Canteloupe
    Paper – Gold Foil, Crisp Canteloupe cs, Crumb Cake cs, Whisper White cs, Neutrals Core’dinations cs (Early Espresso)
    Accessories – Big Shot, Oval Framelits, Sanding Block, Neutrals Chevron Ribbon, 7/8” Cotton ribbon, Linen Thread

    I love how it turned out and I hope it gives you ideas as well!


    spaced shop now sig bar

  • Birthday Celebrations with a Treat Topper and Card

    2013-12-20 11.51.12Earlier this week, Nicholas (my now 4yr old) had the chance to celebrate his birthday with his Preschool class.  It’s a special circle time they call a “Birthday Circle” and they all sit around and the birthday child can have mom/dad/siblings come in for the circle while they share photos or something special about each year the birthday child lived. 

    And treats…. we “get” to provide treats.

    Now, the school is, um, “progressive” I’ll say and so they are very particular about what kinds of treats you can bring.  The list looks something like this:

    fruits and vegetables – or – 100% fruit – or -dried fruit – or –

    a snack from one particular organic company.  ~Done~

    Now, I am still trying to get my “Crafty Mom” cred, and so I couldn’t just send him in with applesauce squeezies… oh no, they had to be CUTE applesauce squeezies!  So this is what I created for him:

    2014-01-14 09.09.03

    Isn’t that lizard so adorable?

    So, I sat down the night before (at 10:45 pm, talk about last minute!) and started coloring this one stamp from the Tag It stamp set with my markers so I could stamp 18 of these guys for the treats.  Then I cut each of them out using the coordinating Chalk Talk framelits…. oh and adding the tag hole from the same framelit set.  Do a little sponging and then just the right twine to tie them off. 

    (psst – sneak peek alert!  This twine is from one of the accessory sets available as a freebie during Sale-a-Bration!)

    I got them all ready and sent them in to school, but then I figured the teacher needed a little thank you as well, so I had to make a card for her too using the same theme.  You know everything has to be coordinating!

    Ta-Da!

    Same idea but just a little mixing around of extra accessories and embellishments to turn it into a card.

    I needed some bright paper to match the bright colors in the stamped image  (I got lazy, no tag this time) and and then the AWESOME candy dots to break up the pattern of the paper and tie it into the birthday image.

    So see, it is like a coordinating set!

    Card Supplies Used

    Stamps – Tag It
    Ink – Crushed Curry, Markers:  Gumball Green, Real Red, Crushed Curry, Island Indigo, Early Espresso
    Paper – Crushed Curry cs, Whisper White Cs, Real Red cs, Quatrefancy specialty designer paper
    Accessories – Early Espresso Bakers Twine, Candy Dots (Brights, Regals, Neutrals), 2 1/2” Circle punch, Chalk Talk framelits, Stampin’ Dimensionals, Sponge Daubers, twine (SAB)

    So, don’t forget to try something simple and cute when you need a treat for something.  It doesn’t have to be complicated to be fun and appreciated by the recipients… even if they are 3 yrs old!  Smile 

    Want to see more great Birthday Card ideas?

    Today over on the Stylin’ Stampin’ Inkspiration blog, we are sharing different Birthday card ideas.  This was mine, but there are lots of other ideas and variety to check out.  So, hop on over and see what other cute ideas you can try.


    spaced shop now sig bar

  • Penguin Punch Art Tutorial & Birthday Giveaway Winners!

    Alright, after fighting with cameras and computers… I finally finished the Penguin Punch art tutorial video!  I swear normally it doesn’t take nearly this much effort to create and share a video but I feel accomplished for showing the technology who is boss.  ha ha!

    So, I shared this card last week:

    And now, here is how to make these cute penguins at home!

    (note–if you are reading this post via email, you may need to click over to the blog to actually view this video)

    Now, on to the good stuff!

    Birthday Weekend Celebration Winners!!

    Thanks to everyone who visited and commented here and on my facebook page!  It was so fun to hear everyone’s favorite holiday traditions, treats, and more.  Smile  Plus it was nice to hear I’m not the only one behind on mailing out Christmas cards!

    I did a random draw of everyone who commented on the blog posts and corresponding facebook posts and here are the winners

    • Day 1 – Tag a Bag Accessory Kit & Silver Sparkle Dazzling Details  :  Saundra W
    • Day 2 – Neutral Candy Dots & Brad Bases   :  Audrey R
    • Day 3 – This & That washi tape & Brights Designer Buttons  :  Meredith
      • Day 4 – Designer Paper Sampler  :  Carla B

    Congrats to all the winners!  Email me at jennifer@nwstamper.com with where you would like me to send your goodies and I’ll get them out to you this week.

    Thanks again for celebrating with me and have a great holiday!

    spaced shop now sig bar

  • Creative Gift idea from Stampin’ Up Wood Mount Boxes

    Today I had the privilege of serving as guest blogger over on the Stylin’ Stampin’ Inkspiration blog.  As I tried to figure out what to share, I realized that I had been planning on sharing some of the projects mom and I made for our recent craft fair and that would be a perfect thing to share over on SSI as well!  (Which, btw, if you haven’t checked out in a while, you should go see some of the fab samples that have been shared recently!)

    Ok, so on to the projects!  I will start by saying, we have a bunch of these left because weather kept a lot of people away from our fair, so I’ll be selling them online here on the blog by tomorrow (UPDATE– I got all the different cases posted and available for purchase here).  So if you like this idea and want a sample or three at your house, let me know and you can reserve your favorites!

    Alright, so you probably have seen the half-size clear mount cases for the smaller stamp sets and single stamps.  They look like this:

    half size woodmount cases

    And it is easy to think of them as what you store your stamps in…. but did you know you can get spare cases in sets of 4?  Sure, it is great for a backup when your toddler steps uses your cases as steps (or is that just me?) but they are also fabulous for other uses!

    For example, did you know they hold 5 ink refills perfectly?

    half size woodmount case with ink

    Neat, right?  But that isn’t what I’m really here to show you.  I wanted to show you some super cute gifts you can make with them!  Check out what my mom and I made for a craft fair last week:

    We started by taking the empty box and cutting a piece of designer paper to slide in for the cover (so it is under the plastic sheet that goes around the outside of the box).  Then we created coordinating embellishments that we glued on top of the case front to allow for extra dimension and pop.
    (and YES! that cupcake is the same cupcake punch that is on the weekly deals this week Smile)

    Then on the inside, we created dividers by taking a piece of matching cardstock and scoring at the right widths to create holes for the goodies we wanted to include in the gift.

    In some boxes we had 3 Hershey’s nuggets and a set of 3×3 cards and envelopes.  In others (like the one above) we had a decorated mini-post it note stack, 2 Hershey’s nuggets, a mini-hand sanitizer, and a chapstick!

    Here are the outsides of a few more of our cases:

    And here is an example of one of the boxes with cards inside (well, you can see the outside and the card)

    So I hope this gave you some ideas and inspiration for the holiday season!  Check them out and start decorating!

    And if you’d like to purchase one of my pre-made sets, check them all out here!

    spaced shop now sig bar